Please post here if you have questions about Sprytile. Also feel free to contact me on Twitter.
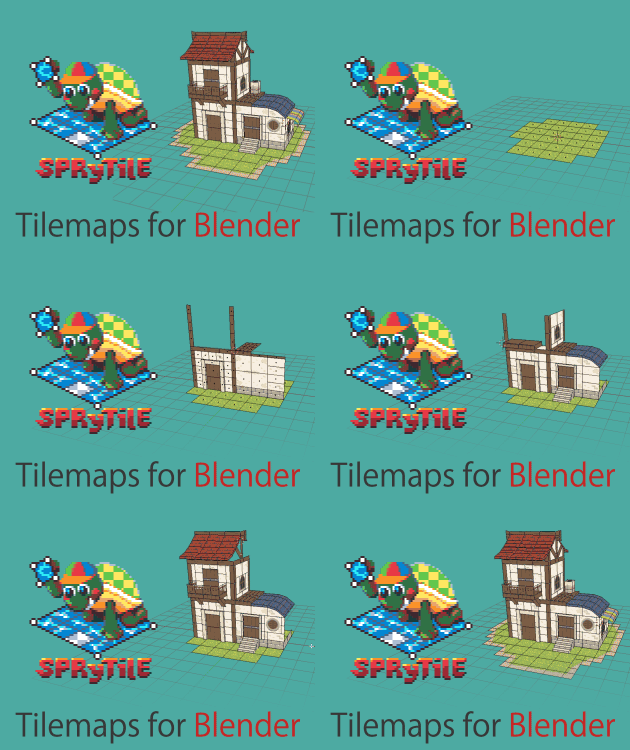
A Blender add-on for building tile based low-poly scenes with paint/map editor like tools · By
Hey! I love the tool so far! Thanks! I did experience the bleeding issue when exporting to Unity (following the guide and using the guide tileset), but I'm going to try following the advice in the other thread for that.
In the meantime, there was another issue I haven't read about. Within Blender, each tile/plane renders on both sides, however, when I export the object to Unity, each plane only renders on one side and the other side is invisible (as expected for a plane). Do you know how I can view this true render state in Blender? And is there any way to automatically place two opposing planes so that it renders on both sides? I have a feeling if I just try creating two tiles on the same vertex but on each side, it'll just replace the first one I place with the second one. Does that make sense?
Thanks for trying out Sprytile! You can see how Unity will render your mesh my turning on Backface Culling. In the right hand side panel of the viewport (press `n` if it isn't visible) expand 'Shading' and toggle Backface Culling on.
There's a way to make faces double sided using a utility that comes with Sprytile, covered in the advanced documentation.
Hope to see the cool stuff you make with Sprytile!
I feel like I'm so close to getting this working! I finally got bleeding turned off, finally got the textures to stop being blurry, and double sided planes all work... but now when I actually import the .obj into Unity, I get the weirdest layering issues!
I feel so close and yet so far away! I haven't seen anyone else mention this so I'm guessing it's another thing I messed up :P
You're right, I feel like an idiot. I stayed up all night playing with Sprytile so my brain must be fried, sorry! I had it set on the Standard shader with the UV map set for albedo but the rendering mode was set to fade. I've set it to opaque and it works mostly great, with the exception that it did something weird to the transparent tiles (the image on the left is before, on the right is after). I'll keep playing around with it within Unity and figure it out, thanks so much!

Cool! If you come up with good settings for the standard shader, could you please share it in the Unity Import Settings thread? Would be nice to have alternatives to unlit materials in that thread. Thanks!
Sure! OK, so I finally got a perfect result I'm happy with, but I'm going to play with it more before I post to that thread. I think it was just another case of me being dumb. I'm using the "Standard" shader with the "Cutout" Rendering Mode--the fatness/weirdness of the wooden bars were due to Alpha Cutoff being set to 0 (I progressively feel more like an idiot the longer this thread lasts, haha, the DEFAULT is .5, not sure how it got set to 0). I set the Alpha Cutoff to x >= .5 and it renders perfectly. I can't use unlit since I have a day/night cycle in the game, and the light adjusts accordingly.

I combined this with the technique posted about in the other thread describing the GIMP script that automatically spaces and margins the tileset and I get zero bleeding / perfect rendering. I'll post all the stuff I learn about the Unity workflow after I finish one full asset and I have a bit more experience in this--I don't want to post something incorrect. Thanks again for all your help and for making this and sorry for all my stupid questions!
Hi. There isn't a way to repeat the same tile on a single face because it wouldn't be technically possible without a specific shader.
What you could do is use the set normal mode on the face and use the build tool to create to roof tiles along that normal. There's a written explanation of set normal mode in the advanced documentation.
Hope this helps!
Noob question sorry, I'm new to 3D in general and wanted to bring my pixel/tile art to the 3D field
So, I made this little, pretty bad test map and I'm trying to render it to see how the pixel textures will behave on a pre-rendered, PS1 style map...

I saw your Twitter post so this might have been sorted out already, but replying in case it helps other people as well.
Which renderer are you using? I've only really tested with Blender's internal renderer and the quick material setup is really designed for an unlit look. The material settings may have to be changed to use the Cycles renderer or for a differently lit scene.
The work plane being stuck on a single axis sounds like Axis Lock might be on. It's not covered in the basic tutorial but the written advanced tutorial does. Basically the toggle on the left of the axis indicators in the Sprytile panel.
Sprytile's tools are untested with subdivided meshes and is not really designed for that use case.
This style of rendering is really neat and an unexpected use of Sprytile for me! Would love to be updated with how you push these renders.
Thanks for using Sprytile!
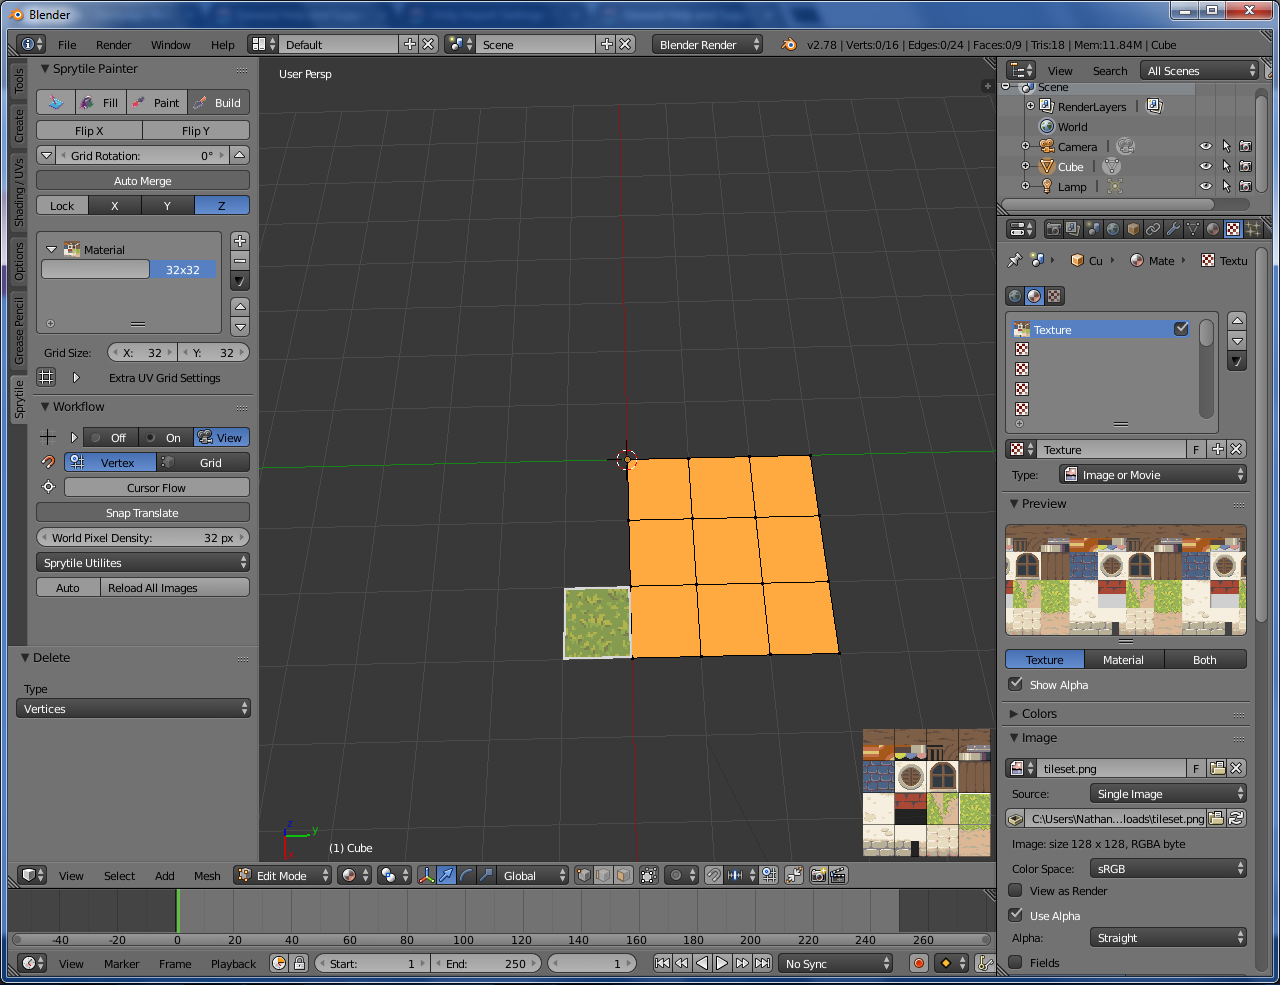
Whenever I try to create something using Sprytile, it displays an orange color instead of the tileset I'm using.
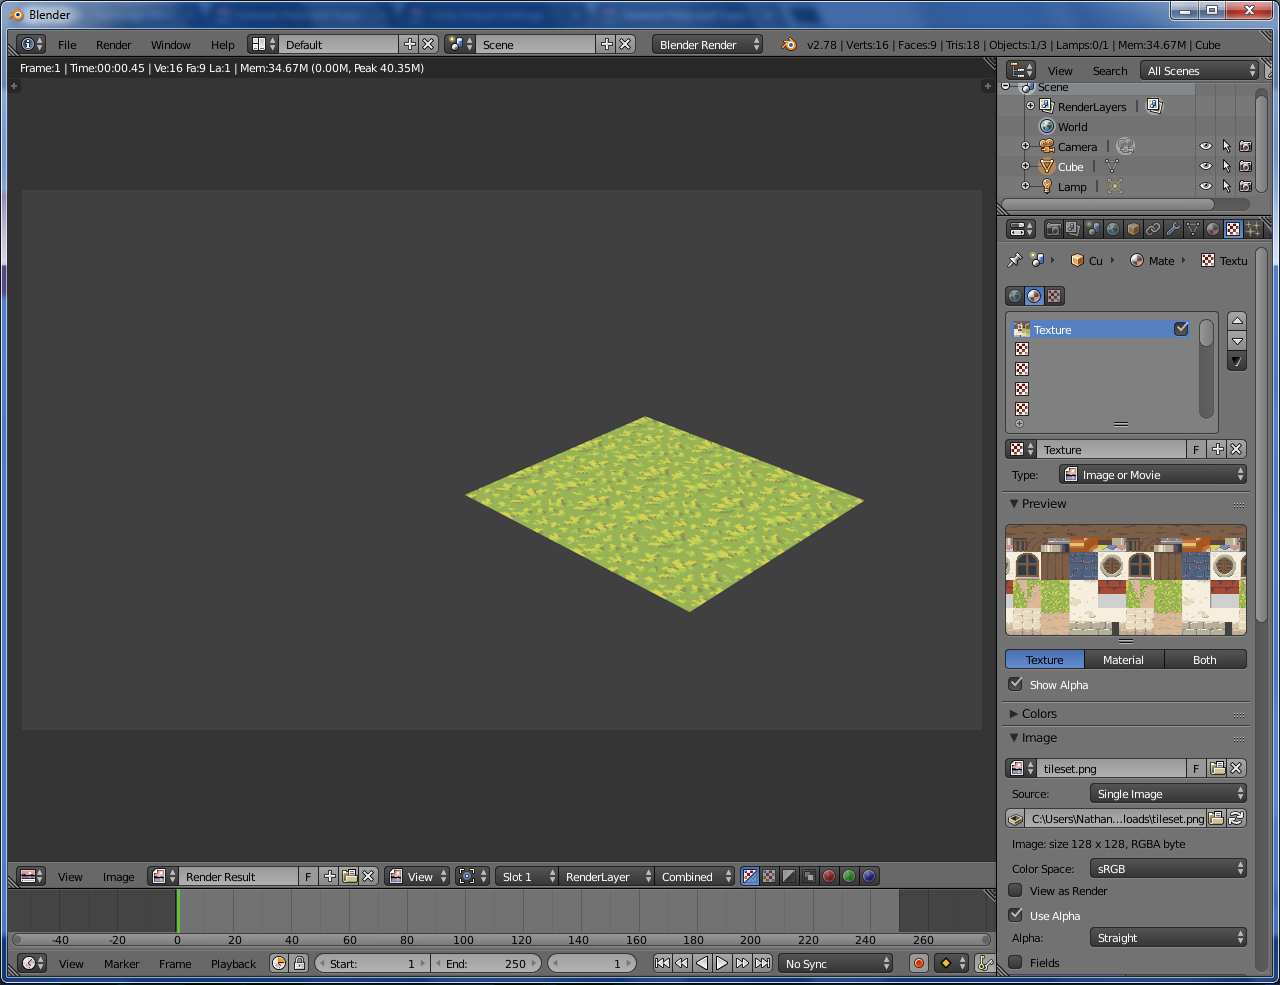
However, if I render it, the tileset shows up like normal.
I'm still learning the ins and outs of Blender, so it may just be a problem on how I set it up. Any help would be greatly appreciated!
Thanks for taking the time to check out Sprytile!
Can you please try going back to object mode and pressing the "Set Material to Shadeless" button in the Sprytile panel?
This might be something to do with your Blender system settings. Can you open your user preferences window and switch to the system tab? For reference, this is what mine looks like.

You can also try deleting the lights in your scene.
I switched over to cycles and added an image texture and then this worked in cycles but upon returning from this back to blender render. I found that this made my screen do this whole orange thing too. It may be related to this that caused you this issue especially if you tried experimenting around in cycles and then switched back and so on.
I tried everything you said above, but the tileset still doesn't display right. My settings seem to be the same as yours. I found a temporary fix where you set the objects viewport shading to rendered. It displays correctly, but the grid is disabled and editing is a bit slow.
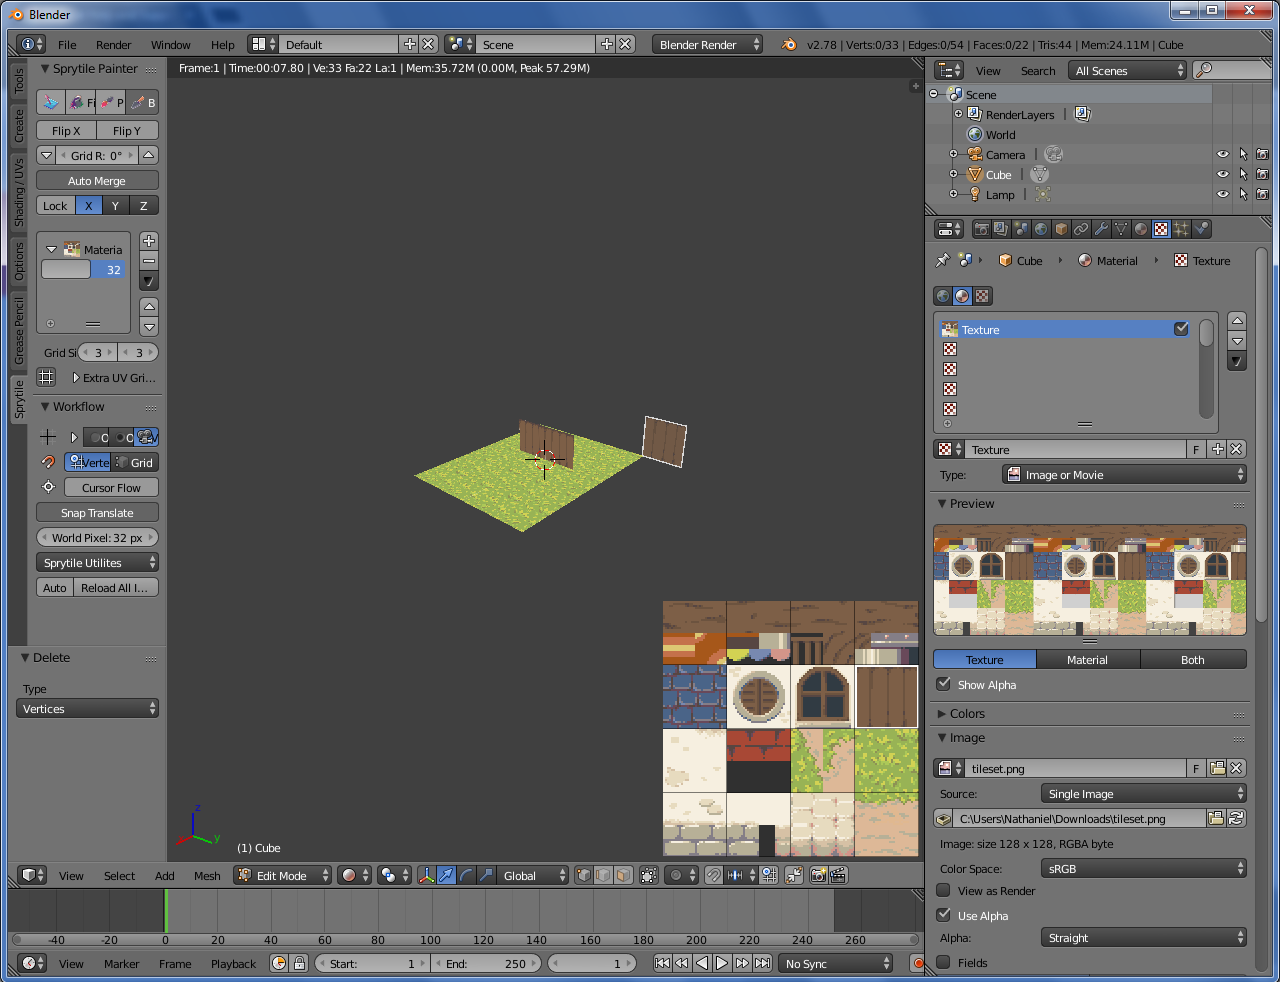
I'm not really sure what the problem is.
Thanks for the help!
Came across this too when I tried to reproduce the issue. Textures not showing up seems to happen when you start a new scene with Cycles on before using Sprytile. It's a little strange that it continues to work when switching to Cycles after setting up Sprytile, but this issue has been noted in the recent docs update :)
This is using Blenders internal renderer? I've been rendering using that and don't remember having to take any extra steps, the material and texture setup should theoretically take care of it.
I'm afraid I'll only be able to help with this tomorrow since I'll be AFK, but try searching for mipmap settings, either in the system settings or the material.
The same method that fixes this issue on other engines fixes it for me so I'm currently using a script to convert the tilesets and it's probably for the better anyways since it seems to be an issue outside of blender even if it isn't an issue internally for everyone. I've also had to start unchecking transparent after setting the material to shadeless which I do not recall having to do before (I also recall the first time [before this shadeless issue], I tested this that it just worked without seams as well not sure if the two issues are related or if im just having a false memory though.
Hi there, is there a key to delete tiles?
Also: [There's a way to make faces double sided using a utility that comes with Sprytile, covered in the advanced documentation.] - This link is now broken. :(
The documentation has moved to a different URL. If links to documentation are broken, you can probably find it in the new URL.
http://docs.sprytile.xyz/advanced-features/#make-double-sided
Hi
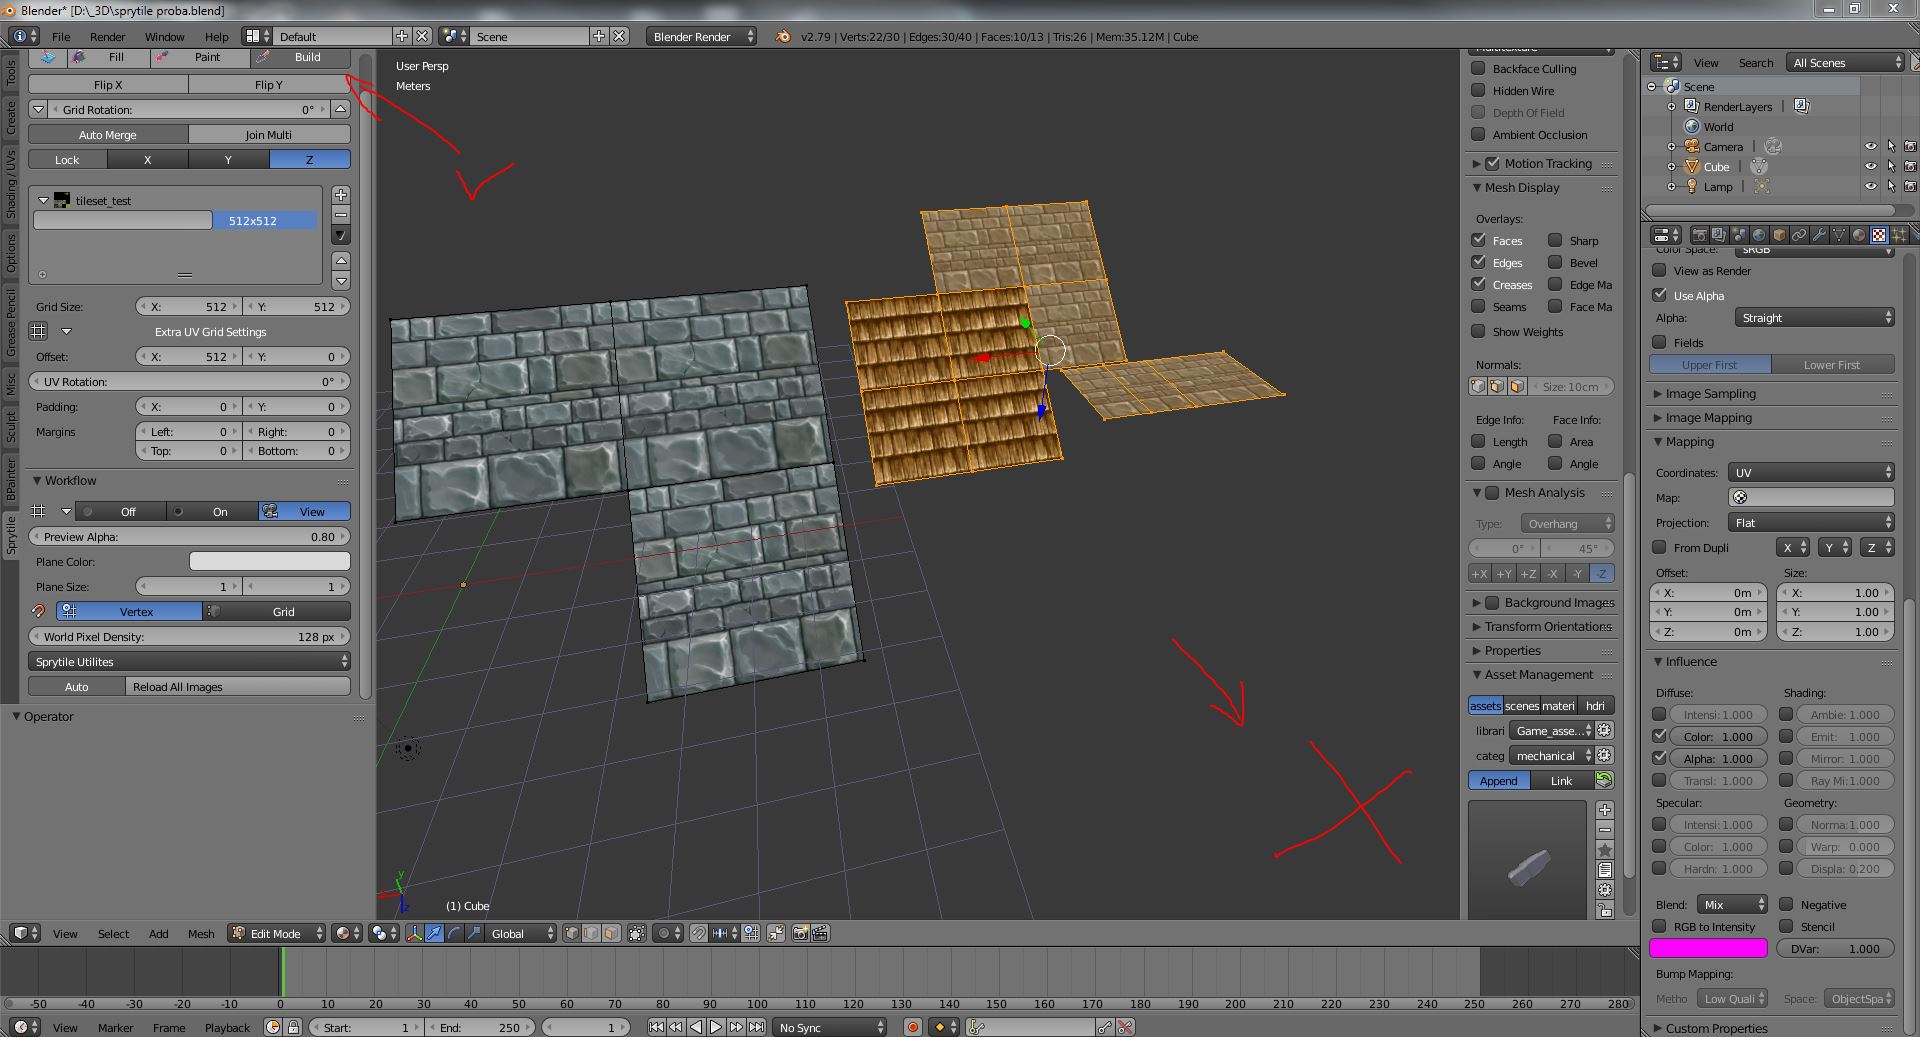
Very interesting and well thought out addon you made! However I am having a slight problem, don't know if I'm doing something wrong. When in build mode tilesheet preview/palette does not appear in the lower right corner. Do I have to enable it somewhere, or could have I maybe closed it by mistake?
I am using blender 2.79, blender internal render and am in material display mode.
Thank you for the great addon and help.
Hi, here is a screenshot. I'm in the build mode, there is no preview in the lower right corner. I thought that maybe some other addon is in some sort of conflict with sprytile, so i turned of bPainter and HardOps addonsm after i took thes screenshot but it did not help.
Not visible on this picture is the fact that i can build as intended, i even get semi-transparent preview of the tile, offset works so I can pick the part of my tile set manually via offset but is not the most comfortable workaround.
As far as I could see other features of the addon work as intended.
Thanks for the help.
edit: just to add.. I am using a 2k tileset that I made, for testing, as I do not intend to use Sprytile for pixel art style.
Hi, apologies for this but as a *complete* beginner to Blender I've been unable to follow some parts of the quick start - how exactly do I extrude edges the way shown? I've looked at other tutorials but I can't seem to get the edges to stop snapping to different angles, how can I freely move edges as shown in the quick start tutorial video?
Sorry again!
No need to apologize, the tutorials really didn't consider people completely new to Blender which I hope to address in the next documentation pass.
I'm probably not moving edges when tiles are moved at angles, it's more likely that they've been rotated. There's a section of the text advanced documents that shows how to do this.
Hope this answers your question, have fun with using Sprytile!
I'm not sure how it would be setup once imported in Unreal, but you can add a second UV channel for lightmapping in Blender through the data tab as shown in this video: https://streamable.com/ut6u7
You'll probably want to play around with the smart project settings to add more padding between UV islands or even manually unwrap the lightmap, but this is the basic idea.
Hi, first of all, thanks for the tool, I have been using it extensively.
I have one issue, when using the paint mode, often times I am unable to paint certain faces unless I flip the normals. Is there any easy fix to this?
To be clear, the normals are all "outside" normals, however for some reason it just doesnt want to accept the face.
Thanks.
OBJ files need to have MTL files to tell other programs what texture to apply to the mesh. You may need to set the Blender OBJ exporter settings correctly: https://blender.stackexchange.com/questions/63624/how-to-properly-export-into-ob...
I downloaded this https://github.com/godotengine/godot-blender-exporter
and tried to import it this way in a different format and failed
Hi, I seem to be having some trouble getting this to work. I import my tilesheet (six 64x64 tiles), create a plane, go to edit mode, click paint, and then Blender crashes.
I'm using Blender 2.76a on Windows 10. Is there a recommended version of Blender I should be using?
EDIT: So I tried updating to the latest version of Blender, and it works now. Fantastic tool btw! It's perfect for my PS1 style game.
In Blender Render I had some lamps set up, but the sprites don’t want to be lit up. I’ve tried all the different lamps already, but the lamps just won’t lightup the scene.
I also tried Cycles Render after building my scene in Blender Render, but the textures won’t show. How do I fix this? (I don’t know if the lamps work in Cycles)
Sorry for the inconvenience!
Found it! Thanks! I didnt check github and thought they updated the download link or something :)
For everyone who`s wondering why it doesnt work, you hav to download the latest version!!
https://github.com/ologon/Sprytile/releases/download/2.8-beta9/sprytile_2.8_beta...
Total n00b, here.
I recently just downloaded Sprytile and I am going in totally blind, I'll admit. I feel that I need a rundown of how everything works with this Blender add-on. I need to know how to create my own textures for tiles and such, and if it is possible to model unique low-poly characters with this add-on. Everything is all set, I just need some extra guidance.
Thank you for taking the time to listen.
Thanks for your support. The lastest version that supports 2.79 is version 0.4.5 and you can download it from the GitHub releases: https://github.com/Sprytile/Sprytile/releases/tag/v0.4.50
Hello, I'm working on a game done in the style of N64 titles such as ocarina of time and this tool looks like it could speed up my workflow. I'm curious to know if the way it generates the UV's can be made to add some small padding to account for bleeding. I need to use mipmaps as the blurriness is more consistent with the n64 look. The way I make my texture atlas I leave a several pixel border around each texture to avoid bleeding, but that means I can't snap the uv's exactly in the middle between two textures, they need to be inset by a specific number of pixels to ensure consistent tiling. Is this possible with sprytile or would I have to manually go in an resize the uv's? if so, that would defeat the purpose of the tool for me.
This is more of a blender-question, but as Sprityle heavily relies on the cursor: Is there a way to dircetly move the cursor on the grid? Aiming and then using Shift-S-4 to correct my aim works but is kinda cumbersome.
Is there a built-in-tool to delete a tile? Currently I go back to select-tool, face-mode and delete face.
In the sprytile build tool, holding down S will snap the 3d cursor to the vertex nearest to your mouse cursor.
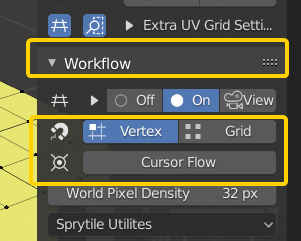
You can configure it to snap to vertices or the virtual grid in the workflow panel.
Turning on cursor flow will make the 3d cursor follow along your tiles while you build.
Good point about delete face. In 2.79 Sprytile was integrated with geometry manipulation so you didn't have to exit out of build mode to delete things, but 2.8 changes the workflow so maybe its time to implement a delete shortcut.
Under Blender 2.8 in the most recent version, I am not able to select the normal under the cursor ("N" key I suppose?) to continue building tiles along that normal. I followed this tutorial to paint tiles along a slope: https://docs.sprytile.xyz/advanced-features/ . Any suggestions?
Oh and another questions: In Paint (not Build) mode, I thought I was able to paint another layer on top of the existing one? But when I paint something with transparency on an existing tile, the tile underneath gets replaced (so it seems to be behaving identical to build mode).
Hey, just started getting into this and I really like it. I do have a random issue where my tilemap disappears. As in, when I am in Edit mode and click on the Sprytile Build I do not see the tilemap. I was able to see it, but going into layout mode and then back to edit mode, it disappeared. Is there anything in Blender that would cause it to disappear?
If you only resize the sheet on the Y axis, this can easily be done with Blender's existing tools. In your image editor, resize the image upwards by 2x. For example if your sheet is 256x256, resize it to 256x512. In Blender load the resized sprite sheet and go to the UV editor.
In the UV editor, set the 2d cursor position in the 'n' key sidebar, by going to the view tab in the sidebar. Set the position to 0,0 and select all of your mesh faces. Set the pivot to the 2d cursor, and use the UV scale tool. Press Y to restrict the scale to the Y axis, and type in 0.5. This will restore your UV map to the original setup with the larger sheet.
Hello, I need help I think. When I try building anything with Sprytile textures don't load. I follow the exact instructions from the Sprytile Quick Start tutorial video and when I got to the point where I can build using the Sprytile build tool it creates a blank, transparent face, evin wit Material or Rendered view. I tried changing shader, tried different tileset but non of that worked. I don't have any other addons installed and am using the newest version of Blender (installed yesterday). Is there any way to fix this? I have some experience with Blender but honestly not much. Thank you for a quick answer :)
Hey, thank you for your amazing work. The tool might really help with my level design workflow.
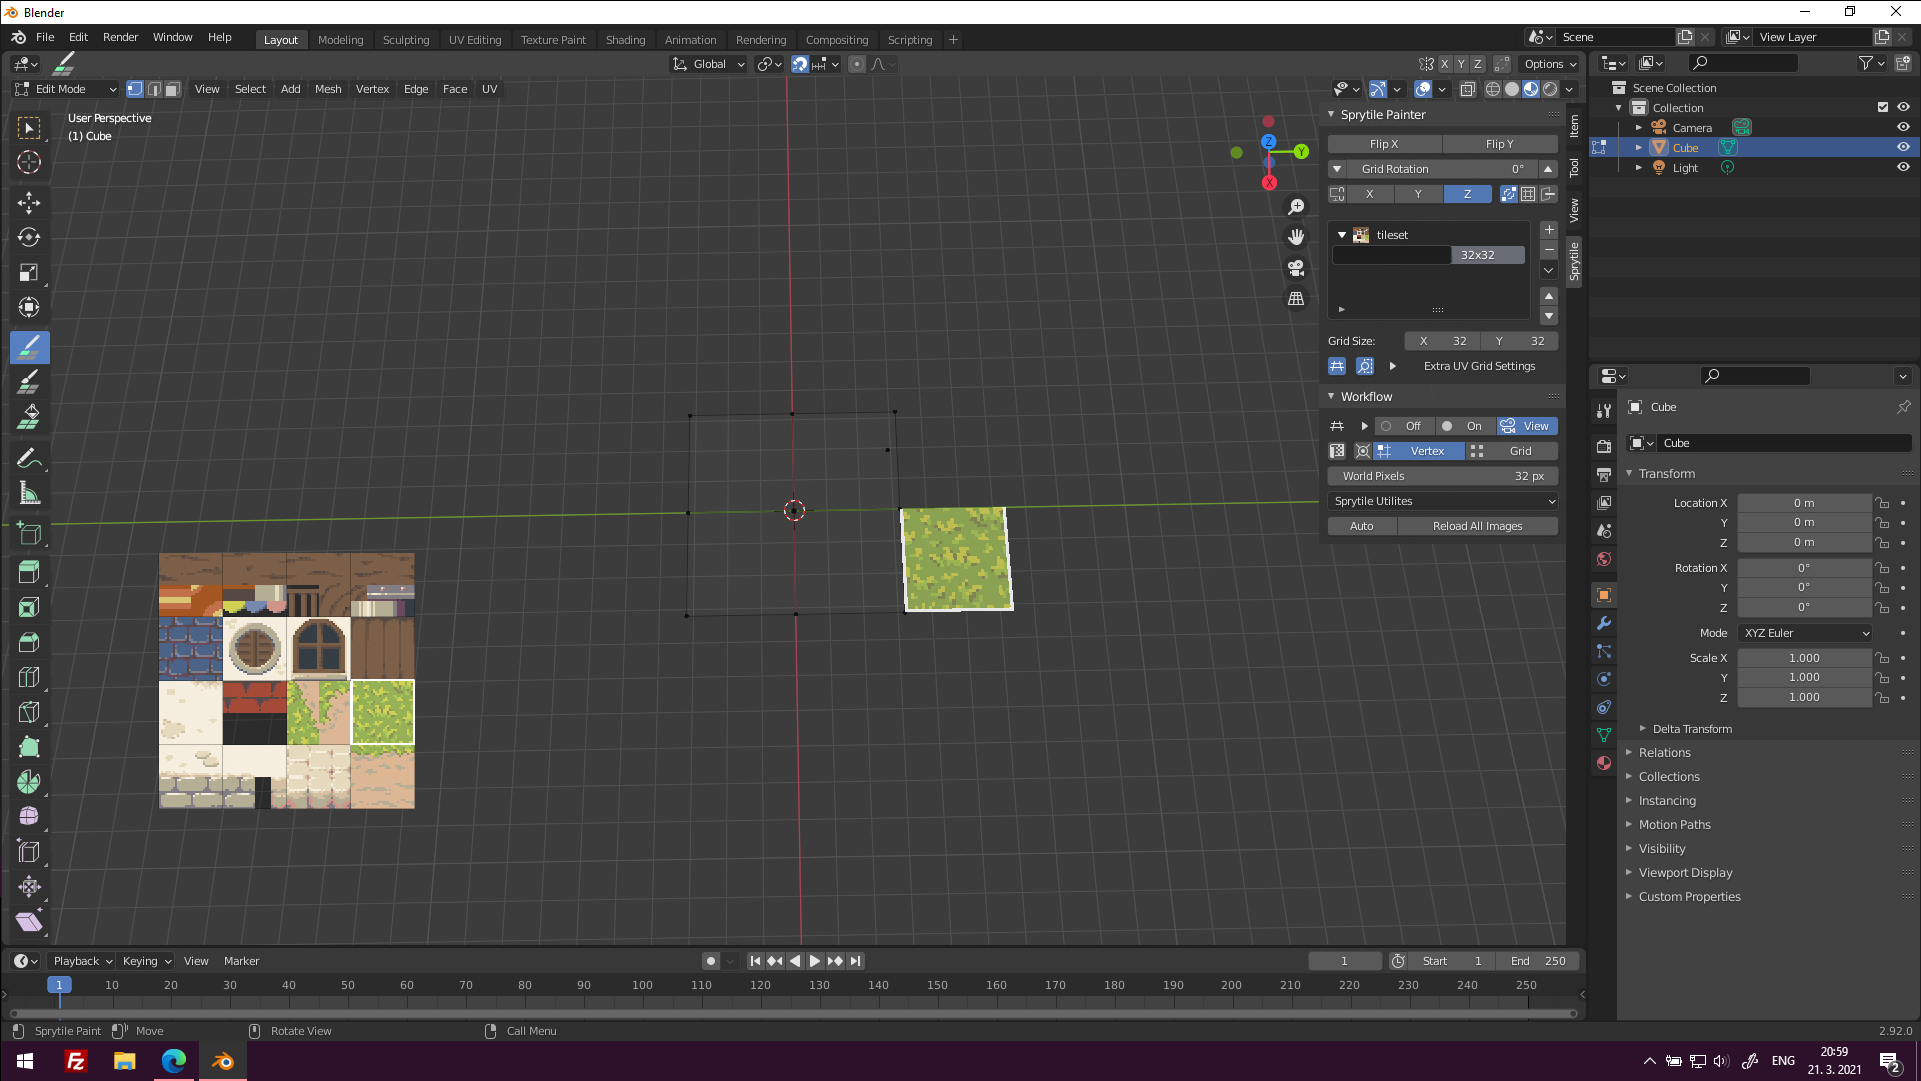
I am experiencing some issues with the texture rotation, as the tile is automatically rotated based on the viewport rotation. In some cases, this also leads to UVs being incorrectly generated. Is there a way to turn off this rotation or do I just need to be careful while editing?
Looking at the video, I now see that the orientation plane changes just like if I place a new tile, but in paint mode it still let's me paint on tiles that don't belong to that rotation. That might be the cause of the collapsed UV.
You can lock the view rotation by clicking the lock axis button, as shown here: Feature Reference - Sprytile Documentation
You'll need to make a material in Unity that is assigned to the model and uses the texture: Unity Settings - Sprytile Documentation
Hello there lovley people,
im new to blender and i dont really know wht im doing but after hours of research i havent found a solution to this problem. so please help.
In the mesh there are these lines wich look really bad, in godot itself its even worse. the material seems to be at an ofset and creates gaps in the intendet look. how would i go about fixing this? thanks
video for clarification:
Hello, I really like your addon but I am running in a couple of issues when trying to using it. First sometimes it crashes Blender when attempting an undo action, but most importantly, the addon seems sometimes to bug, the tile palette disappear and the sprytile widget only shows sprytile painting. This issue doesn't get resolved by rebooting Blender and I have to cumbursomely port my geometry in another Blender file. Do you know what causes this and what I should do to prevent it ? I run it on Blender 2.93.
Hello All,
Is there a hotkey to confirm the current Sprytile edit session, to go back to regular object edit mode ? Neither escape, right click or enter do it. So far the only way I've found consists of clicking the box selection icon, but that's tedious and waste of time.
I'd be also curious about the topic brought up by the user in the post just above, as I cannot navigate the viewport either when using Sprytile.
Hello All,
Is there a hotkey to confirm the current Sprytile edit session to go back to regular object edit mode ? Neither escape, right click or enter do it hence it seems that Sprytile is taking over everything. The only way I've found so far consists of clicking the Select Box, but that's tedious and waste of time.
I'am also curious about the topic brought up by the user in the post just above, as I cannot navigate the viewport either when using Sprytile.
hey got this plugin from https://blendermarket.com/products/sprytile-tilemap-tools do not seam to work in blender 3.1.2
Hello! I've recently ported Sprytile to Blender 4.3+. It might have some bugs here or there that I'm working on stabilizing but for now it does indeed function in 4.3!
https://github.com/invntiv/SprytileForever/releases
Apologies if asked before! Sprytile is not presenting the palette in the bottom left corner anymore for me. Some project files started doing this upon reload, and new projects seem to have this issue too. Sprytile still paints just fine, I just cant see what is selected or select anything else. Im using the same settings/tilesets that worked in the past. Any ideas to get the palette to pop up again?
You could've posted a link to the alternative tool yourself rather than telling them to search the entire forum for it, or at the least given the name.
It's called ReSprytile, updated to work in Blender 4.x, and is available on github: https://github.com/ionthedev/ReSprytile
Hello! I've recently ported Sprytile to Blender 4.3+. It might have some bugs here or there that I'm working on stabilizing but for now it does indeed function in 4.3!
https://github.com/invntiv/SprytileForever/releases
I've started a new project and ported Sprytile to Blender 4.3: https://github.com/invntiv/SprytileForever
Please help me track issues so I can make sure to get everything ironed out and prepped for clean updates going forward!