Indie game storeFree gamesFun gamesHorror games
Game developmentAssetsComics
SalesBundles
Jobs
TagsGame Engines

General Decker Question and Answer Thread Sticky

A topic by ahmwma created Aug 06, 2025 Views: 9,244 Replies: 277
Viewing posts 61 to 73 of 73 · Previous page · First page
(1 edit) (+3)

Hi!! i'm making a dolls house style game using these contraptions (the sticker ones) as 'objects' and i'd like to be able to share it with my friends who all would primarily use mobile devices to play, however due to the touch input if you 'pick up' a sticker and move it horizontally it automatically flips to the next card in the deck. i'm just wondering whether there's a way to turn off the auto flip if that makes sense?
Developer(+1)

Swipes that move between cards generate navigate[] events, just like pressing the left or right arrow keys. You can override the default behavior by defining an empty handler for the navigate[] event on the card- or deck-level script, like so:

on navigate do
 
end

Does that solve your problem?

(+1)

thank you so much, it works!!!! :))

(1 edit) (+1)

I've been implementing a simple visual novel game using the Dialogizer module. I wonder if I could render an animation in a canvas using the zazz.flibook while in the "dialog" mode? Let's say I have the following code

`on view do

 alarm.animated: 0

 alarm.show:"none"


 dd.open[deck]

 dd.say[deck.cards["intro_dialogs"].widgets["dialog"].value]

 dd.close[]

end

`

While in `intro_dialogs:dialog` I have something like

`

Phrase 1

Phrase 2

!play:track

Phrase 3

!alarm

`

There is a command handler in the card's script:

`

on command x do

 # alert["" fuse "intro:got command:", x]

 if x like "play:*"

  track:(":" split x)[1]

  if !(track = "stop")

   play[track "loop"] 

  else

   play[0 "loop"]

  end 

 end

 if x~"alarm"

  alarm.animated: 1

  alarm.show:"transparent"

 end

end

`

Where `alarm` is a canvas with the `on view` handler that runs a zazz.flibook. 

Upon reaching the `!alarm`, the alarm canvas becomes visible but no animation. And only after `dd.close[]`, the zazz kicks in. I read in the tutorial that `dd.say` is synchronous – it blocks the global event loop – while it would still call the `on animate` handler every now and then. But, I guess, I can't use zazz in this handler?

Developer(+2)

While Dialogizer is active, the view[] events requested by flagging a widget as .animated won't be produced naturally by Decker itself; all system events are "blocked" until the synchronous call to dd.say[] completes. Dialogizer sends a "synthetic" animate[] event to the current card every frame, and then you can in turn use that event to explicitly send a view[] event to other widgets that need to animate (or call the view[] function on the card, etc).

Perhaps your card script could have something like:

on animate do
 if alarm.animated
  alarm.event["view"]
 end
end

Or maybe you could do something a little more generic, querying the card to find any animated widgets and pump view[] events to them:

on animate do
 (extract value where value..animated from card.widgets)..event["view"]
end

This animate[] event is also how Puppeteer manages the animation for puppets. If you're using these libraries together, make sure your own animate[] event handler calls

pt.animate[deck]

at some point. You can also take a look at the card script for this part of the Dialogizer tutorial: http://beyondloom.com/decker/dialog.html#eventpumping

Does that help?

(+1)

Thank you!

alarm.event["view"] 

does exactly what I need. The event pumping is something I missed when I was looking through tutorials. Thanks again. 

(+2)

Hey there IJ,

Would you ever consider adding a feature that would let us sort Sounds/Resources/etc alphabetically when looking at the modals for each?

Developer(+1)

It would be reasonably straightforward to sort the sound, prototype, and font lists alphabetically when they are displayed.

Is there a specific workflow that you're having trouble with?

(1 edit)

For example, in my current project, I’m using a lot of sounds and prototypes. For the sounds especially, it is hard to identify what I’ve imported/used/can get rid of simply because I have to scroll up and down trying to find that particular filename.

This is mostly because I’m a fanatic and will re-edit sounds if they’re too loud or the loop isn’t quite right.. so even though I organize all my filenames before import, they still end up out of order if I delete/re-import a re-edited sound because they’re plopped back down to the bottom of the list. Does this make sense?

(3 edits) (+1)

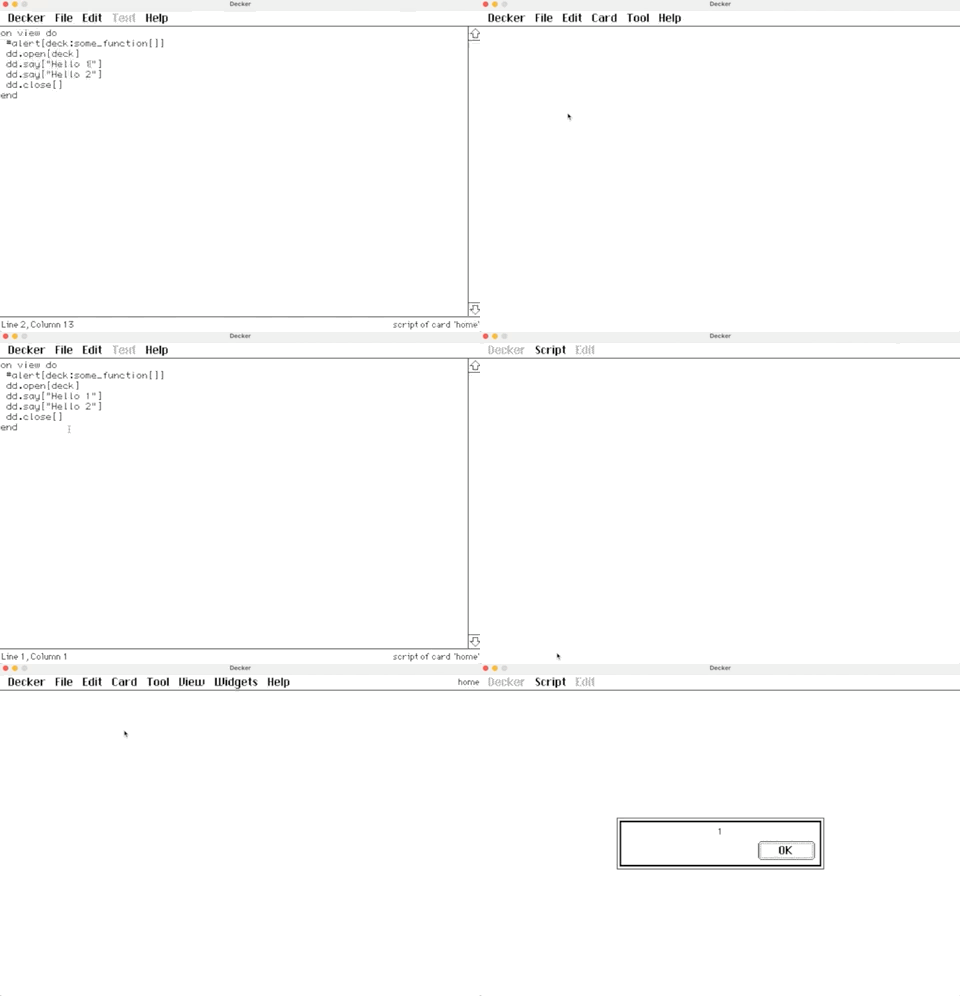
In my game, I moved some of the common logic to the deck-level script. However, when I make a call to one of the function from the deck (e.g., deck:set_progress[me 2]), it breaks the Dialogizer altogether.  The `dd.open[deck], dd.say[...], etc, dd.close[]` just stops working. So weird.

I created a very simple deck where I reproduce the behavior: 

I would appreciate any advice on this. 

Developer(+1)

The phrase

deck:some_function[]

calls a function named "some_function" with no arguments and then assigns the result of calling that function to a variable named "deck". If the result of that function isn't the deck (it appears to be the number "1" in your example), you will then be calling the dialogizer functions with an invalid "deck" argument, which prevents them from working correctly.

If you have defined a function in a deck-level script:

on some_function argument do
 argument+2
end

You can invoke it from any card- or widget- level script by calling it like any other function:

some_function[3]

Widget scripts exist in a scope nested inside card scripts, which in turn exist in a scope nested inside the deck level script which in turn is nested inside a special magical scope with the definitions of all the default event handlers. Every variable or function definition in an outer scope is visible to the scopes nested within it, unless one of those scopes "shadows" it with a local definition with the same name.

Widgets, Cards, and the Deck all expose a ".event" attribute which is a function you can call to send a synthetic event to that deck-part. You can thus also invoke that deck-level function from elsewhere like so:

deck.event["some_function" 3]

This latter method works even if the target is not in a scope surrounding the caller, and it sets up automatic variable bindings ("me", the widgets on a card by name, etc) from the perspective of the target. This is most useful when you want to communicate across cards or simulate user interaction, like sending a button widget a "click" event which appears from that button's perspective like a user-generated click.

Does that help clarify?

(+1)

Now it all makes sense. Thank you!

Hi!

I'm helping localize a Decker project into Russian, and I've run into an issue with Cyrillic characters. So the original deck works fine, but when I replace the English text with Russian using Visual Studio Code, the Cyrillic characters appear as question marks. I also tested editing the text directly inside Decker, and the result is the same.

Is Cyrillic currently supported in Decker? If not, is there a recommended way to localize Decker projects into languages that use Cyrillic?
BTW, I'm not a developer.I'm just trying to figure out how to translate Decker projects. This is my first time working with Decker, so I might be missing something obvious.

Thank you!

Developer

Unfortunately, Decker does not currently support Cyrillic.

Decker uses an internal byte encoding called DeckRoman, which supports a variety of diacritics and special letters for Latin-based alphabets, and provides a range of fonts with those characters.

It is possible to represent other alphabets using a custom font, but this does not automatically make Decker recognize natural text input in those alphabets.

For a more determined tinkerer, it is within the realm of possibility to fork Decker and modify the lookup tables it uses for converting between UTF-8 and DeckRoman, but this would require some programming experience.

(+3)

Hello! I'm making a contraption that allows for you to search data on a hidden grid in the contraption itself. I want the user to be able to configure the columns that are shown when the search is done, and also to configure the column that will be the target of the search (the one that is used in the query). I tried the following code:

on click do
 # Variables to shorten the query line
 srch:search_col_val.text
 show:show_col_val.text
 term:search_terms.text
 # Query
 result:select show where srch like term from internal_copy.value
 # Display results
 search_entries.value:result
end

Where "search_col_val", "show_col_val" and "search_terms" are fields (with only search_terms being visible), "search_entries" being the visible search results grid, and "internal_copy" being the grid that is being searched.

I expected the query to show the elements whose searched column matches the search terms, but instead I get the value of show_col_val. How can I make this query do what I want it to do?

Developer(+2)

Your "srch" and "show" variables contain strings. In the context of a query subexpression they will be interpreted as string values, not the contents of a column by name. You can, however, use the implicit "column" dictionary to perform this indirection, something like

result:select column[show] where column[srch] like term from internal_copy.value

(the "column" dictionary is also how you can reference columns whose names are not valid lil identifiers.)

You might want to take a look at the examples for the "_hideby" column in grids; it's designed to assist in searching and filtering grid contents without requiring an auxiliary source of truth. 

(+3)

Is there a way to use integer scaling to display text in Decker at a multiple of the original font size? 

(I'm working on a custom font and would love to include some zoomed in views of certain glyphs, but keep them as live text)

Developer(+2)

There are a few ways to do what I think you're asking for. You can set a canvas to have a "scale" setting greater than 1 to upscale whatever is drawn on it, and then draw text on it, or you could draw text on a canvas normally, copy the contents of the canvas as an image, upscale that, and then draw the upscaled image back to the canvas.

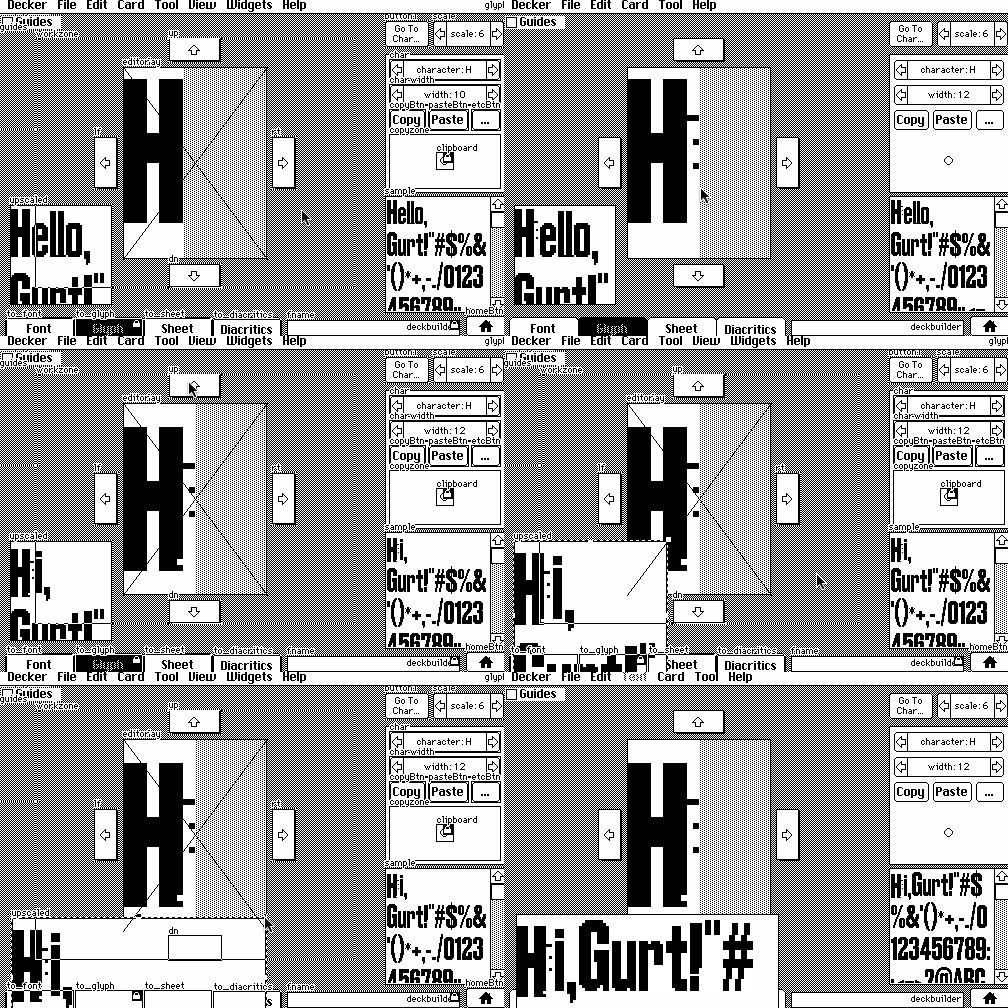
Presuming we start with the glyph editor in "All About Fonts", we could do the following:

1) create a new canvas widget and name it "upscaled". From its "Canvas properties" modal, set the scale factor as "2" (just for starters).

2) modify the card script, adding the following three lines to the "on view ..." function after the line that reads "sample.font:f"

upscaled.font:f
upscaled.clear[]
upscaled.text[sample.text (0,0),(1,2)*upscaled.lsize]

(This will word-wrap the beginning of the text in the "sample" field within the canvas, with a little extra room so it cuts off instead of ellipsizing)

3) tweak the "sample" field so that it triggers an update of the UI whenever it is changed by giving it a script like so:

on change do
 view[]
end

Now the upscaled preview will be updated whenever you draw on the glyph, change other font parameters, or type in the sample field. You can also adjust the "scale" property of the canvas as desired:


How's that?

(+2)

Thank you so much for your generous response, this will work great!

Developer (1 edit) (+1)

Having seen your stream, this can be simplified; for some reason I had assumed you wanted something integrated with the font editor.

Given a field named "f" and a canvas named "c", you can set the font of the canvas and field to your custom font manually, and then give the field the following script:

on change do
 c.clear[]
 c.text[f.text (0,0),(1,2)*c.lsize]
end

Since the contents of the canvas is always being redrawn from scratch to reflect the field contents, you could optionally reduce the file size of your deck a little bit by marking the canvas as "volatile" and dividing the script into a card script that updates the canvas whenever the card is refreshed:

on view do
 c.clear[]
 c.text[f.text (0,0),(1,2)*c.lsize]
end

And a script for the field to kick off an update whenever it changes:

on change do
 view[]
end

And if you wanted the canvas to always reflect the font(s) chosen for the field widget and any rich text inside it, you could generalize the script further to copy the field's font setting to the canvas before doing any drawing and use the field's .value (the rich text contents of the field) instead of .text (the plain-text contents):

on view do
 c.font:f.font
 c.clear[]
 c.text[f.value (0,0),(1,2)*c.lsize]
end

Hope that helps!

(+2)

Thank you again!! I realized that I phrased my original question in a confusing way, and I once again really appreciate your help! I'll dig into this tonight and try to make some adjustments. It's been a delightful process building out a font though!

(1 edit) (+1)

Hello! I have a draggable canvas that I would like to toggle from interact mode. I have tested this with a canvas and two buttons. The first button is scripted as follows:


on click do

 canvas1.draggable:"true"

end


This acts as intended, making the canvas draggable. The second button is meant to make it NOT draggable. I attempt this with the following script:

on click do

 canvas1.draggable:"false"

end


When this button is pressed, the canvas is still draggable; in fact, I have learned that any text in quotes (ex. "beedeebadoo" or "shoobyflooby") will still make the canvas draggable. What would the proper syntax be to make the canvas no longer draggable via a scripted event?

Thank you!! Big fan of your work :)

Developer (1 edit) (+2)

In Lil, the number 0, the empty string "", nil, the empty list (), or an empty dictionary is considered false and anything else is considered true. Most of the time, 1 and 0 are the clearest way to indicate true or false, respectively.

Your examples should probably be

on click do 
 canvas1.draggable:1
end

and

on click do
 canvas1.draggable:0
end

Does that make sense?

(+2)

Ah! I totally thought I had already tried using null, that works!! Thank you for your gifts O Wise One

(+1)

Just started with Decker and was learning the grid widget. I have a question about it. Is it possible to adjust the width of individual columns or are columns always equiwidth, based on the total width of the widget?

Developer

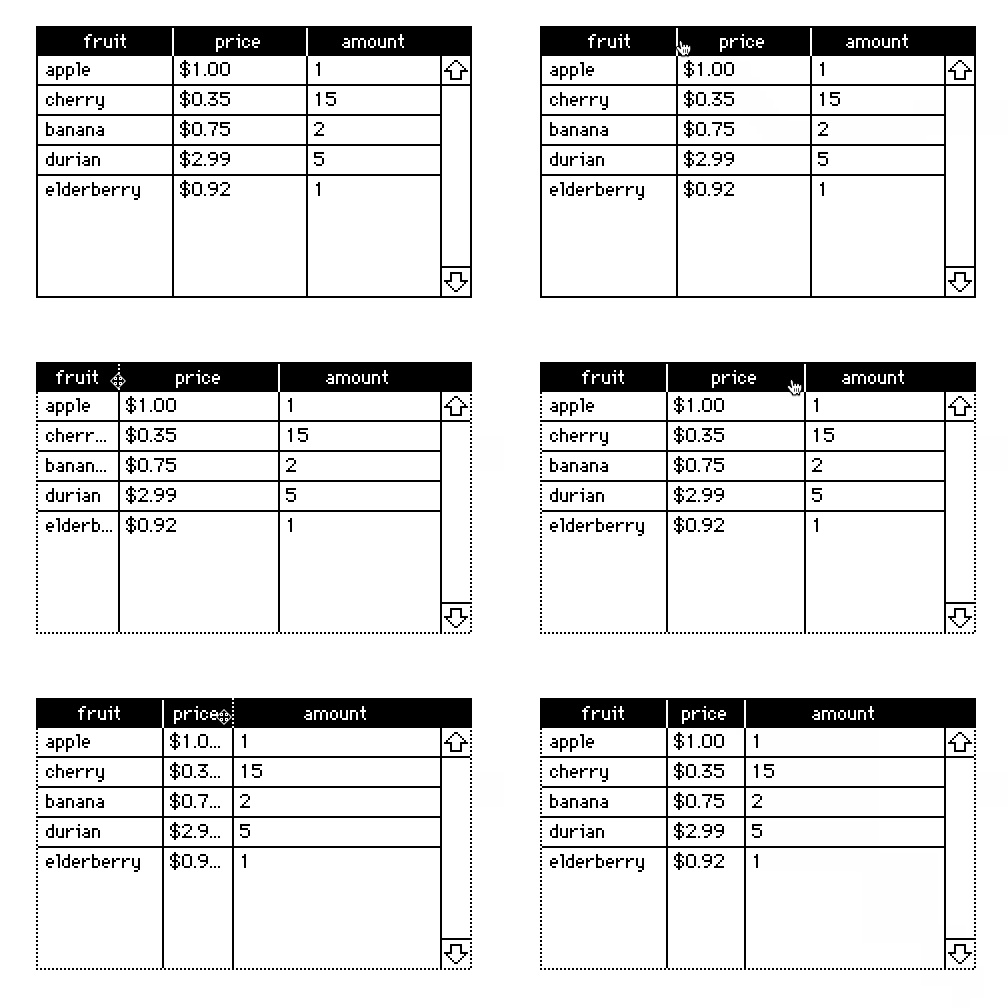
In interact mode, you can drag dividers between the column headers to adjust their sizes:

If you ever want to "unfix" the column widths you can click "Reset Widths" from the grid properties panel.

You can also set the column widths of a grid with scripts or via the Listener with the "grid.widths" property, which accepts a list of column widths in pixels:

mygrid.widths:60,30

Manual resizing constrains the minimum width of columns so that you can always distinguish their drag handles, but with scripting/the Listener it is possible to set columns to 0 pixels wide, as a way of hiding columns from the user without removing them from the underlying table.

Does that make sense?

(+1)

Bless you, sir! It makes perfect sense. Did I miss something in the documentation or are these details not provided? I looked all over and couldn't find anything.

Developer

From the decker reference manual,

If the grid has headers and more than one column is displayed, you can drag the space between column headings to resize the columns. By default, every column is given equal horizontal space. You can restore default spacing by clicking "Reset Widths" in the grid properties dialog.

The .widths property is described in the Grid Interface section, along with all the other scriptable properties:

x.widths: A list of up to 255 widths of table columns, in pixels. r/w.
(+1)

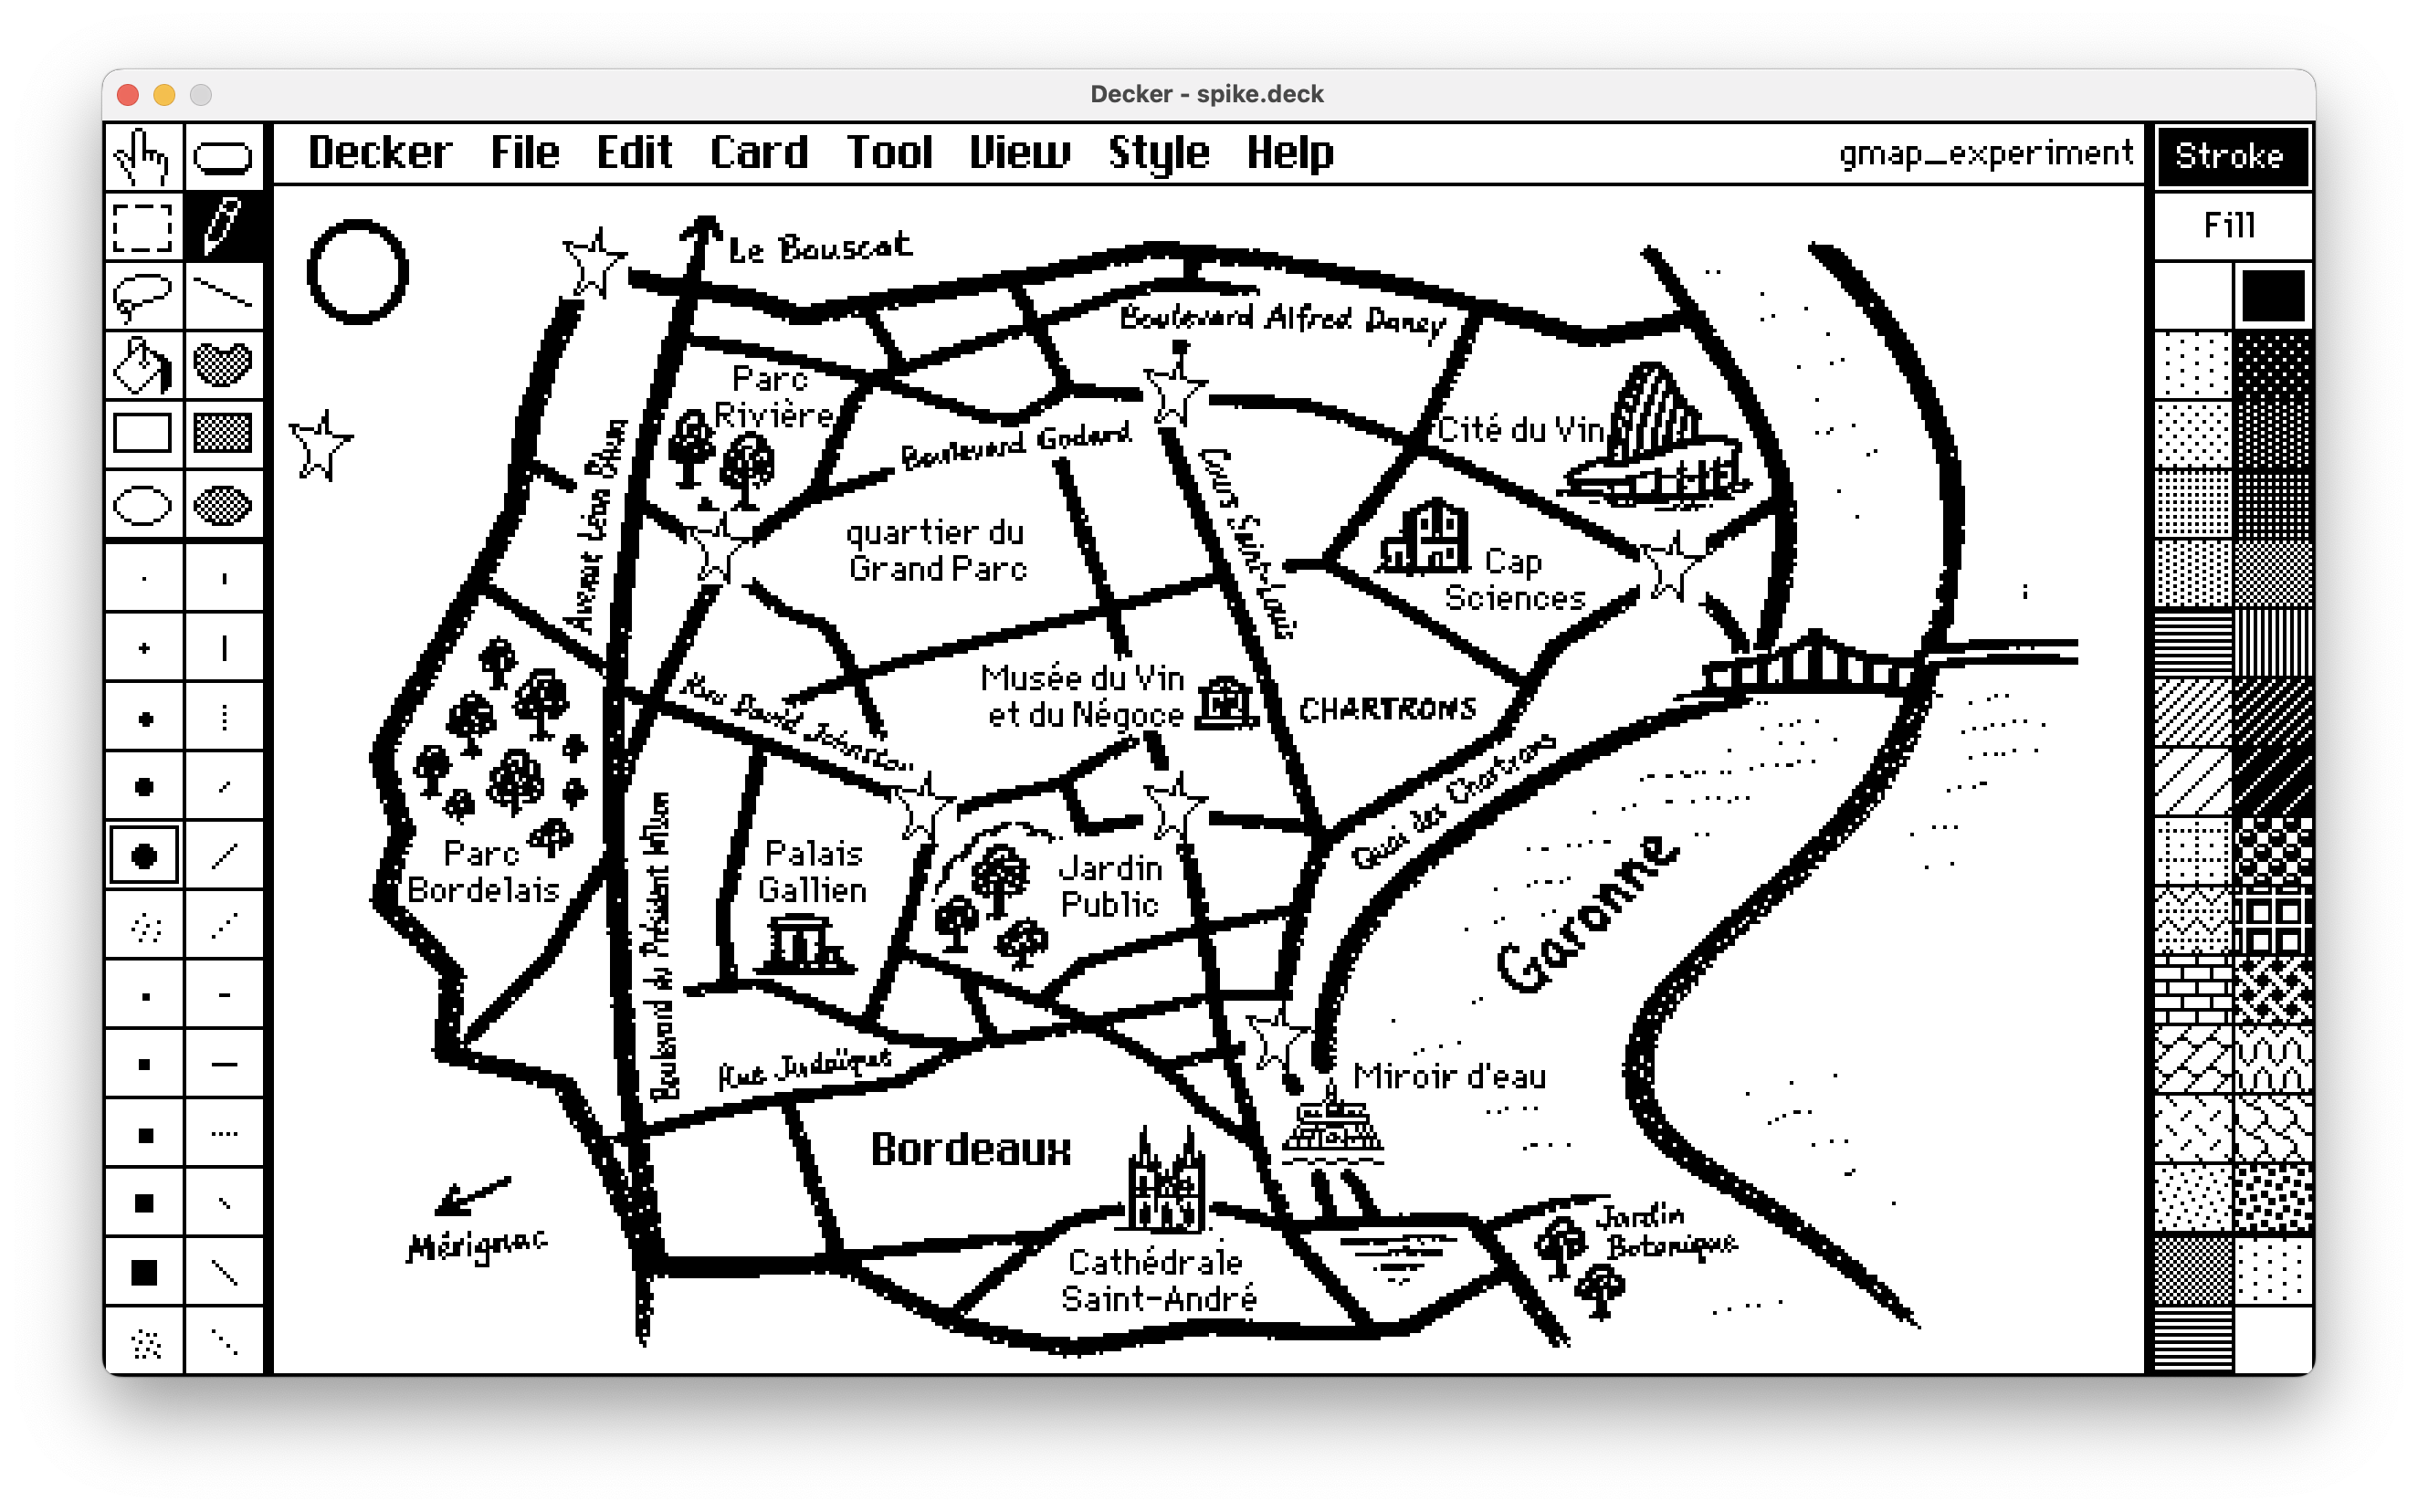
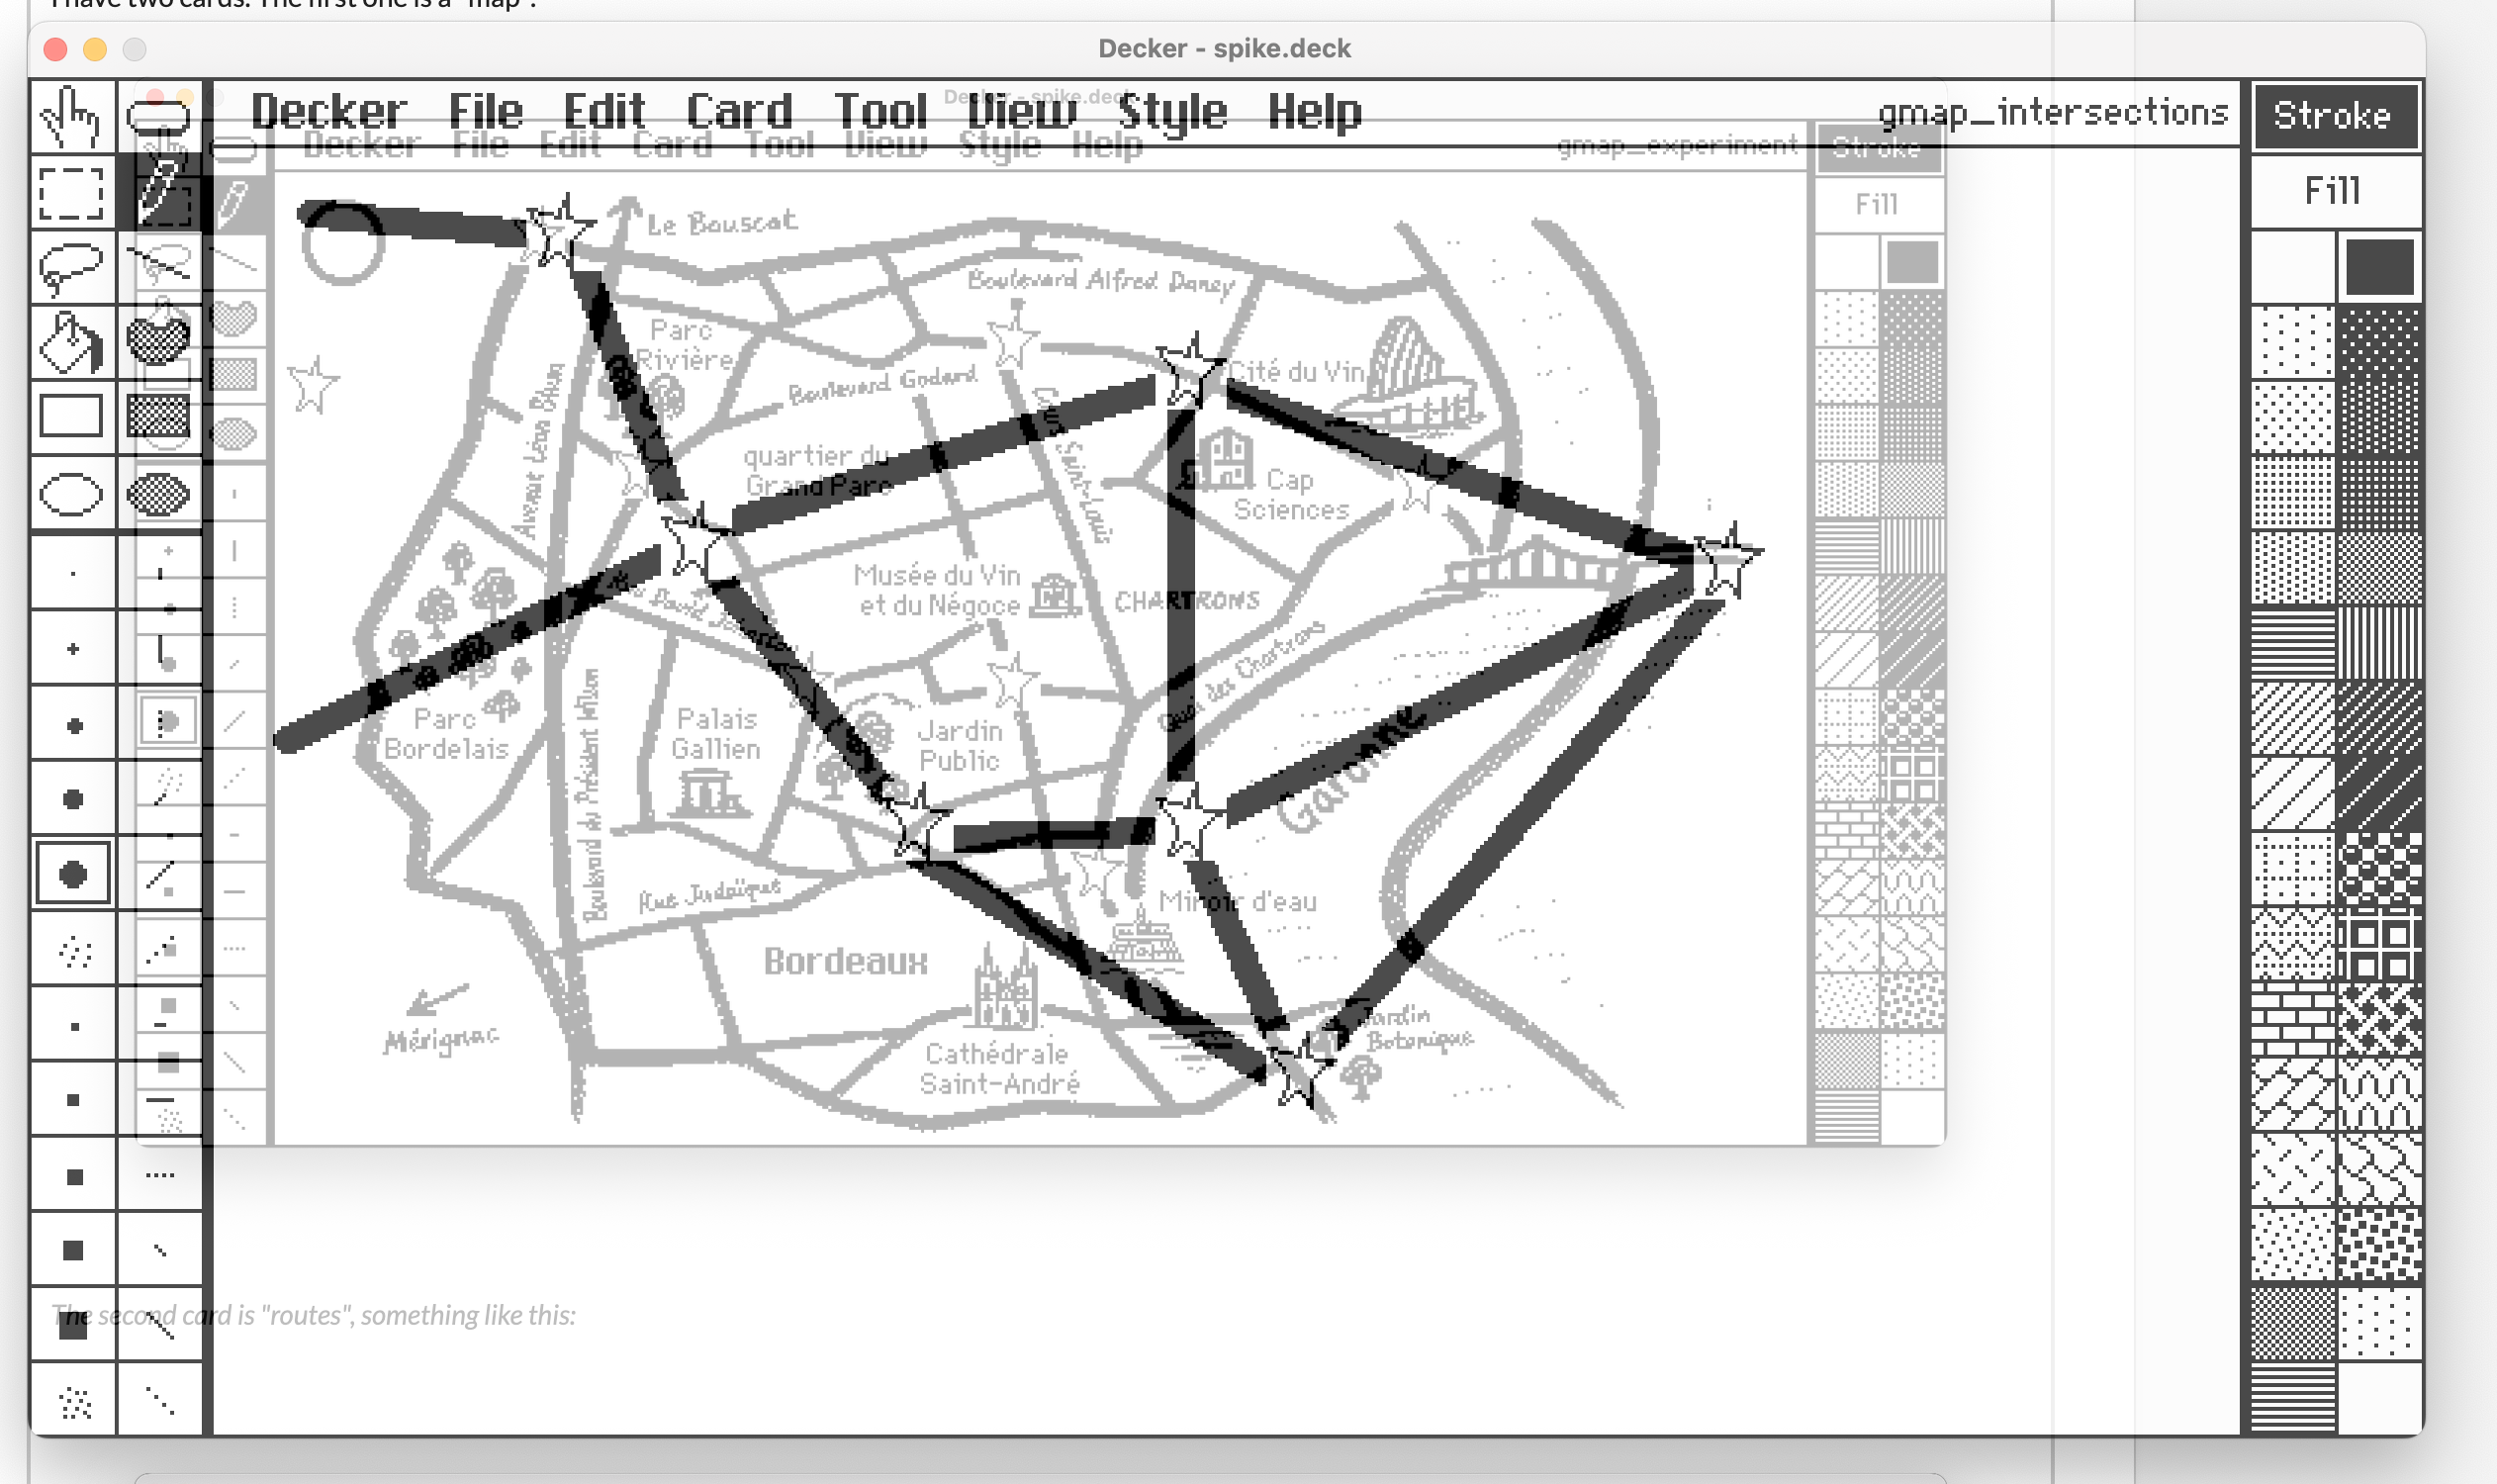
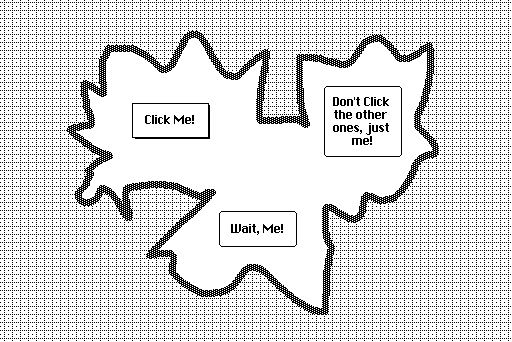
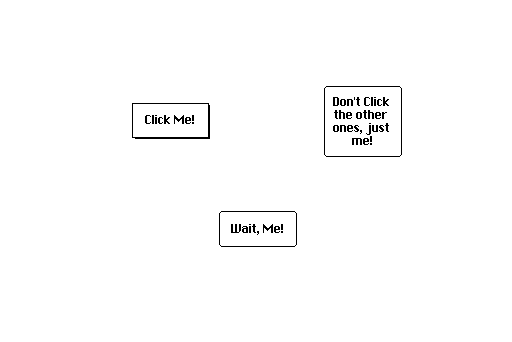
I have two cards. The first one is a "map":

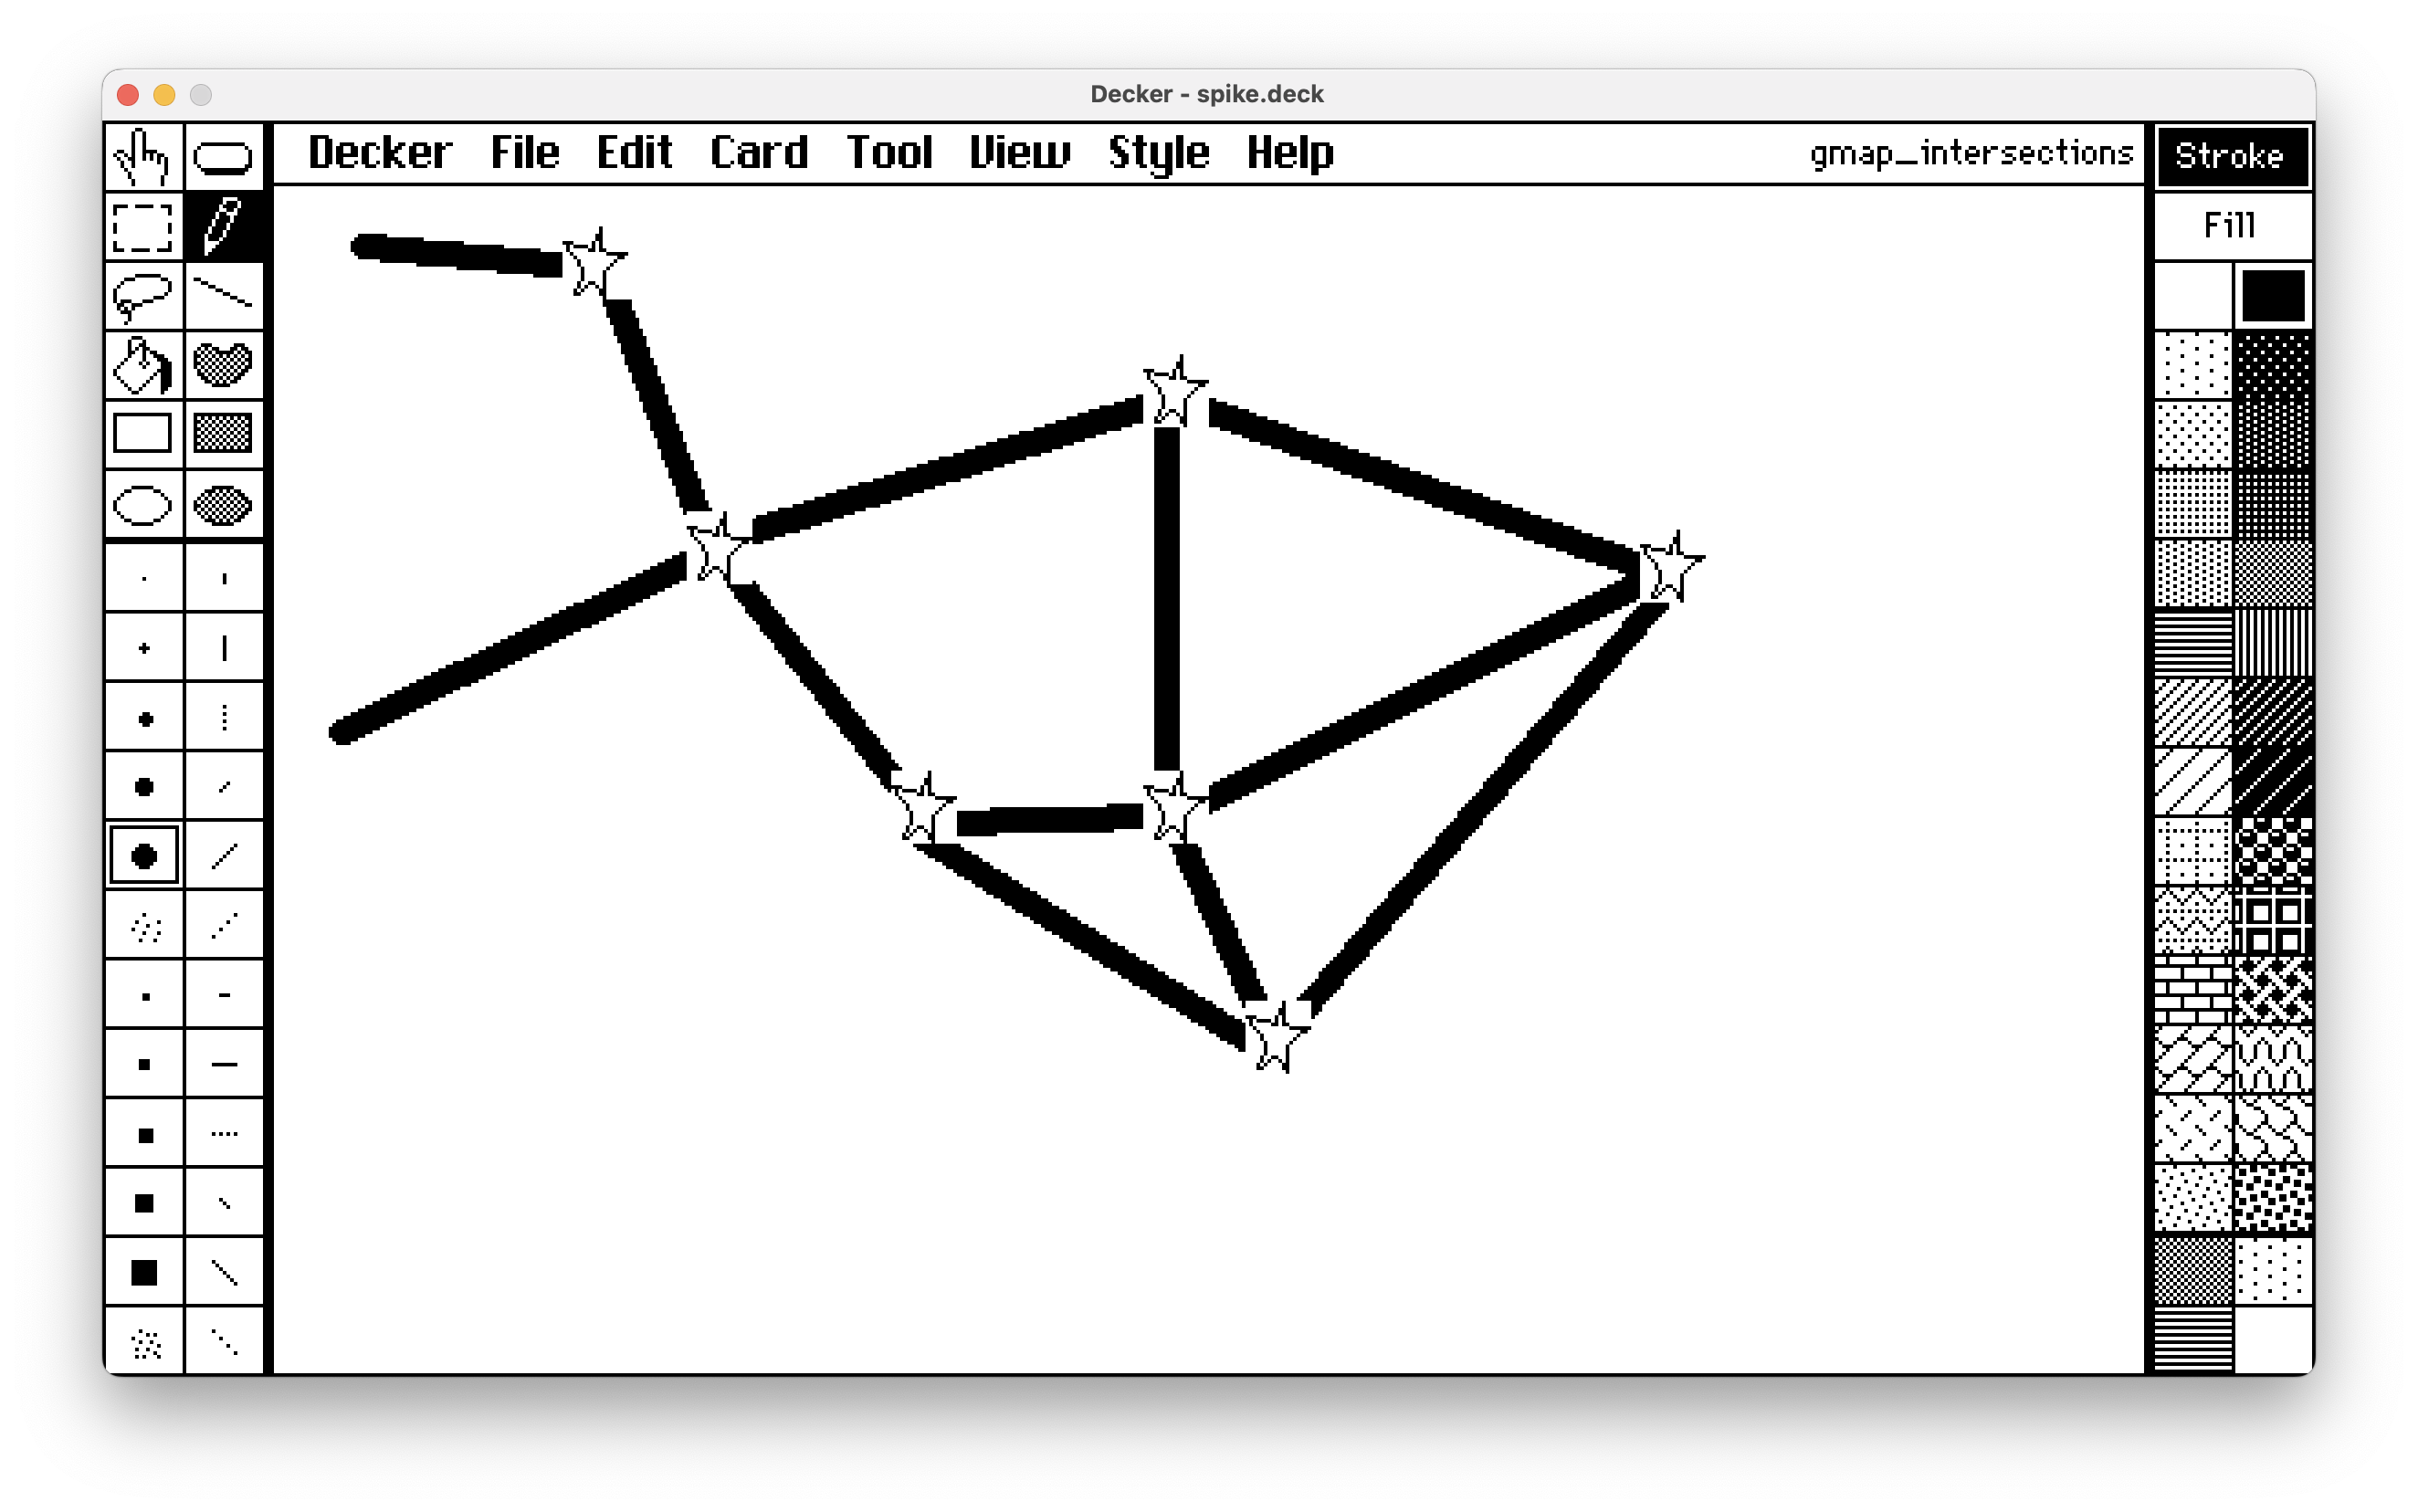
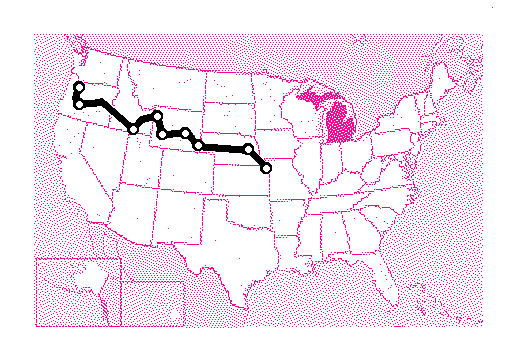
The second card is "routes", something like this:

I want to bring the the "map" card image as a background to the "routes" card by some user event. The caveat is that I want this background "dimmed down".  Ideally, to achieve something that decker provides with the "Style->Tracing Mode":


   I would appreciate any suggestions. Thanks!

(1 edit) (+1)

That's a nice map!

As far as i know Decker doesn't let you fiddle with opacity. Instead, you could "simulate" it by using gray in place of black. When in drawing mode, go to Style and check Color. The different shades of gray are at the bottom of the default Decker palette. I suggest using the Fill tool with your desired shade :)

Developer (1 edit) (+2)

As Flocon noted, Decker uses paletted color and doesn't have any notion of partial transparency, so there are some limits to what we can do here, but I can see ways to achieve something like the effect you describe. If you haven't already, I recommend reading through All About Color for some relevant background information.

Let's assume for simplicity that you're using Decker's default color palette, the "map" and "route" cards are fully in black-and-white (patterns 0 and 1), and everything you want to fade in is part of the card backgrounds (no text in fields, etc).

If we created a new card to tinker with, we could use a script in The Listener to composite the card backgrounds together, assigning a different color to the pixels of "map":

card.image.paste[map.image.copy[].map[1 dict 36]]
card.image.paste[route.image.copy[] 0,0 1]

(Be careful to save before doing this sort of thing in the Listener; it's a very powerful tool, but you can't "undo" changes performed this way!)


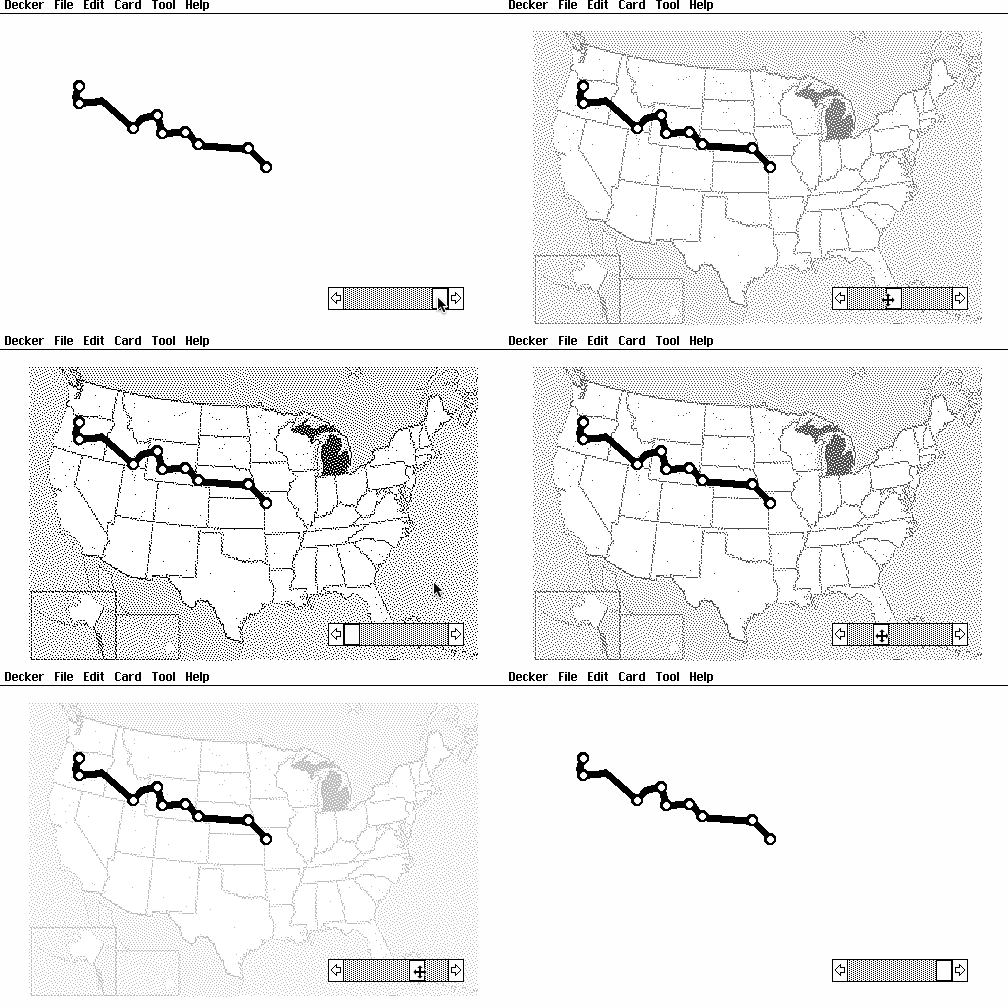
We could then manipulate the color Decker uses to display the "map" (I picked 36 here arbitrarily) to fade it in or out on the fly. Here I have a slider with a range of 0-255 wired up to let me change it manually:

on change do
 patterns[36]:"%06h" parse 6 take "%02h" format me.value
end


The way I'm computing the "packed RGB" grayscale value here is by turning the 0-255 value of the slider into a 2-digit hex code, replicating it 3 times, and then parsing the result as a 6-digit hex number, which may be a little confusing. All About Color has some functions in the "col" module to make computing packed colors a bit easier.

How's that for a starting point?

(+1)

That's an excellent starting point! Thank you for taking time to break it down for me.

And one more question, somewhat related this one. The "map" card aside from the image, has some field widgets with text – I used field widgets purely as labels. Simply because it lets me align text (center it) and easily move it around. Is there a programmatic way to convert the text in a label (with all the fonts and alignment) to an image? The only way that comes to mind is to create a canvas widget, assign it the same font as in the field, and then call the `.text[]` method – but then I'd need to split multi-line strings and calculated positions and anchoring every time.  

Developer(+1)

You can use the app.render[card] function to take a "screenshot" of a card as an image. If we did this for our "map" card in the previous example, the snippet of code for compositing both images together would instead be:

card.image.paste[app.render[map].map[1 dict 36]]
card.image.paste[route.image.copy[] 0,0 1]

Make sense?

It is also possible to render widgets individually and/or programmatically walk over some subset of the widgets on a card to inspect them or render their (rich) text on a canvas, etc. Happy to expand on that with examples if you find you need it.

(+1)

I want to know how to render widget(s) individually. >:)

Developer (1 edit) (+1)

Well, I had intended to allow an explanation to reflect a specific use-case, but I suppose I can concoct something.

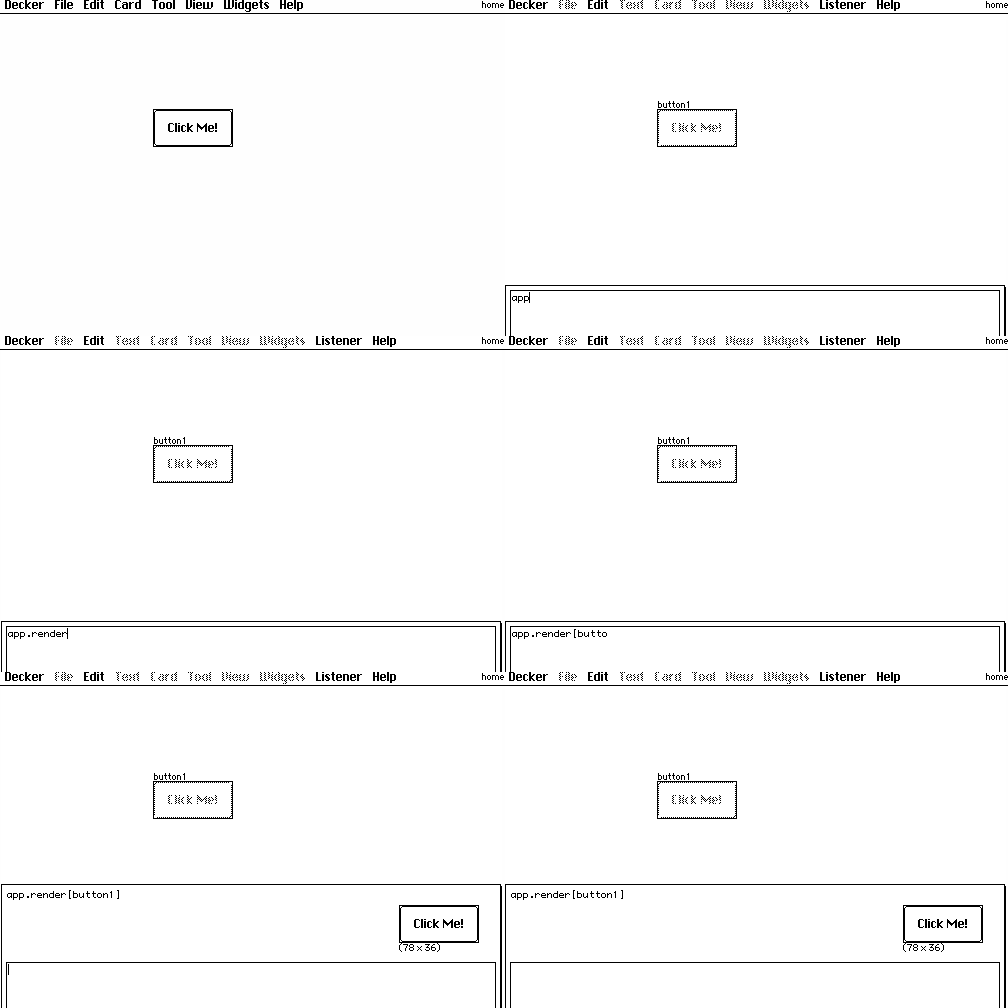
The app.render[] function can be called with a widget, as with a card:


Let's say we want to save a "screenshot" of only the widgets on a card, and ignore the background.


Create an image interface the size of the card, iterate over the widgets of the card, rendering each and pasting it (with transparency) onto the image, reflecting their position on the card, and then write[] that image, prompting the user for a location to save it:

i:image[card.size]
each wid in card.widgets
 i.paste[app.render[wid] wid.pos 1]
end
write[i]


You could also, for example, selectively avoid rendering some of the widgets, either by "drop"-ing them from card.widgets by name before iterating over them:

each wid in ("button2","the forbidden one") drop card.widgets
 # ... draw everything but those two specific ones
end

Or conditionally avoiding/permitting a certain kind of widget:

each wid in card.widgets
 if !wid.type~"field"
  # ... draw everything except for nasty fields
 end
end

You can also use Lil's query language and/or widget naming conventions to locate widgets of interest:

each wid in extract value where value..name like "fancy_*" from card.widgets
 # ... draw only the widgets which are fancy
end

Et cetera, et cetera. How's that?

(+1)

Hello, sorry for the stupid question, but I cannot for the life of me figure out how to import a palette/hex file/use different colors. I did read throughthe 'all about color' deck, but it still wasn't clear to me.

(+2)

Not a stupid question! If you already have a hex file you can just drag it from your file folders onto your Decker projects and it should change your colors automatically. 

If you're on some platform where you can't drag-and-drop you can copy-paste the PalImport contraption (scroll down a little bit in this post to find the code block to copy) which should let you find and open your hex file and then apply it with the button.

Alternatively you can mess around with the colors directly in Decker with Missooni's RGB adjuster (expand the second part of this post and then copy the code block)

There's also an art section in Phinxel's Field Notes which talks about how color works in Decker, in case seeing things explained in a different way is helpful.

I have a zazz question. (I couldn't find a separate forum post dedicated to this module). I'm using `zazz.march` to move a canvas through several points. How do I programmatically "stop" the marching animation? Or put in on hold and resume later?

Developer

The zazz.march[] function is designed for very simple looping animations. It is tied to Decker's global frame counter, which makes it easy to use, but limits its flexibility.

If you have an animation that involves starting and stopping- or even starting and finishing- on a more detailed schedule, like a "cutscene", I'd recommend taking a look at Puppeteer. It defines a language for moving "puppets" around on the screen in various ways, playing sounds on cue, and quite a bit more.

The "ease" module offers another lower-level alternative, with functions for tweening a position along a spline defined by a series of control points.

Does any of that help?

Got it. I liked `zazz.march` exactly because of its simplicity :) The only thing lacking for my use case is "halting" the animation (or all animations currently managed by zazz) . I don't know how it fits with your architectural vision for the zazz module, but it would be nice if it exposed some kind of a `purge` method that just stops any active animations managed by zazz (by purging its internal state). Or, better off, a method for "unregistering" individual targets that are currently being animated. 

Anyway, I'll be looking for workarounds. Thanks!

(+1)

hello!! my problem is that i have a canvas at a specific size, and i want to put an image inside the canvas without changing its size... is there a way to paste it to fit the canvas, or will i have to resize my image manually?

Developer (1 edit) (+1)

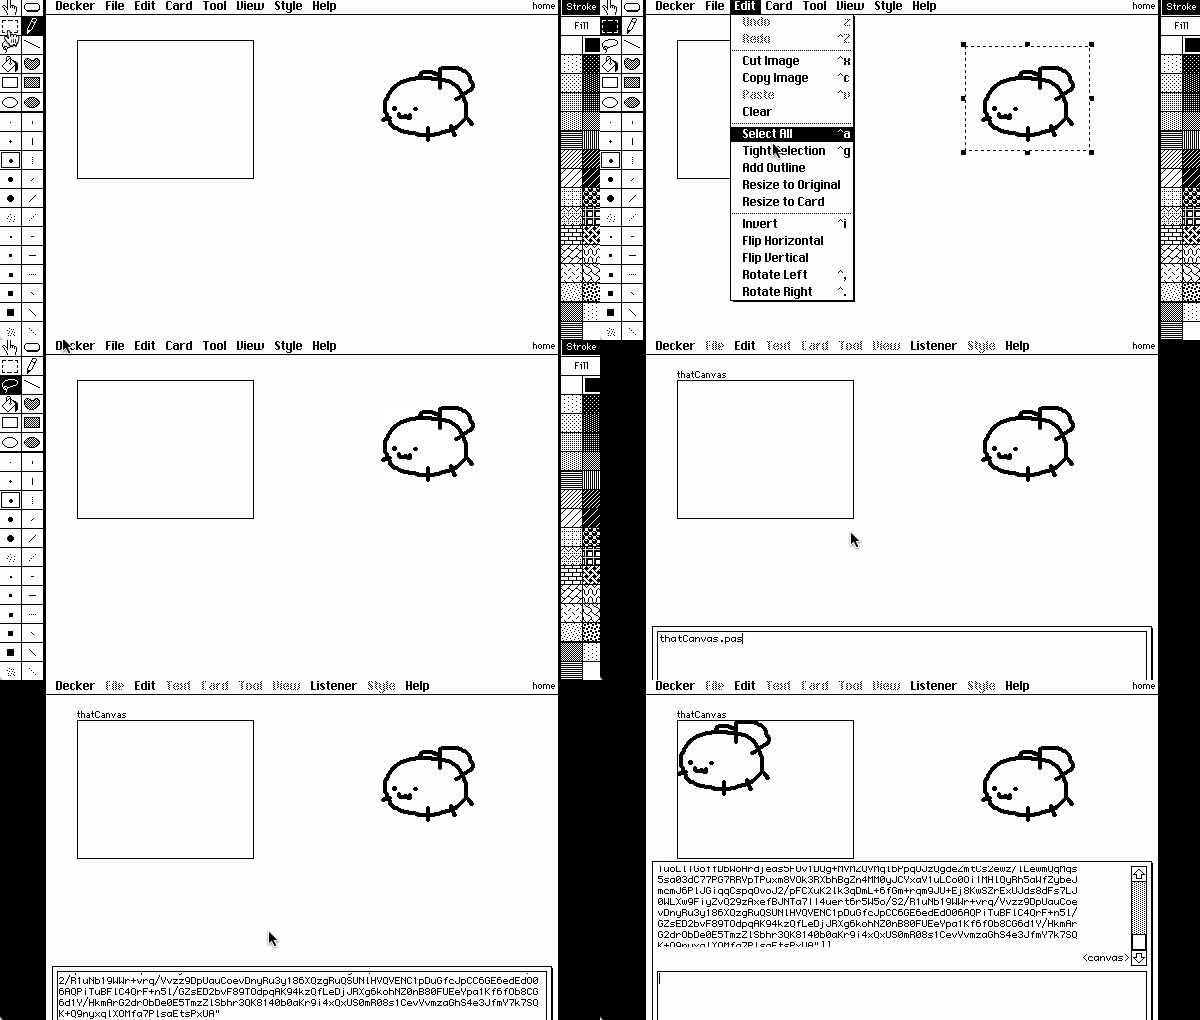
If you have an image in your clipboard, you can paste it into a canvas without altering the size of the canvas by using the Listener. The image is represented in your clipboard as a string that probably looks something like "%%IMG3..."


thatCanvas.paste[image["%%IMG3..."]]

If you wanted to center the image within the canvas, you could tweak this recipe a little. You may also want to clear the canvas before pasting if you already have something drawn on it:

i:image["%%IMG3..."]
thatCanvas.clear[]
thatCanvas.paste[i .5*thatCanvas.size-i.size]

The Listener is also really handy for things like setting widgets to a precise size:

thatCanvas.size:120,100

How's that?

(+1)

thank you! but i also wanted to ask .. is there a way for the original image to resize into the canvas' size? like if the original image was bigger than the canvas? 

(also im not as familiar with lil as i should, but what does the i in i:image["%%IMG3..."] mean? is it like a variable? (and i wanted to know what exactly thatCanvas.paste[i .5*thatCanvas.size-i.size] meant... hope this isnt too much ;;)

Developer (1 edit) (+1)

Commands in the Listener are statements in Lil, Decker's scripting language. If this is your first exposure to Lil, you may want to have a look at The Phield Notes  or the Lil reference manual.

Breaking those examples down a bit more,

"%%IMG3..." is a string representation of an image. The image[] function constructs an Image Interface from such a string. In Lil, the colon (:) is an assignment operator. You can read it aloud as "gets" or "becomes". The phrase

i:image["%%IMG3..."]

Constructs an Image Interface and assigns it to a variable named "i". When you define variables like this in the Listener, you can refer to them in subsequent queries, or additional expressions in one query:


Both Images and Canvas widgets have a ".size" attribute giving their dimensions:


Sizes are represented as a list of two numbers- the width and height, respectively, in pixels. In Lil, all arithmetic operators have uniform precedence, applying right to left unless overridden by parentheses. Arithmetic operators also generalize across lists; subtracting them subtracts them element by element. Multiplying a list by a single number "spreads" that number to each element of the list:


Offsetting the top left corner of the pasted image by half of the difference between the size of the image and the canvas will center the image within the canvas.

Instead of specifying a position for drawing our pasted image with (x,y) coordinates, we could specify a position AND a width and height to stretch/crunch the image to fit, like so:

i:image["%%IMG3..."]
thatCanvas.clear[]
thatCanvas.paste[i (0,0),(thatCanvas.size)]

Is that a bit clearer?

(+1)

yes, that worked!! thank you so much for the explanation :D

Viewing posts 61 to 73 of 73 · Previous page · First page