Indie game storeFree gamesFun gamesHorror games
Game developmentAssetsComics
SalesBundles
Jobs
TagsGame Engines

Eren

13
Posts
13
Topics
A member registered May 22, 2025 · View creator page →

Recent community posts

(1 edit)

Hello. In this post, I’ll walk you through the process of loading and rendering a 3D model.

In the previous post, we covered how to load and display a texture on the screen. This time, we move one step further and load an actual 3D model and display it.

The 3D Model

For this example, I used the Viking Room model introduced in the Vulkan Tutorial.
The model is released under a Creative Commons license, making it perfect for learning and testing purposes.

Vulkan Tutorial – Loading models

Loading Models in Rust

The Vulkan tutorial is written in C++, but since our project is based on Rust, we used a tool suited for Rust.
We chose the tobj crate — a lightweight library that parses OBJ files.

tobj – Rust crate

Fortunately, we had already implemented most of the vertex-related functionality, so all we had to do was plug the parsed data from tobj directly into our vertex buffer. This made the implementation relatively straightforward.

Results

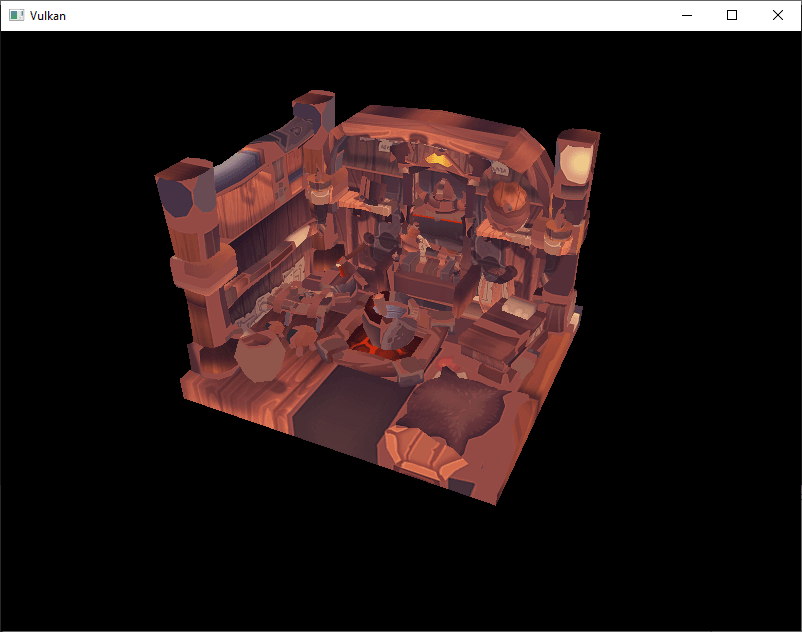
After implementing and running the code, the model rendered correctly in terms of geometry.
At first, the texture wasn’t applied, so it appeared as a plain mesh.
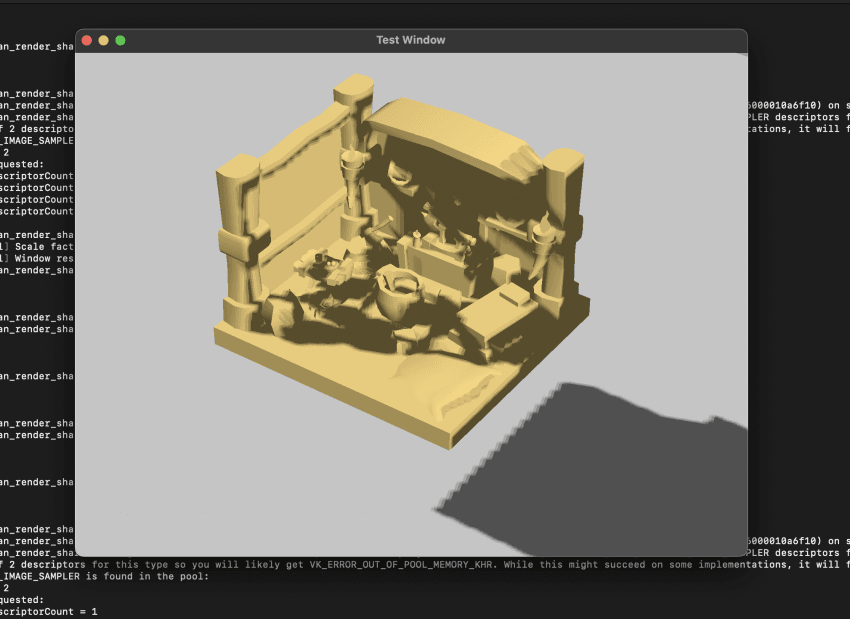

Once we updated the shaders and the main render pass to include a texture sampler, the model rendered properly with textures applied.
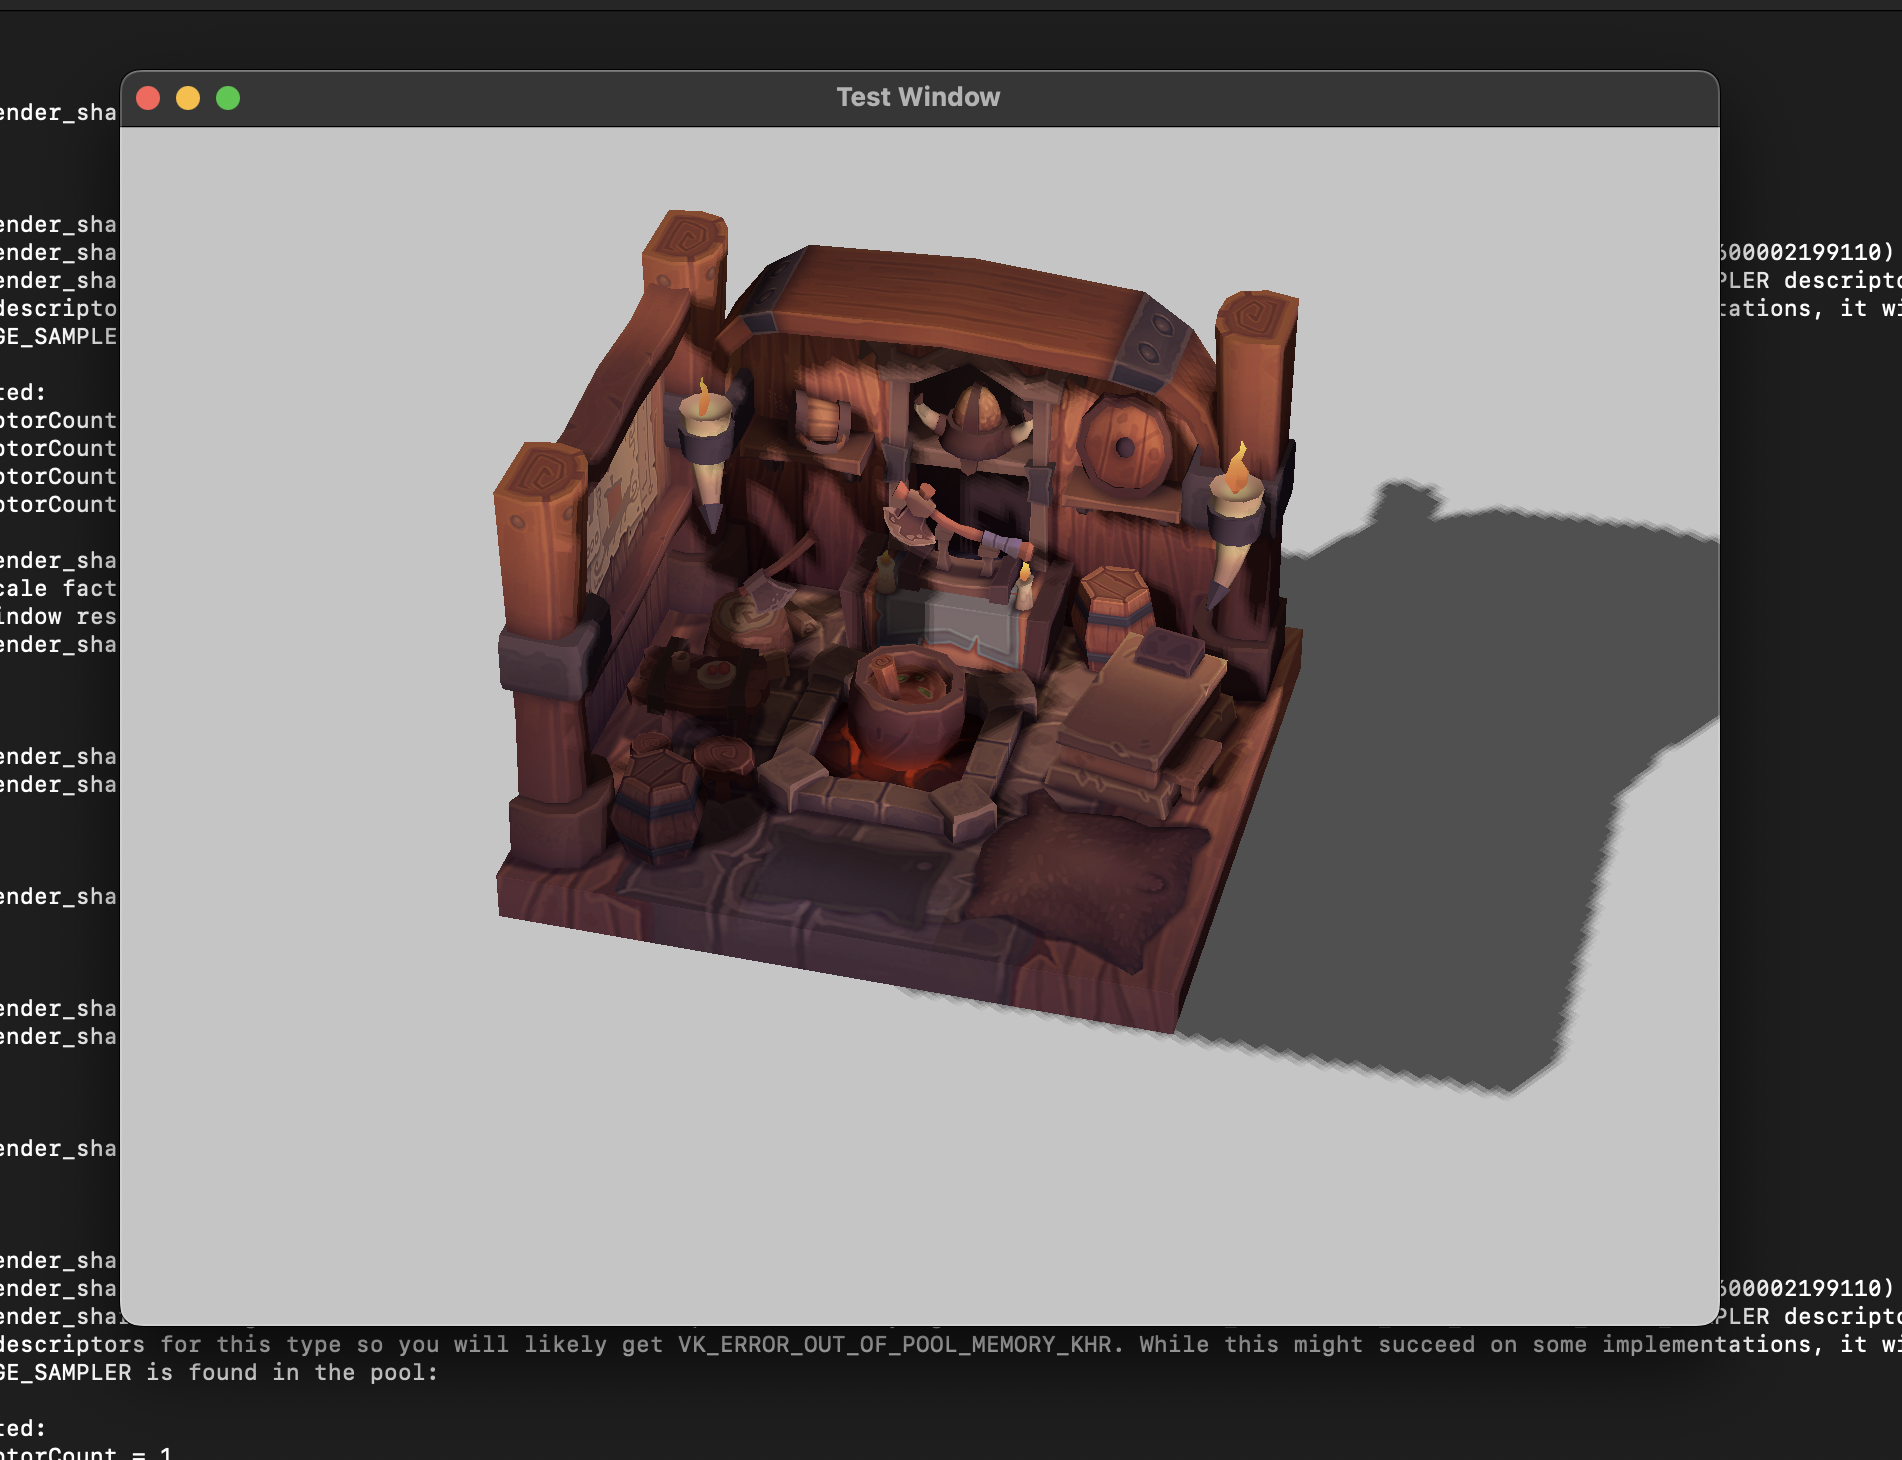

See the test video below:

Testing on the Web

We also deployed the build so it can be tested directly in a browser.
You can try the implementations for WebGPU, WGPU, and WebGL using the following links.

Source Code

The implementations for each platform are available on GitHub:

Coming Up Next

In the next post, I plan to cover 3D animation.
If there’s any specific topic related to engine development that you’d like to see covered, feel free to leave a comment or suggestion.

Hello everyone,

Until now, I’ve been drawing only basic shapes, but this time I finally implemented texture mapping and rendered an actual image.

Preparing the Image

First, I prepared an image to use as a texture.
(For the record — this is the Eren Engine logo. 😄)

Updating the Vertex Structure

To render the image, I needed to extend the vertex data to include texture coordinates.
Here’s the updated vertex struct:

pub struct Vertex {

    pub pos: Vec3,

    pub color: Vec3,

    pub tex_coords: Vec2, // newly added texture coordinates

}

Updating the Shaders

The shaders also required some changes to handle the texture.

Vertex Shader

#version 450

layout(binding = 0) uniform UniformBufferObject {

    mat4 model;

    mat4 view;

    mat4 proj;

} ubo;

layout(location = 0) in vec3 inPosition;

layout(location = 1) in vec3 inColor;

layout(location = 2) in vec2 inTexCoord; // added texture coords

layout(location = 0) out vec3 fragColor;

layout(location = 1) out vec2 fragTexCoord;

void main() {

    gl_Position = ubo.proj * ubo.view * ubo.model * vec4(inPosition, 1.0);

    fragColor = inColor;

    fragTexCoord = inTexCoord;

}

Fragment Shader

#version 450

layout(location = 0) in vec3 fragColor;

layout(location = 1) in vec2 fragTexCoord;

layout(location = 0) out vec4 outColor;

layout(binding = 1) uniform sampler2D texSampler; // added texture sampler

void main() {

    outColor = texture(texSampler, fragTexCoord);

}

Texture Setup

Setting up textures in Vulkan involved creating the image buffer, allocating memory, copying data, transitioning image layouts, and so on — all the usual Vulkan boilerplate.
(I’ll skip the full explanation here.)

Once all the data was set up and fed into the uniform buffers, I ran it and…

The Result

🎥 Watch the result on YouTube


You can also check it out directly in your browser here:

With this, I’ve essentially finished implementing everything needed to create a 2D game renderer!

Source Code

Here are the links to the implementations for each backend:

In the next dev log, I plan to load and render a 3D model file.

Thanks for reading — stay cool, and happy coding! 🌟

Hi everyone — I’m a indie game developer, and I wanted to get some thoughts from you all.

I’ve been leaning heavily on AI in my work. At first it was just for coding help, but lately I’ve started using it for artwork as well. To me, it feels a lot like how we used to buy assets from the asset store — just another tool to get things done.

I personally haven’t faced any backlash, but I’ve seen a lot of pushback from players and other developers in general. Many people seem to feel really strongly against using AI, especially because it’s trained on other people’s creative work. I can understand that — the sense of loss or unfairness that comes with seeing your work or your craft being absorbed into a machine.

So I keep wondering: is it wrong to lean into AI like this? Or is it just the natural direction the industry is moving in?

Personally, I feel like it’s becoming just another tool — like plugins or pre-made assets — but I also feel a little uneasy about how much it depends on the work of others without their consent.

What do you think? Is embracing AI in game development unethical? Or is it just the reality of how things are evolving? I’d really love to hear your perspectives.

Hi everyone,

At this point, I feel like most of the core rendering logic of my engine is complete. (Of course, there’s still sound, physics, and other systems left to tackle…)

Now I want to start designing the API so that it’s actually usable for making games.

But here’s where I run into some uncertainty — because the people who would use this engine include not just me, but other developers as well. (Assuming anyone wants to use it at all… 😅)

That means the “user” is a game developer, but their needs and priorities often feel very different from mine, and it’s not always easy to figure out what would make the engine appealing or useful for them.

On top of that, for developers who are doing this commercially or professionally, Unity and Unreal are already the industry standard.
So realistically, I expect my audience would be more like those “niche” developers who choose to use engines like Love2D, Defold, Bevy, etc.
Or maybe hobbyists who just want to experiment or have fun making games.

But even hobbyists these days seem to lean toward Unity. Back in the day, GameMaker was more common, from what I’ve seen.

Anyway — here’s my main question:

For people who are making games as a hobby, or who deliberately choose to use less mainstream engines just for the experience —
what kinds of features, tools, or design choices are most important to them?

Any insights, suggestions, or wisdom you can share would be greatly appreciated.

Thank you!

Hello everyone!

Last time, I wrapped up the basic rendering features by implementing the depth buffer.

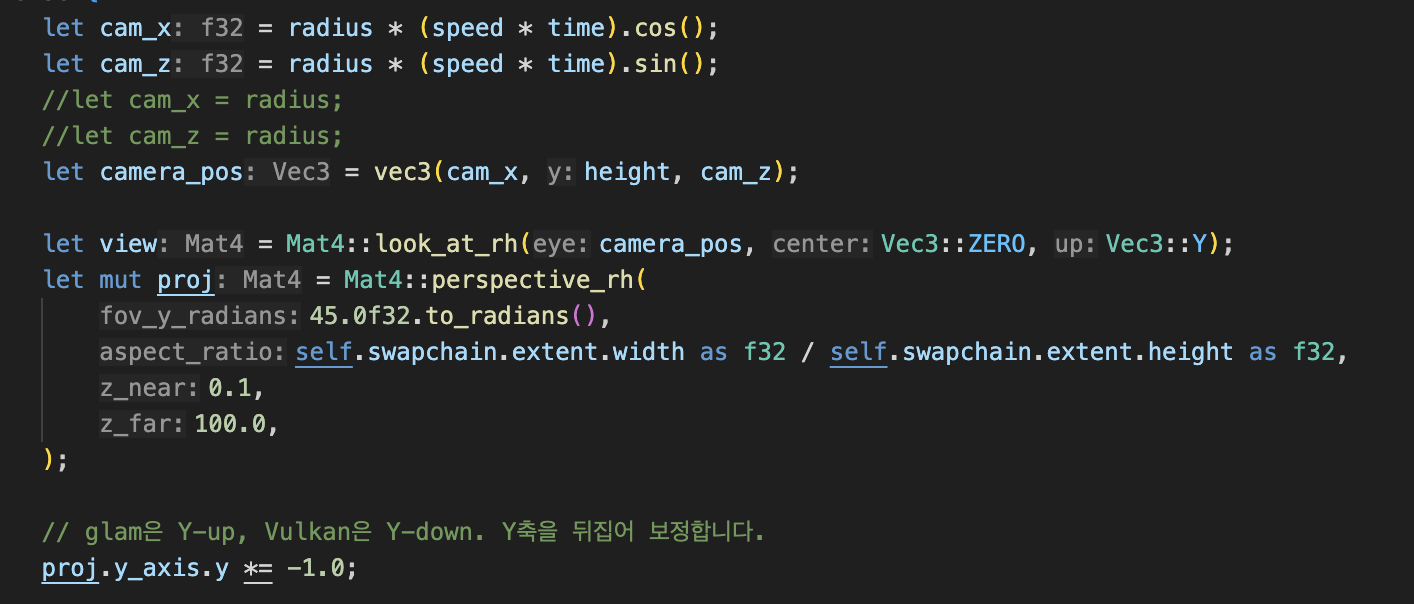
Today, building on what I’ve learned so far, I tackled camera setup and shadow (lighting) rendering.

Ground and Cube Vertices

First, I defined the vertex data for a square ground plane and a cube.
You can find the vertex definitions here:

🔗 Ground and Cube Vertices (GitHub Gist)

Calculating Light and Camera Matrices

Next, I calculated the matrices for both the light source and the camera to render the scene properly.
Here’s a snapshot of the data I used:

Light

Camera

Render Passes and Shadow Rendering

With the shader pre-pass and main pass set up, I ran the renderer and was able to produce a scene where the cube casts a shadow onto the ground.

Here’s a short video demo of the result:

🎥 Watch on YouTube

You can also try it out in your browser:

Source Code

Here are the implementations for each graphics backend:

The result may look simple, but building everything from scratch was definitely a challenge — and a fun one at that.

Thanks for following along, and good luck with all your own projects too.
See you in the next update!

Hello everyone!

Today, I’d like to talk about something essential in 3D graphics rendering: the depth buffer.

What Is a Depth Buffer?

The depth buffer (also known as a Z-buffer) is used in 3D rendering to store the depth information of each pixel on the screen — that is, how far an object is from the camera.

Without it, your renderer won't know which object is in front and which is behind, leading to weird visuals where objects in the back overlap those in front.

A Simple Example

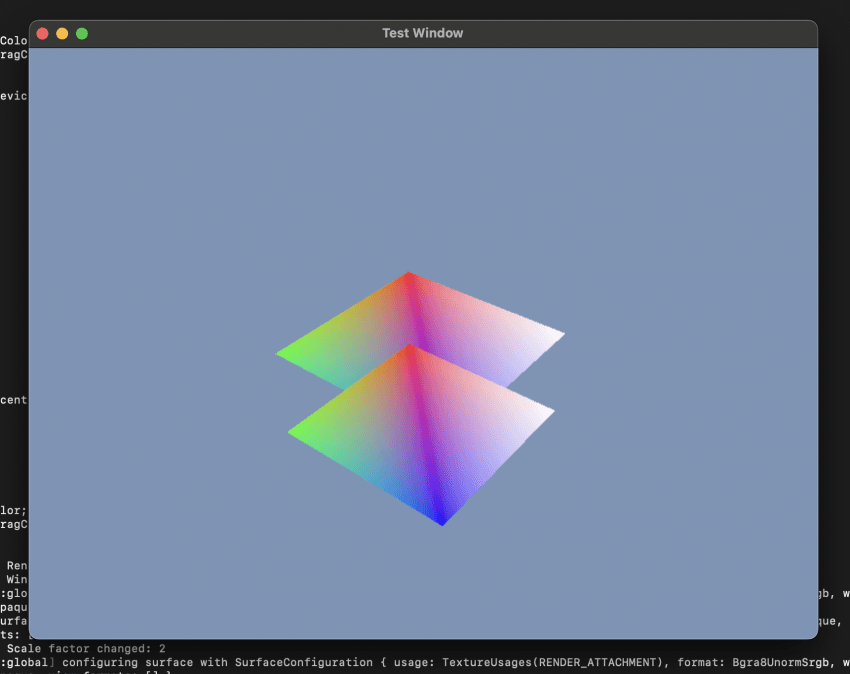
I reused a rectangle-drawing example from a previous log, and tried rendering two overlapping quads.


What I expected:
The rectangle placed closer to the camera should appear in front.

What actually happened:
The farther rectangle ended up drawing over the front one 😭

The reason? I wasn't doing any depth testing at all — the GPU just drew whatever came last.

Enabling Depth Testing

So, I added proper depth testing to the rendering pipeline — and that fixed the issue!
You can check out a short demo here:

▶️ Watch on YouTube

Or try it live on the web:
🌐 WebAssembly Depth Buffer Test

Now the objects render exactly as they should — the one in front is actually shown in front!

Source Code & Implementations

Here are links to the depth buffer test implementations across various graphics backends:

With the depth buffer working, I feel like I've covered most of the essential building blocks for my engine now.
Excited to move on to more advanced topics next!

Thanks for reading —
Stay tuned for the next update.

Hello everyone!

Following up from the previous post, today I’d like to briefly explore compute shaders — what they are, and how they can be used in game engine development.

What Is a Compute Shader?

A compute shader allows you to use the GPU for general-purpose computations, not just rendering graphics. This opens the door to leveraging the parallel processing power of GPUs for tasks like simulations, physics calculations, or custom logic.

In the previous post, I touched on different types of GPU buffers. Among them, the storage buffer is notable because it allows write access from within the shader — meaning you can output results from computations performed on the GPU.

Moreover, the results calculated in a compute shader can even be passed into the vertex shader, making it possible to use GPU-computed data for rendering directly.

Using a Compute Shader for a Simple Transformation

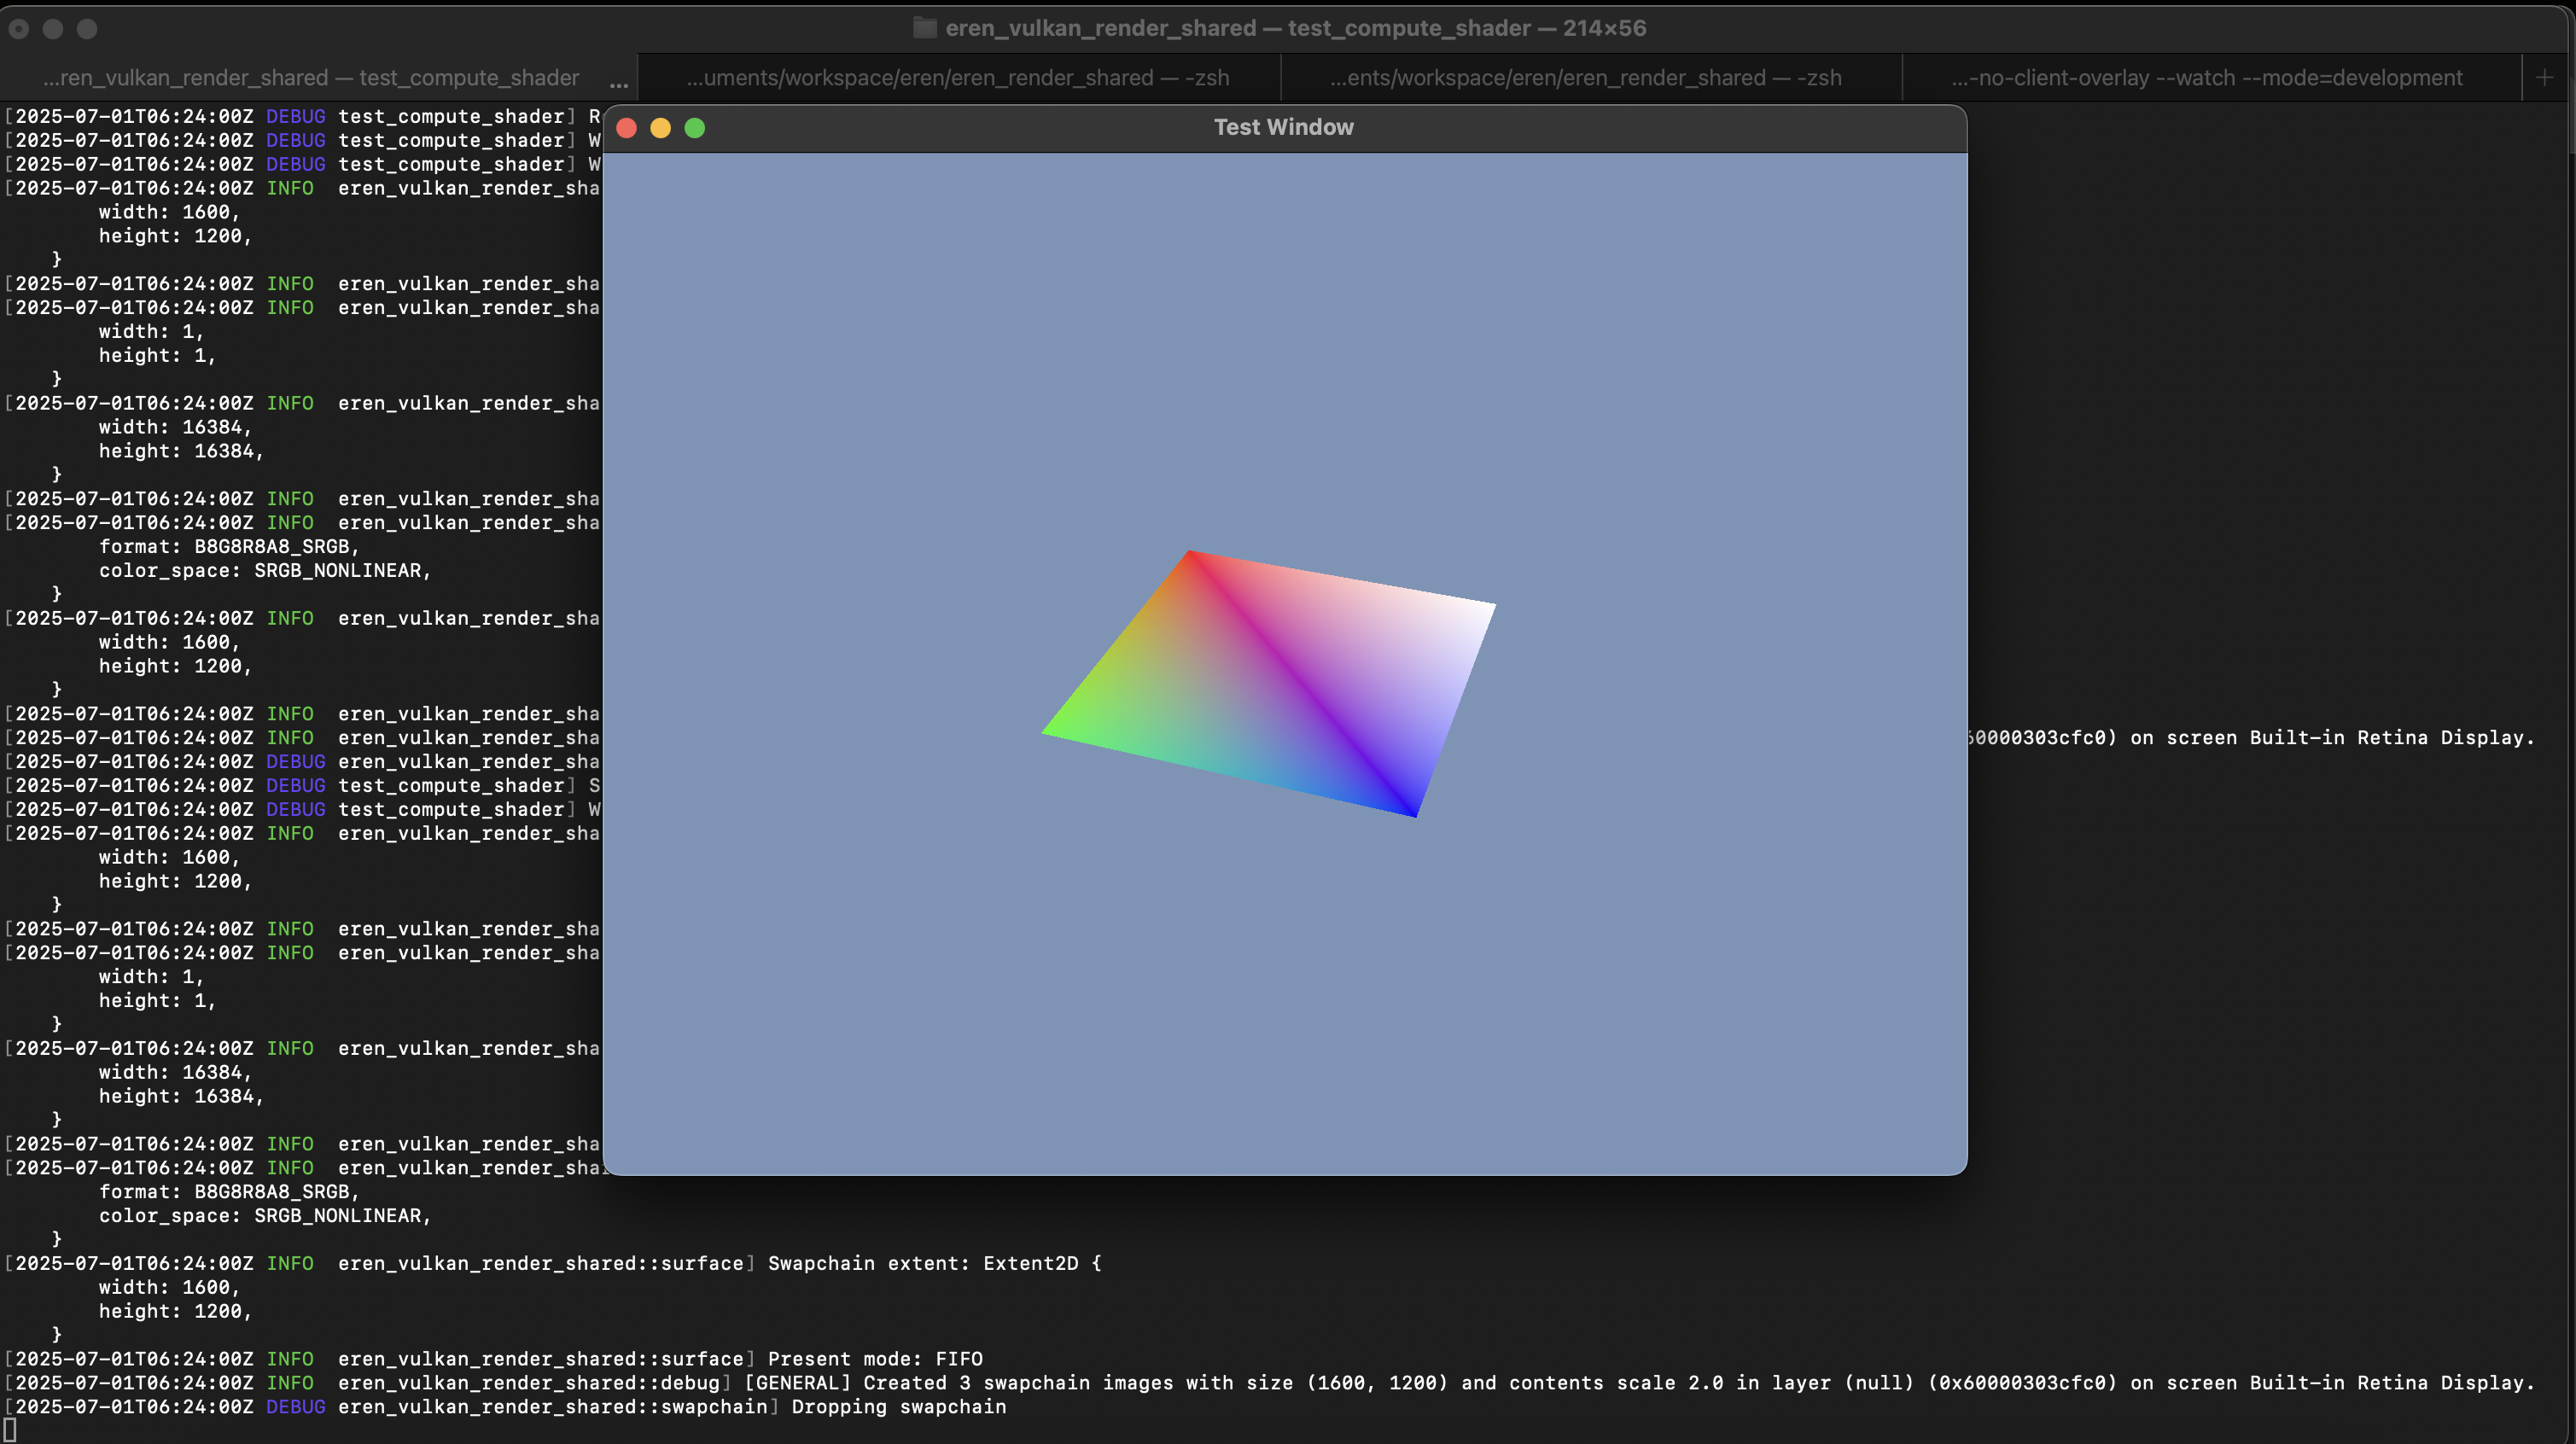
Let’s take a look at a basic example. Previously, I used a math function to rotate a rectangle on screen. Here's the code snippet that powered that transformation:

🔗 Code Gist:
https://gist.github.com/erenengine/386ff40b411010a119ad2c43d6ceab9f

📺 Related Demo Video:
https://youtu.be/kM3smoN8sXo

This time, I rewrote that same logic in a compute shader to perform the transformation.

🔧 Compute Shader Source:
https://github.com/erenengine/eren/blob/main/eren_vulkan_render_shared/examples/test_compute_shader/shaders/shader.comp

After adjusting some supporting code, everything compiled and ran as expected. The rectangle rotates just as before — only this time, the math was handled by a compute shader instead of the CPU or vertex stage.


Is This the Best Use Case?

To be fair, using a compute shader for a simple task like this is a bit of overkill. GPUs are optimized for massively parallel workloads, and in this example, I’m only running a single process, so there’s no real performance gain.

That said, compute shaders shine when dealing with scenarios such as:

  • Massive character or crowd updates

  • Large-scale particle systems

  • Complex physics simulations

In those cases, offloading calculations to the GPU can make a huge difference.

Limitations in Web Environments

A quick note for those working with web-based graphics:

  • In WebGPU, read_write storage buffers are not accessible in vertex shaders

  • In WebGL, storage buffers are not supported at all

So on the web, using compute shaders for rendering purposes is tricky — they’re generally limited to background calculations only.

Wrapping Up

This was a simple hands-on experiment with compute shaders — more of a proof-of-concept than a performance-oriented implementation. Still, it's a helpful first step in understanding how compute shaders can fit into modern rendering workflows.

I’m planning to explore more advanced and performance-focused uses in future posts, so stay tuned!

Thanks for reading, and happy dev’ing out there! 😊

Hello there!

While not many developers build game engines from scratch, I thought this might be helpful for those of you who are curious about graphics programming or are working on lower-level rendering systems. Today, I’d like to introduce a shader language that caught my attention recently — Slang.

The Limitations of Traditional Shader Languages

When writing shaders, developers typically use GLSL (based on C syntax). In certain engines like Unity, HLSL is also widely used. More recently, environments such as WebGPU or WGPU have begun adopting WGSL, a Rust-style shader language.

While these languages are functional and widely adopted, they do come with some significant limitations — the biggest being a lack of modularity.

As your shader codebase grows, things can quickly become messy and hard to maintain. Unfortunately, existing languages don’t provide strong built-in mechanisms to structure code in a modular and reusable way. This becomes particularly problematic when working with compute shaders for GPGPU tasks, which are becoming increasingly common.

Some projects have tried to work around this by implementing custom preprocessor systems to mimic modular structures. For example:

  • naga_oil – a helper project for the Bevy engine

  • WESL – a community-made language that extends WGSL

However, since these are unofficial and community-driven, they often feel like temporary fixes rather than long-term solutions.

What is Slang?

While browsing Reddit, I stumbled upon a post in the Vulkan community that mentioned a shader written in a language called Slang. At first, I thought it referred to some general-purpose scripting language, but the comments clarified that it's actually a shader-specific programming language.

To my surprise, Slang is a shader language that supports full modularity, with a strong emphasis on modern shader development practices. It turns out the project started back in 2015 and was open-sourced in 2017.

Originally developed internally by NVIDIA's R&D team, Slang is now managed by the Khronos Group (the same organization behind Vulkan and OpenGL) as of 2023.

🔗 Official website: https://shader-slang.org

Final Thoughts

Slang seems like a promising language that brings real modularity, reusability, and maintainability to shader programming. While it's still relatively unknown in the broader dev community, it could be especially useful for those working with GPGPU workflows or building sophisticated rendering pipelines at the engine level.

If you’re curious, I highly recommend checking out the official docs and exploring some sample code. Personally, I’ve found it quite fascinating and have started digging into it myself. 😊

Thanks for reading — feel free to share your thoughts or questions!

Hello!

Continuing from the previous post, today I’d like to share how we send and receive data between our application and shaders using various GPU resources.

Shaders aren’t just about rendering — they rely heavily on external data to function properly. Understanding how to efficiently provide that data is key to both flexibility and performance.

Here are the main types of shader resources used to pass data to shaders:

📦 Common Shader Resources

  1. Vertex Buffer
    Stores vertex data (e.g., positions, normals, UVs) that are read by the vertex shader.

  2. Index Buffer
    Stores indices that reference vertices in the vertex buffer. Useful for reusing shared vertices — for example, when representing a square using two triangles.

  3. Uniform Buffer
    Holds read-only constant data shared across shaders, such as transformation matrices, lighting information, etc.

  4. Push Constants
    Used to send very small pieces of data to shaders extremely quickly. Great for things like per-frame or per-draw parameters.

  5. Storage Buffer
    Stores large volumes of data and is unique in that shaders can read from and write to them. Very useful for compute shaders or advanced rendering features.

🧪 Example Implementations

I’ve created examples that utilize these shader resources to render simple scenes using different graphics APIs and platforms:

If you'd like to see them in action in your browser, you can check out the live demos here:

These demos show a rotating square rendered using uniform buffers.


⚠ Platform-Specific Notes

When working across platforms, it’s important to note the following limitations:

  • WebGPU and WebGL do not support Push Constants.

  • WebGL also does not support Storage Buffers, which can limit more advanced effects.

Always consider these differences when designing your rendering pipeline for portability.

That wraps up this post!
Working with shader resources can be tricky at first, but mastering them gives you powerful tools for efficient and flexible rendering.

Thanks for reading — and happy coding! 🎮🛠

(1 edit)

Rust’s window management library, winit, is advertised as cross-platform — but when it comes to mobile, the experience reveals some serious limitations and pitfalls.

(I had my fair share of issues with WASM too, but let's focus on mobile for this post.)


In this write-up, I’d like to share some of the challenges I faced while building a Rust-based mobile app and how I overcame them, step by step.

Rust on Mobile Isn’t Plug-and-Play

Unlike Unity or Unreal Engine, where you can just export your game and you're good to go, Rust apps on mobile must be built as native libraries (.a, .so files) and manually linked to the app’s entry point (e.g., MainActivity on Android).

This by itself is already a major hurdle if you're not familiar with mobile development.

Android – Dealing with GameActivity and More

Android provides a special GameActivity designed specifically for game engines:
📎 GameActivity official docs

To use Rust libraries with this, you either need to hook into GameActivity or fall back to NativeActivity. This changes how winit behaves compared to other platforms.

For example, when initializing the event loop, you need to explicitly pass an AndroidApp instance via with_android_app().

On top of that, you need extra setup to forward logs into Logcat, and other platform-specific adjustments.

WGPU + Android Emulator = Not Great

If you use WGPU as your rendering backend, you might be surprised to find that your app crashes only on the Android Emulator.

The reason? WGPU tries to initialize a Vulkan surface, which ends up blocking EGL surface creation, causing a panic at runtime.

Interestingly, this issue doesn't occur on real devices.

🔗 Related GitHub Issue:
https://github.com/gfx-rs/wgpu/issues/2384

Vulkan Isn't a Silver Bullet

Even if you try to force Vulkan as a backend to avoid EGL issues, you’ll run into different problems.

One major pain point is inconsistent Vulkan support across Android devices:

  • Many devices still use outdated Vulkan drivers, even on recent Android versions.

  • Vulkan 1.3+ support is rare; some don’t even fully support 1.1.

  • Indirect drawing and key extensions may be missing or buggy on lower-end hardware.

And since mobile screens rotate, you need to manually apply transform logic when using Vulkan. This is rarely a problem on desktop, but becomes a unique challenge on phones and tablets.

iOS – Simulator vs. Real Device, Plus One Nasty Bug

On iOS, you have to build separate libraries for the simulator (-sim.a) and for real devices, switching them out depending on your testing or release target. Otherwise, you’ll run into linker or compatibility errors.

Even worse, there's a long-standing bug in winit on iOS:

After the initial redraw event, no subsequent redraws are triggered, even if requested.

This essentially breaks the main rendering loop — quite a dealbreaker for anything real-time like a game or animation.

Fortunately, a developer has shared a workaround in the issue tracker:

🔗 Temporary fix on GitHub

It works for now, but it's clearly a patch and not a proper solution.

Sample Project / Demo

All this trial-and-error eventually resulted in a working setup, which I've published as an open-source reference:

📎 GitHub Repository:
https://github.com/erenengine/eren_mobile_test

Final Thoughts

After going through all of this, I can see why the Bevy team still recommends using engines like Godot for production mobile games.

Rust is powerful and flexible, and its ecosystem is improving fast — but mobile support still has a long way to go before it becomes truly seamless and "cross-platform."

Thanks for reading! I hope this post helps others navigate these same issues more smoothly. 😊

(1 edit)

Hello everyone,

This is Eren again.

In the previous post, I covered how to handle GPU devices in my game engine.
Today, I’ll walk you through the next crucial steps: rendering something on the screen using Vulkan, WGPU, WebGPU, and WebGL.

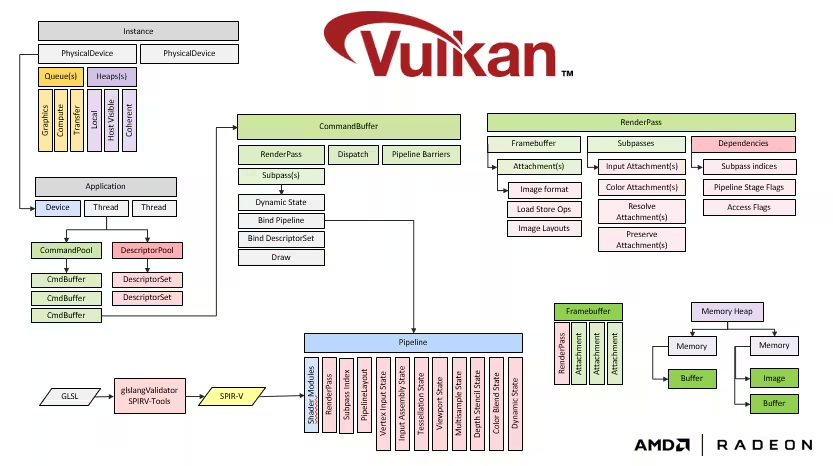
We’ll go over the following key components:

  • Swapchain
  • Command Buffers
  • Render Passes and Subpasses
  • Pipelines and Shaders
  • Buffers

Let’s start with Vulkan (the most verbose one), and then compare how the same concepts apply in WGPU, WebGPU, and WebGL.

1. What Is a Swapchain?

If you're new to graphics programming, the term “swapchain” might sound unfamiliar.

In simple terms:
When rendering images to the screen, if your program draws and displays at the same time, tearing or flickering can occur. To avoid this, modern graphics systems use multiple frame buffers—for example, triple buffering.

Think of it as a queue (FIFO). While one buffer is being displayed, another is being drawn to. The swapchain manages this rotation behind the scenes.

My Vulkan-based swapchain abstraction can be found here:
🔗 swapchain.rs

2. Command Pool & Command Buffer

To issue drawing commands to the GPU, you need a command buffer.
These are allocated and managed through a command pool.

Command pool abstraction in Vulkan:
🔗 command.rs

3. Render Passes & Subpasses

render pass defines how a frame is rendered (color, depth, etc.).
Each render pass can have multiple subpasses, which represent stages in that frame's drawing process.

4. Pipeline & Shaders

The graphics pipeline defines how rendering commands are processed, including shaders, blending, depth testing, and more.

Each shader runs directly on the GPU. There are several types, but here we’ll just focus on:

  • Vertex Shader: processes geometry
  • Fragment Shader: calculates pixel colors

Examples:

5. Putting It All Together

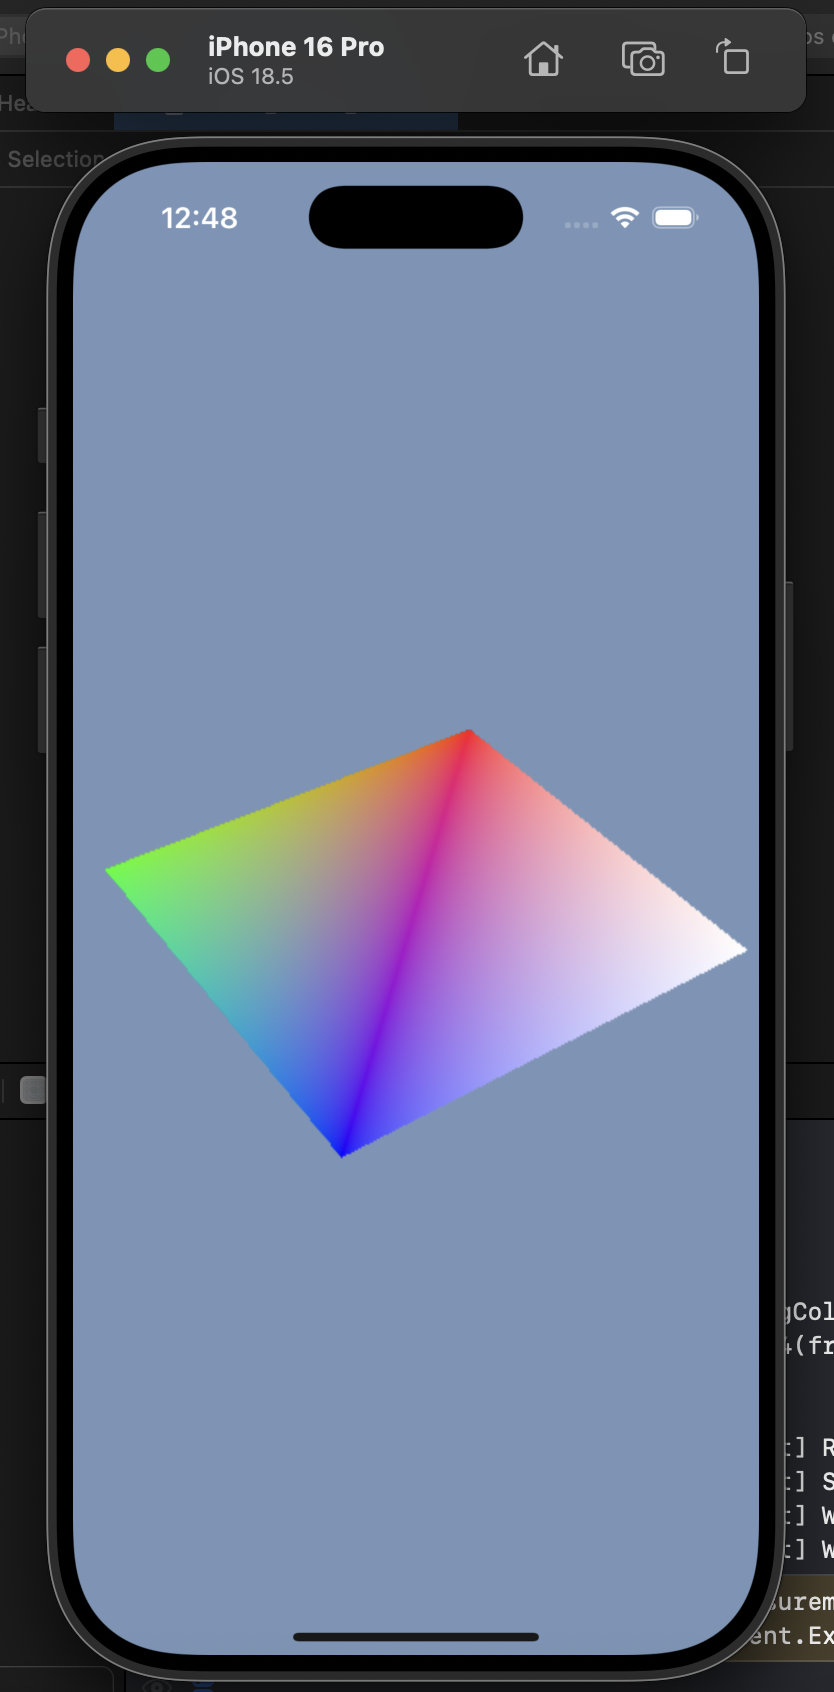
With everything set up, I implemented a basic renderer that draws a triangle to the screen.

Renderer logic:
🔗 renderer.rs

Entry point for the app:
🔗 test_pass.rs

The result looks like this:

A triangle with smooth color gradient, thanks to GPU interpolation.

6. How About WGPU?

WGPU greatly simplifies many Vulkan complexities:

  • No manual swapchain management
  • No subpass concept
  • Render pass and pipeline concepts still exist

WGPU example:
🔗 test_pass.rs (WGPU)

WGSL shader (vertex + fragment combined):
🔗 shader.wgsl

Web (WASM) demo:
🌐 https://erenengine.github.io/eren/eren_render_shared/examples/test_pass.html

7. WebGPU

Since WGPU implements the WebGPU API, it works almost identically.
I ported the code to TypeScript for web use.

Demo (may not run on all mobile browsers):
🌐 http://erenengine.github.io/erenjs/eren-webgpu-render-shared/examples/test-pass/index.html

8. WebGL

WebGL is the most barebones among the four.
You manually compile shaders and link them into a “program”, then activate that program and start drawing.

Conclusion

Even just drawing a triangle from scratch required a solid understanding of many concepts, especially in Vulkan.
But this process gave me deeper insight into how graphics APIs differ, and which features are abstracted or automated in each environment.

Next up: I plan to step into the 3D world and start rendering more exciting objects.

Thanks for reading — and good luck with all your own engine and game dev journeys!

Hello, this is Eren.

In the previous post, I shared how I implemented the window system and event loop for the Eren engine.
Today, I’ll walk through how GPU devices are handled across different rendering backends.

The Eren Engine is planned to support the following four rendering backends:

  • Vulkan

  • WGPU

  • WebGPU

  • WebGL

Each backend handles device initialization a little differently, so I’ll explain them one by one.

✅ Handling Devices in Vulkan

Vulkan is notorious for being complex—and this reputation is well deserved. The initial setup for rendering is lengthy and verbose, especially when working with GPU devices.


One key concept in Vulkan is the separation between:

  • Physical Device – the actual GPU hardware

  • Logical Device – an abstraction used to send commands to the physical GPU

Basic device initialization steps in Vulkan:

  1. Create a Vulkan instance

  2. Create a surface (the output region, usually a window)

  3. Enumerate physical devices

  4. Select the most suitable physical device

  5. Create a logical device from the selected physical device

I’ve structured this setup with clear abstractions so that the API remains user-friendly and maintainable.

Relevant implementation:

Now that a logical device is created, we can send commands and upload data to the GPU.

✅ Handling Devices in WGPU

WGPU is a Rust-native implementation of the WebGPU API. It simplifies many of the complexities seen in Vulkan.

Notably, WGPU hides all low-level physical device handling, instead providing an abstraction called an adapter.

WGPU device initialization steps:

  1. Create a WGPU instance

  2. Create a surface

  3. Request an adapter (WGPU automatically selects an appropriate GPU)

  4. Create a logical device from the adapter

You can check out the WGPU implementation here:

Thanks to its simplicity, WGPU lets you get up and running much faster than Vulkan.

✅ Handling Devices in WebGPU

WebGPU is very similar to WGPU in concept, but implemented in TypeScript for the web.

The only noticeable difference is that you don’t need to create a surface—the <canvas> element in HTML serves that role directly.

Code for the WebGPU implementation is available here:

With WebGPU, you can structure logical device creation almost identically to WGPU.

✅ Handling Devices in WebGL

WebGL is a bit of an outlier—it has no explicit device concept.

There’s no separate initialization process. You simply grab a rendering context (webgl or webgl2) from an HTML <canvas> element and start drawing immediately.

Because of this, there’s no device initialization code at all for WebGL.

Wrapping Up

With GPU device handling now implemented for all four backends, the engine’s foundation is growing steadily.

In the next post, I’ll move on to setting up the render pass and walk through the first actual drawing operation on the screen.

Thanks for reading, and happy coding to all!

Note: Dev Logs #1 through #6 covered early-stage trial and error and are available in Korean only. Starting with this post, I’ll be writing in English to reach a broader audience.

Hi, I'm Eren. I'm currently building a custom game engine from scratch, and in this post, I’d like to share how I implemented the window system.

This is a crucial step before diving into rendering—having a stable window lifecycle and event loop is essential for properly initializing GPU resources and hooking them up to the renderer.

Window Management in Rust – Using winit

In the Rust ecosystem, the go-to library for window creation and event handling is winit. It's widely adopted and has become the de facto standard for GUI and game development in Rust. For instance, Bevy—a popular Rust game engine—also uses winit under the hood.

My window lifecycle implementation is built on top of winit, and the source code is available here:

Source:
github.com/erenengine/eren/blob/main/eren_window/src/window.rs


Key Features

Here’s what the current window system supports:

✔️ Asynchronous GPU Initialization
The system supports asynchronous GPU setup, making it easier to integrate with future rendering modules without blocking the main thread.

✔️ Full WebAssembly (WASM) Support
The window system works seamlessly in web environments. It automatically creates a <canvas> element and manages the event loop properly—even inside the browser.

✔️ Cross-Platform Compatibility
It runs smoothly on Windows, macOS, and Linux, as well as in browsers via WASM.

You can try out a basic WASM test here:
Test URL: erenengine.github.io/eren/eren_window/examples/test_window.html
(Note: The page may appear blank, but a canvas and an event loop are running behind the scenes.)

What’s Next?

The next step is adding full user input support:

  • Keyboard input

  • Mouse input (click, movement, scroll)

  • Touch and multi-touch gestures

  • Gamepad input (via an external library)

For gamepad support, I plan to use gilrs, which is a reliable cross-platform input library for handling controllers in Rust projects.

Final Thoughts

Now that the window system is in place, the next major milestone will be initializing GPU resources and integrating them with the renderer—this is where actual rendering can finally begin.

Building everything from the ground up has been both challenging and incredibly rewarding. I’ll continue documenting the journey through these dev logs.

Thanks for reading! Stay tuned for more updates—and happy coding!
– Eren