So You Want To Upscale Your Game
So you might be wondering to yourself, "How do I make low resolution games in Unity? How can I scale them up without losing my original pixel grid?" This guide answers to aim that. If you really want to make your game be 64x64 in size, though, there's always Screen.SetResolution - though there are some participants on a 4K screen, and it will be even more impossible to play than on a 1080P screen like myself.
Thank you Kavehes from the Discord jam server for letting me know about Screen.SetResolution!
Setting Up The Game Scene
Note: This isn't exactly necessary, but it can be fun to see what your game looks like at 64x64 resolution!
Whether you're new to Unity or you're like me, bumbling your way through learning Unity without checking guides a lot of the time, there's something we need to touch on first. The Game window needs a bit of setup so that you can see what actual scale you're working at. It can do that! It's magical and awesome (and extremely important for GUI testing in-editor).
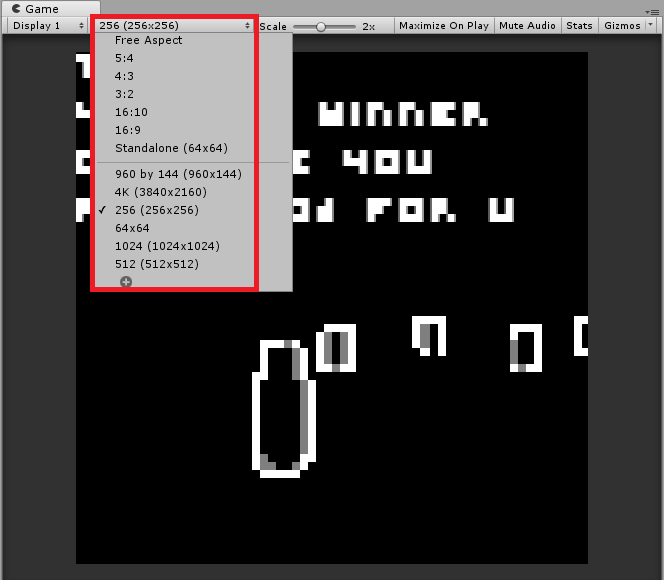
Above, you can see the location of the resolution picker for the Game window. Hit the + to add a custom resolution. Below is the dialog you pull up.
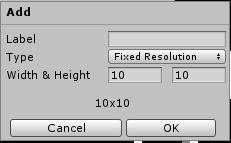
The label is whatever you want. Leave the Type at Fixed Resolution, for magical Unity reasons. Width and Height are pixel values - you will want to add a 64x64 resolution setting for this Jam, as well as another resolution for whatever screen resolution you want to be testing at.
Next, you'll want to go back to the dropdown and pick your custom resolution - in this case, 64x64.

Voila. Your game is now super tiny! And potentially unplayable!
Setting Up Shop With RenderTextures
It's time for the real stuff. If you're tinkering with Unity, you probably know how to add objects and check the inspector and look at your assets window. If not, there's plenty of guides for that. I'm assuming you know at least that much.
In order (images follow below!):
- In your Hierarchy window/tab, Right-click > Add > Camera, and then make a Cube.
- Your cube will go in front of this new camera. It doesn't matter what you name either of these, btw. I like to name the camera "Viewport" to remind me of what its job is.
- If you're starting from scratch, you likely already have a Main Camera in the scene. If you somehow don't, go ahead and add a new camera to the scene. Call it whatever you want. I still call it "Main Camera", though. This will be the camera that actually renders stuff.
- In your assets window, create a new RenderTexture. Give it a name, then click on it to change some stuff.
- Dimension should be 2D, of course! Size should be 64 x 64. This is in pixels.
- Set any of the other settings to whatever you want. Play around! Color Format can make for some interesting changes.
- Set the Filter Mode to Point. This is the most important setting besides size, because the other filters blur the resulting texture when scaled up. You want that sweet retro pixel crispiness, I'm sure!
- Click on your "Main Camera" from the Hierarchy panel, and drag your RenderTexture asset into the "Target Texture" setting. (You can use the dot to search for assets too)
- Now drag your RenderTexture on to the Cube that is in front of your "Viewport".
- Voila! You have perfectly upscaling yet satisfyingly pixel-y lowrez gaming ready to go.
(Important Notes! Don't forget to turn shadows off on your cube/plane/whatever you have your RenderTexture on. Under the Mesh Renderer component, turn "Cast Shadows" off and un-checkmark "Receive Shadows". Also, at the bottom of your cube's Inspector, there is a material block with whatever name you called your RenderTexture. Make sure to hit the Shader dropdown - find Unlit > Texture. Now your graphics should render the way you might expect them to.)
Image time:
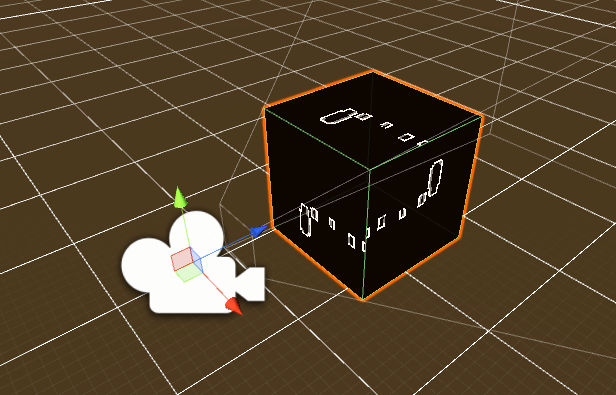
Steps 1-2) This is what you should have by now. Use the Game window to help you align your cube to your camera perspective. This is what I refer to as the "Viewport" camera and its cube.
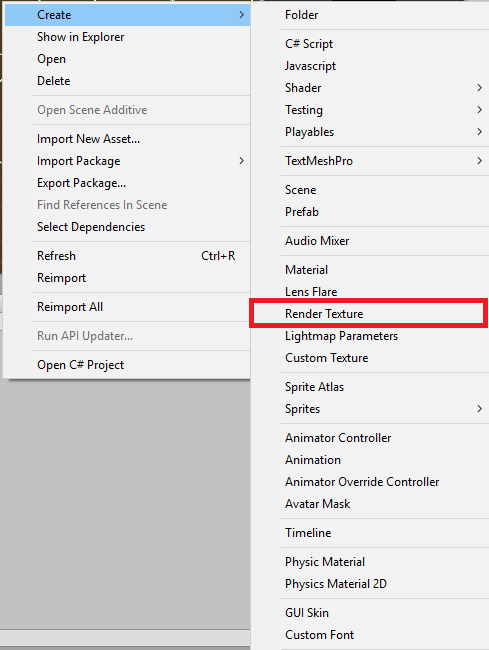
Step 4) This is where to find the Render Texture in your Create menu. Ignore the "TextMeshPro" bit, that doesn't come with Unity by default.
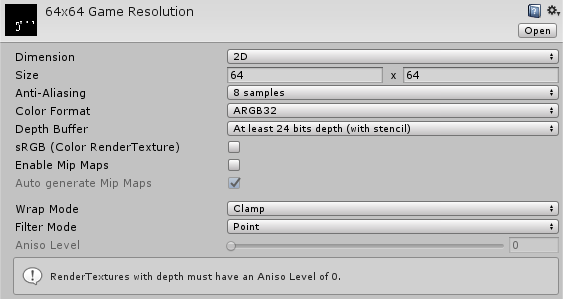
Steps 5-7) A look at my settings for the RenderTexture.
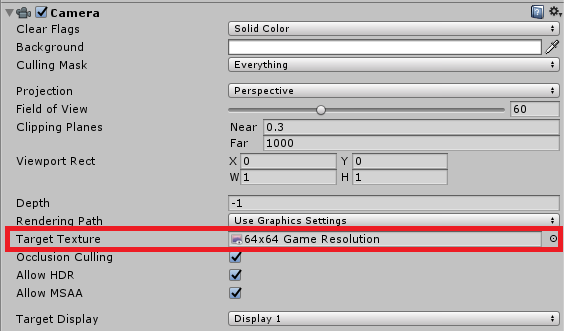
Step 8) This is where to find "Target Texture".
But Wait, There's More! (Not Really)
If you're just testing inside Unity's editor, then there's nothing more you need to set up. Changing the Game window's resolution setting will cause the RenderTexture to upscale because the Viewport camera is taking up the full viewport, and therefore it has to scale the image up. Point filter made sure that your texture isn't blurry.
However, when you get to building your game, you will want to change some specific settings. As I build for Windows/Mac/Linux, these are the player settings I use. Your Mileage May Vary if you build for HTML5/etc. In any case, I can at least link you to player settings stuff for various platforms that jammers are likely to cover:
- Windows/Mac/Linux Standalone: https://docs.unity3d.com/Manual/class-PlayerSettingsStandalone.html
- HTML5 (aka WebGL): https://docs.unity3d.com/Manual/class-PlayerSettingsWebGL.html
It's also worth noting that Screen.SetResolution will also allow you to scale up, not just down. You could program a game that upscales to a resolution based on a portion of the user's screen resolution, for example.
And That's A Wrap.
Did I miss anything? Was something unclear? Leave a comment, and I'll see what I can do. If not, then thank you for allowing me to eat your time with words and pictures.