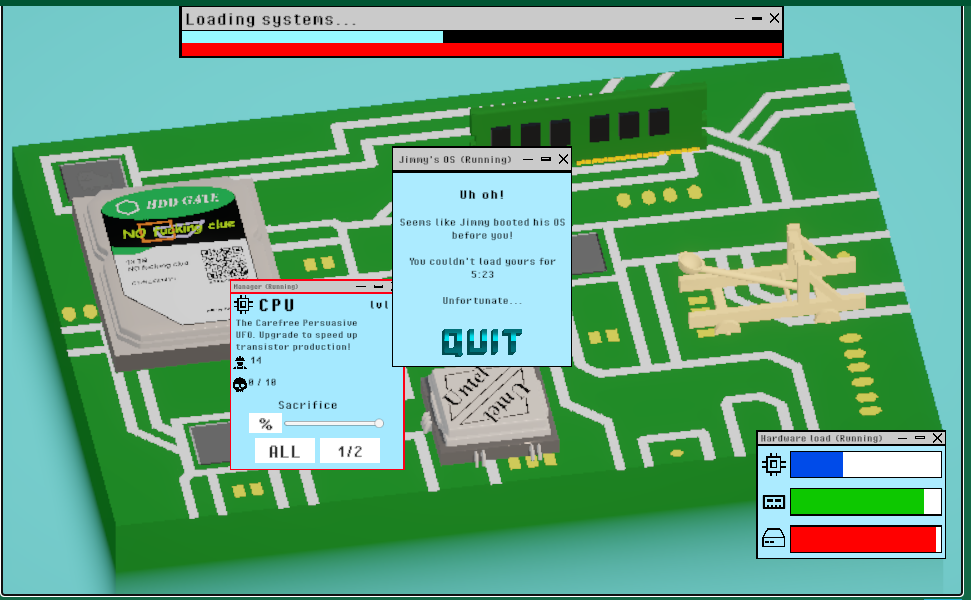
itch.io Spring Selects Series A
On Sale: GamesAssetsToolsTabletopComics
Indie game storeFree gamesFun gamesHorror games
Game developmentAssetsComics
SalesBundles
Jobs
Tags

TylerCode

266
Posts
17
Topics
30
Followers
15
Following
A member registered Apr 20, 2016 · View creator page →

Creator of

Recent community posts

AppImage broken?

ERROR: appimage_register_in_system : Missing icon field in the desktop entry

This game is so funny to me. I come back every year and play with my friends a few times :D

Underrated game for sure! Half-Life GBC Edition

Would have been cool but I know how it goes sometimes with Jam projects <3

Liked this a lot, little dark humor :D

I did have an issue where skeletons spawned in a way that no matter how I moved I took the L

:( Will come back later!

Password required :(

Thanks for checking it out! As far as the arbitrary goal, yeah the plan was to have some much larger contracts that required 10 or more ships but I misread the due time (whoops :D)

Also yeah 15 is the cap on favor which was also going to be boosted to 25 when the above happened. Post Jam will have all that (plus sound and some other fun things)

(1 edit)

Jeff’s life is tragic overall, but he once accidentally fell asleep at the guards tower and accidentally kicked over a lantern which signaled an enemy attack. The entire town spent a day preparing for a war that wasn’t there.

As for contracts, the general rule of thumb is that missions/contracts that cost money, give favor, and vice versa. So it’s a balancing act of getting what you need and when you need it and figuring out what is a good deal.

Thanks for playing!

Thanks!

Straight fire, really like the aesthetic, the light functions and for some reason, booping into walls was really satisfying :D

Got stuck on 7 and I think I know what I’m missing but don’t want to spoil :D

I really dig this concept, very fun game and an honestly amazing execution at this resolution. Would love to see this after some more dev time (if you’re interested in putting more in)

Yeah, for some reason I thought I had this morning to work on it too and I was meaning to adjust that a bit for readability.

We do plan to do a post-jam update to spice it up a bit more. Depth and Juice would probably enhance it a bit.

I agree, I actually wanted to try and sneak a final patch that added your current stuff to that page because I and the person who did the art zeroed out out favor plenty of times during testing.

Also I forgot to update the page but 50 is now the fleet goal. There are a few contracts that have large payouts.

Thank you so much for giving it a try and thanks a bunch for your feedback!

Gotcha! So you have two options to fix this. If you haven’t done any work on the project in that current project, then my recommendation is to make a new project that uses a template that includes the URP pipeline (I use this one for all my 2d work)

Option two is to convert the current project you have to use URP. I don’t know all the ins and outs of doing this so something might not work but here is what I got from a quick test.

  • Import the “Universal RP” package from the package manager window (under Window > Package Manager)
  • Once that is installed (if it wasn’t already), make a “Settings” folder in your Assets folder
  • Right click in this settings folder and go Create > Rendering > URP Asset (With 2d Rendering)
  • Name it whatever you want
  • Then assign it in that window.

Very interesting, alright can you check your project settings under graphics and see which renderer you’re using and maybe the renderer settings too?

If 5.0.3 didn’t fix, I’ll check 2021. This guide was initially written for 2021 so it should work best on it. I’m replying to your other thread for now too.

Looking into this a bit more, in the meantime could you try updating to 5.0.3 in the package manager? Also what version of Unity are you using?

This is what my settings look like, make sure you are using the “Universal Render Pipeline/Unlit” shader.

Added a bit about fonts and getting them setup. Please message if you have questions, I try to make this the most comprehensive guide on 64x64 for Unity.

I added a section for UI Scaling so that it works as expected, I would also recommend this font:

https://fontstruct.com/fontstructions/show/1404190/cg-pixel-4x5-1

(7 edits)

Here is my guide to getting a LOWREZJAM entry setup in Unity. It’s better on GitHub so I’ll paste the gist link:

https://gist.github.com/TylerCode/439a5acf93dc26b1c8a9e2d6f11179bd

This guide has been tested in URP on the following versions of unity: 2021.3.29 2022.3.5 2023.1.6

The Built-In Pipeline was tested with 2021.3 (An early LTS version)

Intro

It’s that time of year again. Time for the #LOWREZJAM!!!

Almost every year so far, I’ve created a guide to getting 64x64 resolution working as natively as possible so this year is of course, no exception. This is not for absolute beginners but if you’ve done some tutorials for unity then you should be fine here.

This guide is going to go beyond just using the default pixel perfect camera and such and the goal is to have Post Processing, UI, and the normal artwork ALL being forced into the 64x64 resolution. I want to warn you, this is janky, but it DOES accomplish those goals. Every time I’ve tried to do it in a more clean fashion, I end up with UI that is affected by post processing, or UI that isn’t interactable, or some edge case in the Pixel Perfect Camera component.

Last thing, if you don’t care about post processing, this is actually much, MUCH easier, you can scroll to the end for that guide and if you’re just making a 2d game with no post processing, I recommend that instead!!! Anyway lets jump in.

Project Setup

We’re going to start with a NEW, 2D URP project on Unity 2021, 2022, or 2023 (I have tested in LTS of 2021, and 2022, and the non LTS 2023.1.6f1). I want to stress that this will work for 3D as well but it DOES require URP and for you to install the pixel perfect packages from the package manager. (It’s actually easier in the Built-In pipeline but you end up with a similar setup to this. You can reference my old guide for that.

Once we have that setup, make a new scene and save it as “64xTemplate” or something similar. In this case, we’re using a LIT 2D (URP) scene. At this point, I like to add a 2D sprite rotated at 45 degrees so that we can see our results.

first image

Game Camera!

  • Create a new folder in Assets called Camera Rig.
  • Inside this folder create a new Material that uses the Universal Render Pipeline > Unlit shader. Name it “Main Render Mat”
  • Also in that folder, create a new Render Texture and name it “Main Render” 5.333333
  • Assign the new Render Texture to the “Main Render Mat”’s Base Map texture

image

  • Set the render texture to have a resolution of 64x64
  • Set the render texture Filter Mode from Bilinear to Point
  • On your main camera, rename it to “Game Camera” (it should keep its MainCamera tag so it continues to work with Cinemachine)
  • On your “Game Camera”, tick the box for Post Processing
  • Now, on your “Game Camera” , set the target render texture to your “Main Render” render texture.

image

  • IMPORTANT If you are using 2D art assets, you need to add a Pixel Perfect Camera onto the “GameCamera”
  • The Pixel Per Unit size needs to be 6 and the resolution needs to be 64x64

image

Render Camera Rig

Okay, so… this is where it gets… Janky.

  • Create a new camera and call it “RenderCamera”
  • Delete the Audio Listener on this camera
  • Move it FAR out of the way, for example: 0, -1000, -10
  • If possible, use that position as it’s easier to setup if your X is 0, and your Z is -10
  • Set your Camera Projection to the following settings:
Projection: Orthographic
Size: 5.333333
Clipping Near: 0.3
Clipping Far: 20

image

Next, add a Pixel Perfect Camera component to it with the following settings.

Assets Pixels Per Unit: 6
Reference Resolution: X64 Y64
Crop Frame: Windowbox
Grid Snapping: Upscale Render Texture

image

Rendering Object Setup

  • Create a new 3D Plane (Yes, even in 2D).
  • Make it a child object of the “RenderCamera”
  • Set the transform to the following:
Position: 0, 0, 10
Rotation: 90, 0, 180
Scale: 1.06, 1.06, 1.06

image

  • Now add that material we made earlier. Main Render Mat!

You should have something that looks like this now!

image

Post Processing

Add a Global Volume to the scene and create a new volume profile on it. For ease of testing, add a couple of effects that make it easy to see. After that you should have something like this:

image image

Easy right? All the effects are pixel perfect and show as you might expect!

Finally… UI…

This is the last little bit here, it’s the reason for all that annoying setup. This is probably the last year this tutorial uses UGUI based on the roadmaps I’ve seen, but I could be wrong. (2023 Edit: I was wrong)

Right click in the heirarchy and create a new UI > Panel.

This should have added a few new objects into the scene

Canvas
> Panel
EventSystem

On the canvas, set it up with the following settings

Render Mode: Screen Space - Camera
Pixel Perfect: YES
Render Camera: RenderCamera
Plane Distance: 5
Sorting Layer: Default
Order in Layer: 1000

On the canvas scaler, you are going to want to set that up as per usual, here are my settings.

UI Scale Mode: Scale With Screen Size
Reference Resolution:
    X: 1920
    Y: 1080
Screen Match Mode: Match Width Or Height
Match: (All the way to Width)
Reference Pixels Per Unit: 100

image

I won’t get into UI specifics but you can adjust your panel or add buttons and they will show up overtop the game scene. Most importantly, they won’t have any post processing applied to them.

image

For fonts, honestly I have not come up with an ideal solution. This is the font I’ve settled on for these jams: https://fontstruct.com/fontstructions/show/1404190/cg-pixel-4x5-1

I also use that with a font size of 150, and a Line spacing of 20

image

If you don’t know how to get that font into Text Mesh Pro, you want to go to Window > Text Mesh Pro > Font Asset Creator

From there, you can use the default settings and just add the source font file. Then hit Generate Font Atlas

Finally, save the font asset out and boom

This is a pretty good starting point depending on what kind of game you are making. This setup will work in 2D and 3D with no differences except you will need to import the 2D pixel perfect package into your project.

If you don’t care about post FX

On your main camera, add a Pixel Perfect Camera component and give it the following values

Assets Pixels Per Unit: Depends on your project, its up to you!
Reference Resolution: X64 Y64
Crop Frame: Pillarbox
Grid Snapping: Upscale Render Texture

Make a new Canvas and set it from Screen Space - Overlay to Screen Space - Camera and assign your main camera to it.

Profit???

UI will work as usual and will adhere to the pixel perfection. The only issue, is that this UI setup gets affected by Post Processing if you use it.

Thanks for this, I wasn’t expecting as many issues with this setup. If you don’t need post processing, then it is better to use 1 main camera and the pixel perfect component. It works slightly differently than the method that we’re doing here. Next year I’ll be sure to include this as well.

Appreciate this, works in Unity as well.

For anyone wondering, if using TMPro with this asset is as easy as going Window > Text Mesh Pro > Font Asset Creator

Then just select the font, select “RASTER” render mode at the bottom and then generate font asset.

Heyo, if you don’t care about URP or post FX, you can just use the pixel perfect camera component. There is one made for the built-in pipeline included in a 2d project. Once you have that added just change your UI Canvas to world space and set the camera to the one you have the pixel perfect camera component on.

You can reference my old guide for some additional details. https://itch.io/jam/lowrezjam-2019/topic/515490/how-to-2d-pixel-perfect-64x64-in-unity

(1 edit)

Two updates I’ve made.

I forgot to add that the “Game Camera” needs a “Pixel Perfect Camera” component as well. This component needs to have a pixel per unit size of 6 and a resolution of 64x64

The second thing is that the “Render Camera” needs to have its “Audio Listener” component removed.

Both of these are now in the guide, but if you used the guide the first or second day of the compo then you are probably missing those steps.

Hi, the thing I forgot to put in this guide is that the “GameCamera” also needs to have a “Pixel Perfect” component added to it. This component needs to have a pixel per unit size of 6 and a resolution of 64x64

Hi, the thing I forgot to put in this guide is that the “GameCamera” also needs to have a “Pixel Perfect” component added to it. This component needs to have a pixel per unit size of 6 and a resolution of 64x64

Let me poke around at this for a bit. I’ll see if I can give some answers to it.

(3 edits)

Intro

This also exists as a GitHub Gist, which is easier to read IMHO

It’s that time of year again. Time for the #LOWREZJAM!!!

Almost every year so far, I’ve created a guide to getting 64x64 resolution working as natively as possible so this year is of course, no exception. This is not for absolute beginners but if you’ve done some tutorials for unity then you should be fine here.

This guide is going to go beyond just using the default pixel perfect camera and such and the goal is to have Post Processing, UI, and the normal artwork ALL being forced into the 64x64 resolution. I want to warn you, this is janky, but it DOES accomplish those goals. Every time I’ve tried to do it in a more clean fashion, I end up with UI that is affected by post processing, or UI that isn’t interactable, or some edge case in the Pixel Perfect Camera component.

Last thing, if you don’t care about post processing, this is actually much, MUCH easier, you can scroll to the end for that. Anyway lets jump in.

Project Setup

We’re going to start with a NEW, 2D URP project on Unity 2021.3.6f. I want to stress that this will work for 3D as well but it DOES require URP and for you to install the pixel perfect packages from the package manager. (It’s actually easier in the Built-In pipeline but you end up with a similar setup to this. You can reference my old guide for that.

Once we have that setup, make a new scene and save it as “64xTemplate” or something similar. In this case, we’re using a LIT 2D (URP) scene. At this point, I like to add a 2D sprite rotated at 45 degrees so that we can see our results.

first image

Game Camera!

  • Create a new folder in Assets called Camera Rig.
  • Inside this folder create a new Material that uses the Universal Render Pipeline > Unlit shader. Name it “Main Render Mat”
  • Also in that folder, create a new Render Texture and name it “Main Render”
  • Assign the new Render Texture to the “Main Render Mat”’s Base Map texture

image

  • Set the render texture to have a resolution of 64x64
  • Set the render texture Filter Mode from Bilinear to Point
  • On your main camera, rename it to “Game Camera” (it should keep its MainCamera tag so it continues to work with Cinemachine)
  • On your “Game Camera”, tick the box for Post Processing
  • Now, on your “Game Camera” , set the target render texture to your “Main Render” render texture.

image

  • IMPORTANT If you are using 2D art assets, you need to add a Pixel Perfect Camera onto the “GameCamera”
  • The Pixel Per Unit size needs to be 6 and the resolution needs to be 64x64

image

Render Camera Rig

Okay, so… this is where it gets… Janky.

  • Create a new camera and call it “RenderCamera”
  • Remove the Audio Listener from this camera
  • Move it FAR out of the way, for example: 0, -1000, -10
  • If possible, use that position as it’s easier to setup if your X is 0, and your Z is -10
  • Set your Camera Projection to the following settings:
Projection: Orthographic
Size: 5.333333
Clipping Near: 0.3
Clipping Far: 20

image

Next, add a Pixel Perfect Camera component to it with the following settings.

Assets Pixels Per Unit: 6
Reference Resolution: X64 Y64
Crop Frame: Windowbox
Grid Snapping: Upscale Render Texture

image

Rendering Object Setup

  • Create a new 3D Plane (Yes, even in 2D).
  • Make it a child object of the “RenderCamera”
  • Set the transform to the following:
Position: 0, 0, 10
Rotation: 90, 0, 180
Scale: 1.06, 1.06, 1.06

image

  • Now add that material we made earlier. Main Render Mat!

You should have something that looks like this now!

image

Post Processing

Add a Global Volume to the scene and create a new volume profile on it. For ease of testing, add a couple of effects that make it easy to see. After that you should have something like this:

image image

Easy right? All the effects are pixel perfect and show as you might expect!

Finally… UI…

This is the last little bit here, it’s the reason for all that annoying setup. This is probably the last year this tutorial uses UGUI based on the roadmaps I’ve seen, but I could be wrong.

Right click in the heirarchy and create a new UI > Panel.

This should have added a few new objects into the scene

Canvas
> Panel
EventSystem

On the canvas, set it up with the following settings

Render Mode: Screen Space - Camera
Pixel Perfect: YES
Render Camera: RenderCamera
Plane Distance: 5
Sorting Layer: Default
Order in Layer: 1000

image

I won’t get into UI specifics but you can adjust your panel or add buttons and they will show up overtop the game scene. Most importantly, they won’t have any post processing applied to them.

image

For fonts, honestly I have not come up with an ideal solution. There are some pixel fonts that I’ve found look good but it’s a matter of getting them aligned properly so they don’t get destroyed by the pixel processing. In the past I’ve cheated by hand-aligning them all where they looked good but your mileage may vary on that.

This is a pretty good starting point depending on what kind of game you are making. This setup will work in 2D and 3D with no differences except you will need to import the 2D pixel perfect package into your project.

If you don’t care about post FX

On your main camera, add a Pixel Perfect Camera component and give it the following values

Assets Pixels Per Unit: Depends on your project, its up to you!
Reference Resolution: X64 Y64
Crop Frame: Pillarbox
Grid Snapping: Upscale Render Texture

Make a new Canvas and set it from Screen Space - Overlay to Screen Space - Camera and assign your main camera to it.

Profit???

UI will work as usual and will adhere to the pixel perfection. The only issue, is that this UI setup gets affected by Post Processing if you use it.

This is really great, I liked the art, the audio, the gameplay, all of it. One thing I’d say is that it’s a bit easy. You could increase the lives to 5 and then take away a life every time you press the wrong button.

I liked this game a lot, I love small scale dungeon crawlers like this a bunch. The concept is nice, the art is cute, and the audio and sounds are perfect.

I did get frustrated by the movement though, the player is too sticky and some of the corridors are small which makes the problem worse.

I really like this game overall though as that is literally my one dislike.

I liked this game a lot, love the concept and would love to see more of it.

It was however a little buggy as I couldn’t see all of the text and I got stuck in the walls and ceiling a lot. Couldn’t make it to the end because of getting stuck.

I did like this concept a lot though.

I got spooked. Love the visual, love the gameplay. Took me 3 tries to get all the way to the end. Nice work

So I think this is really cool as a concept, if you update it post jam I will definitely be back to try it.

I liked this concept a lot. You can’t take damage, but the other ship can. I like that your body can block shots too.

Art style is simple yet pleasing.

Only bad thing I could say is that it isn’t very long, but neither is mine.

I liked this game a lot more than I thought I would. I don’t know why but I really liked the music. It’s funny but also catchy.

I dig this game a lot. Got 20 on my best attempt. I felt like when jumping over boxes, the collision wasn’t perfect but other than that it was everything I’d ever want it to be :D

Thanks, post-jam update coming after the voting period ends that makes the game play better :D