Yeah, there's a way to do it! We'll be using the font editor in examples/fonts.deck to modify the menu font.
The one slightly fussy element is that "menu" is not a font that can be transferred between decks through the DA/Font mover... but after making the change you can save the editor deck as a new file and empty it out to use it as a starting point for future projects.
(There might be other ways to move the font around, but I'm less sure about how....)
If that sounds okay to you then this is how I'd do it: We're going to copy the glyphs of an existing font and apply them to the menu font.
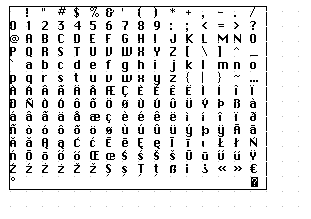
Step one would be to open examples/fonts.deck and hit the button for the Font Editor. Look through the list to find a font you like. A lot of them tend towards whimsical or deliberately handwritten but perhaps there's something in there that would work for you.
There's also the option of using something from this font pack which has some very nice ones but you'd probably want to edit them to have less empty space above the glyphs. (I can explain more if you find one that you prefer in there)
I'm going to use 'ahmCasual' from fonts.deck for my example here. The existing 'menu' font is 16 by 13 pixels, and ahmCasual is 16 by 16. The difference in width might cause a letter to get cut of in some places where 'menu' is currently used but... it's probably okay? It's close enough.
At the top right of this card you'll find a couple of sliders labeled 'font properties' and a button labeled 'set grid overlay to font dimensions' -- the button may be grayed out if the grid overlay already matches the font dimensions listed.
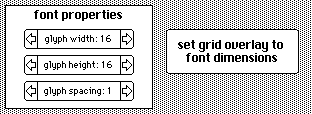
We want to set the grid overlay to match the dimensions of the font we're taking our new glyphs from. So after you find a font you like you should click that button (if it isn't gray already).
Now click the Sheet button at the bottom of the card.
Go into Widgets mode and use the View menu to turn on 'Snap to Grid'. (You can also turn on 'Show Grid Overlay' if you'd like to see what's going on.)
With 'Snap to Grid' active the positions and sizes of widgets will snap to the dots on the grid overlay whenever we move or resize them.
And because we're in Widgets mode you'll also be see the hidden widget that marks the area where the glyphs are drawn on the card. (the widget is named 'workzone')
(an image of the workzone widget as I found it..... not at all aligned with my new grid overlay dimensions but that's fine)
Drag 'workzone' around once to make the top left corner snap to a point on the grid near the top left of the card. Then resize 'workzone' once so the widget is moderately large on the card and the other dimensions will snap to the grid too. You don't need to be too specific about the size or position.
If it's not big enough during the next step you can resize it and try again. It's also okay if there are still unrelated glyphs on the card -- they'll be erased automatically in a moment.
Go back to Interact mode on this same card and click the 'Load' button. The glyphs of the font you selected should now be shown on the card inside the space marked by the 'workzone' widget.
Click the Font button at the bottom of this card to go back to the card with the font list and select 'menu' towards the top of the list.
Use the arrows on the 'font properties' sliders to match the grid overlay dimensions of the other font we're using (in the case of my example, ahmCasual, that's 16 by 16). The 'set grid overlay to font dimensions' button (which we're not clicking now) should become gray/locked automatically when your selected dimensions in the sliders match the current grid overlay.
And now we go back to the Sheet editor card one last time and click the Apply button.
The glyphs that were on the card in the 'workzone' should be applied to the menu font. :)

Save this deck as a new file and enjoy?