Indie game storeFree gamesFun gamesHorror games
Game developmentAssetsComics
SalesBundles
Jobs
Tags

PixelCNC Has Moved: deftware.org

CAM software developed by artists for artists to create unique and original works on a 3-axis CNC router or mill. · By Deftware

King of Diamonds - layered

A topic by GettingRusty created 41 days ago Views: 143 Replies: 9
Viewing posts 1 to 7
(+1)

I’ve been trying to do a carving of a playing card. It’s been a growth journey.


My first attempt using just black and white to set carved depth worked but didn’t produce an easy viewable outcome. This set me into seeing if I can do a better 3D design.

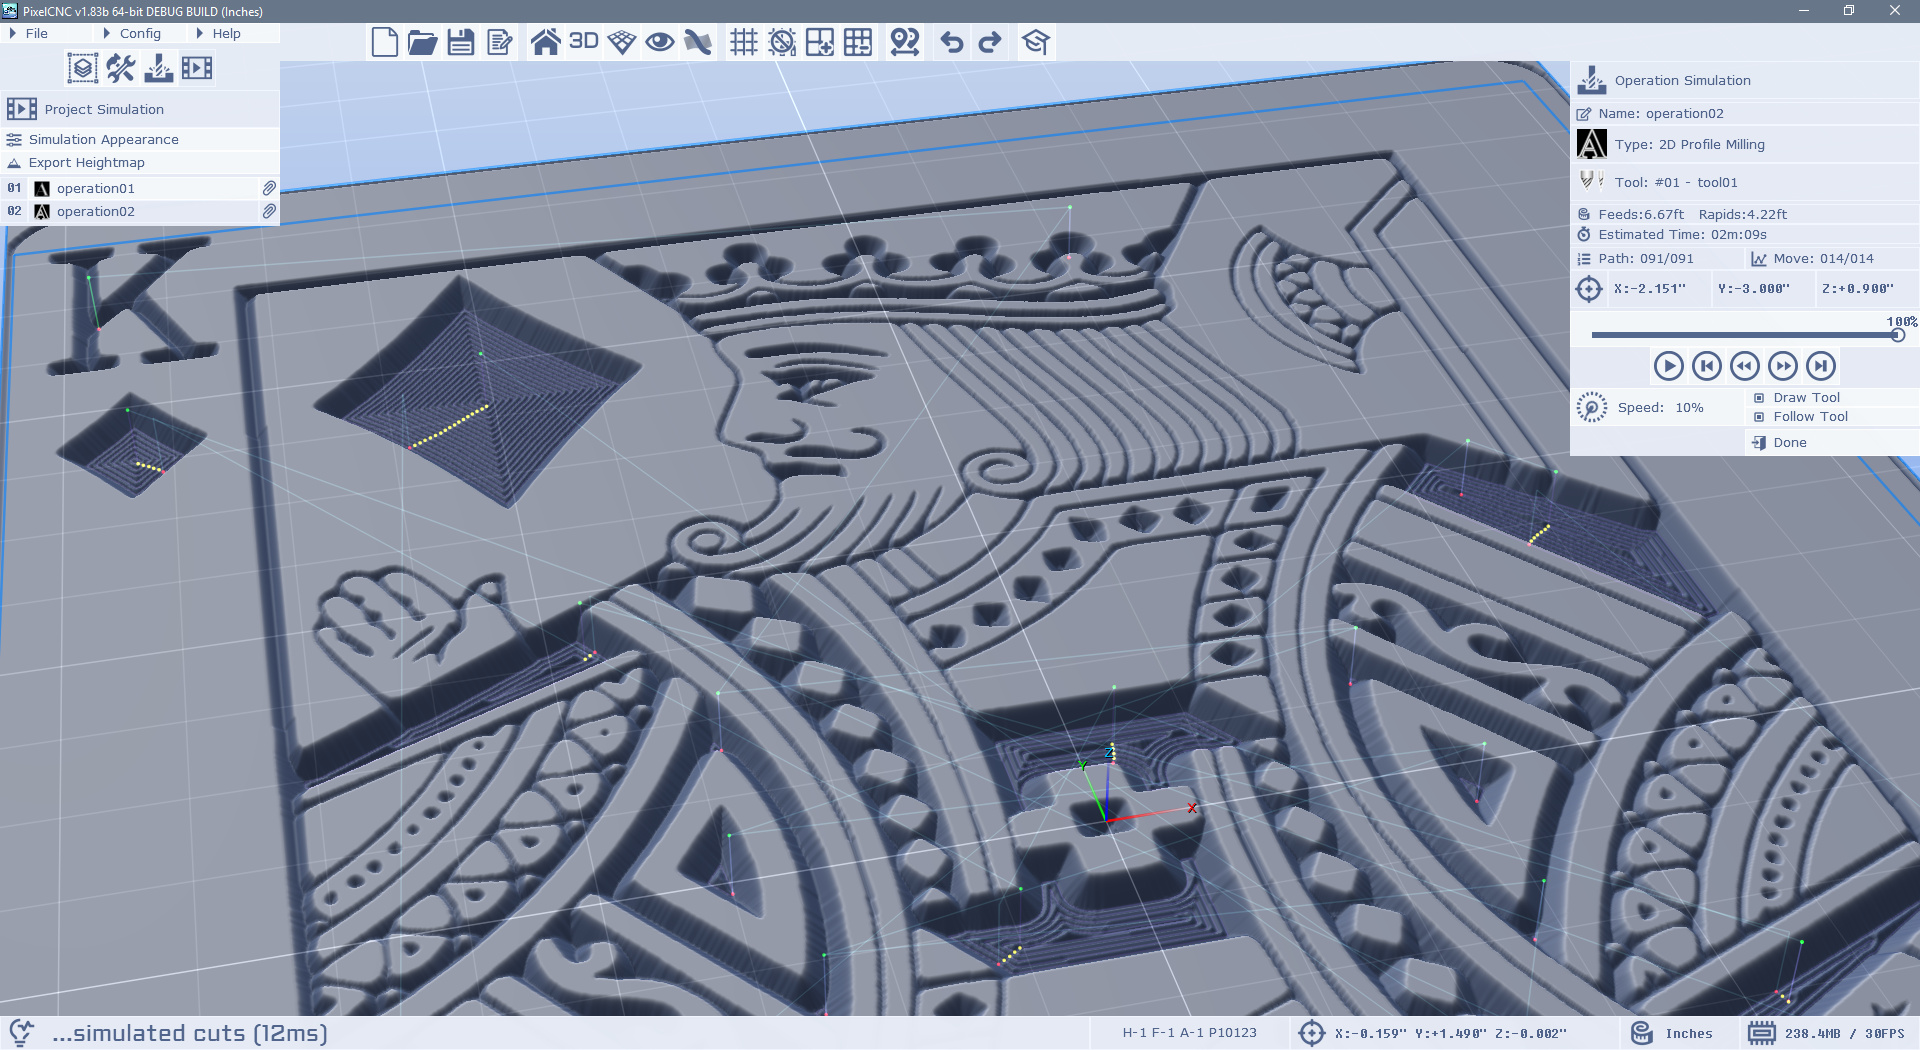
I decided to try  creating a multi tiered design with various heights to simulate a 3D  so that the king looks as though standing in front of the rear surface/wall.

I targeted making 3 levels. 1: the large diamond inverted so that it stands high rather than sunken, 2: the surround about the large diamond and the king’s hand lower, 3: the kings face lower than the hair.

In doing so the approach was I converted the image into a paths layer. From the paths layer I used the tools to select particular paths eg a diamond, With that I created a new paths layer from the paths and filled the closed paths with a flat fillet with Shapes from Paths which made a new raster layer.

I  set the z layer height with additive blending. With the diamond surrounds I also did a path selection and fillet. I used it then with a subtractive blend to take away/lower the surface. Similarly to the king’s face but with it not as low. 

Getting the z heights right was fiddly. I need better discipline with that.

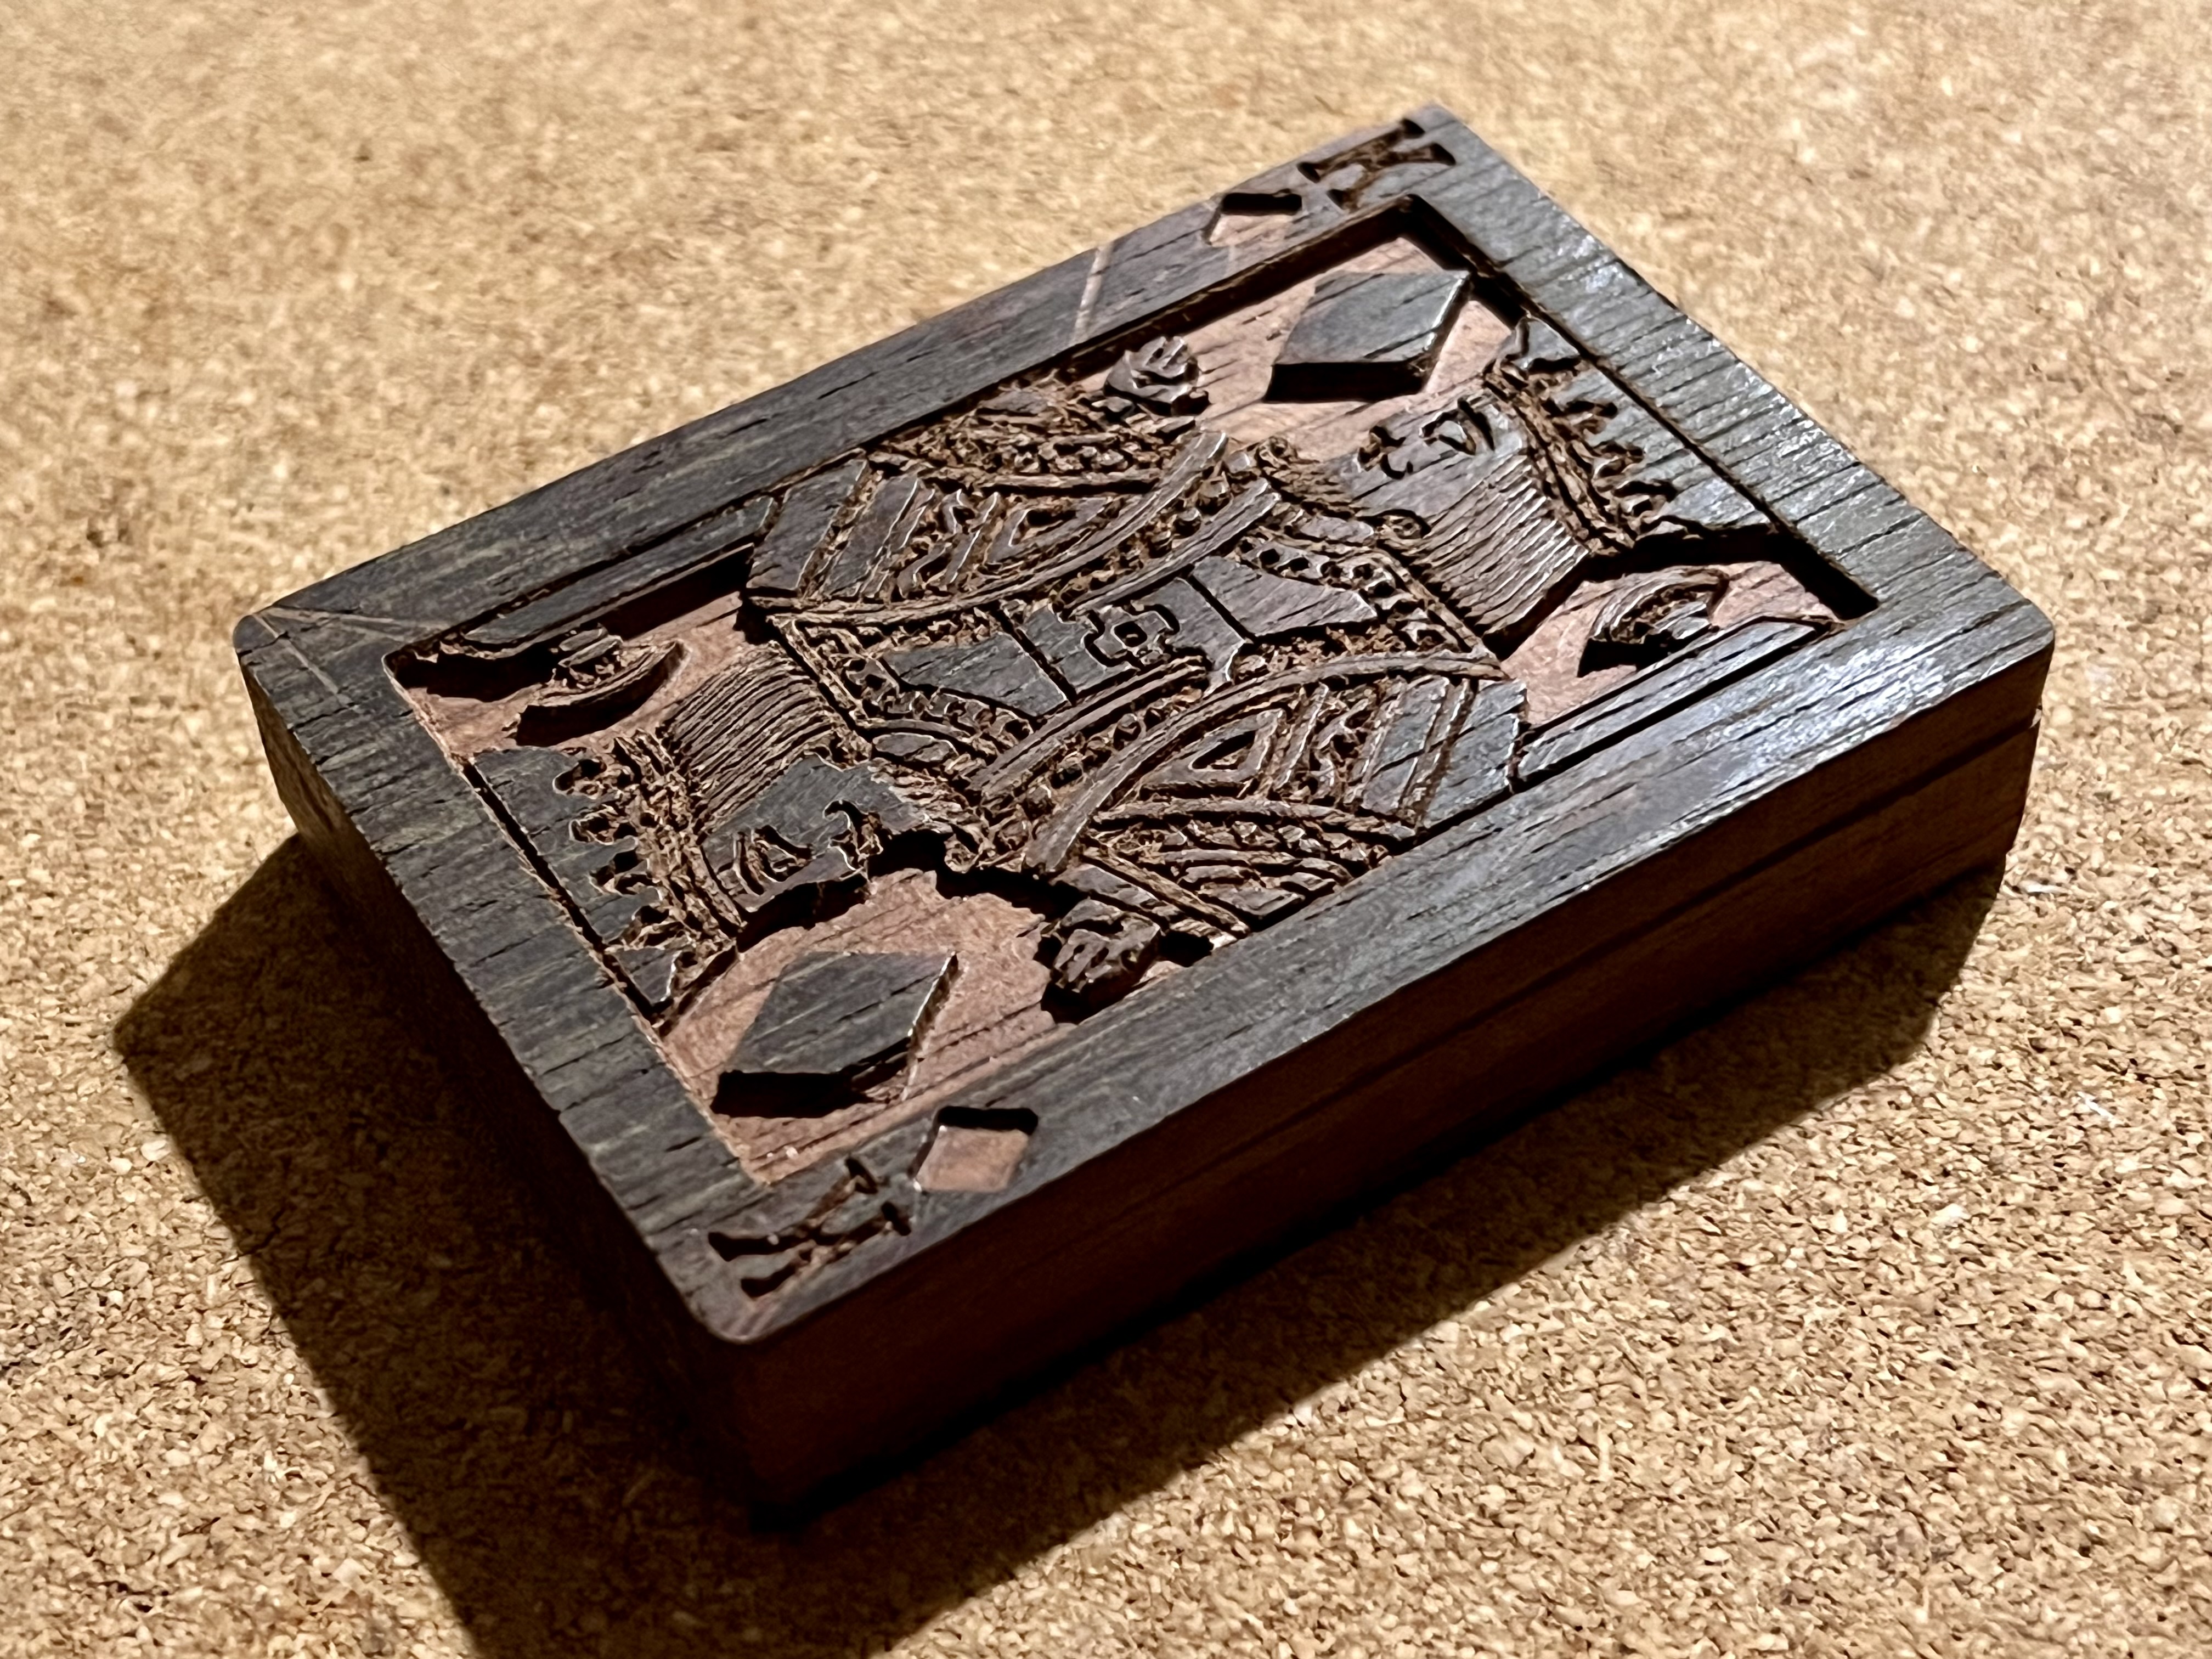
Unfortunately I did miss raising the cuffs on the sleeve. That was black and sunken. I should have set it higher above the hands. Maybe I will fix that if I cut this again.

I’m sure there are many techniques yet for me to use to simplify.  One  of course is to select multiple similar areas to create as one in a new raster layer.


I’m happy with the outcome as it’s heaps better layered except now that I’ve cut it I see that viewing a wood carving with so much detail is hard. There might needs to be right. The only contrast that the eye has is shadows.

I wonder if anyone has hints on how to finish such a carving?

Russ

Developer

Hi Russ,

It's definitely tricky trying to invert specific areas. I went ahead and attempted to re-create what you did here and just the design of the card itself doesn't lend itself well to only inverting the diamonds and the area behind them. It definitely requires some fudging stuff around to get those sleeves up!

Personally, I like to V-carve most things with the medial-axis carving operation, maybe even just a shallow cut and fill the rest of the inner areas with the profile milling operation and a Cut Width that reaches the center of large areas with a tiny stepover - or come in with a small flat endmill to clear an area flat.

With the unmodified card image, here's the medial-axis carving operation with a 90deg V-bit down to 0.05" deep:


...and then follow up with a Profile Milling operation with the same V-bit, and a contour Offset of 0.05" to match how far from the edges that the V-carve cut reached in its deepest cuts for a 90deg bit angle, and a 0.015" cut stepover, which could be smaller if I wanted to make the ridges less apparent:


Trying to replicate what you did, with the inverted diamond area, and then I created a Parallel Carving operation with a 0.5mm tapered ballnose, it looks more like the result you ended up with:

I think that it's just not a good strategy to carve something like this as a relief!


Trying again, but using the previous strategy:


It took a little bit of a Smooth factor on the modified raster-layer, and raising the Contour Z on the m-axis carving and profiling operations so they could get good contours, but I think the result speaks for itself! Granted, you won't have varying heights for things, like a relief, but any time there are fine lines it's very difficult to get them to come out nice with something like a parallel carving operation.

Hope this helps! :]

 - Charlie

(+1)

The type of wood you choose will be very important to get the fine details to avoid the tearing out of the grain. Looks good Charlie. 

(1 edit) (+1)

Hi Charlie...

I got interested in your final example. I tried to recreate what you have done. I've tried several ways and can't get my sleeves looking nearly as good as yours . Would you mind sharing your method to get there ? It seems simple but it is not, would make a good video tutorial perhaps ?

Thanks Joe

Developer

Hi Joe,

First I inverted the diamonds and the area around them and the area on the back of the king's head, using the wand tool and Adjust Levels to flip the height values. Then I went ahead and first just used the wand again to select the sleeves with the tolerance turned down all the way, and because it also selected the border around there I put the view into 2D mode and used the rectangle selection tool with the selection mode set to intersection (the last mode on the right), then manually selected a rectangle that included the sleeves but excluded the outer edge that was selected.

Then I did a little touchup to deselect any other areas that the original sleeve selection leaked into using the remove-from-selection mode and the polygon selection tool.

Let me know if that gets you where you want to go. If not I can make up some screenshots to better show what I did on there :]

 - Charlie

(+1)

Thanks  Charlie....

I've never explored those tools. A lot of options there to go through, I've never needed them . The card got me curious. 

Thanks Joe

(+1)

Hi, I’ve progressed, carving it out using v-carving to get the lines worked well. I did not try lowering the face nor hands as I did on my first example, just two lower layers this time.
 The small diamonds are a lot shallower.

Another advantage of this is it cut a lot quicker. 

There’s some tearing, expected but the focus here is to do different height layers and inversions with different blending modes.

I did not clean the top layer this time and I think the contrast between old and clean wood looks good. It helps see the high detail.


Developer

Hi Russ,

That looks really good! I know that using the Depth Offset parameter on the Medial-Axis Carving operation allows you to apply a Z offset to where the operation considers the top of the canvas to be, or rather the top of the material's surface, so if you were to say mill out a pocket 0.25" deep but wanted to add a V-carve inside of it, you can just set a 0.25" depth offset to the V-carving operation to shift all of the cuts downward to the bottom of the pocket. Just remember that this Depth Offset parameter is separate from the cut/min/max depth parameters (at least for the moment), so that a Max Depth of 0.1" and a Depth Offset of 0.25" will result in cuts that can reach 0.35" below the top of the canvas. This is something I've been looking to resolve so that it's less confusing.

The Depth Offset parameter might be useful if your end-goal is to figure out how to have different heights for features, and still use the medial-axis carving operation to cut the finer lines. The caveat is that it likely won't work well if the V-carving cutpaths must travel between two different heights, unless you don't mind a chamfer being formed along the side of a higher area.

There's also the possibility of manually picking and choosing which features that the V-carving operation actually applies to, by selecting and creating a separate new paths-layer from just the paths that you want the V-carve to occur around, inside of, or between, and use that as the contour input for the V-carve.

For example, if you wanted just the king to be lower, you could mill out a small cut depth from him, but not the large diamonds, and then generate a V-carving toolpath that excludes the large diamonds, and set the Depth Offset to the Max Depth that was used to clear the area of the king.

 - Charlie

(+1)

Thanks Charlie, I saw the Depth Offset, I didn’t realise it’s power. So this means I can have a go at lowering the kings face and still medial axis carve it. I could not see an easy way before but now I see I can select the face paths, eyes and mouth as a layer to carve and use its outline to set the blank area to subtract the surface lower to carve on.

I like  the outcome so far and with more experimental  trials I might get proficient in layering and making more details of the card 3 dimensional just because I could.😄

It could be good practice to drive me to more challenging 3D carves.

Russ

Developer

Sounds good Russ! :]