Hey guys, I wanna talk about some slimes. We will be drawing some today but first we need to briefly discuss what a slime is. If you're a gamer, I'm sure you've seen them before. They're gooey creatures that just look like a round blob the floor but sometimes they hang from ceilings. The basic ones are usually green but then we have our elemental slimes which vary in color. Some of them have cute faces as well but for now we're starting simple with a simple green blob.

Next we probably want it to look a bit shinier, so we'll go for a highlight color.

A good skill to learn is drawing translucency. It means only some light can pass through something, such as this slime. I will admit, this is not a beginner concept and you don't need it if you're starting out, but the idea is to not only render the frontal lighting of the slime but also the back ever so slightly so that it looks see-through.

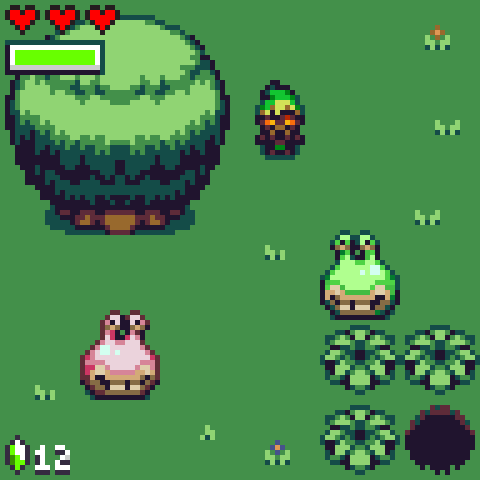
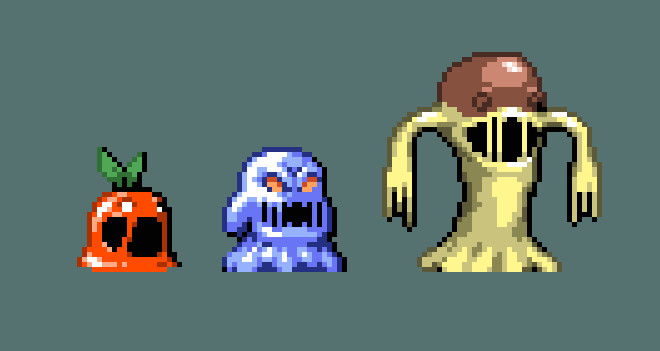
That's how you draw a very basic slime, but let's try a Chu Chu from Zelda: Majora's Mask! It's more or less the same thing, but it has eye-stalks and a mouth. Try 32x32px.

Now if you play Zelda, you might be thinking... "Where's the magic jar? Why's he not see-through?". Both are good questions. This is only a 32x32px sprite and I've tried drawing the magic jar inside the Chu Chu but it just didn't work out for me.

I don't think it's needed. We get it, it's a slime with a goofy face and it drops magic jars when defeated. If I was going to use it in a Zelda fan game, we could tell what the slime drops are just by looking at the color anyway: green drops magic jars and red drops hearts.
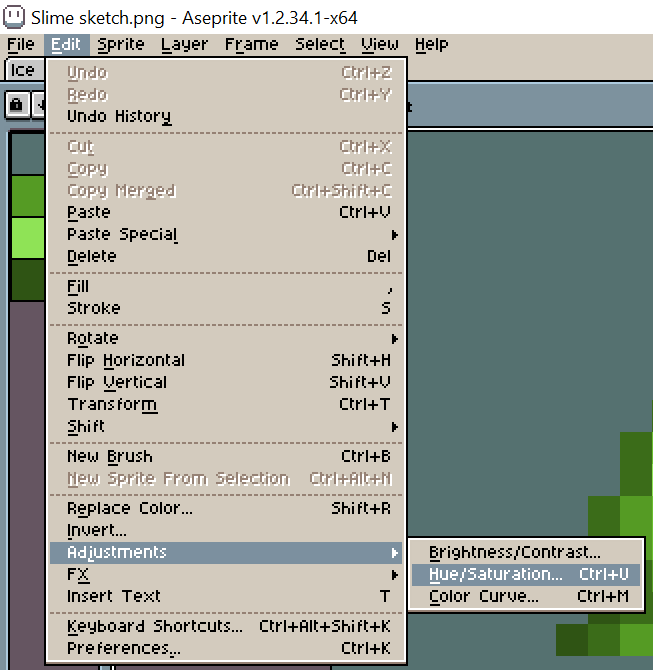
Moving on, let's try a frost slime. Let's take our original slime from the first example and change the color. If you're on Aseprite, you can go to Edit-Adjustments-Hue/Saturation then change the hue to some icy colors.

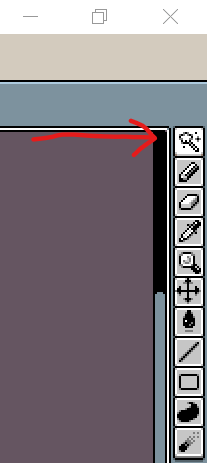
But those probably won't be the best colors so in the polishing stage I usually just get the magic wand tool and change the color groups individually. You can also set it to a shortcut key through the Aseprite preferences if you want.
Alright so it's blue now, but that alone doesn't communicate to us that this thing is made of ice. Sure it's a slime, but at the same time I want it to look like it has ice powers. Crystal shapes can be used to convey that it's made of ice so we can add them to the slime.
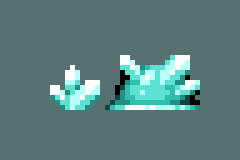
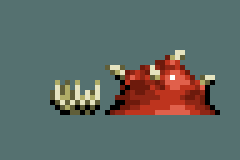
Cool stuff. Let's try another. How about a bloody slime with bone shards sticking out? It's a very similar process.
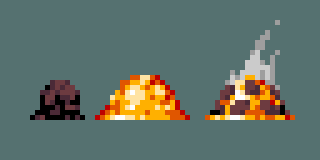
Then we have lava slimes where you just take some rocks, some magma, and jam them together.
Now I forgot to mention, but we also have these slime cube guys.

So those are some of the basics. I think the main things to practice here are the little dabs of highlights, and maybe achieving that see-through look some of the more liquidy slimes have. Once you get a hang of that, maybe you can try to draw the flans from Final Fantasy!
Anyway enough said. That's all I have for this tutorial. Good luck and see you in the next one!