I have been busy for the past weeks, so it has been a while since my last big update. Today we will be looking at the new building/wall system for the game. Instead of making walls by connecting squares together, players can now draw their walls from a grid, which hopefully makes building defenses more intuitive. I am expecting both the amount of walls you can put and the dimension of the grid to be upgradable.
Controls
When the player clicks the space bar, the game will pause and the grid will display around the player, letting them have the time to build their walls. Right click to place a block on a certain square; hold right click and let go to place multiple blocks. During this time, players can also buy upgrades from the shop. The system can be exploited if time was slowed , but players won't be able to cheat their way out of a situation if we stop time as a whole.
This is the brief summary of the new system. The walls are there to help you defend against the growing amount of enemies as you progress through the game. Leave any comments on improvements we can make and how you feel about this new system. There are some fixes we can do with other systems (i.e. the player movement system) in order to make this building system fit more smoothly in the game (you'll see what I mean in the next update).
Now for those game developers out there who are here to learn a thing or two, I will now dive deeper into my development and share my process for creating a new system.
Development
Before I do any coding, I am always drawing diagrams, whether that is inside the game engine or on a whiteboard. Diagrams help me figure out how to make efficient algorithms that achieve my goals; they help me find patterns that I can use in my code.
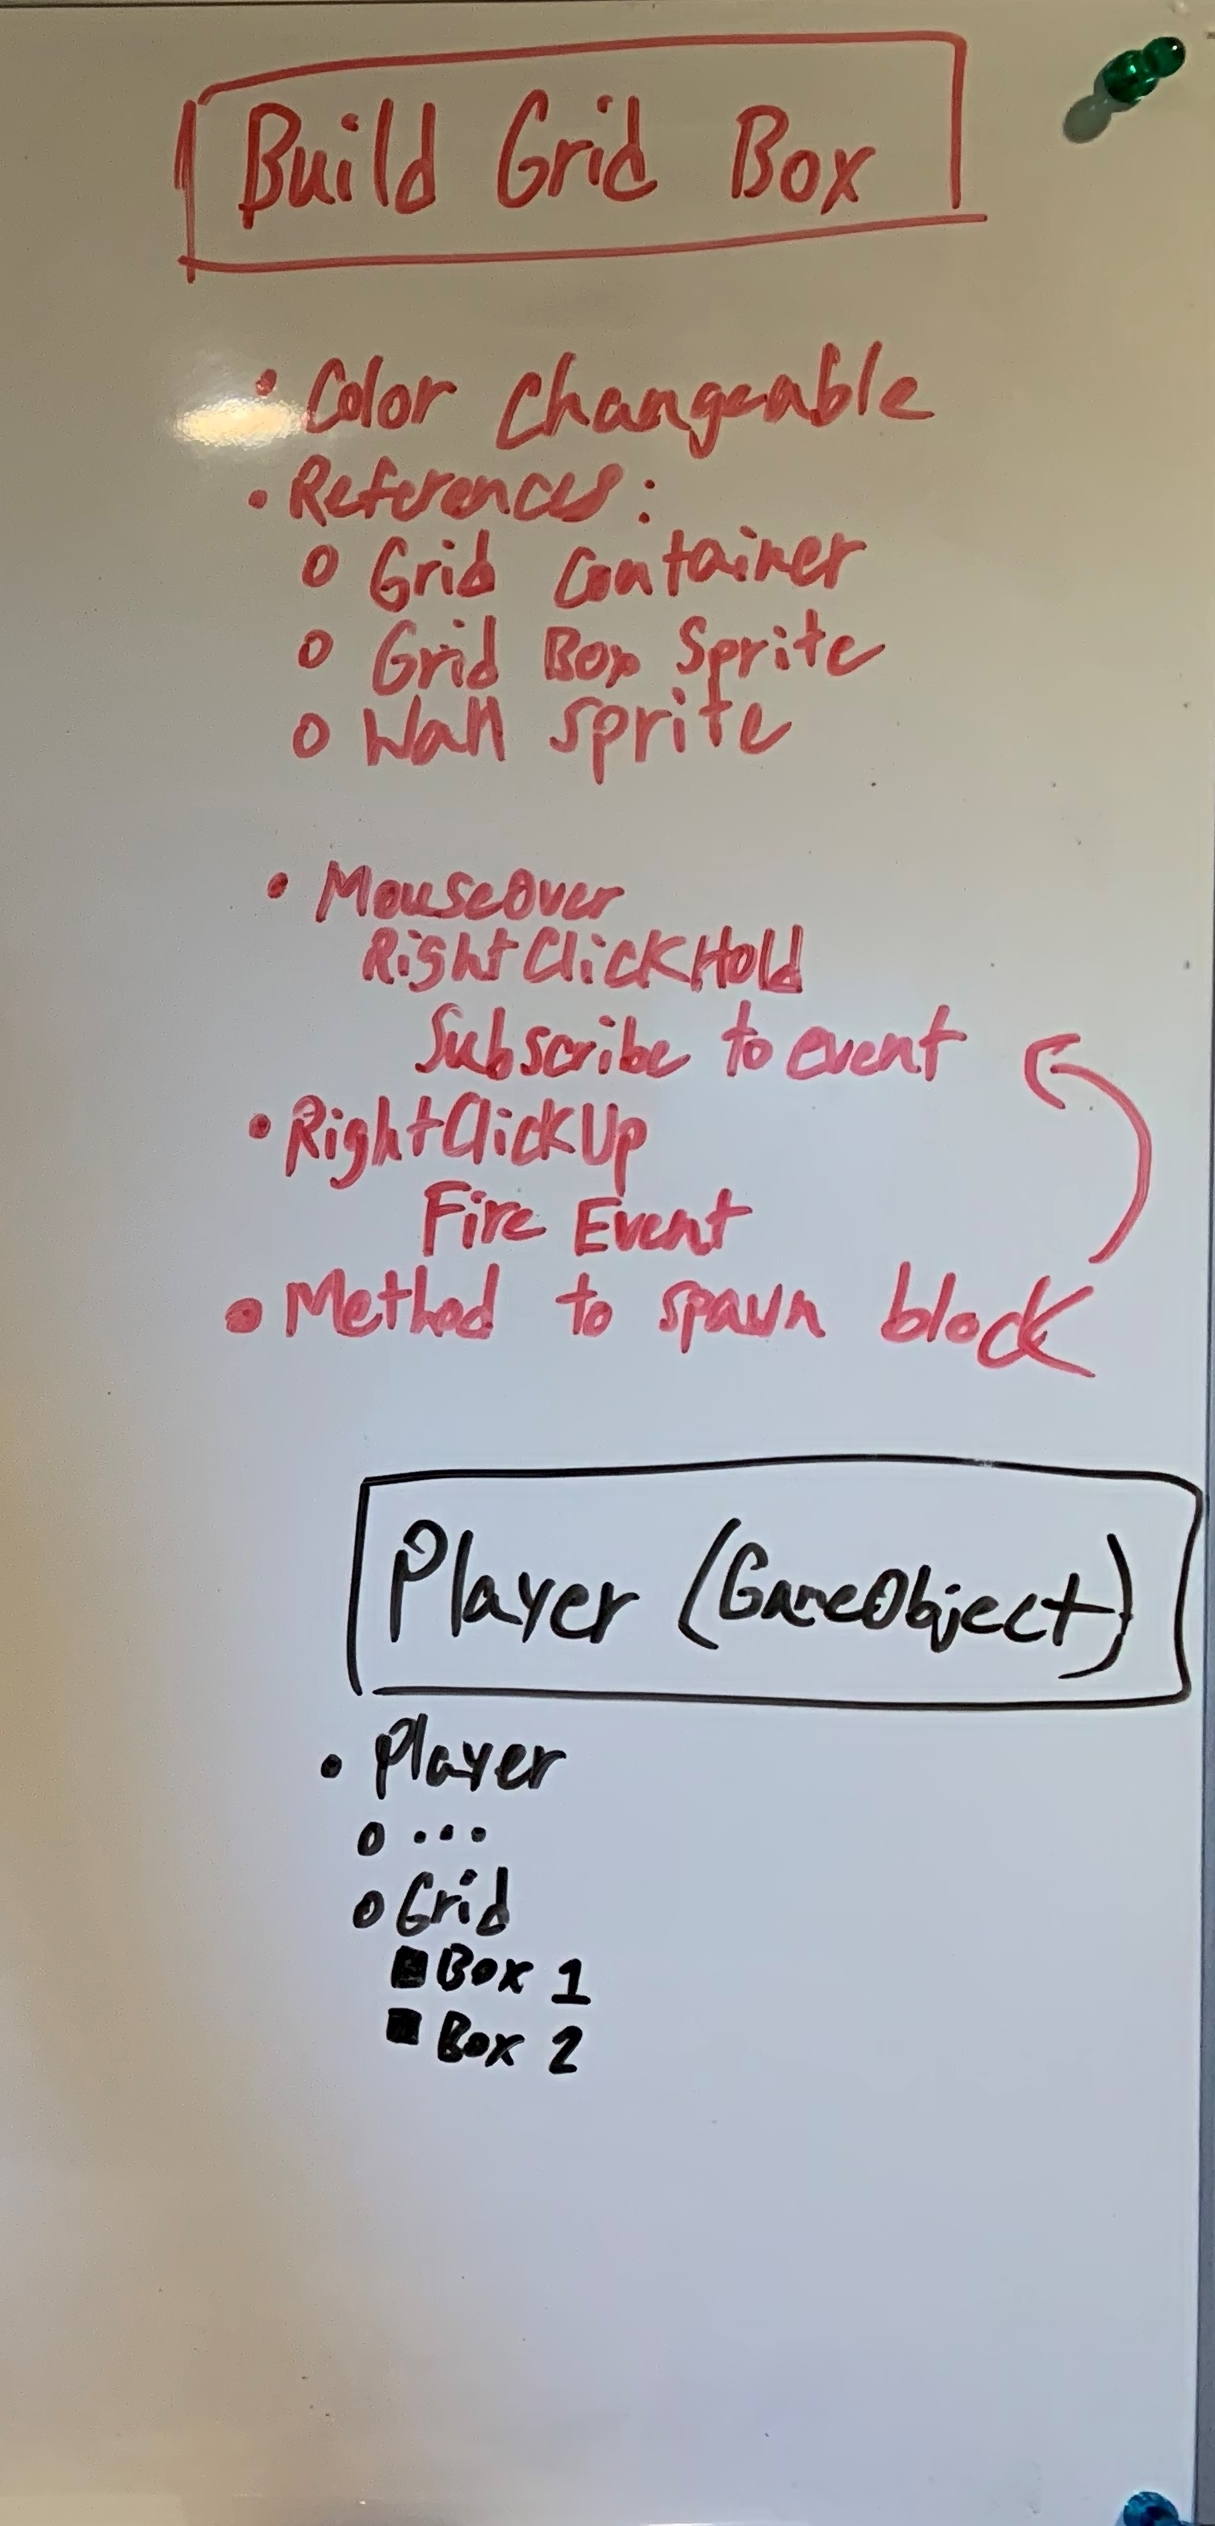
There are three main parts to the building system: the grid display, an individual grid box's attributes, and the individual wall's attributes. Fortunately, I only needed to focus on two of these systems because the previous wall's attributes are exactly the same as the new wall's attributes (i.e. wall health system).
I started with figuring out how I wanted the player to interact with an individual grid box. The main concept was that I wanted to make each grid box have a hover effect (i.e. a faded wall), have the ability to keep the hover effect if the player right clicks (in other words have the grid box wait for the player to release right click), and have the ability to spawn a block (paired up with my custom object pooling system). These three concepts seem pretty simple, but when considering all the different conditions you can have, it turned out to be a bit more complicated. As shown on the whiteboard, I made each individual grid box subscribe to an event if the player is holding right click over them. Each grid box subscribes to the event with a method to spawn a wall on their position. So when the player releases the right click button, the event will fire and in turn all of the methods subscribed will be fired.
The goal of the grid display algorithm is to efficiently create multiple grid boxes around the player, but there shouldn't be a grid box on the player. The main variable in the algorithm is variable dimension, which will always be odd. Though the white board is a bit messy with arrows pointing all over the place, what is written was almost fully transferred to Visual Studio. We start at the bottom left and work our way to the top; when we finish spawning all the grid boxes on the column, we move to the next column to work our way to the top again; the cycle repeats until we are done. From looking at those grid diagrams, I was able to find out that the middle (aka. the grid where the player will be standing on) will always be when variables i and j are both equal to dimension divided by 2 (integer division). The other details revolve around making the system more efficient when we are upgrading the dimension size.
The whiteboard helps me plan out how I am going to implement a system. If I don't write my thoughts down somewhere, I will end up getting lost. The thing to remember is that the whiteboard shows your thoughts, so you should write in anyway that is understandable for you. The whiteboard outline isn't perfect, so there might be things here and there where you will have to code without the guidance of it, but it is the starting architecture for your system and you should stick to that architecture.
I hope you guys learned something from this long devlog. I will try to post a free demo on itch by the end of the week. The full game should be done a week after the demo. Let me know how you guys liked the discussion of my development process; this is the first time I've done something like this.
Thanks for making it all the way through! Always be active on your developing games!