
So today I went crazy, I drew something I never drew given roughly 5 hours. Disclaimer!
this tutorial might be a little sloppy, but I definitely learned a lot today and I'm more than happy to share what I learned.
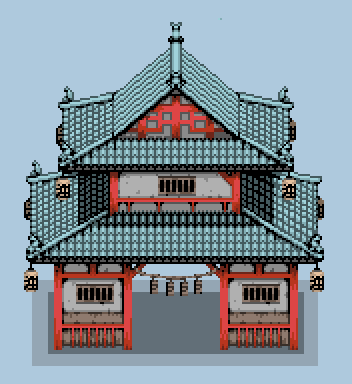
I wanted to make a tutorial for some Japanese architecture today so I searched up "Japanese buildings", later I discovered something called a "Mon Gate" on Wikipedia. Read about it if you want but basically what I'm understanding is that it's a gate-like building similar to a torii gate but resembles a building more. They "separate the mundane from the sacred". Pretty much I think that's all we need to know to get started. Anyway I was looking at tons of reference as I was doing this and honestly I was just picking little features here and there from each and combined them into my own kind so maybe mine could be a bit inaccurate from a real one, but the vibe is there hopefully and I think there's a lot to learn regardless.
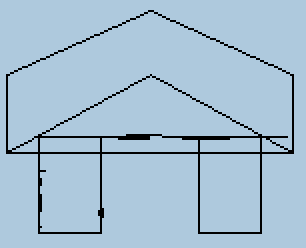
First make some rough linework sketch just to get a feel of the proportions. Also maybe its a good idea to turn on some grid. I was using 16px to measure some spacing.
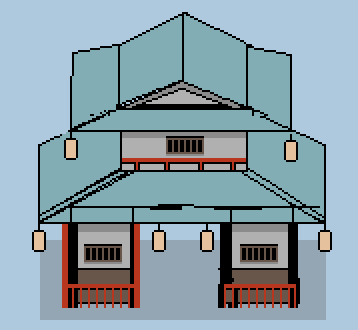
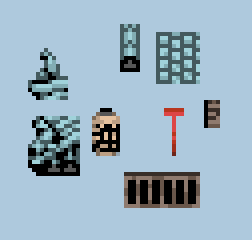
Next take some time to look at some of the common elements from various forms of Mon Gates or even Japanese architecture in general if you want to experiment. Common things I noticed are lanterns, those "hanging card things with letters on them", wooden railings/pillars, and sometimes windows or statue ornaments. Those are just to name a few. After that, sketch those in.

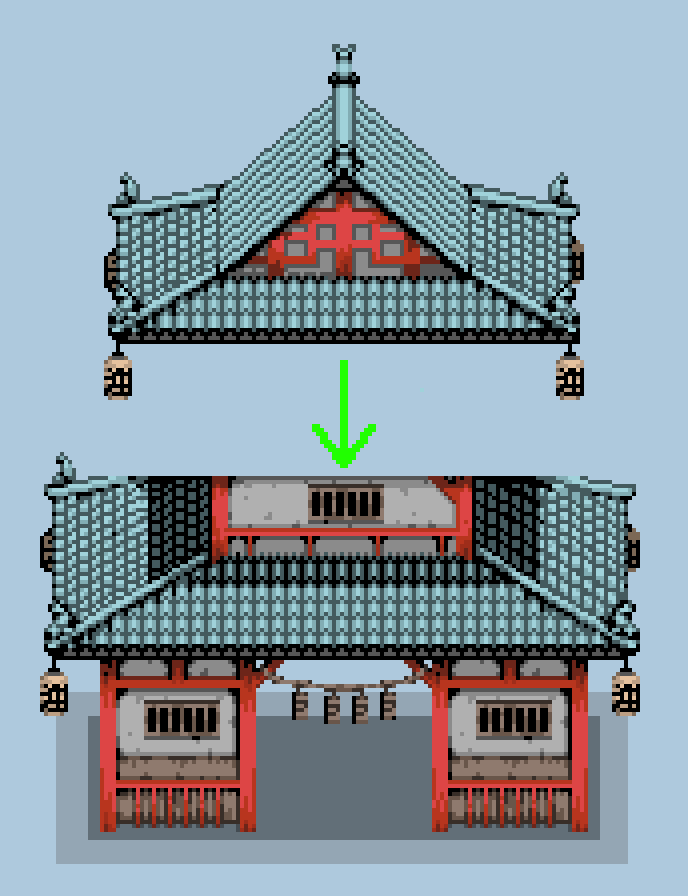
You may have also noticed that I added a second story rooftop, it just seemed like it was going to be a nice addition and I like to over complicate things sometimes.
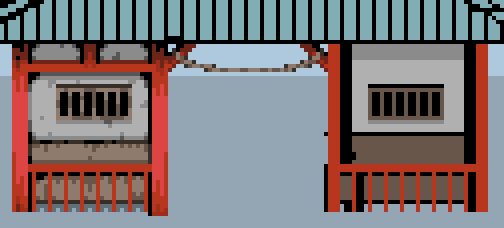
Anyway here was the point that I started blocking in colors.
Now was a good time for me to start trying to render some of the materials a bit more, for wood and walls I usually don't like to draw them perfectly clean with solid colors, I like to make them look gritty or splintery and have shadows. I usually show this at the edges of the shades by making them just slightly noisy but be careful not to over do it.
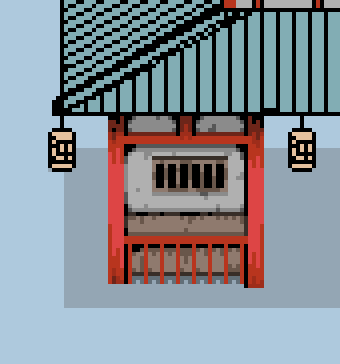
It's a bit tough at first but with practice you'll get better at doing this. Something that helps me draw the darker areas is imagining the corners of a room such as between the floor and the wall, or the wall and the ceiling. The corners look slightly darker because of the reflections, but I'm not going to get into that too much, it's a bit hard to explain so that should be for another day.
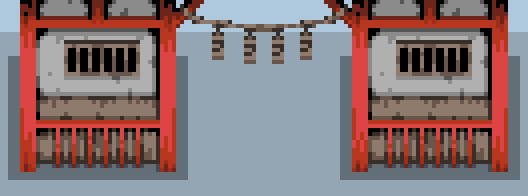
I also started working on the lanterns.

My friend Gutty Kreum helped me with the letter on it. I don't know much about Japanese culture but he does and you should check out his pixel art content on Twitter. Pretty chill dude... Basically the lantern is supposed to say "Hi" or "Welcome" or something.
I also replaced the center lanterns with a hanging rope so that I can add cards on them just to add a little more variation to the design.
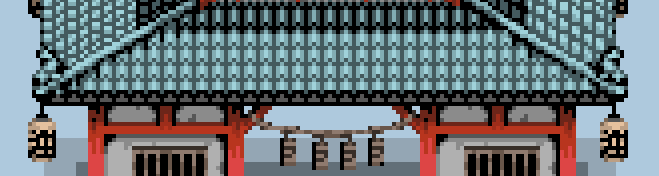
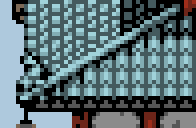
Now the hard part, roof tiles. I actually messed this up and only realize until the very end of my drawing that I drew them incorrectly. But looking at Japanese roof reference, they are stacked after each other, each tile is curved, not flat like on most American houses.
Something else I realized really late while drawing this is that it saves a lot of time to keep little bits of your drawing separate from the main drawing so that you can select and reuse them pretty easily with out having to do a lot of editing and drawing over. Keep them separate like this.
With much Japanese roof architecture, I notice there tends to be these corner tile pieces in common so be sure to draw them in. In Aseprite you can draw lines with the pencil selected and holding Shift and clicking around so that's pretty useful for those. 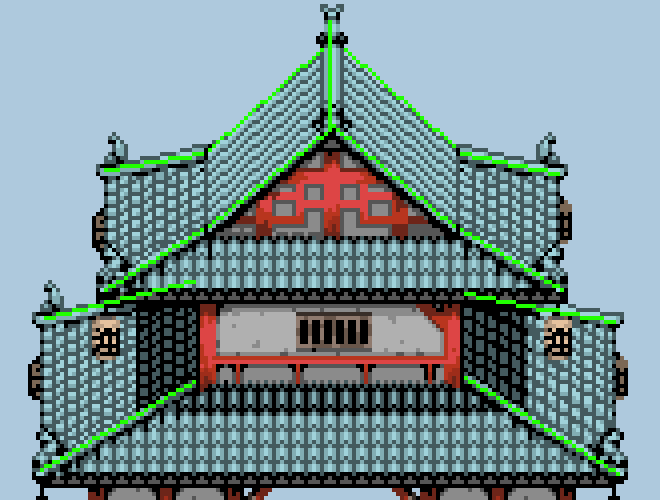
They are supposed to be tiled as well like the rest but I drew them like bars because it just helps them pop out a bit more from the other in my opinion. I also added fish ornament on the ends because I notice they are common on the rooftops.
Unfortunately I don't have a whole lot of time to explain how I made the second story rooftop. It's pretty similar to the lower roof but with a triangular prism structure on the top center of it and a bit smaller. The roof was pretty hard for me to draw. It took some experimentation and referencing so I wish you good luck for now. Maybe I'll cover it more some other day, but I advise you to experiment with it separate from the lower half of the building, you don't want to ruin it during this process. You can do it off to the side or on another layer. Be sure to get the proportions to fit with the lower half of the building though. You can use bits and pieces you already created for the lower structure to speed up the process for the upper roof.
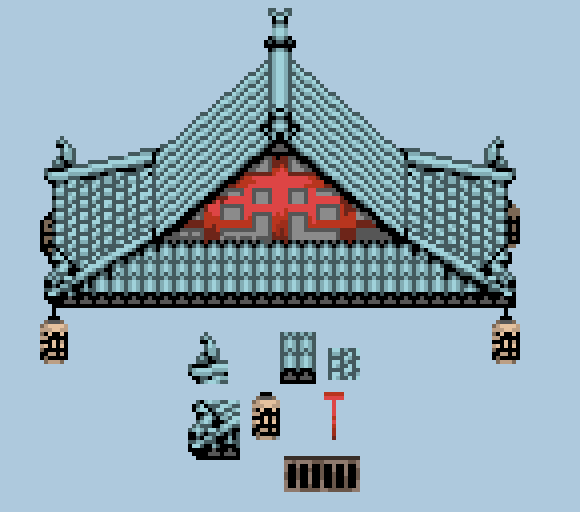
At this point I was running out of time so I decided to add a red square pattern in the center, it's just one of those things I see a lot with Japanese architecture and it didn't look so bad after all so I went with it. After that, all I had to do was just drag and drop it over the original drawing and add some shade underneath the upper roof. I didn't take a screen shot but just to represent what I mean, it was like this except without the shadow on the lower roof yet.
So that's the end of the tutorial, I know this one was pretty darn complex and maybe a bit rushed. Maybe I should take it a step back in my next tutorial but I'm still glad I made it anyway. Let me know what you think and I plan to do more tutorials so until next time!
Check out my other tutorials below if you want: