
Indie game storeFree gamesFun gamesHorror games
Game developmentAssetsComics
SalesBundles
Jobs
TagsGame Engines

Creating custom opponents guide. Sticky Locked

A topic by Eldricus created May 12, 2021 Views: 4,522 Replies: 9
This topic was locked by Eldricus May 17, 2021
Viewing posts 1 to 11
Developer (9 edits)

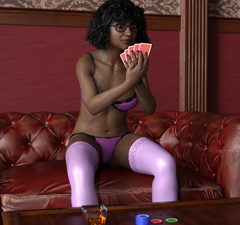
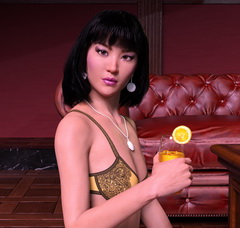
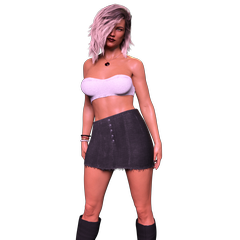
TLDR: Copy-paste one of the existing player folders in the /opponents folder and replace assets with yours.

This guide will go through the contents of an opponent and describe what everything is and what values things can be set to.

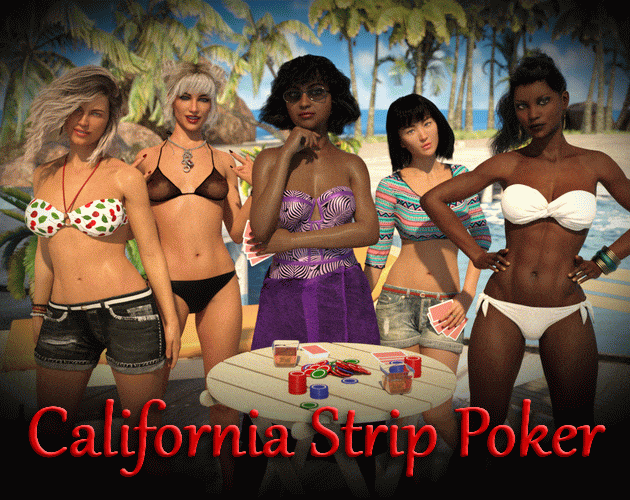
Once you have a working opponent, zip up their folder and share it here!

The main folder

This is the folder you created in the /opponents folder, that everything else goes into. Note that this folder name is the game's 'real' internal name for your player. Stick with lowercase and no spaces.
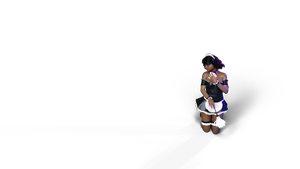
The portrait

The portrait should be a square image of the player's face, preferably on a dark red background. Preferably a 120x120 JPG but larger sizes and pngs will work as well.

The opponent.properties file

This file contains basic data about the player. See the following post about detailed specifications of the file contents.

Developer (4 edits)

The opponent.properties file

This file contains basic data about the player. Most of it is optional. The order of the lines in the file does not matter.

Each line is in the format of property_name=property_value

opponent.name

This is the name of the opponent as it will appear in the game. Mandatory

opponent.ai

This is the core ai type used by the opponent when playing. The value can be random (mostly random, absolutely terrible player), fixed (always bets the same), or proportional (adjusts choices to the quality of their hand, solid player). 

opponent.ai.components

This is a comma-separated list of modifiers that can be applied to your AI to tweak it's behavior and give it a personalized play style. There are multiple values to choose from, and they can be combined.

rookie players will make rookie mistakes that normal players avoid by default. Sub-optimal choices like folding against a 0-bet or trying to beat a shielded opponent instead of folding

shy_X players will bet lower and fold more often. X is a value from 1 to 4, where higher is shyer.

aggressive_X players will bet higher and fold less often. X is a value from 1 to 4

bluffer_X players will attempt to bluff more often. X is a value from 1 to 4

clumsy_X players will occasionally reveal their cards by accident. X is a value from 1 to 4

peek_resistant_X players guard their cards well and will have improved chances of resisting the peek action. X is a value from 1 to 4

ruthless players will always buy shields if they have enough money to win the game by buying shields every turn.

kind players will never buy shields if their only opponent is down to their last piece of clothing

opponent.alcoholPerDrink

How drunk the player gets when they drink. Defaults to 2. Tweak this value to match the type of drink your player is having, or reflect their natural alcohol tolerance. 0 means they will not get drunk at all.

opponent.drinkInterval

The number of rounds before the player is ready to drink again. Defaults to 3. Tweak this value to match the type of drink your player is having, or reflect their guzzling/sipping habits.

opponent.voice.clone

The folder name of the opponent who's voice should also be used for this opponent.

example: opponent.voice.clone=leah  will give Leah's voice to this opponent.  

opponent.lock

This can be used to lock the opponent until a specific condition has been met, like beating one or more other players first. Note that all player and outfit names in the lock value must be the folder name, not the display name. Examples:

victoria.* means Victoria needs to have been defeated. Any outfit will do.

victoria.swimsuit means Victoria's Swimsuit outfit needs to have been defeated.

victoria.*,nadia.bluedress means both Victoria must have been defeated, and Nadia's Blue Dress outfit must also have been defeated, in the same match

flavor properties

These properties only show up in the opponents details hover-card and have no effect on the game. Fill these out to help flesh out your player's background/personality.

  • opponent.description
  •  opponent.occupation
  •  opponent.likes
  •  opponent.dislikes
  •  opponent.age
  • opponent.ethnicity
  •  opponent.hair.color
  •  opponent.eye.color
Developer (4 edits) (-1)

Outfits

Each opponent can have multiple outfits. Each outfit is contained in a sub-folder within the player folder.  This folder should be all lowercase with no spaces, and will be used as the 'real' internal game name for the outfit.  

Note that the outfits will be ordered alphabetically by this name, so if you have an unlockable bonus outfit, you can put a z at the beginning of the folder name to have it listed last.

Outfit image

The outfit image should be a square image of the player fully dressed. Preferably a 120x120 JPG but larger sizes and pngs will work as well.

Outfit properties file

Similar to the opponents properties file, this file contains setting specific to the outfit. See the next post or detailed specifications

Outfit state folders

These are the  binary name folders representing the possible state of undress of the player. These are the folders the images go into. Each value in the sequence represents the state of that piece of clothing.  1 means the clothing is on, 0 means the clothing is off, - means the clothing is in halfway-off, and X means the clothing may or may not be on.

The game will scan through these folders to determine all the possible undressing orders.

Here are some examples for a player with outfit.1=dress outfit.2=bra and outfit.3=panties defined in their outfit.properties

111 this folder contains the images of the player with all their clothes ON

000 this folder contains the images of the player with all their clothes OFF (yay!)

001 this folder contains the images of the player with only their panties on

010 this folder contains the images of the player with only their bra on (this is how you allow for alternate undressing orders)

01X this folder contains images of the player with dress off, bra on, and panties may or may not be on. (like closeups of their upper body)

0-1 this folder contains images of the player stripping out of their bra, with their panties still on.

Developer (3 edits)

Outfit properties file

Similar to the opponents properties file, this file contains setting specific to the outfit.

outfit.name

The name of the outfit as it will be displayed in the game. Mandatory.

outfit.X

These are the ordered names of the clothes your player is wearing. Keep the names short or they will have trouble fitting in the various buttons they can appear on. Must have one entry for each clothing being worn, exactly. 

example:

outfit.1=dress

outfit.2=bra

outfit.3=panties

While the order in which the clothes are be removed can be flexible, this does define the "default" order. There is no upper limit to the number of clothes allowed.

outfit.X.undress

This value can be used to customize the sound that is played when this article of clothing is removed if the default sound based on the clothing name does not match. This is a comma separated list of sound effect names, that will be played in order.

The following example will play the sound of a zipper being unzipped, clothes ruffling, and then clothes dropping on the ground. outfit.3.undress=zipper,clothes_remove_0,clothes_drop

Available sound effect names are:

  • belt_remove
  • belt_unbuckle
  • clothes_drop
  • clothes_remove_0
  • clothes_remove_1
  • shoe_drop
  • zipper
outfit.location

The location in which the outfit is shown. This will be used by the game for putting together composite shots of all the players together.

Only include this line if your player is being drawn in one of the game's predefined locations.

Current available locations are beach, bedroom, lounge and void


outfit.layer

Used to determine how deep into the composite shots the player is located. The higher the value, the further the player is in the background. The value should be used in a consistent manner with that of other players in the same location, as it is used to determine who gets drawn in front of whom.

outfit.position

This is the position of your player in the composite shots. It can be any arbitrary value, as long as it is consistent with the positions used by other players in the same location, like left, right, or front. Used to detect whether two players occupy the same spot in composite shots

outfit.lock

Similar to opponent.lock, but locks only the outfit.  Use this to lock spicier or more 'bonus' type outfits behind the regular ones, or to force the exact order the outfits should be played in.

outfit.music

Can be used to customize which music should play when this outfit is worn. If not set, the default music will play. Current music options are beach holiday romantic and spooky  

Developer (6 edits)

Image files

The game uses renders created using DAZ Studio, but you can use any type of artwork or photos you like or have available. 

If you are interested in trying out DAZ, it is free, and here is a tutorial.  Beware that the assets can get expensive quickly though, and render times can be quite long even with a powerful computer.

Any size image will work, the game will shrink, stretch, and pan across images in whichever ways fit the screen best.  Optimal size for 1080p resolution games is 2200x1238, or 1920x2160 for vertical images. JPGs are better because of their smaller file size, but PNGs work as well.

The names of the images do not generally matter, as long as they are in the correct folder.  There are substrings that can be included anywhere in the image names:

By default, images will be used for game states where the player is not playing (in between rounds, or already folded

_playing anywhere in the image name means the image shows the player in-game, holding their cards. The game will prioritize these images mid-round when the player has not folded. These should make up most of your pictures to make the game more immersive.


_maybeplaying means the image does not clearly show whether the player is holding cards or not, and can be used in either situation

_drinking means the image shows the player with their drink. It will be shown any time after a round of drinks is bought, until the drink runs out.  Should usually be combined with _maybeplaying


_composite means the image is a 2200x1238 transparent image showing only the player and their shadow that can be overlaid on top of the location image to show everyone playing together. Combine with any of the previous substrings for best effect.   Refer to the separate post further down on how to make composite images.


status_ at the beginning of the image name indicates that this is a status image that replaces the player icon to show their current undress state.  It should be a square PNG image showing only the player over a transparent background, and does not need to be very large. 240x240 should be plenty.


Developer (9 edits)

Locations

The game currently has 4 locations that can be played in:  the beach, the lounge, the bedroom, and the void. To create images in the same locations, you will first need to have DAZ Studio installed and own the relevant assets. Some of these assets are fairly expensive, but they go on sale somewhat regularly:

Once you have the assets, installed, you should download the render_toolkit.zip file from this site. The zip contains DAZ save files for each environment. These save files also contain the various cameras and lights required to have a consistent look with existing renders.

The toolkit zip also contains the backdrop images used by some of the environments (beach and bedroom).

  1. Install DAZ
  2. Install the assets
  3. Load the environment .duf file into DAZ
  4. Load your model, move it in front of the camera
  5. Set the backdrop (beach and bedroom only)
  6. Adjust pose, camera, lights, until things look good.
  7. Render!


Creating custom locations

To create a new location, you will need to create a render of your location for composite player images to be rendered over. The composite images will all need to be the same size as your location image.  The standard 2200x1238px size is recommended, and the image should be a jpg.  Make sure you save your render exactly as it was rendered, as you will need to render all composite images with the exact same camera and lights and positions to create a realistic illusion of them being in the location.

The most convenient way to package your location jpg is to simply place it in your custom opponent's outfit folder . Then set your outfit.properties file's outfit.location property to the name of your location image, minus the extension.   

(The core folder for locations is the /locations folder, and placing your location jpg there works as well).

Note that you only need to do this if you plan on having composite images for your players in that location.

Developer (8 edits)

Composite Images

Composite shots are created by overlaying mostly transparent images of each model on top of a picture of the given location. These location pictures can be found in the locations folder for reference.


The render_toolkit.zip file contains all the data you will need to create composite shots in each locations.

Assuming you already have loaded your model in the correct environment to do a normal render, follow the following steps to create a composite render:

  1. Move your model to her assigned playing spot in the room and face her towards the card pile
  2. Adjust her so she is looking at the cards or some other imaginary player
  3. Load the composite render preset.
  4. Hide the room group
  5.  Hide all the lights in the model group (bedroom and lounge only)
  6. Un-hide the composite group
  7. Move the rear composite spotlight to above and behind your model and point it at her. (bedroom and lounge only) (do not ever change anything else in the composite group though or it won't match the image it is being overlaid on)
  8. Make sure there is no environment backdrop(beach and bedroom only)
  9. Switch view to the composite camera
  10. Make sure you are rendering a png, and include "_composite" in the file name.
  11. Render! (good news: these only take a few minutes)

The result should be a 2200x1238 mostly transparent picture of only your model and her shadow.

If part of your opponent image should be obscured by the table (beach and lounge locations), use the included mask file in photoshop to cut out the parts of your image that should have been hidden by the table.

Once you have your rendered composite image, you can place it in the same game folder as your regular images.


Testing composites can be made a bit easier by adding the following line to your settings.properties file:

minCompositePlayers=1

This will allow showing composites when  there is only one opponent in the game.

Developer (4 edits)

Finales

Finales are extra spicy activities that players will engage in after the game is won. They are unlocked by beating the opponents multiple times.

Folder

To add a finale, create a sub-folder in the outfit. The name of the folder can be anything, but the game usually uses the pattern finale_X_action for clarity.  The order the finales will be unlocked in is the alphabetical order of these finale folder names.

Images

Put images in the finale folder the same way you would put them in the regular folders. All the same naming formats still work, but only the _composite substring is still relevant in finales.

finale.properties file

The finale folder must include a finale.properties file in it to be detected as a finale folder.

The following property values can be set:

finale.name : The name of the finale as it will appear on the buttons. Keep it short or it will not fit in the button.

finale.partners : A comma separated list of the names of other players involved in this finale. Note that these must be the folder names of the players, not their displayed names. Do not include the current player's name in the list. If there are no other players involved in this finale, simply omit this line.  The partners must be all present in the game for the finale to be available.

Example: finale.partners=victoria,nadia


finale.position and finale.layer these work like outfit.position and outfit.layer, and can be used to specify a different location if the finale is happening in a different place in the room from the outfit's normal location.

Developer (4 edits)

Custom Player Cards

You can add one or more unlockable custom cards for your player. 


Cards folder

At the top level of the player folder, create a folder called cards.

Card sub-folders

Each card will live in its own sub-folder in the cards folder. The name does not matter.

Card image

Unzip the csp.jar file and copy the card image you want from the images/cards folder into your card sub-folder to use as a starting point. Then use your favorite image editing tool to mix in a picture of your player. 

card.properties file

Add a card.properties file to your card folder, with the following property values:

suit   The suit of the card. Allowed values are hearts diamonds spades or clubs . This line is mandatory

value  The value of the card. Allowed values are two three four five six seven eight nine ten jack queen king or ace. This line is mandatory

lock  The condition that unlocks this card. Works like the locks property in the player.properties file.

Developer (4 edits)

Existing player's specs


These are the assets that each of the players in the game were created from.

You can find save files for each player in the render_toolkit.zip, but these assets will need to be installed for them to load fully.

No clothing is included. Makeup and body-morph adjustments may need to be made to match the clothing you give them.

Note that you will most likely get a long list of errors even if you have all these assets, as other character morphs that were installed will exist in the saved model, even if they aren't used and just set to 0.

Most of the opponents also require the Genesis 8 body morphs and Genesis 8 head morphs, and the Genesis 8 female anatomical elements.

Candy

Crystal

Denise

Leah

Rosie

Sandra

Vivian

Developer locked this topic