Indie game storeFree gamesFun gamesHorror games
Game developmentAssetsComics
SalesBundles
Jobs
Tags

Caleb O'Brien

11
Posts
2
Followers
A member registered Dec 18, 2014 · View creator page →

Creator of

Recent community posts

reposting feedback as comment, itch doesn't respect formatting and makes it super hard to read. 

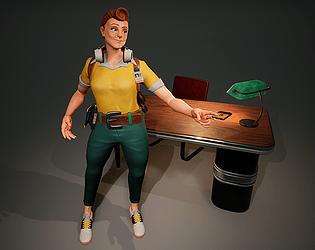
Submission title: Hellhound

Student name: Zahra Tilling 

Challenge tier: Rising Star

Assessor: Caleb O’Brien - Senior Character Artist @Firesprite

Research & Development   

Great work here. I love that you’ve chosen to focus on an area of improvement in creature art, and the concept chosen is wicked. Supporting reference gathered is relevant, concise and supports each element of the design.

My producer colleagues will be happy to see you creating a schedule! Nice job breaking down the project into stages and blocking out suitable time for each. I love that you’ve chosen to focus on your passion, prioritising projects that lead towards your goals and continued improvement. Of course, Uni projects are important, but ultimately it’s your portfolio and knowledge of character art that will weigh most towards landing a role in games so any choice you can make to support this is the way to go.   

Something you could try is having a target platform in mind, mobile/ps5 etc. and the style influence or target for the quality you hope to achieve with the character. Look at existing games to give yourself a rough quality bar to aim for whilst working. For example, Elden Ring, Spider Man 2, Death Claws from Fallout etc. In doing so you can establish constraints and help you make informed decisions throughout development. 

You clearly understand your strengths and areas of improvement which is a great skill. It’s awesome to see you investigating existing techniques and workflows through tutorial’s, taking the time to upskill to feed into the success of your project.  

Technical Art 

Overall, an incredible technical proficiency has been demonstrated here. Your game mesh is approaching industry quality with clean and consistent distribution of polys across the character. 

Perhaps you could push the game mesh further, by selectively capturing more details from the high res to push the silhouette, such as the ridges/profile of the head horns and edges of metal armour. Having a target platform in mind can help when making technical decisions on the game mesh. As you know it’s a balance of quality vs budget, so any chance to demonstrate your eye for optimisation goes a long way.

UV’s are unwrapped and packed well, with consideration taken leaving enough room for texture padding. Where possible, try and lay your UV cuts in the most sensible areas, such as under overlapping elements or across natural seams in the mesh. 

I love how you’ve packed the UVs into sensible texture sets, this technique is often used in games especially on large scale creatures to maintain resolution. Texel density looks solid, but it would be great to get an idea of the texture resolution for each set to further demonstrate your knowledge of creating an optimised game ready asset.

Such a bonus seeing you create an idle animation for the character! It totally brings it to life and pushing things to that next level. Also, I LOVE the subtle pulsing glow in the mouth this is such a great touch. 

Creative Art 

Incredible work. Your sculpt is impressive and I love the interesting variation between elements such as armour, muscle, horns etc. You’ve created a tonne of visual appeal with this character.

I feel there may be some room for improvement on the proportions across the model. The torso, traps and neck feel slightly compressed and short in comparison to the concept. Perhaps the lower legs and feet could be beefed up to build a stronger and believable foundation for the mass of the upper body. This may help balance out the proportions as currently it’s feeling quite top heavy. The ribcage is so awesome, but perhaps some lengthening to the torso would create more room for the lower trunk area, allowing the abdominus and obliques to sit above that waistline.

I can’t put my finger on it, but your creature feels slightly more nimble and agile than the creature in the concept. Perhaps this is due to the sense of scale we get from the stick salesman as opposed to your isolated creature. It’s a tough one but consider ways you can push the sense of scale in the sculpt, study existing creatures such as Godzilla and dragons to understand what makes them feel BIG. Your composition in the final renders could further support scale with choice of lens, DoF and where the character sits within the frame. This could also be down to your pose which gives me the impression the character will be jumping between skyscrapers as opposed to stomping and looming over its enemies.

You may have considered all the above and made your own creative choices to move away from the concept which is totally cool too! But maybe this is an area you can take that step further, consider the mobility and personality of the creature which may influence its design and proportions. Just something to keep in mind going forward but overall, you’ve smashed it with the sculpt.

To push the torn cloth that little bit further, some frayed alpha cards on the edges could help break up that silhouette. 

Impressive work on the textures, I love the result you’ve achieved and the fact you critiqued yourself along the way. Substance painter stack looks well organised and easy for someone else picking up the file to understand. Consider using roughness variation to push your textures further, creating zones of interest from the specular response. For example, the chest/rib cage of the creature appears extremely tough and impenetrable, perhaps the roughness here could support that by being slightly rougher/less shiny in contrasty to the skin.

The teeth don't feel grounded within the character causing a bit of disconnect. Texture around the base of these could be pushed to help embed them in the jaw/gums. A subtle darker gradient around the bottom of each tooth could further support this. I would apply the same approach to the horns and the fingernails, they feel slightly flat in their diffuse causing them to pop out from the skin colour. A dark to light gradient starting from skin connection to tip would help ground these. 

So awesome to see you requesting feedback and acting upon it. Being open to feedback and ablet to receive it well is a massive skill you’ll use daily working in the games industry. It’s clear you’re willing to learn and push yourself and I encourage you to keep this up going forward! Seek feedback whenever you can, but make sure you maintain a few select ‘mentor’ figures as you say and remember you don’t need to apply all and every piece of feedback, be selective to those which serve your projects goals and personal grown/development. 

Documentation 

Excellent documentation. Thank you for giving such a clear and comprehensive look at the development of this character! You’ve clearly got a solid understanding of the character workflow which would give any employer confidence into your ability. If possible, I’d suggest finding ways to inject this into your final portfolio piece in a concise and summarised way. For example, showing your reference, some progress shots, breakdowns, and final summary etc. It’s difficult to get this stuff across in a way that’s easily digestible for people viewing your project, but when done right it can tell someone exactly what they need to know about your skills and experience, leaving no room for guessing.

I think a final round up/project summary would help tie this project out. I’d have loved to hear a few final thoughts touching on lessons learned and goals going forward.  Awesome work overall.

Final Presentation

Final renders and presentation is highly successful. This stage is arguably one of the most crucial as it's how the majority of people will see your work. Good presentation will make or break a project and you’ve nailed it here. The lighting and atmosphere feel cohesive with the characters theme, and the range of wide/close shots really highlights the hard work you’ve put in. 

Perhaps the backdrop is slightly too dark as the character is getting lost in a few renders, especially the turnaround shots. Maybe a subtle gradient and a drop shadow would help here. I think the renders are most successful where you’ve got fog/mist effects in the background plus the rock pedestal. This creates depth and helps ground the character in the scene, amazing job.

Overall, Zahra this is project is incredible and you’re clearly going to be a successful character artist and make a positive impact on the industry. I have no doubt about that. You’re already working at such a high-level and my hope for you is that you continue being awesome and land a junior role in the industry amongst a supportive and inspiring team where you’ll be able to grow exponentially. 

It's only up from here! Your key strengths are creativity, artistic ability, technical knowledge, and an incredibly strong understanding of industry standard practice for character art. I feel the rest of your skills will continue to grow naturally as you gain more experience working from personal project to project, seeking feedback/ looking for areas to improve. I think the biggest area of improvement for you right now from this project and looking at your portfolio, is the overall balance of proportions across a character. This skill will come with time, but there are ways you can push this going forward. Consider performing self-critic of your work, especially in the early stages of the sculpt/block out. Taking screenshots of your character into photoshop to paint over, looking for ways to improve the silhouette, forms, proportions and overall read. When seeking feedback, you could also approach concept artists as they have a great eye for this stuff and could help you nudge a sculpt that little bit further through paint overs. 

My main advice for you is just to keep going! Keep creating character projects that are fun and interesting for you, exploring new areas and techniques which you feel you’d like to improve. I look forward to seeing what you work on next and wish you the best with everything going forward.

reposting feedback as comment, itch doesn't respect formatting and makes it super hard to read. 

Submission title: Hyakkimaru - Dororo

Student name: Joseph Tagsa

Challenge tier: Rising Star

Assessor: Caleb O’Brien - Senior Character Artist @Firesprite

Research & Development
Extensive reference gathered, relevant and well considered. Nice to see you using PureRef and grouping images with annotations. Be wary of throwing too many images into your reference as it can get overwhelming when working. In many cases less is more, especially in an industry setting where you may present work alongside reference during reviews to give your lead or art director something to base their feedback on. If you have too many images it can create more work for yourself as you’ll be giving mixed messages, different people will have their own bias towards certain ref and could provide conflicting feedback. Be clear, concise and to the point with your reference. That being said feel free to keep a more general mood board for your own use that you can use as a sort of visual mind map of the character.

Consider exploring character examples from existing games of which art style you’d like to hit to give you a clear path going forward. Also having a rough idea of the type of game setting you’d see your character in can help you stay focused and make informed creative decisions during production. For example, if it’s a 3rd person game where we mainly see the character from behind, we could consider adding visual interest to the back of the character like secondary animation.

Technical Art
Overall great job here, however some room for improvement on the distribution of polys across the model. Some areas are considerably denser than others. Try and maintain a consistent density of polys across the character. Of course, areas such as the face and hands are bound to require more attention, but for the body your density varies greatly. The density of the upper torso, belts, forearm looks decent so I’d suggest aiming for this consistency across other areas like the legs, feet and hanging skirt.

UVs have been unwrapped cleanly and grouped into appropriate texture sets. Some UVs are sitting at odd angles which could cause stepping in the textures at lower resolution. In future consider taking the time to straighten out rectangular sections of UVs using the lattice tool and straighten features in maya. For the head UVs consider giving the face more UV space by compressing the outer sections like the back of the head and neck. At the moment the face is taking up a small section of the UVs and could cause a noticeable lack of detail at lower resolutions in game. Overall great job on the UVs, it looks like you’ve placed your UV seams at sensible locations. Having some cloth seams sculpted in can give you a nice natural place to add breaks to your UVs.

Creative Art
Excellent block out, nice to see you using poly paint to give an impression of the final look of the character.

Industry standard approach demonstrated with Marvelous Designer. So good that you used time here to iterate quickly on the cloth based on feedback.

It's excellent that you’ve used hair cards for this project with the results looking solid, great work! Hair in games is such a tricky area and can be a specialism in itself. Some advice for future would be to really pin down some solid reference of your chosen hair style from every angle, be concise and break down your reference to fully understand it. Also consider investing some time into a decent sculpted block out to the hair in Zbrush. This can be decimated and brought into Maya to give you a solid base/guide to work off when placing cards. Some flyaway hairs would be a lovely addition to this but fantastic work overall keep it up!

Texturing overall is excellent I love the roughness/material contrast across the model. Particularly love the gritty feel and treatment of gore/blood it’s super effective! It would be awesome to see some worn/frayed cloth in the texture to further support the torn sleeves mesh, potentially even using alpha cards to break up the silhouette and push realism. Also watch out for texture seams, especially on skin where it can be more evident such as where the head meets the body.

Documentation

Clear and concise documentation with a solid overview of the character from idea conception to final piece. Perhaps you could have included some more details on texture resolution/packing of textures and insight into choices you made regarding performance/optimisation of the character. Also, I’d have loved to see a final round up section, touching on your experience with the project overall summarising the journey and highlighting any areas of improvement going forward. I’m sure you’ve got a super bright future ahead so it would be great to hear your thoughts and plans for growth.

Final Presentation
Nice work on the final renders. I love the dark and moody feel you’ve achieved using clever lighting choices. I feel the renders are quite dark, the character gets slightly lost in the background with it being a similar colour to the characters cloth and hair. Some finessing of your lighting set up could help break the character away from the backdrop and a shadow under the characters feet could also help ground them in the scene, giving them a sense of presence.

Your creative skills and technical knowledge are evident. You’ve demonstrated a high level of understanding of industry practices covering the character workflow for games. Sculpting skills are strong, and I particularly love that you’re using Marvelous Designer and creating hair with cards. For your next project I’d suggest focusing on presentation and lighting, perhaps finding successful reference/examples out there to guide you during this stage. Consider things like composition of final renders, depth of field, posing and breakdowns. Considering this is a rising star project and you’re only in your second year I’m super impressed! Great job overall, you’ve created a very successful project here and I can’t wait to see what you work on next. Keep it up!

reposting feedback as comment, itch doesn't respect formatting and makes it super hard to read. 

Submission title: The Scared Gargoyle

Student name: Kevin Tarazona

Challenge tier: SFAS

Assessor: Caleb O’Brien - Senior Character Artist @Firesprite

Research & Development
Love your concept sheet, it’s awesome to see you exploring ideas and iterating on the silhouette and design. The fact you’re experimenting with poses and expressions is a nice bonus too, it gives a much clearer idea of the final character and their personality. Great work on the proportion’s sheets too.

Some further explanation of the idea, project goals and additional reference/research would have been great to see at this stage. Reference is so crucial in an industry setting, although the concept acts as our target, reference is the ground truth which helps us navigate creative/technical decision making throughout production. It also helps align people on the vision for the character.

Consider establishing constraints for your personal projects. This could be things like game type/genre, a rough narrative, target platform (mobile/ps5 etc.) art style influence/inspiration. Doing so will help mirror a real industry setting/live project, giving yourself a track to work inside allowing you to make informed decisions.

Technical Art
No evidence of final game ready asset. Seeing as you’ve got such a successful sculpt down it would be great to see you finish this project out, retopo the character, texture and render in a game ready setting. Keep it up it’s coming along great!

Thanks for providing your ZBrush file, it was nice to get a closer look at the sculpt. When adding tertiary detail to your character and getting into more detail, consider working in a sub d approach instead of DynaMesh. DynaMesh is great for the early stages, blocking out forms and making big changes to the sculpt, but consider ZRemeshing to quickly create clean topology for sculpting, allowing you to subdivide up and project the details of your dynamesh. This will give you more flexibility and freedom, plus more resolution especially when getting into those detailed areas sculpting fine creases and wrinkles etc.

The file was quite bulky and heavy with a lot of WIP subtools making it hard to navigate. Although it’s nice to see your progress, this would be better shown using images or GIFs. It’s worth adhering to good file management and workflow practices as in an industry setting it’s important to create clean files that can be passed between other artists. Consider naming your subtools and using the folder grouping option, this can make your life easier when working on the file too as there’s no guessing required.

It's great to have a representation of the moss in the ZBrush file, but I’d suggest focusing on this during the texture/shading pass down the line to give you more flexibility and to not lock you into the moss placement from the high res.

Creative Art
Great execution of the concept with an excellent sculpt in ZBrush. You’re clearly super creative and passionate about character art. Your concept sheet is very strong and the personality of the character is shining through. Only comment here is that your final sculpt is siding towards a semi realistic style with more defined anatomy etc. compared to the concept, which is quite clean, stylised and simplified. Not necessarily an issue, but it might be worth nailing down exactly what you’d like to achieve out of the project so you can be more focused and decisive whilst working. Again this is where reference, inspiration and having clear goals can work to your benefit. Very nice overall though, I’d love to see how you approach texturing this character.

Documentation

Brief documentation provided with some progress highlighted showing WIP stages of the sculpt. In future try and give a bit of an idea into your decision making and explanation behind techniques used. At the moment it’s unclear what your goals are or if the character is aimed at a game ready setting. Although documentation like this might not be necessary for a final portfolio piece, the principles here will still apply to your breakdown images and during interview when you’ll be asked to go into more detail about your projects

Final Presentation
Presentation of the concept is highly successful and clearly shows that you understand composition and presentation techniques. Hard to comment on the final presentation as the project appears unfinished. The sculpt is clearly presented and poly paint has been used to give an impression of the final textures. Ideally a game ready setting such as Marmoset or Unreal Engine would be used to show off your character.

Keep up the awesome work, I look forward to seeing the results of the finished project and excited to see what you create next! It’s awesome that you’re finding time to invest in additional projects like SFAS, this will all add up leaving you with a strong portfolio ready to apply for industry roles.

reposting feedback as comment, itch doesn't respect formatting and makes it super hard to read. 

Submission title: Fourth Dimensional Traveler

Student name: Henriette Kormos

Challenge tier: SFAS

Assessor: Caleb O’Brien - Senior Character Artist @Firesprite

Considering this submission is unfinished, it’s difficult for me to give in depth feedback. But overall, I love where this is going. You’ve clearly put a lot of time and effort into this already and I hope you find time to finish it out! As it seems like a very ambitious project; you could consider adapting your original scope as you go, aiming to just get the base character finished as I’m sure you’ll have learnt a lot from the process already. It might be more beneficial to apply learnings to your next project instead of getting too hung up on this one. Your skill and creativity are shining through, it’s clear you’re super passionate about character art.

I love how much thought and consideration you put into the concept stage, researching different cultures, existing artists, and taking your own reference images. Your 2D concepts are extremely successful. It’s such a joy to see the exploration and iteration of designs in 2D before committing to 3D. I can’t see any clear ZBrush/high poly shots of your character; it would be nice to see how you’ve approached the cloth (Marvelous designer etc.) Overall, the proportions of your model look solid, and the cloth feels believable and has a nice weight to it. The full character with the backpack and accessories is super interesting and visually appealing, I’d love to see this come to life with textures and lighting etc. Perhaps the hair could be left out for now so you can get everything else over the finish line.

So good to see that you’re experimenting with Xgen for hair creation. I would however suggest that for each project you set clear goals and choose a clear area to target and develop, otherwise you run the risk of losing focus and getting overwhelmed by trying to take on many different areas. It would be awesome to see you attempt a hair study in a separate/future project using xgen or alpha cards.

I can see you’ve textured your character, but it’s unclear from your submission how you’ve laid out your UVs, baked textures, approached texturing and packed textures, and set up in engine etc. It would be awesome to see evidence of a game ready character with consideration for optimisation and performance for a game engine setting.

Overall, I’m impressed with this submission but would love to have seen some more development, breakdowns, and insight into your process. This is a highly unique and interesting character and you’re clearly an extremely capable character artist. I’d love to see what you create next, keep up the awesome work!

(2 edits)

Posting  written feedback in comments as assessment period has ended. Feedback   requested by student via Discord. 

Submission title: Aztec Guardian 

Student name: Donald Careme

Challenge tier: Rising Star

Assessor name: Caleb O’Brien - Junior Character Artist @Firesprite 

Love your choice of concept. It’s great to see you tackling such an ambitious design and following it through with an awesome piece of character art.  

Working from a concept can be useful as it lets us dive right into the character creation process with a strong design to work on from the get-go. With that being said don’t be afraid to experiment around a chosen concept and put your own spin on things. 

I’d suggest taking some time to iterate on a concept by blocking things out in 3D with super rough 2D paint overs on top to help settle on a strong silhouette that looks great from multiple angles. Often times in industry there is back and forth between 2D and 3D to settle on the best final result, so be sure to spend a bit of time in the ideation phase in future. You may even find that you can solve creative and technical problems early, saving you time later on in development. 

Great that you’re showing your reference and inspiration and I like how you’ve separated these out for different aspects of your character. I can see some evidence of this in your mood board, but it would be awesome to see you breaking down the concept into different material properties used such as stone and metal with some solid reference of what you hope to achieve with your materials.  

Documentation

Good overview of your process here. Would be nice to see you diving a bit deeper into your process and decision making throughout the project. Showing more rough block outs and getting in some self-reflection would give some great insight into your thinking and how you put together your character. 

Sculpt 

Great work on your sculpt a brilliant job overall here especially with all the hard surface elements. 

Some minor feedback I’d suggest is bringing in some subtle asymmetry into your sculpt. This could be the last step in the sculpting phase where your taking some time to subtly tweak and a move your final pieces to break up the symmetry and introduce a bit of randomness. This is great to help get a bit more of a natural feel into your characters especially when there are lots of repeated armour pieces. 

I think you’ve done a really solid job with the head and body anatomy as this is often a really tricky area. It looks like you’ve grabbed a lot of anatomy reference which is a good move, I’d highly recommend continuing to practice your anatomy and organic sculpting, spending time studying your reference and checking proportions. Anatomy takes a lifetime to master so stick at it, you’ll see big improvement from each character project to the next. Anatomy4sculptors have some great resources for anatomy, including this cool 3D viewer. https://ecorche.anatomy4sculptors.com/muscle-man 

Game mesh

Your game mesh looks really solid overall. A clean and evenly quadded mesh with supporting loops around areas of deformation. 

If I we’re to be really nit-picky, I think there is room for reductions and optimisation as the mesh feels quite dense in certain areas. Some easy wins could come from collapsing loops in the backs of panel /armoured sections especially where there will be little to no deformation. Don’t be afraid to introduce some triangles here and there to allow you to collapse loops and reduce down the density of the mesh. Triangles are totally acceptable in a game mesh, just avoid using them too heavily in areas of deformation. 

It might help to consider the type of game you may expect to see your character in, and what role they may have. This can help inform decisions like where to focus more detail on the game mesh to make sure certain areas hold up when the player gets close. For example, if you know the player will mostly see your character from the torso up, focusing on the head, then you can make sure you’re throwing a few more polys around there to support the high-res details within the game mesh. 

Neatly packed UVs with efficient use of space. Nice work grouping your mesh into texture sets as different shaders would likely be applied in engine for cloth, skin etc. I think 4k is a little overkill for some sections, especially the feathers. I’d expect to see some of those texture resolutions capped in game, most likely at 2k or lower. Just something to consider for pieces on your portfolio as it’s a great exercise to introduce some limitations into personal projects to encourage you to stay within budget. These days it’s often textures that are optimised first over polys so it’s great to get into the habit of packing textures and authoring them at appropriate resolutions. 

Pose

Great work with your poses. I love that you’ve created 2 poses as it really helps give a good impression of what the character might look like in a game setting with animation applied etc. 

I love that you’ve taken inspiration from the concept for your 1st pose, however I feel the pose could be pushed slightly further in order to better match the concept and achieve some dynamic gesture. The thing I feel is lacking most in this pose is that there is no movement or angle change in the hips or shoulders which results in a slightly stiff feeling pose. I think it would really help if you introduce  some contrapposto, adding a subtle offset between the angles of the hips and shoulders might help to loosen up the pose. 

Really study the concept here for subtle weight changes and angles. It may also help to find some solid reference of badass poses with legs stood far apart, angled hips and shoulders etc. just to get a bit more of a dynamic feel into your characters pose. 

Pushing the asymmetry of the pose may also have some benefit, for example turning the head further to one side and shifting the angle of the neck or even having one knee slightly bent and the other straighter, this would naturally push a stronger angle in the hips too. 

2nd pose is great; I really like that you’ve created your own unique pose separate to the concept which helps to give us more insight into the personality of the character and tells a bit of a story. I think you’ve nailed it here, my only suggestion would be to lower the head slightly further, as if they are looking down deeper in thought like they’re about to go into battle. This would also give us a nice view of the helmet and could create an interesting shape with the feathers rising above breaking the silhouette. 

Texturing

You’ve done a great job on the texturing overall, however one area that stands out to me the most is the skin. I think the skin would benefit greatly from some breakup in the colour. It’s missing some warmer tones and varied skin hues, feels quite monotone and flat overall. You could try using grunge masks to introduce some noisy colour breakup into the skin, as well as making use of your thickness map to bring in some more saturated tones. I’d recommend taking a look at images of scans for reference such as 3dscanstore, 3d.sk and texturingxyz. There is quite a lot of skin on show with this character so lots of room to add visual interest here. 

The feathers could do with a little more colour variation and breakup. They feel slightly flat and one tone. Grab some solid reference here and study the concept as there are some lovely yellow hues within the quill/stem which bleeds into the veins of the feather. Some darker dirtier colours might help to introduce a bit of breakup and variation.

It would be great for you to show the different channels of your textures applied to the character such as metal rough so etc. I’d suggest bringing in some grunge and breakup into the roughness of the leather and metal sections to create an interesting response with the lighting.  

I think with the weapon there’s room for you to add some interesting material variation between certain elements. One great example and an easy win here is making the fins/blades of the weapon metal rather than stone. Currently the weapon is all one stone like material, whereas in the concept the blades have a lovely metallic treatment. This might help the weapon feel more lethal and you could even add chips and scratches to show they’re battle worn. You may need to reduce the width of the blade edge slightly within your game mesh in order to sell that it is a sharp object. 

Perhaps bringing in an emissive channel into the orange patterned sections on both the armour and weapon could be an interesting touch. You may have added this already, and if so, I think it could do with really bumping up in the strength in order to bring these details out. This will also help to achieve more of that vibrancy in the colours as seen in the concept. Even some emissive glow in the weapons mouth to suggest fire might look awesome too.

Your texturing is really strong overall so nice work here. It looks like you’re going for realism and your textures are working well to support that. 

Lighting and final presentation 

Overall the colours feel quite desaturate and cold. Perhaps this is due to your lighting or HDRI set up. It would be great to see the blues and orange hues pushed further to bring back some of that interesting contrast seen in the concept. Try playing around with your lighting set up and HRDI’s and don’t be afraid to revisit the colour values off your textures to make them more vibrant. 

Something I’ve found really useful is finding good examples of presentation on Artstation and saving them for future reference. Artstation has a great ‘Collections’ feature which is perfect for this. I’ll share a couple of examples here of ones that I feel do a really solid job of presenting their characters. Some things to consider are of course lighting, composition, use of background etc. Also consider how many images there are, what are they highlighting within the image and any interesting breakdowns or under the hood type stuff is great too. 

Great presentation overall here: https://www.artstation.com/artwork/wJOQ8g

Hazel Brown has some great examples of things to include alongside your renders, like wireframes etc.: https://www.artstation.com/artwork/lxnwVe

Something as simple as a shadow beneath the feet to help ground the character into the scene will really help. At the moment, in your renders the character is floating in a void and not connected to the floor in any way. Adding a simple shadow will really help to ground your poses and sell a sense of weight.

Honestly, you’ve done an absolutely amazing job on this character overall, especially considering the time frame you managed to complete this project in. I feel like it’s just lacking that final 10% of polish to really hit the ball out of the park. 

I’d strongly suggest taking a week or two to revisit this project when you can find the time, just to push everything that last little bit leaving you with a super solid portfolio piece. Perhaps just focus on the pose/texturing phase onwards to wrap this up nicely. No need to be too destructive with tweaking topology and UV’s etc. as these are areas you will keep improving on as you work through your next characters one after another. 

Here is a hit list of areas of improvement, of course this is just my opinion so take from it what you will. I’ll briefly summarise here what I’ve covered in the rest of my feedback. But I think improving in these few areas will greatly increase the quality of the overall project. 

- Skin variation/colour breakup  

- Colours need to be warmer and more vibrant across the board (textures and lighting) 

- Add/increase strength of emissive glow on the orange pattern sections (armour and weapon)

- Add metal to the weapon fins/blade on the outer sides. 

- Poses can be pushed slightly further, more gestural, and dynamic

- Lighting needs to be moodier and more contrasty. Feels quite studio diffuse lit at the moment and doesn’t support the themes of the character

- Add a shadow beneath the characters feet to ground them on the floor plane 

- Show more breakdowns such as wireframe overlay, high poly zbrush render, PBR channels like metallic and roughness etc. 

Thanks for reaching out for feedback and best of luck! Please give me a shout if you have any questions. 

(2 edits)

Posting  written feedback in comments as assessment period has ended. Feedback   requested by student via Discord. 

Submission title: Unholy Matrimony

Student name: Chelsea Cowan

Challenge tier: SFAS 

Assessor name: Caleb O’Brien - Junior Character Artist @Firesprite

First of all, I’ve got to commend you for taking on such an ambitious project. You’ve created something really unique and absolutely nailed the prompt too which is great to see!

Concept, research, and development 

I really like the concept you’ve chosen. Very impressed with how you’ve handled the translation into 3D, considering the complex design which features little to no symmetry. 

In an industry setting there would most likely be a lot of back and forth between 2D and 3D with this type of character, in order to settle on the best result that feels most appropriate in a 3D game setting.

With that in mind, perhaps in future it might be beneficial for you to experiment on top a chosen concept with some 3D concepting in ZBrush. Spending some time in the ideation phase, iterating between 3D block outs and 2D paint overs, you may find that you can solve creative and technical problems early on, saving time further into the production.

I love that you are thinking about backstory, exploring ideas about how this amalgamation came to be. It's great to see you putting your own creative spin on things in this way as this type of exploration can help feed into the personality of the character. Even aspects such as the games setting, gameplay attributes and character emotions can help influence the design and are worth exploring in the early stages. 

Good choice of references, a clear focus and not too overloaded in terms of number of images. Love the material sphere reference for the gore. I’d have loved to see further evidence of research and perhaps a few more reference like the hand sculpt from Evil Within as this seems like a really good target for your sculpting.  

Sculpt 

Overall I think you’ve done a great job with the sculpt. There’s something about it that evokes a miniature/Warhammer aesthetic which I quite like, there’s a nice stylisation to the sculpt overall.

Perhaps some areas of the sculpt could do with refining/tightening up a little bit to get away from that miniature sculpted feel. For example, the feathers feel quite thick and heavy, they would probably read well for a top-down stylised game, but perhaps alpha card feathers could be worth exploring in future.  

Lovely work on sculpting all the grotesque detail. I agree with your statement about how it could have been pushed more to be closer to the references, but I think your details are consistent throughout resulting a cohesive sculpt, which is difficult when working between anatomy, monster flesh, cloth etc. 

Marvellous

Really nice to see you using marvellous which has given you some lovely draping cloth and folds.

Something I’ve started to understand more only very recently is anatomy of cloth, the different types of folds and how they sit. Often times with Marvellous cloth it can take a bit more finessing in ZBrush to really get the most out of it. For example, sometimes Marvellous cloth folds can look a little sharp in some areas and need smoothing down/rounding off. Hand sculping in supporting folds and using wrinkle/memory fold alphas to add creases and secondary details can really help tie everything together. 

Here's some videos that I find really useful when trying to understand cloth anatomy.

Outgang: Cloth and fold anatomy - 

Raf Grassetti: Sculpting Cloth 

ModernDayJames: Cloth and Drapery

Texturing

Fantastic job on the texturing, especially all the gruesome gory details which you’ve nailed. 

Not often that you can describe something as disgusting and grotesque in feedback and it be a good thing! Love all the lighting response to the roughness information in the fleshy bits, great work.

It could be interesting to feature a render of your character with base colour channel view alongside your other breakdown images. This will help to give further insight into your treatment of textures. 

Game mesh

Overall, I think your game mesh looks solid, nice evenly spaced quads and clean loops around areas of deformation.

Ideally the character would be sculpted in a more neutral pose, allowing for a deformation friendly game mesh that would leave more options for rigging and animation down the line.

Something to consider in future is your density/distribution of polygon resolution within the game mesh. Try and look for areas that you can optimise to save on polys which will free you up to add more resolution/loops into other areas. For example, the feathers and eyebrows look quite dense which could be reduced slightly and then perhaps more resolution can be added to the large eye socket to allow for a smoother silhouette.  

Similarly, the cloth sections look like they could be evened out and optimised slightly, overall, a really solid job here considering how complex this construction is. You’re demonstrating a good understanding of topology.

UVs

I can imagine this wasn’t easy to UV! Totally agree about the UV optimising, I’m sure it was mostly down to time that you had quickly unwrapped and packed them. I highly recommend showing off some really solid examples of UVs in your portfolio with future projects as it’s definitely an area that employers will look at during portfolio reviews/interviews. 

Nice job separating the mesh out into separate texture sets. Something I’d suggest is ensuring you keep the rotation of your UV islands consistent. I noticed some stepping in the pixels within the texture of your hair strands. Ideally the hair sections should be laid out straight and all following the same direction, the same goes for cloth elements too as it will make it much easier to add tiling details/patterns down the line. You could use the something like the lattice tool to warp your UV shells into a more even and straight shape.  

Rig

I love that you challenged yourself with rigging this character! Massive props to you for even attempting to rig and skin this from scratch. Creating a rig for a character like this could be whole project within in itself so great to see you having a go at it. 

You’ve managed to capture an awesome pose in the model itself so I don’t think your rig is letting you down at all really, although I’d agree with some of your other assessor feedback that ideally the character would be modelled in T-pose to allow for more freedom with rigging and animation. I can imagine a character like this having limited movement in game and it would probably limp after you slowly, so at the end of the day the result you’ve achieved here is very nice.

In an industry setting characters like this would go through multiple layers of discussion between various disciplines in the early stages to achieve the best option that satisfies all parties. I would imagine concept art, character art, tech art and tech animation/riggers would all be involved to make sure the most awesome design was plausible, whilst considering limitations such as cloth simulation and rig complexity etc.

So don’t worry too much about your rigging issues here, at the end of the day you’ll be making static meshes in industry that are passed onto riggers so as long as you can achieve an awesome pose and presentation for characters in your portfolio, I wouldn’t worry about getting too caught up on the rigging side. As long as you can demonstrate a good understanding of static meshes built with deformation in mind, then you could even use auto riggers like mixamo, and then hand posing with transpose in ZBrush or soft select in maya to get the best result out of your model.

The pose is very dynamic and has a great sense of movement. I love the solid fist connection with the floor as it gives the pose a really grounded feel and helps support the feeling of great mass and weight of the upper body lurching towards the viewer.

There’s some great gesture in your pose and it feels very dynamic especially with the cloth and hair elements lending to the sense of movement.

Lighting/Presentation 

Really well presented, nice clear renders with a lighting set up that supports the horror theme of the piece, dark and moody. I love the contrast and strong rim lighting which helps to highlight the interesting silhouette of the beast. Your lighting set up helps bring out all those interesting roughness details which is great to see. 

This is super nit-picky, but I think a drop shadow on the floor would help make the character feel grounded and convey a stronger sense of weight and mass. This type if shadow could even be done in post using photoshop, just something super simple. Often a shadow can help make sure your renders don’t look like they’re floating in a void and can add a bit more context to the final result. 

I think you’ve done a great job with your lighting and presentation overall, definitely a strong point for your project nice work! 

Great work with the frayed edge on the cloth, I also love the torn sections on the back revealing the skin underneath! It would have been great to see the frayed edge continued on the base of the red cloth as it feels quite sharp and polygonal in places. Perhaps some more dirt and scuffs within the textures would have been a bonus here too to break up the large colour sections of cloth, but great job on the cloth overall considering how much there is draped across the character! 

Nice documentation, super clear and easy to follow. It's great to see you taking the time for self-assessment throughout the project. This is something that is a bonus to see as it gives a taste of one’s personality and work ethic, so it’s clear to me that you are passionate about growing stronger as a character artist and learning from your experiences. 

The personality of your character shines through and it creates a strong first impression which can be hard to achieve! Fantastic job on this, I look forward to seeing what you create next! 

Feel free to reach out to me if you have any questions or would like any further feedback. 

re-posting feedback with spacing, hopefully this is a bit easier to read through!

Submission title: Azealia, The Crime Daughter 

Student name: Morgan Crossley 

Challenge tier: Rising Star 

Assessor name: Caleb O’Brien - Junior Character Artist @Firesprite 

Research & Development

Good research into the theme to help inform the characters design. I like your Silhouette sketch which captures the essence of the character; however, it would have been great to see how you took this idea and iterated on it to settle on a final design. Perhaps through exploratory sketches or rough 3D blackouts with 2D paint overs etc. Nice work and it’s great that you’ve been really ambitious, challenging yourself with creating a character to fit within a specific art style and world. This was a really smart move as it provides you with clear and defined boundaries in which to work within that has helped you to focus in on your own interpretation and have fun with it. 

Technical Art 

Game mesh and UVs 

Some areas are working well and demonstrating examples of good topology, such as the face, lower arms and upper legs which feature evenly spaced loops and a more appropriate density of quads. However, the mesh is slightly too dense and non-uniform overall. One area that stands out the most to me is the shoulders/upper arm which is lacking flow and consistency. This is an area that you would ideally benefit from clean loops running around the shoulder so as to allow for the best result when the character deforms. 

In most cases, decimation master isn’t suitable for creating game meshes for characters as the meshes will simply not hold up well during deformation. Decimated meshes are also extremely difficult to UV map successfully and you may be left with a faceted surface in engine. Totally understandable to try and save time here, especially working on such a tight timeframe for the challenge. In future I would suggest giving more priority to the retopology/game mesh stage as it really is the key element to ensure your work would be suitable in a game setting. I’d highly recommend using something like quad draw in maya and going in by hand to place quads for a more consistent and successful result. Think of this stage like sculpting, laying down your primary forms broadly with quads before increasing the density to support secondary/tertiary details with geometry. 

Something else to consider which may help and make things more manageable to work with is splitting you meshes where they would naturally be separated in real life, for example you could break the forearm off from the jacket sleeve to create a cleaner transition across the elbow. 

UVs are grouped appropriately into separate texture sets for each element. The UV layouts themselves could do with neatening up a little as the angle/direction of UV islands feel quite random. Try to avoid odd angles for UV islands as stepping will occur, especially at lower resolutions. 

Consider studying successful game meshes with clean gridded out quads and efficiently packed UVs, here’s a great example www.artstation.com/artwork/g8oDYG 

Rig 

Great to see you posing your character and the blender solution seems to have given you a successful result despite potential issues with the game mesh. 

Creative Art 

Overall I think this is where your project shines brightest for me, most notably in the strong personality you’ve captured. You’ve created a really interesting character with lots of unique elements. I especially love the design of the steampunk style parts like the leg which are cohesive with your original theme and inspiration. 

The character has a lot of personality which is pushed further with your poses and it’s great that you’ve created a prop asset to help present your character in context.

Sculpt 

The sculpt is successful overall and I can tell you’ve put a lot of work into the head and hair which are setting a good benchmark for your desired style, sitting closest to the Arcane treatment. I feel that you could have pushed a few areas further with the rest of the body in order reach the same quality bar you achieved with the head/hair. Some sculpted forms are feeling quite soft overall such as the shoulder pad and shorts. Sharpening up certain surfaces and defining sharper edges may help to bring in a nice balance between organic and hard surface elements. Don’t be afraid to really push certain shapes to strengthen the visual read and silhouette, like for example enlarging the shoulder piece. The character may also benefit from more asymmetry in certain elements, such as the scarf. 

Documentation

 A clear and concise insight into the characters development with supporting annotations going into more detail. 

Pre-production 

Really solid intro with some nice insight into your chosen theme and inspiration. It’s great that you took the time to create some mood boards and gather reference to help achieve the specific Arcane art style. 

Production 

Clear overview of development with some nice insight into specific tools and processes used. 

Post-production

 I think some insight into the engine set up and lighting rig would be a bonus here as the document rounds off sharply to a finish after the rigging phase. I’d have loved to see a brief summary of your tools used to create this piece, along with a short retrospective discussing your lessons learnt and how you will improve on your next character. 

Final Presentation 

Nice work creating a number of poses to portray the personality of your character. The lighting is feels moody and dark which is in keeping with the project themes and the composition of the final renders is strong. 

I think the renders could benefit from a slightly different background and lighting set up as some of the features of the character blend into the backdrop and are a slightly hard to read. The lighting feels slightly blown out especially against the skin, perhaps leaning towards a more traditional 3 point set up would give you a clear result. 

I think your final shots could feature an image with multiple turnarounds on one page in order to give a good look at the character from every angle. Currently the viewer is constrained to one angle from which to view your work. 

If this were for a character art portfolio, I’d love to see your final renders supported by some more breakdown type shots of your character in A-pose with wireframe overlayed and turnaround shots from different angles. Be sure to show off some renders of your final sculpt too as it’s nice to see how this has translated into the final game res character.

Overall some really nice work. The project demonstrates a lot of great potential and a good understanding of the character creation workflow for games. I recommend that you keep at it and continue creating awesome characters, you will only improve the more you tackle interesting challenges and work through the pipeline. Stay inspired and keep making awesome art I’m looking forward to seeing what you create next! 

Feel free to reach out to me if you have any questions or would like any further feedback.

re-posting feedback with spacing, hopefully this is a bit easier to read through!

Submission title: Guardian of the forests  

Student name: Dominyka Baliuanite 

Challenge tier: SFAS 

Assessor name: Caleb O’Brien - Junior Character Artist @Firesprite 

Research & Development   

Really nice concept I love that you took the time to explore and iterate an existing idea of yours with sketches before designing the final look of the character.  

There is little research or reference evident in the final document. I think a mood board or reference sheet would have been really nice to see here. This is especially important when aiming for a specific style such as Apex legends. I’m sure you do have some solid reference for the character, totally understand if you ran out of time to include this in your document.    

Technical Art 

Game mesh 

Good quality game mesh with evenly spaced quads and clean loops around areas of deformation. In future keep an eye out for separate elements that sit next to each other and ensure the loops line up across both meshes. You’ve nailed this for the most part with consistent density between separate elements. Nice clean loops in the face to support animation. I feel that you could be slightly more generous with the density around the hair line in order to support the nice fall off and details you’ve captured in the sculpt as the final hairline/scalp transition feels quite sharp.  

UVs are packed well, you’ve taken the time to lay them out efficiently by gridding them out nicely which is great to see. Appropriate use of texture sets to separate skin from cloth etc. One thing that may help with future characters is placing edge loops and running your UV seam lines along natural seams in the sculpt such as over the cloth seams. This helps to better hide your UV seams and means that if you tile patterns over the model they will terminate naturally at the cloth seams/intersections as the UV seams match the construction of the garment.  

Baking result is really solid and the high res sculpt details have for the most part translated well into your game mesh with no visible baking artifacts. Some of the lovely soft cloth folds evident in the sculpt are hard to spot on the final character. Don’t be afraid to support larger cloth folds with geometry by cutting them into the game mesh, or perhaps by pushing these details out further in the texturing phase. Certain features such as the jacket fold over the chest could be captured with geometry in order to support the strong lip of the cloth sections layered over one and other.  

Rig 

Highly commend you for creating a rig from scratch for this character. The final poses are very successful and dynamic so clearly your game mesh is set up well for defamation.  

Engine set-up 

Good material set up in engine and nice to see use of packed textures and material instances.  

Creative Art 

Sculpt 

Your sculpt is fantastic you’ve done a great job at capturing that Apex Legends style. The silhouette of the character is really interesting and unique featuring strong and appealing shapes. You’ve achieved great material expression with the cloth and fur feeling very soft which is aligns with your red panda inspiration. The hair treatment is lovely too really nice work here, though I do feel it would benefit from a few fly aways breaking away from the larger clumps of hair.  But overall you've got a really nice balance of realism and stylised which creates a very appealing result.  

Texturing 

I think you have a really solid base here and some lovely colour balance cross the model that creates a beautiful visual read. However, I think the material expression could be pushed slightly further, especially if you’re aiming for the desired Apex Legends style. Roughness levels on face/skin are working well and the make-up looks wonderful especially the way it creates highlight on the cheek bones from certain angles. The material expression on the tights is a good benchmark for the style you should aim to hit, I think the cloth needs a little work more work to reach this same quality bar. The surface on the cloth is a little hard to make out and could benefit from some weave influence into the diffuse/roughness. You could also consider scaling up the cloth weave details slightly so they read better from a distance as the materials feel quite smooth in the final renders.  

Pose 

Your poses are very dynamic and full of personality! Great work posing the face of your character too in order to add lots of life into the final renders. Your poses and characters personality are definitely the highlight of your project for me along with the brilliant sculpt.  

Documentation 

The documentation is clear and well-presented but sadly lacking overall. It would have been great to see further insight into how your character was put together. The broad strokes are covered well but there are no notes discussing interesting challenges and how they we’re overcome.  

Pre-production 

I like the fact you chose one of your old concepts and developed it further with some exploratory sketches. It’s great to see you exploring potential poses and personality in the early stages in order to inform your creative and technical decision making.  

Production 

Although each stage of the pipeline is nicely presented and evident in the doc, I would have liked to see more breakdowns and work in progress work like sculpt block outs etc. with written commentary in order to support the final result in each stage.  

Post-production 

Project has been rounded off nicely with some fantastic renders and presentation. However it would be great to show off a the tools and software used during development, along with a brief summary about the project as a whole and your lessons learnt.   

Final Presentation  

Final presentation is extremely successful. The character is presented clearly and well-lit creating some really aesthetically pleasing images. I love that you’re capturing a sense of movement in your leaping pose, showing this off from two various camera angles. The standing pose is fantastic too, you’ve captured a beautifully subtle gesture between the hips and shoulders that adds a tonne of personality to the character. My only criticism is that I’d love to see a firmer connection to the floor plane in the standing poses as the character feels like it’s floating in a void rather than being grounded within the scene. A Simple shadow beneath the feet would be enough here to really solidify those feet on the floor, supporting an already strong pose. You could even fake a floor shadow  in Photoshop. 

The final renders on your submission page would be perfect for an Artstation portfolio piece. Be sure to include renders of your sculpt and game mesh alongside in your portfolio as you have created a very strong piece here and I wouldn’t want this hard work going missed, great job! I'm Looking forward to seeing what you create next. 

Feel free to reach out to me if you have any questions or would like any further feedback. 

re-posting feedback with spacing, hopefully this is a bit easier to read through!

Submission title: Wandering Knight

Student name: Yunice Liao

Challenge tier: SFAS

Assessor name: Caleb O’Brien - Junior Character Artist @Firesprite

Research & Development

The project is supported by strong research which has clearly fed into the final outcome. Initial concept and theme have been analysed into key words to find the essence of the character which is then supported by your own sketches/concept. It’s great to see you taking the time to give yourself a really strong foundation to build upon. A lot of work has been completed on the characters background which helped solve potential problems and inform creative decisions at an early stage in development. Also, it’s a nice bonus to see you thinking about how players will interact with your character, showing your focus is on creating an interesting character for a game setting. 

Technical Art / Workflow

Clear demonstration of knowledge for industry standard workflows and software.

Game mesh

Successful game mesh that captures the forms and silhouette of the high res well.  Reasonable poly count which feels in budget for a character in this style. The mesh features clean and evenly spaced quads with consistent poly flow, particularly in areas between two separate meshes that overlap each other (Chest armour and should piece for example)

If I were to be really critical, the short branches/growths from the head look quite dense and could be optimised/reduced down very slightly. Also, with the details of the mouth sculpted out beautifully in the high res I would expect the shapes of the lips to be better supported in the game mesh with poly loops around the mouth etc. This would support an opening in the mouth that would allow deformation/speaking if the character we’re to be animated in an industry setting. 

Rig

Really nice that you’ve created a rig for your character, and I like that you experimented with different rigging methods for each pose.  

Engine set-up

Good use of packed textures and the maps and are authored at appropriate resolutions for the style, which would be efficient within a game setting.

I love how you've presented your texture maps, visually demonstrating the textures resolution in context to one and other. Consider showing the UV wireframe over these to better demonstrate how your UVs have been packed. 

Creative Art

Sculpt

Fantastic work on the treatment of the wood! The stylisation is consistent across the character with interesting flowing primary forms supported by finer detailed wood grain, making for a really pleasing visual aesthetic. The character has a tonne of visual appeal overall! I really like that the flow of the wooden forms echoes the once human anatomy/muscle structure of the character. You’ve also done a great job at balancing the details across the sculpt with densely detailed sections that are supported by areas of rest. 

One minor criticism would be that the final character could benefit from slightly more asymmetry, most notably in the lower legs. I think the silhouette break in the shin is a really nice touch, but due to the fact that this element is mirrored makes the symmetry easy to spot. The mirroring of the arms has been broken well with the asymmetrical vine detail on the left arm. There seems to be some asymmetry in the sculpt which was when translated into a game res mesh, perhaps for time reasons which is understandable. The green/vine details are lovely, with the vine growing out of the nose being an especially nice touch. 

Texturing

Textures are successful and support the stylisation of the sculpt. You’ve created some really nice variation in the material read between the different elements of the character which all add to the overall appeal. I love the subtle hint of skin tone blended with the wood in the face, It’s great to see your story and inspiration seeded into every aspect of your characters development. It would have been nice to see this textured transition supported within the sculpt to really enforce the idea that the wooden/nature aspect is slowly infesting and creeping its way into the knight. 

The wood texture treatment is lovely and helps support the visual read of the sculpted forms. There’s also a really nice balance of wear and tear across the character which helps add to the wider story. In future you could consider using subtle gradients as a way to create focal points. For example, a gradient from top to bottom slightly lightening the face to draw the viewers gaze could help with the overall read, especially if this character were in a top-down 3rd person game setting. Don’t be afraid to bring some AO and subtle baked lighting into the diffuse colour, especially in more stylised pieces such as this one. This can really add depth and help with the read from a distance. 

Overall, I’d love to have seen a bit more greenery on the character like is evident in the concept. This could even be done in the texturing phase to help break up the larger brown wooden sections.

Pose

Excellent work creating two varied poses walk/Idle and run/fighting stance. The poses strongly support the background and personality of the character and give a good impression of the characters presence in a game setting.

Documentation 

Pre-production

It's clear that lots of work has gone into the pre-production stage in order to find a strong direction for the character. Inspiration has led to in depth research into the theme along with essential mood board/reference gathering to help inform the creative process. There is a clear flow to follow through your development of the character with a strong final piece that beautifully represents the themes explored in the initial stages. Great work! 

Production

Very thorough documentation. Clear evidence of each stage of production supported by images and informative text commentary. There is some clear evidence of creative decisions being evaluated during production in order to settle on the right look. For example, during the head sculpting phase multiple variations have been experimented with in order to find the most successful direction.

Post-production

Really strong final renders echoing the theme with consistency between each image. You’ve created an awesome stylised character which would feel right at home within a game setting. The documentation is capped off nicely with a brief conclusion of the project discussing the experience. 

Final Presentation

Overall you’ve created some really nice final renders that show off the character in a clear and effective way. Good use of lighting and fog to create a strong atmosphere and feeling of wandering through a dark forest. In order to push the lighting further I think the overall brightness could be lowered with some more intense lights used to strengthen the contrast and support the moody effect. To achieve this perhaps some lighting that emulates a strong full moon lit night would help to further highlight the characters silhouette whilst tying nicely into the setting. A darker scene could also draw more attention to the lovely details of the mushrooms and spores with a subtle emissive glow highlighting the face.  

The final composition could be enhanced with a simple ground plane featuring some scattered foliage (similar to the grass on the characters head) to help support the narrative of a woodland setting. A basic shadow under the feet would also help to ground the character in the scene as it feels like it’s floating in a void. Even a quick Photoshop shadow done in post would work here. 

I love the render with the character in ‘A-Pose’ with 4 turnaround angles featured in one image. I’d love to have seen an image like this with the wireframe mode overlaid over the final render to give a really clear look at your game mesh. Also, some nice renders of your high res sculpt from multiple angles would be a lovely addition to your final shots for your portfolio. 

Check out the Darksburg characters such as this one on Artstation below for some good examples of lighting and presentation. www.artstation.com/artwork/XBBe8w

You've created an awesome stylised character with this project, and you have clearly learnt a lot in the process! It’s great to see you reflecting on the project as a whole, discussing your findings and how you can apply this to future projects. Really looking forward to seeing what you create next and best of luck! 

Feel free to reach out to me if you have any questions or would like any further feedback.

re-posting feedback with spacing, hopefully this is a bit easier to read through!

Submission title: Queequeg 

Student name: Colin Daniel 

Challenge tier: SFAS 

Assessor name: Caleb O’Brien - Junior Character Artist @Firesprite 

Research & Development 

I really like the fact that you made time for research and collected strong reference, especially for your character's pose. I can certainly see the influence of this research in the final result. Really strong concept. Love the research and reference. Your influences and inspiration have really come through strong in the final result which makes for a unique piece. I absolutely love the fact you took the time to explore different colour palettes for the character. I can tell you put real thought and conscious decision making into each palette and clearly the final result has benefited greatly from this experimentation. It’s great to see you trying out more extreme ideas such as the clown fish variant in order to help boil down to most successful outcome. 

Technical Art / Workflow 

Game mesh 

Really solid result from your baking. The high-res sculpted details have translated really well onto your game mesh and you’ve done a good job of supporting important forms with geometry. Nice choice of marmoset for the baking too as it has clearly given you a solid result, especially using the grouping feature you’ve created a clean result with no visible artifacts. 

Rig 

Really nice work on the rig it’s fantastic that you’re demonstrating a good understanding of rigging and skinning as this can feed back into your decision making when laying out polys for game res meshes. The rig seems to have supported some very successful poses and a brilliant idle animation which is the icing on the cake. This will really help your portfolio stand out to employers as it’s much easier for them to picture your work in a game setting. 

Unreal Engine 

The character is supported by a successful material set up in engine, with some extra features explored in the skin shader such as subsurface and a really nice use of Fresnel plugged into the diffuse/metallic giving the scales a lovely effect. It would be great to see you working with packed textures in future in order to optimise the material set up, but overall, really solid work here. 

Creative Art 

Sculpt 

Very strong sculpt. High fidelity details such as the scales are supported by areas of rest creating really nice balance of details across the model. Texturing Texturing is extremely successful. The scales are a highlight for me. I love all the different varied materials and elements which create lots of visual interest but still achieving a cohesive result. Lots of nice information in the roughness too that helps sell the idea that this is a seafairing creature. 

Documentation 

Pre-production 

During pre-production and throughout the development it’s clear that you’ve took time to gather reference in order to better inform your creative and technical decision making. 

Production 

Documentation is very strong and each step of the character's production is clearly laid out and easy to follow. Key stages of production are evident with a nice level of detail, supported by notes on interesting design and workflow choices throughout. I really like how you jumped between ZBrush and 2D paint overs to quickly iterate the design of the character. Artistic methods are thoroughly documented, specifically during the sculpting phase showing a solid understanding of various tools and techniques to create complex details such as the rope and scales. 

Post-production 

I’d have loved to see your final thoughts on the project as a whole, touching on areas that you feel we’re successful and areas that you feel you could improve in. If you haven’t already, I’d highly suggest taking a step back and evaluating your project in order to determine what worked well for you and how you could improve going forward into your next character. After completing a large project like this it can be really illuminating as to what your strengths and weaknesses are. 

Final Presentation 

Final lighting is well thought out and creates a strong mood and feels consistent with the theme of the character. Really nice use of rim lighting to highlight the strong silhouette. Final renders feature an extremely strong composition which reinforces the interesting elements of the character and shows off all the hard work which has gone into creating the final piece. Not only are the static poses really strong but you’ve even took the time to create a simple idle animation which is a lovely bonus. Overall you’ve created a fantastic piece of character art that demonstrates creative skill and a solid understanding of the pipeline. Queequeg is extremely visually pleasing and has a tonne of personality which is an epic feat in itself! Really great work I'm very impressed with this project. 

Feel free to reach out to me if you have any questions or would like any further feedback.

(1 edit)

re-posting feedback with spacing, hopefully this is a bit easier to read through!

Submission title: Food Seller
  

Student name: Ibim Krukrubo 

Challenge tier: Rising Star 

Assessor name: Caleb O’Brien - Junior Character Artist @Firesprite 

Research & Development     

I love the concept you’ve chosen; It’s quite a unique character so it’s great to see that you’re being really ambitious tackling such an interesting design. It’s clearly given you a strong starting point and enabled you to dive right in and get to grips with the pipeline, without getting too held up on the initial ideation phase.  

The final character has a lot of personality which has clearly emerged from a number of decisions throughout development that are supported by good research. Creating a basic narrative for your character really helped to inform choices such as pose and presentation that has led to a successful final result.  

Good amount of research with some strong reference images to inform things like anatomy, clothing, and props. The props fit really well with the theme and add a lot to the original concept supporting your narrative of a family business. Very nice solution for the back of the clothing which feels in keeping with the original design. I especially like that you chose to tackle some expressions for your character which help to reinforce the personality. 

Perhaps some evidence of further concept development, such as rough sketches of your poses/final scene could have been a nice bonus and helped to inform the final renders.  

Technical Art      

Overall you’ve demonstrated a solid understanding of the character workflow making use of industry standard tools and processes. Overall I’m really impressed with your toolset for this project. 

Marvellous designer 

Fantastic to see you using marvellous designer at this stage. It has clearly given you a solid base to develop further in ZBrush. 

Substance Designer 

Marvellous and substance designer are a nice bonus to a character artists kit. A common use for substance designer in the character pipeline is for creating tiling detail maps for cloth weave that are overlayed in engine. It would be awesome to see you tackling something like this in the future as it seems you have a good understanding of substance designer already.  

Game mesh 

Overall the game mesh is of good quality, with a suitable polycount that supports the style of the character. Some areas feel a bit uneven such as around the mid-section, try to maintain clear gridded evenly sized/spaced quads across the model where possible. Shorts/hips are quite low density compared to the rest of the mesh, could do with a few more loops here to support deformation. UVs are packed efficiently making good use of texture sets to separate skin from cloth etc.  

UV’s for the head could be improved further to give more resolution to the face as currently the UV’s here are a little compressed and are sitting in quite a small portion of UV space. You could enlarge the potion of the UV island where the face sits with soft select, don’t worry if sides and back of the head take a slight hit in terms of stretching and resolution drop as the facial features take priority here. You could even experiment with giving the face its own UV tile and texture set in future. 

Rig 

Skinning looks successful considering the potentially tricky areas such as the shoulder/forearm connection with solid metal rings. In future don’t be afraid to ‘cheat’ in order to create a more dynamic final pose. This could be achieved by taking the posed character into ZBrush to transform the pose further manually, or even something as basic as soft select in maya to push and pull areas around that aren’t responding as desired with the rig alone.  

As a character artist you most likely won’t be responsible for rigging in an industry setting, so you can get away with ‘cheating’ your character poses for your portfolio in order to create the most interesting/dynamic result. The fact you are showing a solid base understanding of rigging and skinning is a huge bonus and will add a lot of value to your skillset.  

Engine set-up 

Good material set up in engine and great use of packed textures. It would be great to see you experimenting with material instances with parameters in future. Most often a tech artist would be responsible for shader set up in industry, but it’s still important to have an understanding of the material workflow in unreal. 

Creative Art       

Sculpt 

Material thickness and cloth treatment feels appropriate and innkeeping with the visual language of the character. Strong cloth exaggerated cloth folds are reading very well. These details can be difficult to balance when working on a more stylised character so great job.  

I really love the treatment of the hair especially the hair though I feel the ends/base of the hair could benefit from a more interesting natural shape and taper. The end result is very straight and level at the bottom, whereas something closer to the hair in the concept with a subtle flow and kick out plus some flyaway hairs may have worked well here.  

The overall silhouette of the character is really interesting and successfully captures the forms present in the concept.  

Texturing 

Texturing is very successful overall. I like the treatment of the skin which has some life in it without taking away from the stylised look. Really nice use of gradients to ensure the textures don’t feel flat and nice use of baked lighting/AO pass in the diffuse texture to help create depth.  

Pose 

Absolutely love the poses they have a lot of personality! I like that you’ve chosen to create two unique scenarios that tie into your theme, showing the different sides of your character. I love the contrast here between the proud ‘serving’ pose, and the relaxed ‘On break’ pose. My only feedback here is that I’d love to have seen the poses pushed that little bit further with more dynamic gesture and contrapposto. The arms feel a little squared off and are held quite close to the body. Perhaps raising the arms and breaking symmetry could help open up the pose, whilst maintaining the large presence of the shoulder pads. Because you’ve done such an awesome job creating a strong personality, I’m dying to see a more energetic pose capturing a bit of motion to really sell the identity of the character. Fantastic job overall though!  

Documentation      

Pre-production 

I love that you took the original concept and developed it further by creating a narrative to help inform your characters personality and props etc. Great to see you being realistic about your scope by leaving out the crab cart and instead focusing on the quality of the final character. 

Some good research on top of the original concept in to help inform each stage of development. The reference/mood board is concise and tailored to the concept helping to maintain a clear focus throughout development.  

Starting with a super basic block out helps to achieve a quick idea of how each element is working together, I’d love to have seen something like this in your document. The rough 3D block could be taken into a 2D programme to paint over in order to quickly iterate ideas on the silhouette etc. This block out stage can be useful as it allows you to solve problems early on in development. 

Production 

Good evidence of workflow. Each stage in the process presented clearly with notes describing specific challenges met and how they were overcome.  

I love that you showed the various versions of the head sculpt as you’ve clearly taken the time step back and re-evaluate your work at certain stages, looking to find clear reference and try again resulting in a great outcome. 

I especially liked seeing all the patterns and alphas that we’re created for the clothing. Clearly a lot of work has gone into the creation of this character and it’s great to see you showing off every aspect of it as it. 

Post-production 

Tools list is clearly highlighted giving a good summary of the pipeline which is consistent with industry standards.  

Project has been well evaluated touching upon lessons learnt and areas of potential improvement. Great to see you talking about potential weak spots in the project and how these could be worked on and improved next time. I’d love to hear where you may go next with your learning journey. It would be awesome to see you taking part in next year’s SFAS challenge as you can use it as an opportunity to assess your personal/artistic development.  

Final Presentation      

Final presentation is extremely successful. The character is cleanly presented with a strong lighting set up. It’s great that you’re experimenting with different background colours to find the most appropriate one. Perhaps a slightly darker blue tone could have helped to keep more focus on the character itself, but the final result feels really appealing and pleasant to look at!  

One suggestion for the lighting is to bring in a stronger rim light to help highlight and reinforce the silhouette of the character. This would also help to break the character away from the background swatch adding more depth to the scene. 

I like the variety of beauty shots you’ve assembled with a number of wide shots and close ups. The A-Pose turn around image giving a clear overview of the character from every angle.  

Final renders are well considered, and number of images is concise keeping in mind the ‘less is more’ mentality. This is great for your portfolio as often times reviewers won’t have much time to look over your work, so keeping the renders concise and to the point helps to give a quick and lasting impression without overwhelming the viewer.  

Overall, I think you’ve created a great piece of character art demonstrating a solid understanding of the pipeline. I look forward to seeing what you do next, keep it up!  

Feel free to reach out to me if you have any questions or would like any further feedback on your project.