


Posting written feedback in comments as assessment period has ended. Feedback requested by student via Discord.
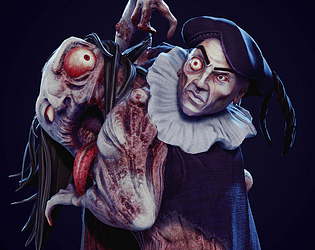
Submission title: Unholy Matrimony
Student name: Chelsea Cowan
Challenge tier: SFAS
Assessor name: Caleb O’Brien - Junior Character Artist @Firesprite
First of all, I’ve got to commend you for taking on such an ambitious project. You’ve created something really unique and absolutely nailed the prompt too which is great to see!
Concept, research, and development
I really like the concept you’ve chosen. Very impressed with how you’ve handled the translation into 3D, considering the complex design which features little to no symmetry.
In an industry setting there would most likely be a lot of back and forth between 2D and 3D with this type of character, in order to settle on the best result that feels most appropriate in a 3D game setting.
With that in mind, perhaps in future it might be beneficial for you to experiment on top a chosen concept with some 3D concepting in ZBrush. Spending some time in the ideation phase, iterating between 3D block outs and 2D paint overs, you may find that you can solve creative and technical problems early on, saving time further into the production.
I love that you are thinking about backstory, exploring ideas about how this amalgamation came to be. It's great to see you putting your own creative spin on things in this way as this type of exploration can help feed into the personality of the character. Even aspects such as the games setting, gameplay attributes and character emotions can help influence the design and are worth exploring in the early stages.
Good choice of references, a clear focus and not too overloaded in terms of number of images. Love the material sphere reference for the gore. I’d have loved to see further evidence of research and perhaps a few more reference like the hand sculpt from Evil Within as this seems like a really good target for your sculpting.
Sculpt
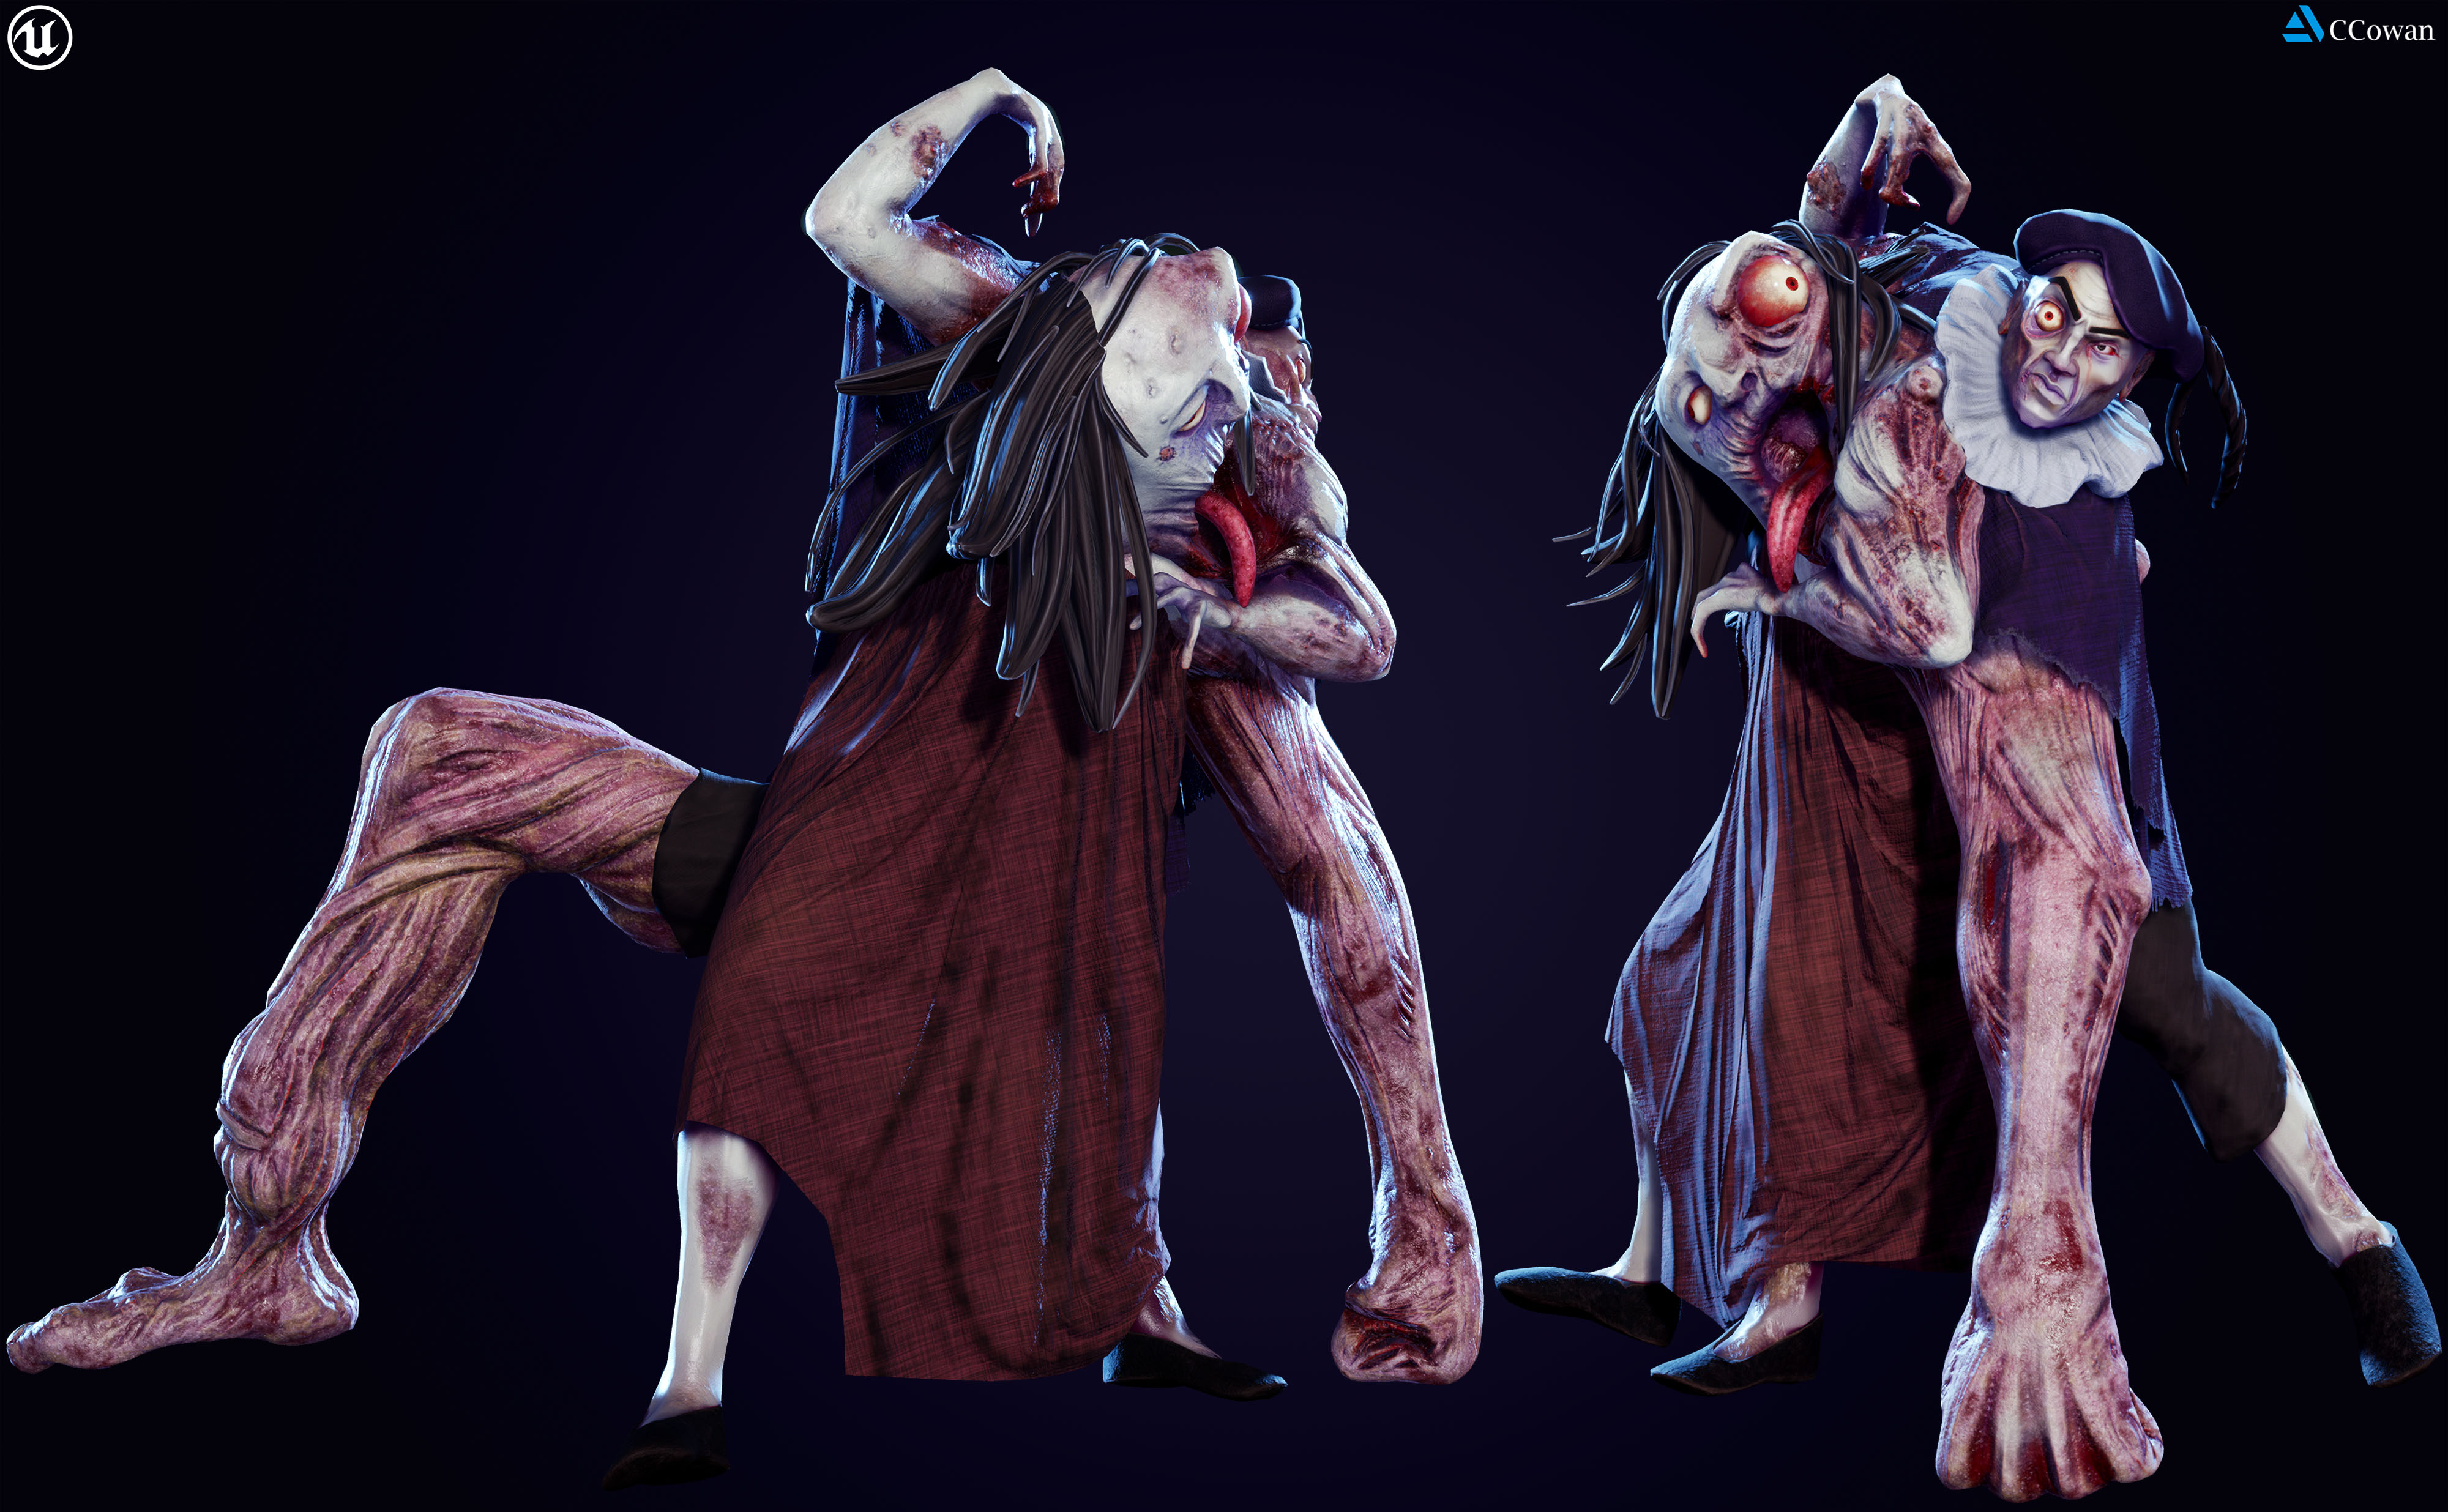
Overall I think you’ve done a great job with the sculpt. There’s something about it that evokes a miniature/Warhammer aesthetic which I quite like, there’s a nice stylisation to the sculpt overall.
Perhaps some areas of the sculpt could do with refining/tightening up a little bit to get away from that miniature sculpted feel. For example, the feathers feel quite thick and heavy, they would probably read well for a top-down stylised game, but perhaps alpha card feathers could be worth exploring in future.
Lovely work on sculpting all the grotesque detail. I agree with your statement about how it could have been pushed more to be closer to the references, but I think your details are consistent throughout resulting a cohesive sculpt, which is difficult when working between anatomy, monster flesh, cloth etc.
Marvellous
Really nice to see you using marvellous which has given you some lovely draping cloth and folds.
Something I’ve started to understand more only very recently is anatomy of cloth, the different types of folds and how they sit. Often times with Marvellous cloth it can take a bit more finessing in ZBrush to really get the most out of it. For example, sometimes Marvellous cloth folds can look a little sharp in some areas and need smoothing down/rounding off. Hand sculping in supporting folds and using wrinkle/memory fold alphas to add creases and secondary details can really help tie everything together.
Here's some videos that I find really useful when trying to understand cloth anatomy.
Outgang: Cloth and fold anatomy -
Raf Grassetti: Sculpting Cloth
ModernDayJames: Cloth and Drapery
Texturing
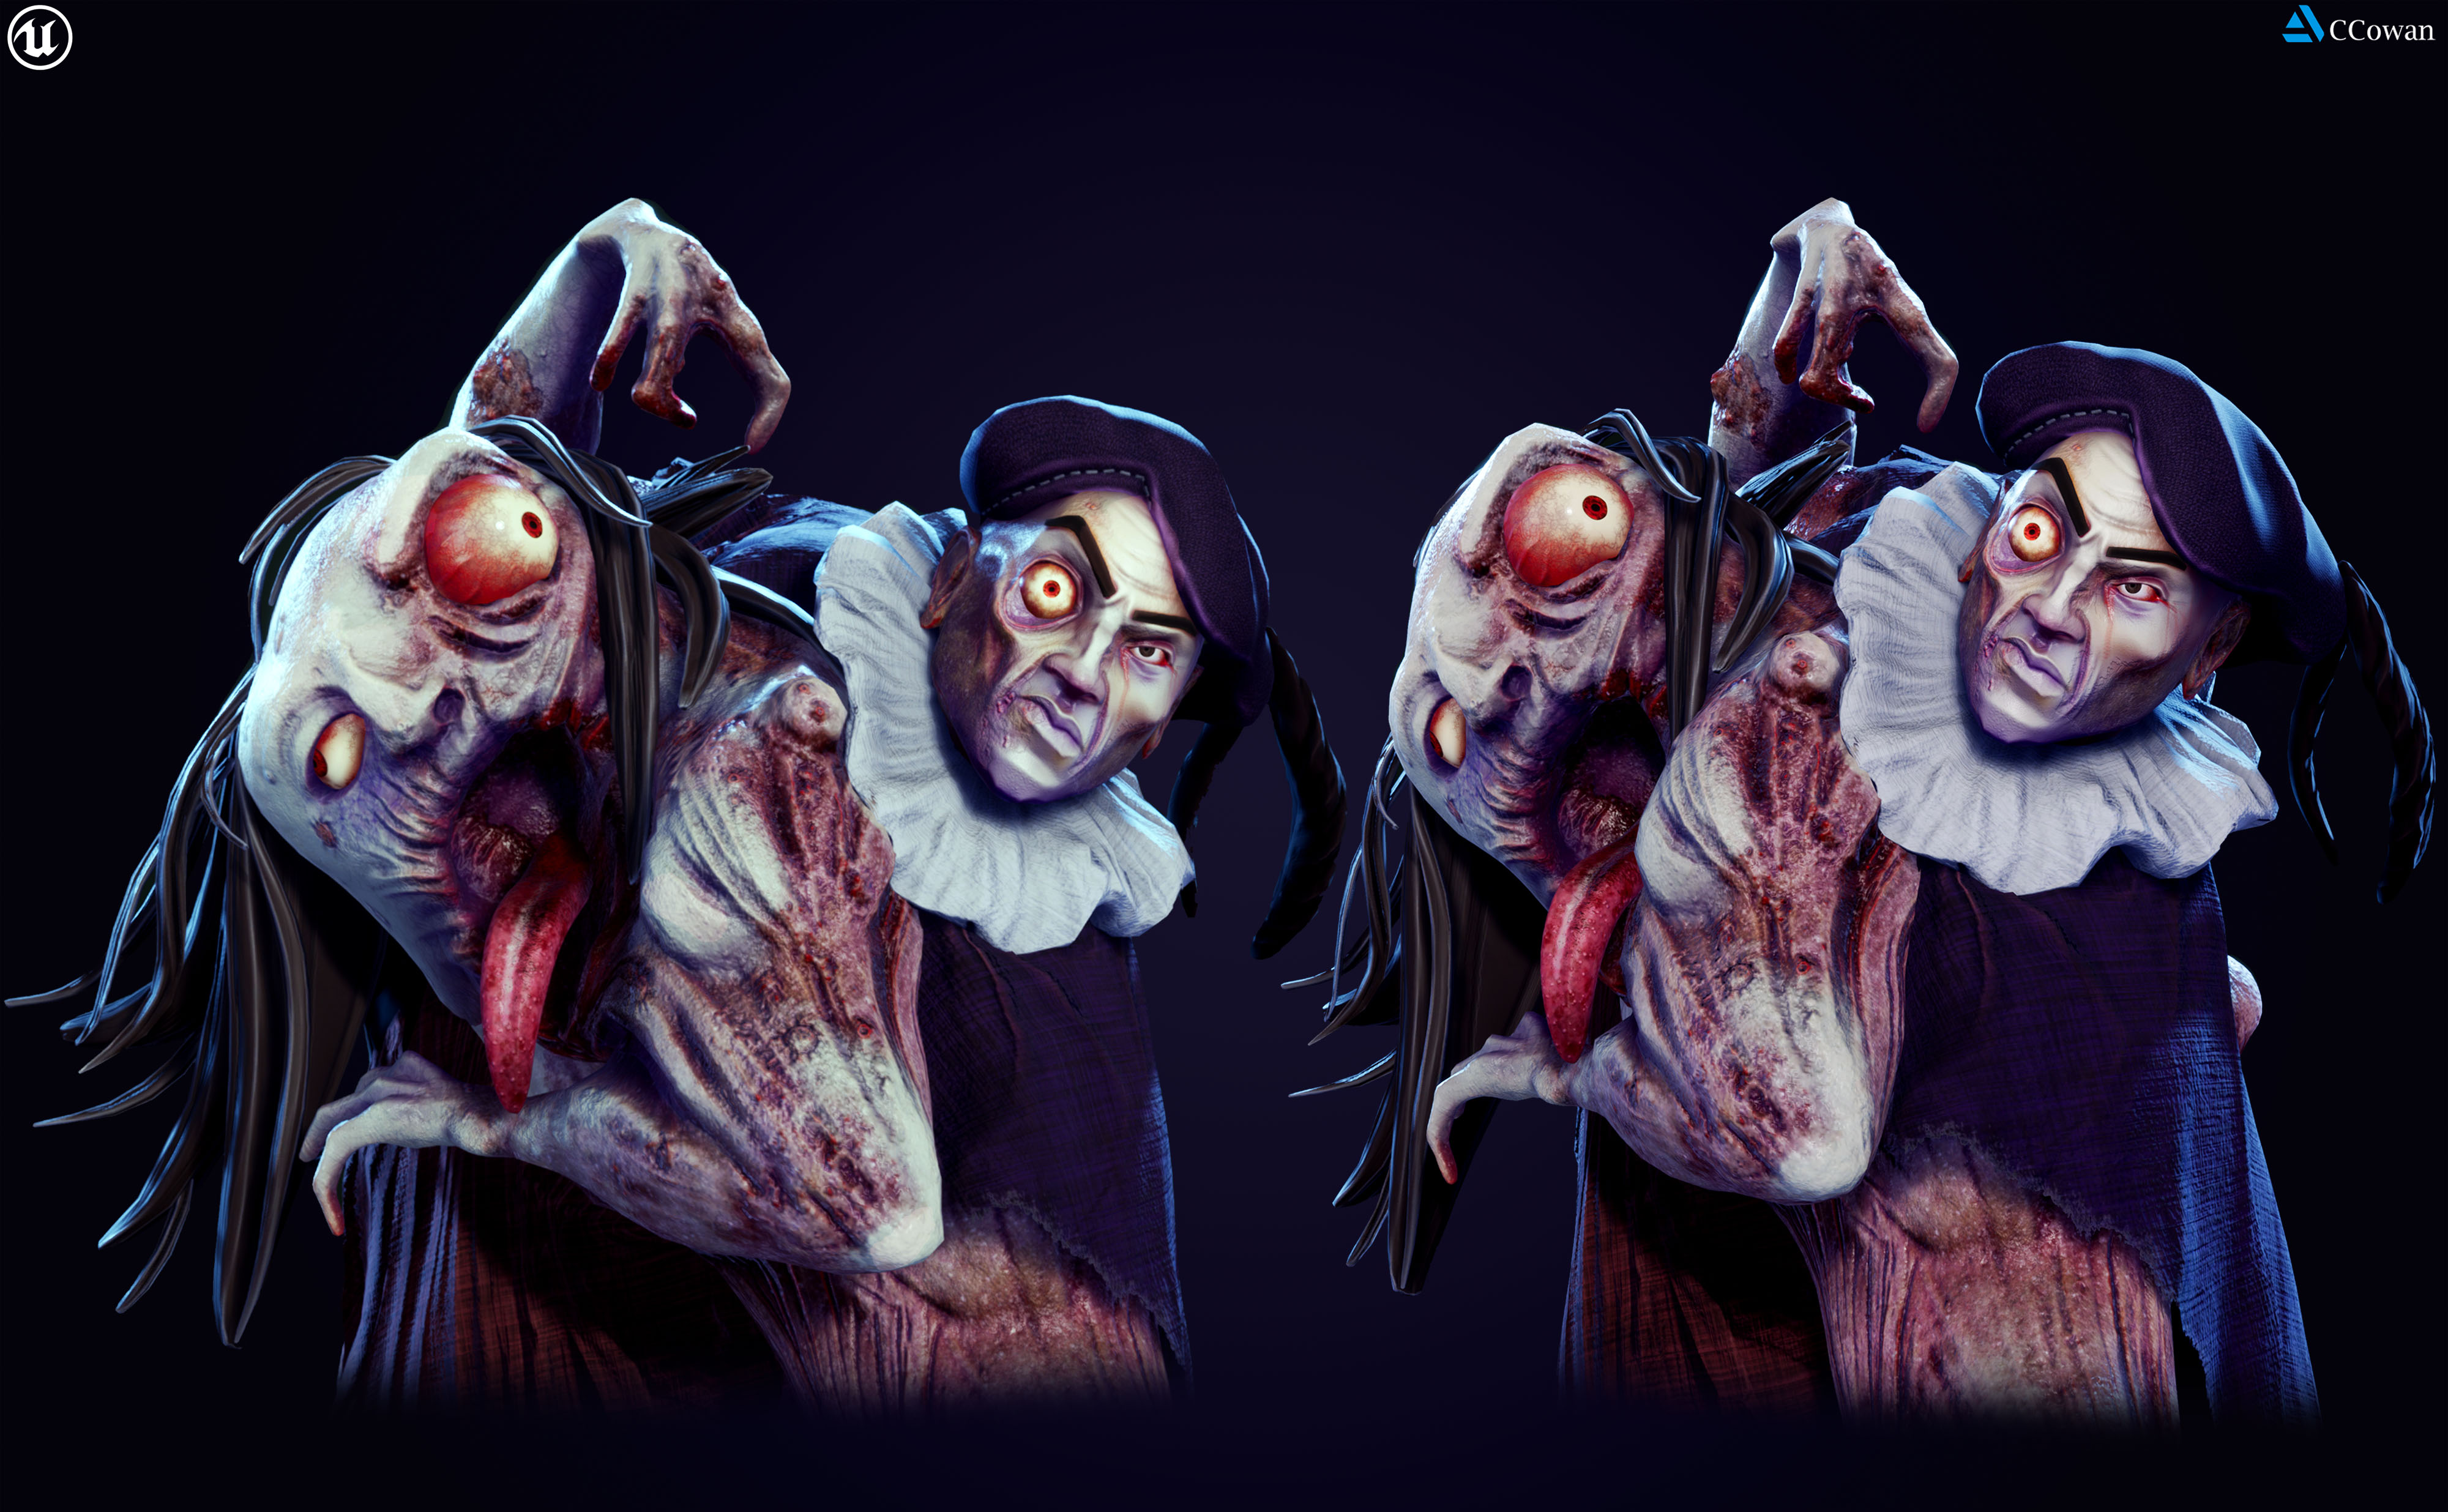
Fantastic job on the texturing, especially all the gruesome gory details which you’ve nailed.
Not often that you can describe something as disgusting and grotesque in feedback and it be a good thing! Love all the lighting response to the roughness information in the fleshy bits, great work.
It could be interesting to feature a render of your character with base colour channel view alongside your other breakdown images. This will help to give further insight into your treatment of textures.
Game mesh
Overall, I think your game mesh looks solid, nice evenly spaced quads and clean loops around areas of deformation.
Ideally the character would be sculpted in a more neutral pose, allowing for a deformation friendly game mesh that would leave more options for rigging and animation down the line.
Something to consider in future is your density/distribution of polygon resolution within the game mesh. Try and look for areas that you can optimise to save on polys which will free you up to add more resolution/loops into other areas. For example, the feathers and eyebrows look quite dense which could be reduced slightly and then perhaps more resolution can be added to the large eye socket to allow for a smoother silhouette.
Similarly, the cloth sections look like they could be evened out and optimised slightly, overall, a really solid job here considering how complex this construction is. You’re demonstrating a good understanding of topology.
UVs
I can imagine this wasn’t easy to UV! Totally agree about the UV optimising, I’m sure it was mostly down to time that you had quickly unwrapped and packed them. I highly recommend showing off some really solid examples of UVs in your portfolio with future projects as it’s definitely an area that employers will look at during portfolio reviews/interviews.
Nice job separating the mesh out into separate texture sets. Something I’d suggest is ensuring you keep the rotation of your UV islands consistent. I noticed some stepping in the pixels within the texture of your hair strands. Ideally the hair sections should be laid out straight and all following the same direction, the same goes for cloth elements too as it will make it much easier to add tiling details/patterns down the line. You could use the something like the lattice tool to warp your UV shells into a more even and straight shape.
Rig
I love that you challenged yourself with rigging this character! Massive props to you for even attempting to rig and skin this from scratch. Creating a rig for a character like this could be whole project within in itself so great to see you having a go at it.
You’ve managed to capture an awesome pose in the model itself so I don’t think your rig is letting you down at all really, although I’d agree with some of your other assessor feedback that ideally the character would be modelled in T-pose to allow for more freedom with rigging and animation. I can imagine a character like this having limited movement in game and it would probably limp after you slowly, so at the end of the day the result you’ve achieved here is very nice.
In an industry setting characters like this would go through multiple layers of discussion between various disciplines in the early stages to achieve the best option that satisfies all parties. I would imagine concept art, character art, tech art and tech animation/riggers would all be involved to make sure the most awesome design was plausible, whilst considering limitations such as cloth simulation and rig complexity etc.
So don’t worry too much about your rigging issues here, at the end of the day you’ll be making static meshes in industry that are passed onto riggers so as long as you can achieve an awesome pose and presentation for characters in your portfolio, I wouldn’t worry about getting too caught up on the rigging side. As long as you can demonstrate a good understanding of static meshes built with deformation in mind, then you could even use auto riggers like mixamo, and then hand posing with transpose in ZBrush or soft select in maya to get the best result out of your model.
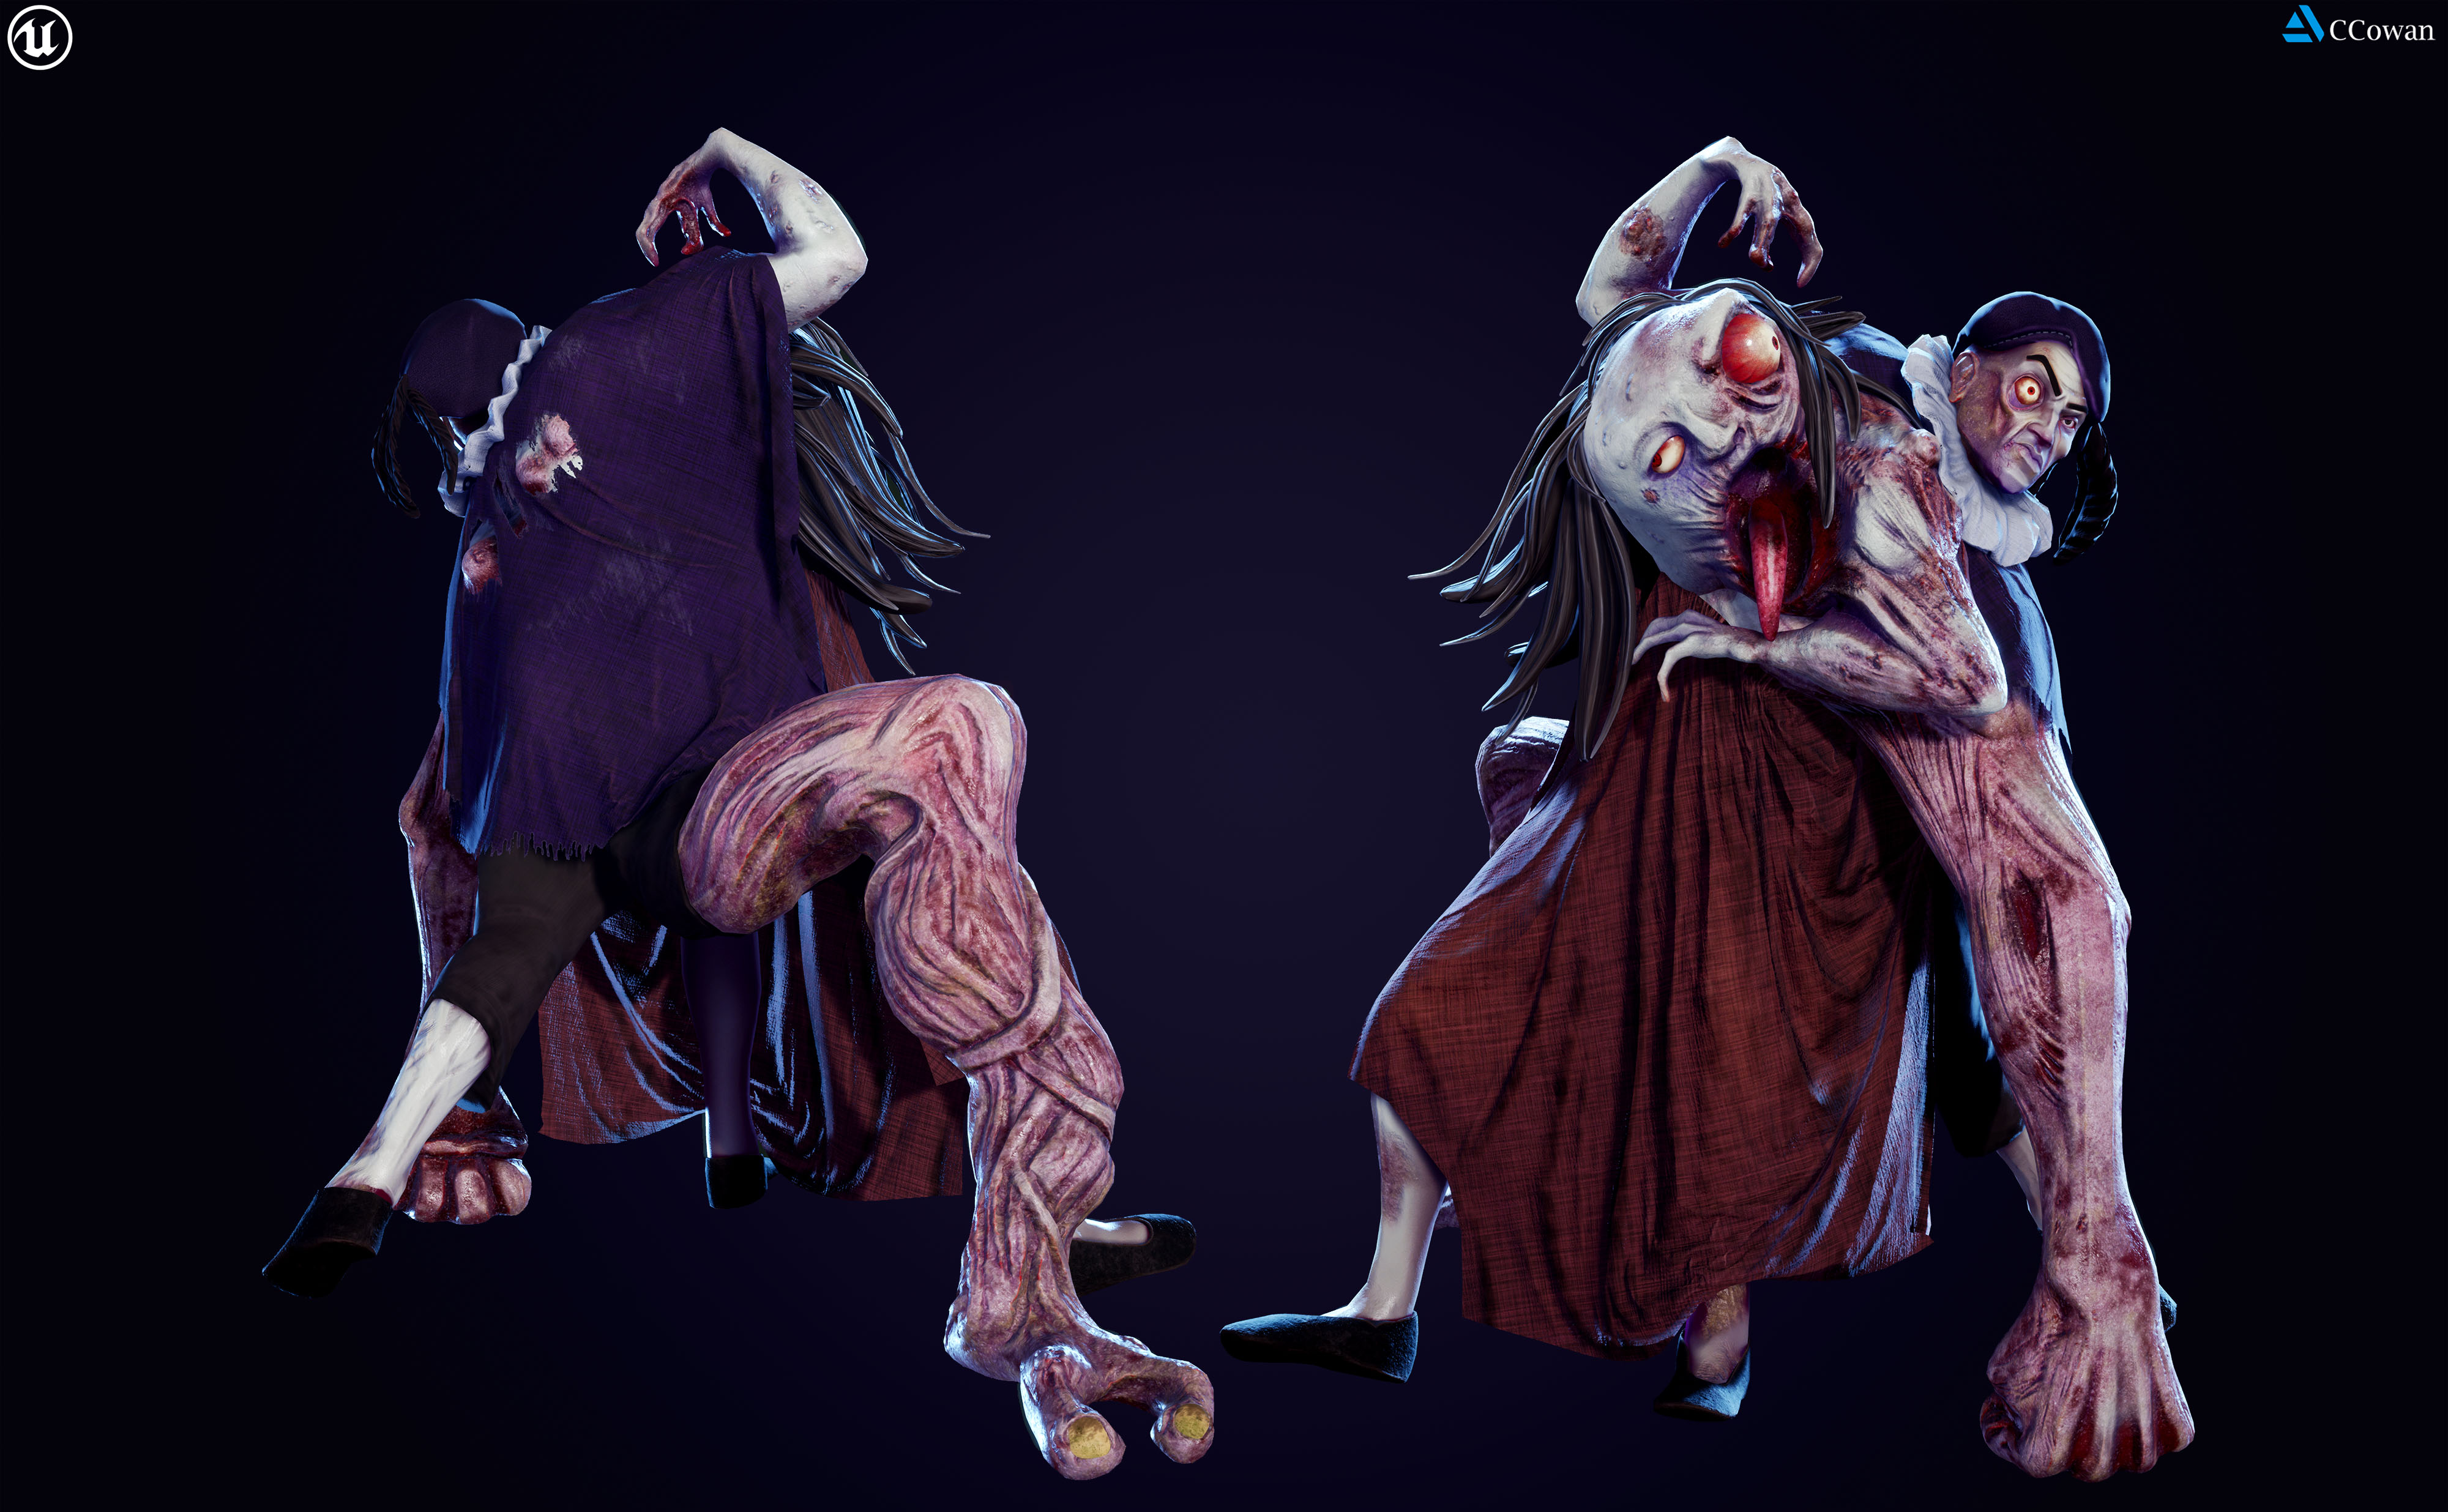
The pose is very dynamic and has a great sense of movement. I love the solid fist connection with the floor as it gives the pose a really grounded feel and helps support the feeling of great mass and weight of the upper body lurching towards the viewer.
There’s some great gesture in your pose and it feels very dynamic especially with the cloth and hair elements lending to the sense of movement.
Lighting/Presentation
Really well presented, nice clear renders with a lighting set up that supports the horror theme of the piece, dark and moody. I love the contrast and strong rim lighting which helps to highlight the interesting silhouette of the beast. Your lighting set up helps bring out all those interesting roughness details which is great to see.
This is super nit-picky, but I think a drop shadow on the floor would help make the character feel grounded and convey a stronger sense of weight and mass. This type if shadow could even be done in post using photoshop, just something super simple. Often a shadow can help make sure your renders don’t look like they’re floating in a void and can add a bit more context to the final result.
I think you’ve done a great job with your lighting and presentation overall, definitely a strong point for your project nice work!
Great work with the frayed edge on the cloth, I also love the torn sections on the back revealing the skin underneath! It would have been great to see the frayed edge continued on the base of the red cloth as it feels quite sharp and polygonal in places. Perhaps some more dirt and scuffs within the textures would have been a bonus here too to break up the large colour sections of cloth, but great job on the cloth overall considering how much there is draped across the character!
Nice documentation, super clear and easy to follow. It's great to see you taking the time for self-assessment throughout the project. This is something that is a bonus to see as it gives a taste of one’s personality and work ethic, so it’s clear to me that you are passionate about growing stronger as a character artist and learning from your experiences.
The personality of your character shines through and it creates a strong first impression which can be hard to achieve! Fantastic job on this, I look forward to seeing what you create next!
Feel free to reach out to me if you have any questions or would like any further feedback.
Leave a comment
Log in with itch.io to leave a comment.