
Hi Nikgohn! Thank you for sharing it, it's really nice to have it all in one place, it's almost like a timelapse of the progress we've made over the last 9 months ^-^
A member registered Nov 13, 2018 · View creator page →
Creator of
Game development tools for OpenMW

Recent community posts
I thought it'd be fun to share some of the updates outside of walled-in communities like Discord.
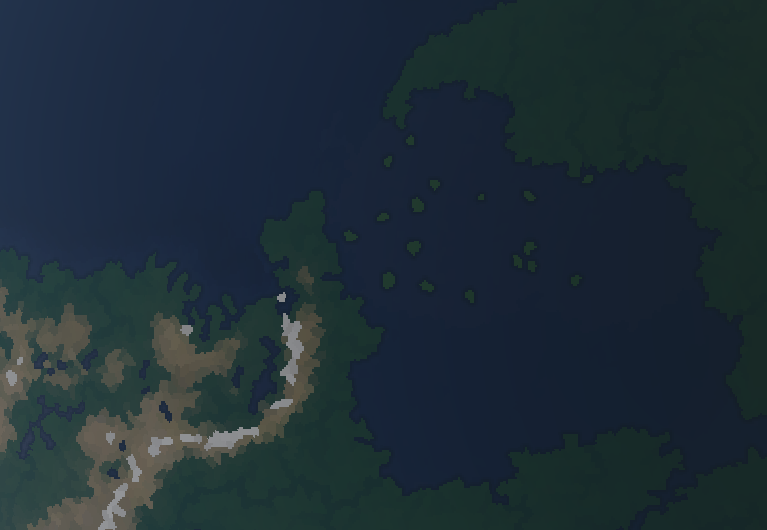
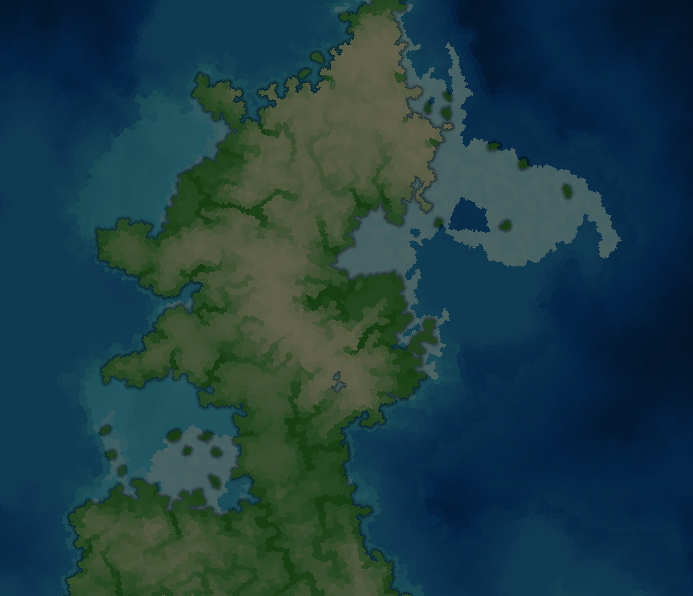
To get this thread started, here is the new item on the agenda: coral reefs
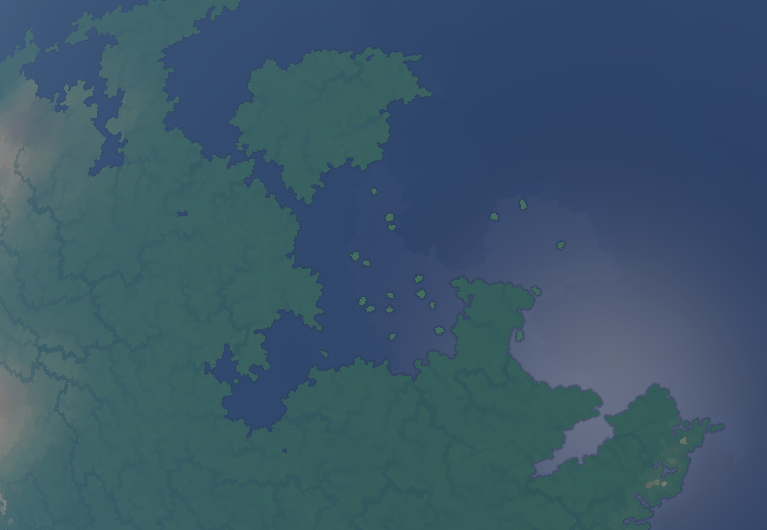
A long lasting issue with Gleba has been the lack of small islands in tropical regions, this will help us alleviate the issue.
They can only spawn in relatively shallow waters, where the temperature range allows for their growth.
They are meant to represent large coral reef bodies, for small subtile coastal reefs and minor barrier reefs we will rely on subtile features and world upscaling.
Gleba (v0.3.3) community » Questions, and tutorials · Created a new topic How to get started with crustmap and platemap imports
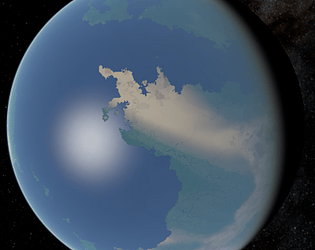
Gleba generates reasonable realistic planets by default, but if you want more control over the layout of landmasses and placement of mountains, you may want to use the crustmap and platemap imports.
This thread is a very short tutorial for beginners describing how to get started. Let us know if you run into any issues!
1. Make a black and white image (say, 1000 by 500) pixels where white pixels are continental crust and black ones are oceanic crust
Here's an example: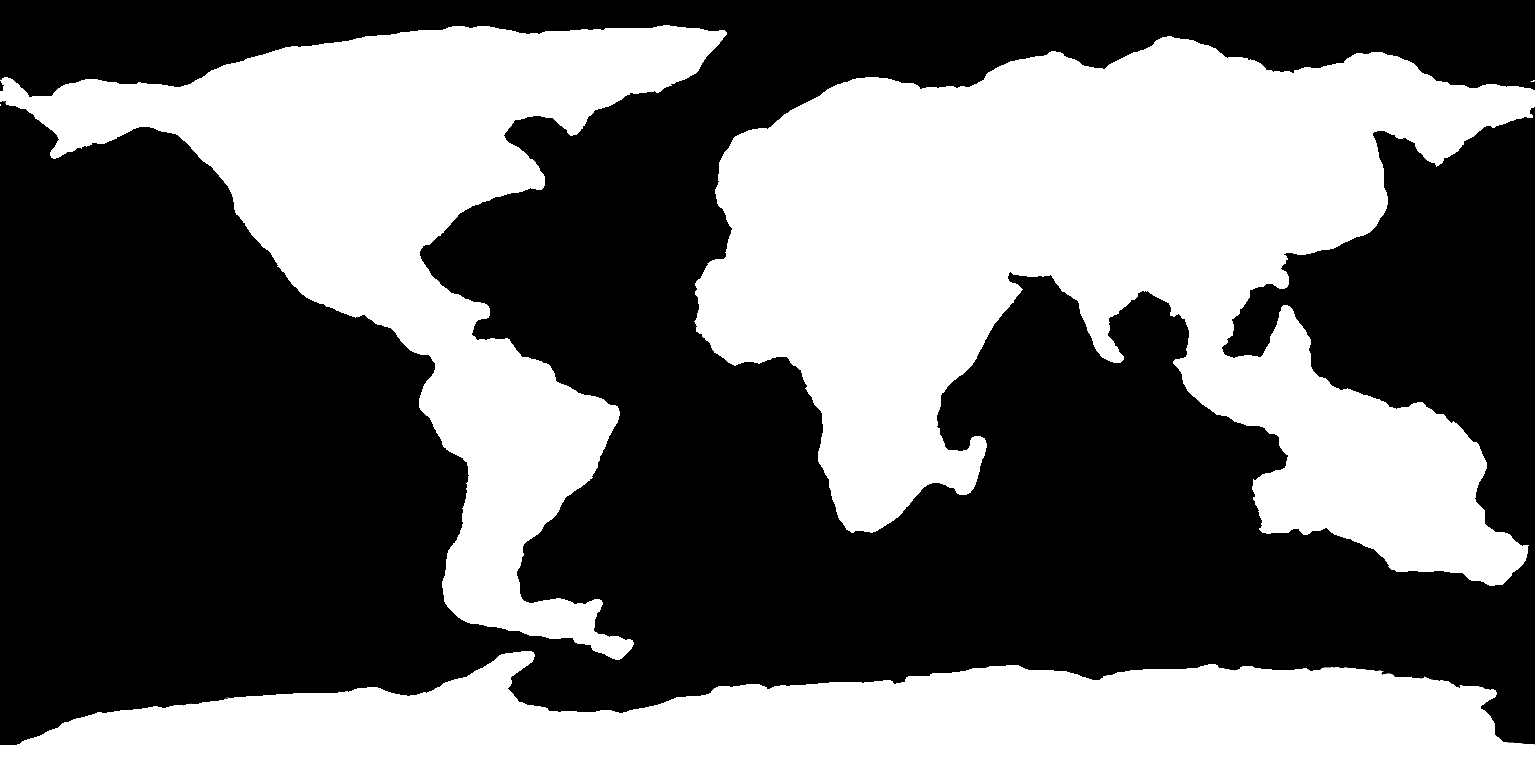
One important thing to keep in mind is that the map represents *continental crust*. Not coastlines, or landmasses. As such it shouldn't contain volcanic island arcs or hotspot island, but *should* include shallow parts of the continental shelf that would otherwise be underwater.
If you want the generated world's coastlines to adhere more closely to the crustmap, you can try lowering "sea level increase since LGM" (last glacial maximum).
2. Save the image as a png
3. Make an image of tectonic plates, with each plate represented by a single unique color. You can choose any colors you want, as long as you stick to the rule that a single plate gets a single (unique) color.
Here's an example:

It is *essential* that each plate gets *exactly* a single, unique color. You need to make sure that edges between plates have no aliasing, smoothing, or any other brush effects that some image editing software add automatically.
Here's an example of a correctly formed boundary between two plates:
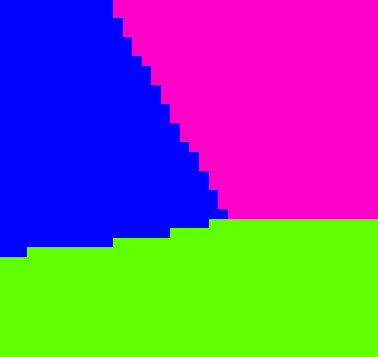
If your map fails to load, it is very likely because you didn't ensure these crisp, sharp, pixel perfect plate boundaries. Each unique shade of color gets interpreted as a different plate so if your brush is smooth, each individual pixel on the boundary would get interpreted as a tiny 1 pixel large plate, which is almost certainly not what you want.
4. You can also (but dont need to) specify movement direction of plates by placing black (rgb of 0, 0, 0) and white (rgb of 255, 255, 255) dots on them. The plate will move in the direction from the black dot to the white dot.
Here's an example:
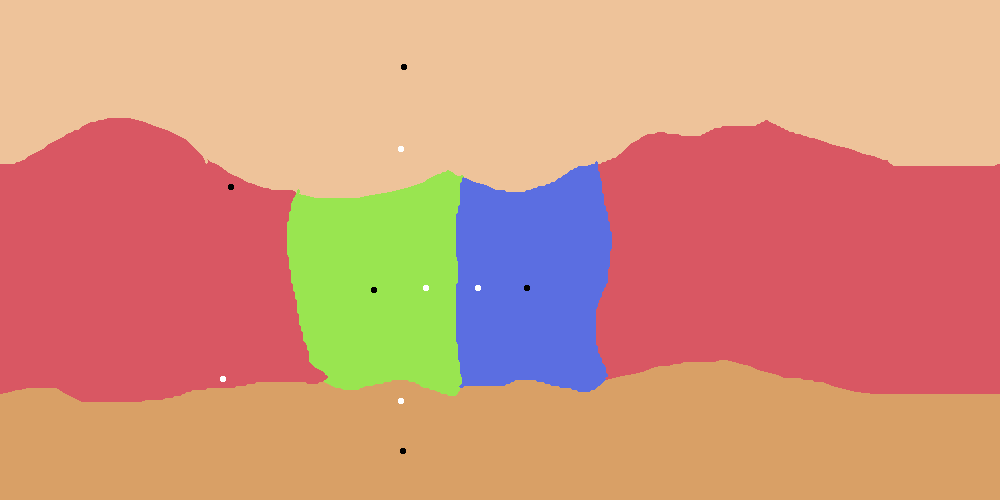
The size of the dot doesn't matter as long as they are fully surrounded by a single plate. To ensure correct behavior, place no more than a single pair of dots per plate. You should also prefer placing them closely, as to avoid possibly counterintuitive consequences of the curvature of Earth. The exact speed of the movement depends on the distance between dots *relative* to all other distances between dots. As such, there's no reason to place them very far apart.
5. Save the image as a png
6. Load the platemap and the crustmap in Gleba, using the buttons in the menu with world parameter sliders
And that's about it! Gleba will now generate a world roughly in the shape that the files prescribe.
Now, here's a list of common issues you may run into:
1. If you don't get orogenies or other plate boundary features, you need to make sure that the boundaries of the crust align with the boundaries of the plates. Gleba checks for boundary types (such as continental collisions) only within the immediate vicinity of the boundary. Do not try to manually move crust back to account for flexural forces of the collision. Place the crust along the boundary of the plate and let Gleba do it for you.