


Hi there!
Indeed, the dev retired from indie-deving in 2019 and none of his projects will be updated.
Thanks for the fix to make the game run on 64-bit platforms! This game was developped when 32-bit was still predominant.
As the deadline to submit the game is approaching, I am lacking time to write devlogs. And my professional life doesn't help. I am also missing time to work on the game itself. Thus, I guess the devlogs will be shorter and less detailed for this last week.
Two days ago I worked onthe level selection screen. It looks like that :

You can find the code in the repository : LevelSelectionScreen.java.
Basically, the LevelSelectionScreen.java contains a Table, with many TextButtons. I already talked about the of Table and TextButton to create the HUD.
The key part of the LevelSelectionScreen.java is the positioning of the various TextButtons to form a nice table. Here is the code :
tableLevels = new Table();
tableLevels.defaults().width(Gdx.graphics.getWidth()/10).height(Gdx.graphics.getWidth()/10).space(Gdx.graphics.getWidth()/60);

levels = new Array<TextButton>();

for(int i = 0; i < GameConstants.NUMBER_OF_LEVEL; i++){
    TextButton textButton = new TextButton("" + (i + 1), textButtonStyle);
    levels.add(textButton);
    if((i + 1)%5 == 0)
        tableLevels.add(textButton).row();
    else
        tableLevels.add(textButton);
}
About this code :
I first sets the Table that will contains the various TextButtons. With the line
tableLevels.defaults().width(Gdx.graphics.getWidth()/10).height(Gdx.graphics.getWidth()/10).space(Gdx.graphics.getWidth()/60);
I set the height and width of the buttons, and the spacing between each button.
Then I create an array in which I will store the buttons. This array will be important to interact with the buttons.
And finally, with a for loop I create the TextButtons and arrange them in rows of 5 buttons. For that, I add each buttons to the Table, and every five buttons, I add the button to the Table and create a new row, with the lines :
if((i + 1)%5 == 0)
    tableLevels.add(textButton).row();
With this code, you obtain this level selection table :

Note in my code the GameConstants.NUMBER_OF_LEVEL, is a number I stored in the GameConstants.java. For now I set this number to 15, but when I see how much work I have to do before the end of the jam, I guess it will be 10 levels or less for the jam version of this game.
So now, I want to have a "back" button, to return to the main menu screen if I want to.
Thus I create the back button :
backButton = new TextButton("<", textButtonStyle);
backButton.setWidth(Gdx.graphics.getWidth()/10);
backButton.setHeight(Gdx.graphics.getWidth()/10);
And I want this to look good, I want the "back" button to be aligned with the table. For that, Actors have a very useful function, that is localToStageCoordinates. If I want the back button to be aligned to the left of the table, I need to know the coordinate of left side of a button in the first column. I'll get this coordinate with this line :
levels.get(0).localToStageCoordinates(new Vector2(0,0))
I take the 1st button, that I stored in the array levels, and I ask to translate Stage coordinate of its origin (new Vector2(0,0)) to the world system.
I also want my "back" button to be at the bottom of the table, and I want it to use the same spacing as the spacing between the buttons of the table. Thus, I set the position of the "back" button with this code :
backButton.setX(levels.get(0).localToStageCoordinates(new Vector2(0,0)).x);
backButton.setY(levels.get(levels.size - 1).localToStageCoordinates(new Vector2(0,0)).y - backButton.getHeight() - Gdx.graphics.getWidth()/60);
And you obtain this screen :

hu... wait... what's this bullshit ?
The back button is in the middle of the table.
OK, here is the important part. If you want to translate the coordinate a button in the table to the world coordinate, you first need to add the table to the stage, draw it, and the get the coordinate.
In pseudo-code, you need to do that in the creator():
//Create buttons and put them in the tableLevels
<span class="redactor-invisible-space">stage.addActor(tableLevels);
stage.draw();
<span class="redactor-invisible-space">
<span class="redactor-invisible-space">//Create the "back" button and set its position
stage.addActor(backButton);<span class="redactor-invisible-space"></span></span></span></span>
And now you've got this nice screen :

Now we want the player to be able to see which levels he has already done.
There are many ways to deal with that.
The bad solution
We could only create the buttons corresponding to the levels completed and the first next level to complete : If the player already completed levels 1 and 3, we could create a table containing the buttons 1, 2 and 3. Thus the player will know that the last button displayed correspond to the level he has to play. This solution will create inconsistency in the displaying of the table :

The good solutions
There are several way to make this look well. You could create a 2 TextButtonStyles, one for the locked levels, and one for the unlocked levels. This way you could display the buttons with different colors (for example) according on the locked/unlocked state of the level.
The solution I chose is to completely hide the button corresponding to the locked levels with this code, at the end of the creator() :
for(int i = 0; i < levels.size; i++){
    if((i + 1) > Data.getLevel()){
        levels.get(i).setTouchable(Touchable.disabled);
        levels.get(i).setVisible(false);
    }
}
I check if the number of the button is greater than the unlock level number that I saved in the Preferences file "Data". I yes, I set the button invisible and untouchable.
And here is the result :

Then you only have to create a Label to display the "Chose a level" title to obtain the screen displayed in the gif, at the beginning of this post.
During the past 3 days, I drew. And the good news, for me, is that I think I'm done with the drawings for the libGDX Jam. I have everything I need for my game. I could do more, but, I don't have time, the jam ends in 8 days !
But well, I have the minimum to create levels : a few tiles for the background, and sprites for every objects of my game. At last !
Basically, for the code, I have two draw methods, in the Obstacle.java, and I call the needed method depending on the need to use a NinePatch or a TextureRegion.
Here are the draw() methods :
public void draw(SpriteBatch batch, TextureAtlas textureAtlas){
        batch.setColor(1, 1, 1, 1);
        batch.draw(textureAtlas.findRegion(stringTextureRegion),
                this.body.getPosition().x - width,
                this.body.getPosition().y - height,
                width,
                height,
                2 * width,
                2 * height,
                1,
                1,
                body.getAngle()*MathUtils.radiansToDegrees);
    }

    public void draw(SpriteBatch batch){
        batch.setColor(1, 1, 1, 1);
        ninePatch.draw(batch,
                        this.body.getPosition().x - width,
                        this.body.getPosition().y - height,
                        2 * width,
                        2 * height);
    }
So... what did I drew during these days ?
This sprites are used with the ObstacleLight.java. For now I have to sprites : one for boxes with square proportion and one for rectangles. These are wooden box sprites... doesn't really suit the space theme, I know. If I have time during next week end, I'll draw some metal boxes.

These sprites are used with the Leak.java.

For the gas leak, I had to create an animation, so I drew 10 sprites, and the Leak.java has its own draw() method :
public void draw(SpriteBatch batch, float animTime){
        batch.setColor(1, 1, 1, 1);
        batch.draw(leakAnimation.getKeyFrame(animTime),
                this.body.getPosition().x - width,
                this.body.getPosition().y - height,
                width,
                height,
                2 * width,
                2 * height,
                leakScale,
                1/leakScale,
                leakAngle);
}
These sprites are used with the ObstacleDoor.java and the ItemSwitch.java.

The ItemSwitch.java has its own draw() method to be able to draw the right sprite depending on the switch being in the "on" or "off" state :
public void draw(SpriteBatch batch, TextureAtlas textureAtlas){
        batch.setColor(1, 1, 1, 1);
        if(isOn){
            batch.draw(textureAtlas.findRegion("SwitchOn"),
                    this.swtichBody.getPosition().x - width,
                    this.swtichBody.getPosition().y - height,
                    2 * width,
                    2 * height);
        }
        else{
            batch.draw(textureAtlas.findRegion("SwitchOff"),
                    this.swtichBody.getPosition().x - width,
                    this.swtichBody.getPosition().y - height,
                    2 * width,
                    2 * height);
        }
    }

This sprite is used by the ObstacleMoving.java.

These sprites are use by the FuelRefill.java and OxygenRefill.java.

This sprites are used by the Exit.java.

This one took me A LOT of time. I wanted to create an animation for the level exit door. I created the animation with Spriter Pro.
Just for fun, here is a speed up video showing the process of creating the animation with Spriter Pro :
Drawing : Done !
Next : Sounds
OMG
After setting up the scrolling star background, I worked on the map itself. For that I use the amazing level editor Tiled.
First, I need to draw a tileset... I spent 3 evenings on this and I am not near finishing it. I have the minimum to create some levels... without variety and without beauty...
I made the (probably bad) decision to work with square tiles of 100 pixels x 100 pixels. From what I usually see, people use lower resolutions like 32px x 32px for example.
So why this 100 x 100 resolution ?
Well... the truth is I ABSOLUTELY suck at drawing. And it seems much easier to draw with higher resolutions. I wasted more than one evening trying to draw 32x32 tiles, but seriously... when we talk about "pixel art", the word "art" is not excessive. With low resolution, every single pixel you draw is important.
For example, just doing a gradient is an art in low resolution, there are some precise rules to make a dithering look good while with higher resolutions you can just go with the "aaaaaah fuck it, Photoshop as the right tool for that" way.
Then, once the 100x100 resolution chosen, I can draw the tileset and create a first level in Tiled. For now, I came up with this obviously unfinished tileset. As you can see, I am still completely in the process of creating it. I try to figure out many things like the size or the color of different elements.

I put the tileset in the folder android ---> assets ---> Levels and I also save the .tmx file generated by Tiled in the same folder.
After drawing the map, I can render it with few code lines in the GameScreen.java.
First we need to create the TiledMap and the TiledMapRenderer in the constructor :
tiledMap = new TmxMapLoader().load("Levels/Level 3.tmx");
tiledMapRenderer = new OrthogonalTiledMapRendererWithSprites(tiledMap, GameConstants.MPP, game.batch);
Then in the renderer() we need these lines :
tiledMapRenderer.setView(camera);
tiledMapRenderer.render();
Very simple ! Here is the result :

Off course, the order you draw things is very important. If you want the game map to appear in front of the scrolling background I set up in the previous devlog, you must first draw the background, then draw the map, like this :
tiledMapRenderer.setView(camera);

//Background
game.batch.begin();
    game.batch.draw(backgroundTexture,
            0,
            0,
            levelPixelWidth,
            levelPixelHeight,
            (int)(backgroundTime * 8),
            0,
            (int)(levelPixelWidth * 20),
            (int)(levelPixelHeight * 20),
            false,
            false);
game.batch.end();

//Game map
tiledMapRenderer.render();
Where are the walls the Obstacles ??
As you can see in the above gif, there are still a lot of things rendered by the Box2d renderer, namely the walls and the objects.

To obtain this effect, I use a 100px x 100px image of stars that I repeat all over the level surface, and I scroll it slowly. The problem with that code is that I draw the background also outside the camera viewport. That's definitely a waste of GPU time, but, as I said, I definitely don't have time to look for a better option.
All the code is added to the GameScreen.java.
In the creator of the GameScreen.java you need to declare a Texture and make it repeatable :
backgroundTexture = new Texture(Gdx.files.internal("Images/Stars.jpg"), true);
backgroundTexture.setWrap(Texture.TextureWrap.Repeat, Texture.TextureWrap.Repeat);
Still in the creator, I calculate the screen dimensions :
levelPixelWidth = Float.parseFloat(tiledMap.getProperties().get("width").toString()) * GameConstants.PPT * GameConstants.MPP;
levelPixelHeight = Float.parseFloat(tiledMap.getProperties().get("height").toString()) * GameConstants.PPT * GameConstants.MPP;
Then in the render() of the GameScreen.java I draw the Texture with the right SpriteBatch method:
game.batch.begin();
    game.batch.draw(backgroundTexture,               //Texture to load
                    0,                               //X position of the Texture
                    0,                               //Y position of the Texture
                    levelPixelWidth,                 //Width of the Texture
                    levelPixelHeight,                //Height of the Texture
                    (int)(backgroundTime * 8),       //X offset of the texture
                    0,                               //Y offset of the texture
                    (int)(levelPixelWidth * 20),     //I have no fucking idea how to rationnalize these 2 factors but
                    (int)(levelPixelHeight * 20),    //the higher value, the smaller the size of a single Background Texture
                    false,                           //Flip horizontal
                    false);                          //Flip vertical
game.batch.end();
You noticed in this method that in the X offset I entered (int)(backgroundTime * 8). backgroundTime is simply a float that I update in the render with this line :
backgroundTime += Gdx.graphics.getDeltaTime();
And that's it ! I now have stars scrolling in background !
Just in case you are interested :
I talked about the bad optimization of my code. With the previous code I draw the background even outside the viewport. Actually, I worked a lot on this issue, I even think too much for such a detail, at such a time of the Jam. I came up with that code, that draws the background with exactly the viewport size. The background also follows the camera position :
Vector3 posBackground = new Vector3(0,0,0);
camera.project(posBackground);

game.batch.begin();
game.batch.draw(backgroundTexture,
                -posBackground.x * camera.viewportWidth / Gdx.graphics.getWidth(),      //Follows the camera
                -posBackground.y * camera.viewportHeight / Gdx.graphics.getHeight(),    //Follows the camera
                camera.viewportWidth,                                                   //Camera viewport width
                camera.viewportHeight,                                                  //Camera viewport height
                (int)(backgroundTime * 8),
                0,
                (int)(levelPixelWidth * 10),
                (int)(levelPixelHeight * 10),
                false,
                false);
game.batch.end();
Here is the result

This is okay for the optimization, but not for the rendering. Once I draw the tiles over this background, it's very weird as the tiles "slide" over the background, when we look through windows, we have the feeling that the stars scroll very fast. To compensate, I have to take the camera speed into account in the Offset argument of the draw method, but I don't know how yet.
In the prévious devlog, I created a spritesheet containing all the images I need to create an Idle and a Fly Animation. This spritesheet was created with the libGDX Texture Packer, and comes with a .pack file, that contains the coordinates of every sprite in the spritesheet.
Thus I have the files Tom_Animation.png and Tom_Animation.pack. I put them in android ---> assets ---> Images
In the LoadingScreen.java, I load the spritesheet, like I load any Texture Atlas, with this single code line :
game.assets.load("Images/Tom_Animation.pack", TextureAtlas.class);
In the Hero.java, to create the animations, we need to add this lines in the constructor :
TextureAtlas tomAtlas = game.assets.get("Images/Tom_Animation.pack", TextureAtlas.class);
Animation tomIdle = new Animation(0.1f, tomAtlas.findRegions("Tom_Idle"), Animation.PlayMode.LOOP);
Animation tomFly = new Animation(0.1f, tomAtlas.findRegions("Tom_Fly"), Animation.PlayMode.NORMAL);
And that's it ! We created 2 Animations, based on 1 TextureAtlas. Easy, ain't it ?
Details of an Animation declaration :
To use the animations, I create a draw() function in the Hero.java. That draw() function will be called in the GameScreen.java, between a batch.begin() and a batch.draw().
Here is the draw() function of the Hero.java :
public void draw(SpriteBatch batch, float animTime){
        if(Gdx.input.isKeyPressed(Keys.W) && fuelLevel > 0){
            if(!fly){
                GameConstants.ANIM_TIME = 0;
                fly = true;
            }
            batch.draw(tomFly.getKeyFrame(animTime),
                    heroBody.getPosition().x - bodyWidth,
                    heroBody.getPosition().y + bodyHeight - spriteHeight,
                    bodyWidth,
                    spriteHeight - bodyHeight,
                    spriteWidth,
                    spriteHeight,
                    1,
                    1,
                    heroBody.getAngle()*MathUtils.radiansToDegrees);
        }
        else{
            if(fly){
                GameConstants.ANIM_TIME = 0;
                fly = false;
            }
            batch.draw(tomIdle.getKeyFrame(animTime, true),
                    heroBody.getPosition().x - bodyWidth,
                    heroBody.getPosition().y + bodyHeight - spriteHeight,
                    bodyWidth,
                    spriteHeight - bodyHeight,
                    spriteWidth,
                    spriteHeight,
                    1,
                    1,
                    heroBody.getAngle()*MathUtils.radiansToDegrees);
        }
    }
About this code :
You can see in my code, that for there are parameter called bodyWidth, bodyHeight, and spriteWidth, spriteHeight.
Why ?
I could have drawn the sprites at exactly the same size as the Box2D body, but I would have a weird collision detection :

As you can see on the picture above, as my character is moving, in some frames, his limbs cover a smaller portion of the Box2D body, but, the body would still detect collisions in the non covered area... So I made the choice to create a body that has the same height as the sprites, but is thiner. Therefore, there will be som frames (mainly in the idle animation) with part of the limbs going out of the detection zone, which is OK, as limbs are flexible, it's not really a problem if we don't take into account the collision with small parts of them.
As the frame is not the same size as the Box2D body, in the draw function, I had to do a bit of mathematics to calculate the X and Y positions of the frames rotation center, as they don't correspond anymore to the Box2D body rotation center.
And here is the result !

I worked a bit more on Major Tom's design. I added a bit of light and shadows, to make it look less flat, and I added small details to the helmet. Oh ! and also, color to the logo on the shoulder ! Now the hero is 99% black and white, not 100%.
Here is a before/after pictures :

I am pretty sure I'll stick to it. Drawing is definitely a pain for me. I think I gave my best shot on this.
So now I am happy with my hero, what do I do with him ?
I chop him into parts ! Just like Dexter would do !
Oh noooooo ! Major Tom has been chopped !

Why did I do that ???
To create an animation, basically, there are 2 methods :
When you are like me, and you are not skilled in drawing, the second method is definitely the best. You'll save A LOT of time and frustration.
Therefore, I put all these body parts in the amazing software Spriter Pro.With this tool, you just drag and drops the body parts of your character in the main window. Once you placed them, you can draw "Bones", basically one bone for each part of the body you want to move, and you assign a body part to every bone. All that remains to do is move the limbs of your puppet, and the Spriter will interpolate the whole motion, it very intuitive and ridiculously easy. Just look the first of them tutorial videos, in 7 minutes you'll be able to do very cool animations !
The screen looks like that :
![]()
Then all you need to do is export your animation. You can export it in gif, or you can export the .png files. That's what we'll do, as libGDX needs a spritesheet with all the animations steps to create the in-game animation.
Here is the idle animation of Major Tom, floating in space. In-game, the animation will be slower.

I also created an animation that will be called Fly Animation, that will be displayed when Major Tom activates his jet pack.
Finally, I exported 11 png for the Fly Animation and 20 png for the Idle Animation, and packed them with the libGDX Texture Packer, to obtain this animation spritesheet :

The names of the different png are VERY important. All the png of a single animation must have the same name, followed by a number. For example, for the Idle animation I have Tom_Idle_000, Tom_Idle_001, Tom_Idle_002, ..., Tom_Idle_019. And in the libGDX code, to create the animation, I'll only refer to the name "Tom_Idle", and libGDX will be able to get all the pictures and put them in order.
We'll see the code in the next devlog !
And voilà ! I reach to the much dreaded part : Draw
Basically, all that remains is to give a visual identity to the game. Oh and there are also sounds... damn.
Starting from today, I completely come out of my area of "expertise " (If only I was an expert in coding... haha). The 17 remaining days will be really difficult, and I'll learn to draw...
Before doing the tileset, I started by the hero, Major Tom. And it was... painful. I spent 110 minutes on Photoshop, drawing shapes. Looking at examples on Google Image.
Well, I am somewhat satisfied with the result :

Here is a speed up videos showing the whole process in 2 minutes :
Notice that I drew Major Tom in high resolution ! I found it was easier. I'll have to scale it down. I hope it will render well once scaled down... Fingers crossed.
Now I have to animate Major Tom.
That will be painful again.
Until now, the only output I have in my game is the console. If I get crushed, if I'm out of fuel or oxygen, or if I finish the level, I have to check the console. I need a HUD to display informations on the GameScreen.
I want the HUD to display the oxygen and fuel levels, to display a menu if the player wins or loses. I want something like this :

For that I created a HUD class.
Here is the code for the HUD.java creator :
public class HUD {

    final MyGdxGame game;
    public Image OxygenBar, FuelBar;
    private float posXOxygen, posYOxygen, width, height, outOfFuelAlpha;
    private Hero hero;
    private Table tableWin, tableLose, tablePause;
    private TextButtonStyle textButtonStyle;
    private TextButton nextButton, replayButton, replayButton2, replayButton3, menuButton, menuButton2, resumeButton;
    private LabelStyle menulabelStyle, hudLabelStyle;
    private Label outOfFuelLabel, loseLabel;
    private Image imageTableBackground;
    public String loseString;

    public HUD(final MyGdxGame game, Stage stage, Skin skin, Hero hero){
        this.game = game;
        this.hero = hero;

        outOfFuelAlpha = 0;
        posXOxygen = 9 * Gdx.graphics.getWidth()/100;
        posYOxygen = 95 * Gdx.graphics.getHeight()/100;
        width = Gdx.graphics.getWidth()/3;
        height = Gdx.graphics.getHeight()/70;
        loseString = "You lost !";

        menulabelStyle = new LabelStyle(game.assets.get("fontMenu.ttf", BitmapFont.class), Color.WHITE);
        hudLabelStyle = new LabelStyle(game.assets.get("fontHUD.ttf", BitmapFont.class), Color.WHITE);

        outOfFuelLabel = new Label("PRESS ESC TO RESTART", hudLabelStyle);
        outOfFuelLabel.setX(Gdx.graphics.getWidth()/2 - new GlyphLayout(game.assets.get("fontHUD.ttf", BitmapFont.class), outOfFuelLabel.getText()).width/2);
        outOfFuelLabel.setY(Gdx.graphics.getHeight()/2 - new GlyphLayout(game.assets.get("fontHUD.ttf", BitmapFont.class), outOfFuelLabel.getText()).height/2);
        outOfFuelLabel.addAction(Actions.alpha(0));

        loseLabel = new Label(loseString, menulabelStyle);

        textButtonStyle = new TextButtonStyle();
        textButtonStyle.up = skin.getDrawable("Button");
        textButtonStyle.down = skin.getDrawable("ButtonChecked");
        textButtonStyle.font = game.assets.get("fontTable.ttf", BitmapFont.class);
        textButtonStyle.fontColor = Color.WHITE;

        //Win table buttons
        nextButton = new TextButton("NEXT", textButtonStyle);
        replayButton = new TextButton("PLAY AGAIN", textButtonStyle);
        //Lose table buttons
        replayButton2 = new TextButton("PLAY AGAIN", textButtonStyle);
        menuButton = new TextButton("MENU", textButtonStyle);
        //Pause table buttons
        replayButton3 = new TextButton("PLAY AGAIN", textButtonStyle);
        menuButton2 = new TextButton("MENU", textButtonStyle);
        resumeButton = new TextButton("RESUME", textButtonStyle);

        tableWin = new Table();
        tableWin.setFillParent(true);
        tableWin.row().colspan(2);
        tableWin.add(new Label("LEVEL CLEARED", menulabelStyle)).padBottom(Gdx.graphics.getHeight()/22);
        tableWin.row().width(Gdx.graphics.getWidth()/4);
        tableWin.add(nextButton).spaceRight(Gdx.graphics.getWidth()/100);
        tableWin.add(replayButton);
        tableWin.addAction(Actions.alpha(0));

        tableLose = new Table();
        tableLose.setFillParent(true);
        tableLose.row().colspan(2);
        tableLose.add(loseLabel).padBottom(Gdx.graphics.getHeight()/22);
        tableLose.row().width(Gdx.graphics.getWidth()/4);
        tableLose.add(replayButton2).spaceRight(Gdx.graphics.getWidth()/100);
        tableLose.add(menuButton);
        tableLose.addAction(Actions.alpha(0));

        tablePause = new Table();
        tablePause.setFillParent(true);
        tablePause.add(resumeButton).width(replayButton3.getPrefWidth()).pad(Gdx.graphics.getHeight()/50).row();
        tablePause.add(replayButton3).width(replayButton3.getPrefWidth()).pad(Gdx.graphics.getHeight()/50).row();
        tablePause.add(menuButton2).width(replayButton3.getPrefWidth()).pad(Gdx.graphics.getHeight()/50);
        tablePause.addAction(Actions.alpha(0));

        imageTableBackground = new Image(skin.getDrawable("imageTable"));
        imageTableBackground.setColor(0,0,0.25f,1);
        imageTableBackground.setWidth(1.15f*tableWin.getPrefWidth());
        imageTableBackground.setHeight(1.15f*tableWin.getPrefHeight());
        imageTableBackground.addAction(Actions.alpha(0));

        stage.addActor(imageTableBackground);
        stage.addActor(tableWin);
        stage.addActor(tableLose);
        stage.addActor(tablePause);
        stage.addActor(outOfFuelLabel);
    }
}
In the creator :
The Asset Manager has been set up, and some fonts and sprites sheets were loaded during the loading screen. Now I can create a MainMenuScreen.
The MainMenuScreen code is very simple. Basically, the screen is the same as the LoadingScreen, but it will also display a "Play" button :

Here is the code of the MainMenuScreen.java :
public class MainMenuScreen implements Screen{

    final MyGdxGame game;
    private OrthographicCamera camera;
    private Stage stage;
    private Skin skin;
    private Texture textureLogo;
    private Image imageLogo;
    private TextureAtlas textureAtlas;
    private TextButton playButton, optionButton;
    private TextButtonStyle textButtonStyle;

    public MainMenuScreen(final MyGdxGame game){
        this.game = game;

        camera = new OrthographicCamera();
        camera.setToOrtho(false, Gdx.graphics.getWidth(), Gdx.graphics.getHeight());

        textureLogo = new Texture(Gdx.files.internal("Images/Logo.jpg"), true);
        textureLogo.setFilter(TextureFilter.MipMapLinearNearest, TextureFilter.MipMapLinearNearest);
        imageLogo = new Image(textureLogo);
        imageLogo.setWidth(Gdx.graphics.getWidth());
        imageLogo.setHeight(textureLogo.getHeight() * imageLogo.getWidth()/textureLogo.getWidth());
        imageLogo.setX(Gdx.graphics.getWidth()/2 - imageLogo.getWidth()/2);
        imageLogo.setY(Gdx.graphics.getHeight()/2 - imageLogo.getHeight()/2);

        stage = new Stage();
        skin = new Skin();

        textureAtlas = game.assets.get("Images/Images.pack", TextureAtlas.class);
        skin.addRegions(textureAtlas);

        textButtonStyle = new TextButtonStyle();
        textButtonStyle.up = skin.getDrawable("Button");
        textButtonStyle.down = skin.getDrawable("ButtonChecked");
        textButtonStyle.font = game.assets.get("fontMenu.ttf", BitmapFont.class);
        textButtonStyle.fontColor = Color.WHITE;
        textButtonStyle.downFontColor = new Color(0, 0, 0, 1);

        playButton = new TextButton("PLAY", textButtonStyle);
        playButton.setHeight(Gdx.graphics.getHeight()/7);
        playButton.setX(Gdx.graphics.getWidth()/2 - playButton.getWidth()/2);
        playButton.setY(29 * Gdx.graphics.getHeight()/100 - playButton.getHeight()/2);

        stage.addActor(imageLogo);
        stage.addActor(playButton);

        playButton.addAction(Actions.sequence(Actions.alpha(0)
                ,Actions.fadeIn(0.25f)));
    }

    @Override
    public void render(float delta) {
        Gdx.gl.glClearColor(0,0,0,1);
        Gdx.gl.glClear(GL20.GL_COLOR_BUFFER_BIT);

        game.batch.setProjectionMatrix(camera.combined);

        stage.act();
        stage.draw();
    }

    @Override
    public void show() {
        Gdx.input.setInputProcessor(stage);

        playButton.addListener(new ClickListener(){
             @Override
                public void clicked(InputEvent event, float x, float y) {
                 game.setScreen(new GameScreen(game));
             }
        });
    }

    @Override
    public void dispose() {
        this.dispose();
        stage.dispose();
    }
}
In the creator :
In the render() :
In the show():
In the dispose(): Like on EVERY screens, we need to dipose everything that can be diposed, to avoid memory leak.
And that's it for the main menu screen !
OK now, I have a nice logo, I can create a main menu screen that will display this logo, and at least a button that you have to press to start playing. Eventually, I'll add an "Option" button and a "Quit" button.
Before creating the main menu screen, I need to create few assets, just to give a nice look to the buttons.
For that I'll use 2 tools :
Creating NinePatch
What is a NinePatch and why do we need NinePatchs ? A NinePatch is an image that you can stretch along X and Y axis in order to fill a region. It's very useful to create nice user interface, for example to skin buttons. The NinePatch is divided in 9 regions, among which 5 are scalable while the 4 regions in the corner will keep their size and proportions. Here is an illustration that shows the difference between scaling a NinePatch vs scaling a normal image.

Thus, I created my first assets, composed of 4 NinePatchs, with the tool draw9patch (that you'll find in you SDK tool folder), with which I will create my UI.

The 2 big images will be used for buttons. There is one picture for the button in initial state, and one that will be used when the button is pressed. The small square will be used for basic representation of the oxygen and fuel levels during the game, and the last one will be used as background for various Tables.
Creating the TextureAtlas
Now that I have my first assets, I need to pack them in a single png image with the Texture Packer that you can download here. Packing all the pictures in a single file will optimize the GPU usage : You load the big picture only once, then you draw only the portion you need.
Once you packed your assets, you obtain two files : the .png file that contains every picture you packed, and a .pack file, that is a text file containing the name and the coordinate of all the pictures. Therefore, in your code you'll access every single picture by it's name.
Now that we have assets, we need an Asset Manager ! For the Asset Manager , I create it in the loading screen.
Creating the loading screen
Actually, we already have the Asset Manager , as I created it in the Main activity, remember :
public class MyGdxGame extends Game implements ApplicationListener{
    public SpriteBatch batch;
    public AssetManager assets;

    @Override
    public void create () {
        batch = new SpriteBatch();
        assets = new AssetManager();

        this.setScreen(new GameScreen(this));
    }

    @Override
    public void render () {
        super.render();
    }
}
Finally, we create the loading screen, in which we'll load a lot of things in the Asset Manager. This screen will be displayed only during the loading time. Thus, with a very small image to load, the screen will appear during less that one second, but when we'll have a lot of pictures in our Texture Atlas, it will take more time.
During the loading screen, I load the Texture Atlas, and I create and load several fonts that will be used during the game.
During the loading time, the screen will display the nice logo I created yesterday.
Important : every asset (image, texture atlas, font file, sound, level maps...) must be stored in the folder Android ---> Asset. In the Asset folder, I create subfolders Image, Sound, Fonts. Every time you put an asset or modify in the Asset folder, you need to refresh the Android folder in Eclipse.
Here is the code for the LoadingScreen.java :
public class LoadingScreen implements Screen{

    final MyGdxGame game;
    OrthographicCamera camera;
    private Texture textureLogo;
    private Image imageLogo;
    private Stage stage;

    public LoadingScreen(final MyGdxGame game){
        this.game = game;

        camera = new OrthographicCamera();
        camera.setToOrtho(false, Gdx.graphics.getWidth(), Gdx.graphics.getHeight());

        //Creating the logo picture
        textureLogo = new Texture(Gdx.files.internal("Images/Logo.jpg"), true);
        textureLogo.setFilter(TextureFilter.MipMapLinearNearest, TextureFilter.MipMapLinearNearest);
        imageLogo = new Image(textureLogo);
        imageLogo.setWidth(Gdx.graphics.getWidth());
        imageLogo.setHeight(textureLogo.getHeight() * imageLogo.getWidth()/textureLogo.getWidth());
        imageLogo.setX(Gdx.graphics.getWidth()/2 - imageLogo.getWidth()/2);
        imageLogo.setY(Gdx.graphics.getHeight()/2 - imageLogo.getHeight()/2);

        stage = new Stage();

        //Loading of the TextureAtlas
        game.assets.load("Images/Images.pack", TextureAtlas.class);

        //Loading of the Freetype Fonts
        FileHandleResolver resolver = new InternalFileHandleResolver();
        game.assets.setLoader(FreeTypeFontGenerator.class, new FreeTypeFontGeneratorLoader(resolver));
        game.assets.setLoader(BitmapFont.class, ".ttf", new FreetypeFontLoader(resolver));

        FreeTypeFontLoaderParameter size1Params = new FreeTypeFontLoaderParameter();
        size1Params.fontFileName = "Fonts/good times rg.ttf";
        size1Params.fontParameters.genMipMaps = true;
        size1Params.fontParameters.minFilter = TextureFilter.Linear;
        size1Params.fontParameters.magFilter = TextureFilter.Linear;
        size1Params.fontParameters.size = Gdx.graphics.getWidth()/18;
        game.assets.load("fontMenu.ttf", BitmapFont.class, size1Params);

        FreeTypeFontLoaderParameter size2Params = new FreeTypeFontLoaderParameter();
        size2Params.fontFileName = "Fonts/good times rg.ttf";
        size2Params.fontParameters.genMipMaps = true;
        size2Params.fontParameters.minFilter = TextureFilter.Linear;
        size2Params.fontParameters.magFilter = TextureFilter.Linear;
        size2Params.fontParameters.size = Gdx.graphics.getWidth()/35;
        game.assets.load("fontTable.ttf", BitmapFont.class, size2Params);

        FreeTypeFontLoaderParameter size3Params = new FreeTypeFontLoaderParameter();
        size3Params.fontFileName = "Fonts/good times rg.ttf";
        size3Params.fontParameters.genMipMaps = true;
        size3Params.fontParameters.minFilter = TextureFilter.Linear;
        size3Params.fontParameters.magFilter = TextureFilter.Linear;
        size3Params.fontParameters.size = 13 * Gdx.graphics.getWidth()/1000;
        game.assets.load("fontHUD.ttf", BitmapFont.class, size3Params);

        //Displaying the logo picture
        stage.addActor(imageLogo);
        imageLogo.addAction(Actions.sequence(Actions.alpha(0)
                ,Actions.fadeIn(0.1f),Actions.delay(1.5f)));
    }

    @Override
    public void render(float delta) {
        Gdx.gl.glClearColor(1, 1, 1, 1);
        Gdx.gl.glClear(GL20.GL_COLOR_BUFFER_BIT);

        camera.update();
        game.batch.setProjectionMatrix(camera.combined);

        stage.act();
        stage.draw();

        if(game.assets.update())
            ((Game)Gdx.app.getApplicationListener()).setScreen(new MainMenuScreen(game));
    }

    @Override
    public void dispose() {
        stage.dispose();
    }
}
About this code :
During the first week I coded most of the game mechanics. Now it's time work on the visual identity of the game. Before working on the game graphics, I worked on the logo, that will be the main menu screen background. And to make that logo, I needed a name.
After one week, my project still didn't have a name. Thus, I took benefit of the past few days without coding, due to Christmas time, to think about a name.
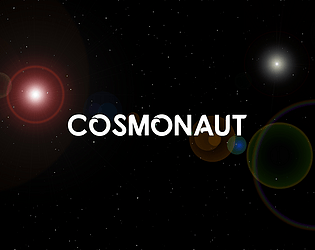
The first name that came up was simply COSMONAUT. I like simple things. Always. But, I wondered... should I find a name that says more about the game. Should I find a name more intriguing ? Should I use something like "Lost in Space", "Forlorn", "Abandoned", "Condemned" ?
Well... I found all that boring as hell, I finally stuck to my first choice, which is almost a rule of life with me, and I kept the simple COSMONAUT. I really like it. It's very simple, it doesn't say anything about the gameplay and the story, it only says about who you are, a cosmonaut.
Then I spent a bit of time on Photoshop to create this logo :

For those who are interested in the process of creation of this logo, here is a speed-up video of the whole process :
All that is missing in this world is a little bit of hope ! During is travel, Major Tom will find oxygen and fuel refill, that will save his life, more that once.
Thus I created the OxygenRefill and FuelRefill classes, that are subclasses of an Item class.
Here is the code of the Item.java :
public class Item {

    protected static World world;
    public Body body;
    private BodyDef bodyDef;
    private FixtureDef fixtureDef;
    private PolygonShape polygonShape;
    private float width, height;
    public boolean used;

    public Item(){
    }

    public void create(World world,  OrthographicCamera camera, MapObject mapObject){
        this.world = world;
        used = false;

        width = mapObject.getProperties().get("width", float.class)/2 * GameConstants.MPP;
        height = mapObject.getProperties().get("height", float.class)/2 * GameConstants.MPP;

        bodyDef = new BodyDef();
        fixtureDef = new FixtureDef();

        bodyDef.type = BodyType.DynamicBody;

        bodyDef.position.set((mapObject.getProperties().get("x", float.class) + mapObject.getProperties().get("width", float.class)/2) * GameConstants.MPP,
                            (mapObject.getProperties().get("y", float.class) + 1.5f*mapObject.getProperties().get("height", float.class)) * GameConstants.MPP);

        polygonShape = new PolygonShape();
        polygonShape.setAsBox(width, height);

        fixtureDef.shape = polygonShape;
        fixtureDef.density = 0.1f;
        fixtureDef.friction = 0.2f;
        fixtureDef.restitution = 0f;
        fixtureDef.isSensor = true;

        body = world.createBody(bodyDef);
        body.createFixture(fixtureDef).setUserData("Item");
        body.setUserData("Item");
    }

    public void activate(){
        //Called when Major Tom collide with the item
    }

    public void active(TiledMapReader tiledMapReader){
        if(used){
            body.setActive(false);
            world.destroyBody(body);
            tiledMapReader.items.removeIndex(tiledMapReader.items.indexOf(this, true));
        }
    }
}
About this code :
FuelRefill.java :
public class FuelRefill extends Item{

    private static Hero hero;

    public FuelRefill(World world,  OrthographicCamera camera, MapObject mapObject, Hero hero){
        this.hero = hero;
        create(world, camera, mapObject);
    }

    @Override
    public void activate(){
        used = true;

        System.out.println("Fuel level before refill : " + hero.getFuelLevel());
        hero.setFuelLevel(hero.getFuelLevel() + GameConstants.FUEL_REFILL);

        if(hero.getFuelLevel() > GameConstants.MAX_FUEL)
            hero.setFuelLevel(GameConstants.MAX_FUEL);
        System.out.println("Fuel level after refill : " + hero.getFuelLevel());
    }
}OxygenRefill.java :
public class OxygenRefill extends Item{

    private static Hero hero;

    public OxygenRefill(World world,  OrthographicCamera camera, MapObject mapObject, Hero hero){
        this.hero = hero;
        create(world, camera, mapObject);
    }

    @Override
    public void activate(){
        used = true;

        System.out.println("Oxygen level before refill : " + hero.getOxygenLevel());
        hero.setOxygenLevel(hero.getFuelLevel() + GameConstants.OXYGEN_REFILL);

        if(hero.getOxygenLevel() > GameConstants.MAX_OXYGEN)
            hero.setOxygenLevel(GameConstants.MAX_OXYGEN);
        System.out.println("Oxygen level after refill : " + hero.getOxygenLevel());
    }
}
As you can see, these 2 subclasses are very straightforward. We only define the activate() function, to add either fuel or oxygen. A couple of "System.out.println()" are here only to monitor the fuel and oxygen level in the console, ash I still didn't create the HUD.
All we need to make the activate() function run is adding these two lines in the GameConstants.java :
public static float FUEL_REFILL = 40f;
public static float OXYGEN_REFILL = 30f;
Of course, these values are arbitrary for now. I'll do the fine tuning much later.
Recognizing items with the TiledMapReader.java :
This happens in the same for loop as the Switches recognition, as the items will be placed in the "Spawn" layer of the Tiled Map, and not in the "Object" layer. Processing like that will make it easier to visualise things when I'll create levels in the level editor.Therefore, this for loop that reads the Spawn layer looks like that now :
//Spawned items
for(int i = 0; i < tiledMap.getLayers().get("Spawn").getObjects().getCount(); i++){
    if(tiledMap.getLayers().get("Spawn").getObjects().get(i).getProperties().get("Type") != null){
        //Switches
        if(tiledMap.getLayers().get("Spawn").getObjects().get(i).getProperties().get("Type").equals("Switch")){
            ItemSwitch itemSwitch = new ItemSwitch(world, camera, tiledMap.getLayers().get("Spawn").getObjects().get(i));
            switchs.add(itemSwitch);
                }
        //Oxygen Refill
        else if(tiledMap.getLayers().get("Spawn").getObjects().get(i).getProperties().get("Type").equals("Oxygen")){
            OxygenRefill oxygenRefill = new OxygenRefill(world, camera, tiledMap.getLayers().get("Spawn").getObjects().get(i), hero);
            items.add(oxygenRefill);
        }
        //Fuel Refill
        else if(tiledMap.getLayers().get("Spawn").getObjects().get(i).getProperties().get("Type").equals("Fuel")){
            FuelRefill fuelRefill = new FuelRefill(world, camera, tiledMap.getLayers().get("Spawn").getObjects().get(i), hero);
            items.add(fuelRefill);
        }
}
And I added a new function in the TiledMapReader.java :
public void active(){
        hero.displacement();

        for(Obstacle obstacle : obstacles)
            obstacle.active();

        for(Item item: items)
            item.active(this);
    }
This function will run in the render() of the GameScreen.java and it will replace this lines
mapReader.hero.displacement();
for(Obstacle obstacle : mapReader.obstacles){
    obstacle.active();
by this line
mapReader.active();
Finally, we only need to update the beginContact function of the ContactListener, in the GameScreen :
public void beginContact(Contact contact) {
                Body bodyA = contact.getFixtureA().getBody();
                Body bodyB = contact.getFixtureB().getBody();
                Fixture fixtureA = contact.getFixtureA();
                Fixture fixtureB = contact.getFixtureB();

                if(fixtureA.getUserData() != null && fixtureB.getUserData() != null) {
                    ...

                    //Items
                    if(fixtureA.getUserData().equals("Tom") && fixtureB.getUserData().equals("Item")){
                        for(Item item : mapReader.items){
                            if(item.body == fixtureB.getBody())
                                item.activate();
                        }
                    }
                    else if(fixtureB.getUserData().equals("Tom") && fixtureA.getUserData().equals("Item")){
                        for(Item item : mapReader.items){
                            if(item.body == fixtureA.getBody())
                                item.activate();
                        }
                    }
                }
            }
And here is the result !

So here is the (short and easy) code for this ObstacleRevolving.java :
public class ObstacleRevolving extends Obstacle{

    private float speed = 90;

    public ObstacleRevolving(World world, OrthographicCamera camera, MapObject rectangleObject) {
        super(world, camera, rectangleObject);

        //Rotation speed
        if(rectangleObject.getProperties().get("Speed") != null)
            speed = Float.parseFloat((String) rectangleObject.getProperties().get("Speed"));

        body.setFixedRotation(false);
        body.setAngularVelocity(speed*MathUtils.degreesToRadians);
    }

    @Override
    public BodyType getBodyType(){
        return BodyType.KinematicBody;
    }

    @Override
    public void activate(){
        active = !active;

        if(active)
            body.setAngularVelocity(speed*MathUtils.degreesToRadians);
        else
            body.setAngularVelocity(0);
    }
}
About this code :
for (RectangleMapObject rectangleObject : objects.getByType(RectangleMapObject.class)) {
            if(rectangleObject.getProperties().get("Type") != null){
                ...

                //Revolving obstacles
                else if(rectangleObject.getProperties().get("Type").equals("Revolving")){
                    ObstacleRevolving obstacle = new ObstacleRevolving(world, camera, rectangleObject);
                    obstacles.add(obstacle);
                }

                ...
            }
And here is the result !
Now that I can control objects with switches, I can create doors, that can be open/closed with switches.
Here is the code of ObstacleDoor.java :
public class ObstacleDoor extends Obstacle{

    private float speed = 5;
    private Vector2 initialPosition, finalPosition;

    public ObstacleDoor(World world, OrthographicCamera camera,    MapObject rectangleObject) {
        super(world, camera, rectangleObject);

        //Motion speed
        if(rectangleObject.getProperties().get("Speed") != null){
            speed = Float.parseFloat((String) rectangleObject.getProperties().get("Speed"));
        }

        initialPosition = new Vector2(posX, posY);

        if(width > height)
            finalPosition = new Vector2(posX + Math.signum(speed) * 1.9f*width, posY);
        else
            finalPosition = new Vector2(posX, posY + Math.signum(speed) * 1.9f*height);
    }

    @Override
    public BodyType getBodyType(){
        return BodyType.KinematicBody;
    }

    @Override
    public void active(){
        if(active)
            body.setLinearVelocity(    Math.signum(speed) * (initialPosition.x - body.getPosition().x) * speed,
                                    Math.signum(speed) * (initialPosition.y - body.getPosition().y) * speed
                                    );
        else
            body.setLinearVelocity(    Math.signum(speed) * (finalPosition.x - body.getPosition().x) * speed,
                                    Math.signum(speed) * (finalPosition.y - body.getPosition().y) * speed
                                    );
    }

    @Override
    public void activate(){
        active = !active;
    }
}
About this code :
The TiledMapReader.java need to recognize the ObstacleDoor in the map :
for (RectangleMapObject rectangleObject : objects.getByType(RectangleMapObject.class)) {
            if(rectangleObject.getProperties().get("Type") != null){
                ...

                //Doors
                else if(rectangleObject.getProperties().get("Type").equals("Door")){
                    ObstacleDoor obstacle = new ObstacleDoor(world, camera, rectangleObject);
                    obstacles.add(obstacle);
                }

                ...
            }
        }
And here is the result !

OK, thus far I have animated obstacles like ObstaclePiston and ObstacleMoving, and I plan to have few others. It would be very interesting if we could enable/disable these animated obstacles with switches. And it would be interesting if one switch could control several obstacles at a time, and also if an obstacle could be controlled by several switches. It will allow me to create some puzzles.
Here is a video showing how that works :
As you can see in the video, to associate a switch with one or several animated object, I use an Association Number. For that, as usual, I set a property in Tiled, I give it the name "Association Number", and I give the same number to the switch and the animated object that I want to control. I can give several Association Numbers to the switch, by separating them with a comma, if I want the switch to control several objects.
Here is the code for ItemSwitch.java :
public class ItemSwitch {

    public Body swtichBody;
    private BodyDef bodyDef;
    private FixtureDef fixtureDef;
    private PolygonShape switchShape;
    private float width, height;
    private boolean isOn;
    private String[] associationNumbers;

    public ItemSwitch(World world,  OrthographicCamera camera, MapObject mapObject){
        create(world, camera, mapObject);
    }

    public void create(World world,  OrthographicCamera camera, MapObject mapObject){
        //Is the switch on ?
        if(mapObject.getProperties().get("On") != null){
            if(Integer.parseInt((String) mapObject.getProperties().get("On")) == 1)
                isOn = true;
            else
                isOn = false;
        }
        else
            isOn = false;

        //Association Numbers
        if(mapObject.getProperties().get("Association Number") != null){
            associationNumbers = mapObject.getProperties().get("Association Number").toString().split(",");
        }

        width = mapObject.getProperties().get("width", float.class)/2 * GameConstants.MPP;
        height = mapObject.getProperties().get("height", float.class)/2 * GameConstants.MPP;

        bodyDef = new BodyDef();
        fixtureDef = new FixtureDef();

        bodyDef.type = BodyType.StaticBody;

        bodyDef.position.set((mapObject.getProperties().get("x", float.class) + mapObject.getProperties().get("width", float.class)/2) * GameConstants.MPP,
                            (mapObject.getProperties().get("y", float.class) + mapObject.getProperties().get("height", float.class)) * GameConstants.MPP);

        switchShape = new PolygonShape();
        switchShape.setAsBox(width, height);

        fixtureDef.shape = switchShape;
        fixtureDef.density = 0;
        fixtureDef.friction = 0.2f;
        fixtureDef.restitution = 0f;
        fixtureDef.isSensor = true;

        swtichBody = world.createBody(bodyDef);
        swtichBody.createFixture(fixtureDef).setUserData("Switch");
        swtichBody.setUserData("Switch");
    }

    public void active(Array<Obstacle> obstacles){
        isOn = !isOn;

        for(String number : associationNumbers){
            for(Obstacle obstacle : obstacles)
                if(obstacle.associationNumber == Integer.valueOf(number))
                    obstacle.activate();
        }
    }
}
About this code :
To use the ItemSwitch, with the Obstacles, I need to do some modifications in Obstacle.java:
The activate() function will be defined in each type of Obstacle. For now it the same function for both ObstaclePiston and ObstacleMoving :
public void activate(){
        active = !active;
    }
And of course, the active() function of every type of Obstacle must take into account the new boolean active (I guess it starts to be really confusing between active, active() and activate()) So basicaly, the new active() of every Obstacle looks like this :public void active(){
if(active){
//Do the regular stuff
}
else
body.setLinearVelocity(0, 0);
}Finally, we need to detect collision between Major Tom and ItemSwitch
public void beginContact(Contact contact) {
                Fixture fixtureA = contact.getFixtureA();
                Fixture fixtureB = contact.getFixtureB();

                if(fixtureA.getUserData() != null && fixtureB.getUserData() != null) {
                    //Switch
                    if(fixtureA.getUserData().equals("Tom") && fixtureB.getUserData().equals("Switch")){
                        for(ItemSwitch itemSwitch : mapReader.switchs){
                            if(itemSwitch.swtichBody == fixtureB.getBody())
                                itemSwitch.active(mapReader.obstacles);
                        }
                    }
                    else if(fixtureB.getUserData().equals("Tom") && fixtureA.getUserData().equals("Switch")){
                        for(ItemSwitch itemSwitch : mapReader.switchs){
                            if(itemSwitch.swtichBody == fixtureA.getBody())
                                itemSwitch.active(mapReader.obstacles);
                        }
                    }
                }
            }
And that's it ! Here is the result :

Here is the situation : Major Tom’s spaceship is completely wrecked because it entered a very dense region of the asteroid belt, thus it was hit by uncountable micrometeoroids. In some places, tubes carrying oxygen a various gases were punctured, causing gas leak.
In the absence of gravity, these gas leaks will propel anything that crosses the gas spray.
Here is an animation showing what happens when Major Tom pushes floating boxes in a gas leak :

Let's see the code of Leak.java :
public class Leak extends Obstacle{

    private Set<Fixture> fixtures;
    private Vector2 leakForce, leakOrigin;
    private float force, leakSize;

    public Leak(World world, OrthographicCamera camera,    MapObject rectangleObject) {
        super(world, camera, rectangleObject);

        body.getFixtureList().get(0).setSensor(true);
        body.getFixtureList().get(0).setUserData("Leak");
        body.setUserData("Leak");

        fixtures = new HashSet<Fixture>();

        //Leak force
        if(rectangleObject.getProperties().get("Force") != null){
            force = Float.parseFloat(rectangleObject.getProperties().get("Force").toString()) * GameConstants.DEFAULT_LEAK_FORCE;
        }
        else
            force = GameConstants.DEFAULT_LEAK_FORCE;

        //Leak direction and leak origine
        if(rectangle.width > rectangle.height){
            leakForce = new Vector2(force, 0);
            leakSize = rectangle.width * GameConstants.MPP;

            if(force > 0)
                leakOrigin = new Vector2(posX - width, posY);
            else
                leakOrigin = new Vector2(posX + width, posY);
        }
        else{
            leakForce = new Vector2(0, force);
            leakSize = rectangle.height * GameConstants.MPP;

            if(force > 0)
                leakOrigin = new Vector2(posX, posY - height);
            else
                leakOrigin = new Vector2(posX, posY + height);
        }
    }

    public void addBody(Fixture fixture) {
        PolygonShape polygon = (PolygonShape) fixture.getShape();
        if (polygon.getVertexCount() > 2)
            fixtures.add(fixture);
    }

    public void removeBody(Fixture fixture) {
        fixtures.remove(fixture);
    }

    public void active(){
        for(Fixture fixture : fixtures){
            float distanceX = Math.abs(fixture.getBody().getPosition().x - leakOrigin.x);
            float distanceY = Math.abs(fixture.getBody().getPosition().y - leakOrigin.y);

            fixture.getBody().applyForceToCenter(
                                                    leakForce.x * Math.abs(leakSize - distanceX)/leakSize,
                                                    leakForce.y * Math.abs(leakSize - distanceY)/leakSize,
                                                    true
                                                );
        }
    }
}
About this code :
for (RectangleMapObject rectangleObject : objects.getByType(RectangleMapObject.class)) {
            if(rectangleObject.getProperties().get("Type") != null){
                ...

                //Leaks
                else if(rectangleObject.getProperties().get("Type").equals("Leak")){
                    Leak leak = new Leak(world, camera, rectangleObject);
                    obstacles.add(leak);
                }

                ...
            }
}
In the GameScreen.java, we'll use beginContact and enContact functions of the ContactListener to add or remove bodies from the gas spray :
public void beginContact(Contact contact) {
                Fixture fixtureA = contact.getFixtureA();
                Fixture fixtureB = contact.getFixtureB();

                if(fixtureA.getUserData() != null && fixtureB.getUserData() != null) {
                    //Leak
                    if (fixtureA.getUserData().equals("Leak") && fixtureB.getBody().getType() == BodyType.DynamicBody) {
                        for(Obstacle obstacle : mapReader.obstacles){
                            if(obstacle.body.getFixtureList().get(0) == fixtureA){
                                Leak leak = (Leak) obstacle;
                                leak.addBody(fixtureB);
                            }
                        }
                    }
                    else if (fixtureB.getUserData().equals("Leak") && fixtureA.getBody().getType() == BodyType.DynamicBody) {
                        for(Obstacle obstacle : mapReader.obstacles){
                            if(obstacle.body.getFixtureList().get(0) == fixtureB){
                                Leak leak = (Leak) obstacle;
                                leak.addBody(fixtureA);
                            }
                        }
                    }
                }
            }


            @Override
            public void endContact(Contact contact) {
                Fixture fixtureA = contact.getFixtureA();
                Fixture fixtureB = contact.getFixtureB();

                if(fixtureA.getUserData() != null && fixtureB.getUserData() != null) {
                    //Leak
                    if (fixtureA.getUserData().equals("Leak") && fixtureB.getBody().getType() == BodyType.DynamicBody) {
                        for(Obstacle obstacle : mapReader.obstacles){
                            if(obstacle.body.getFixtureList().get(0) == fixtureA){
                                Leak leak = (Leak) obstacle;
                                leak.removeBody(fixtureB);
                            }
                        }
                    }
                    else if (fixtureB.getUserData().equals("Leak") && fixtureA.getBody().getType() == BodyType.DynamicBody) {
                        for(Obstacle obstacle : mapReader.obstacles){
                            if(obstacle.body.getFixtureList().get(0) == fixtureB){
                                Leak leak = (Leak) obstacle;
                                leak.removeBody(fixtureA);
                            }
                        }
                    }
                }
            }
And that's it ! Another feature for the level design !
The ObstacleMoving is an obstacle that will follow a given path. You only have to draw the path in Tiled, and the code will generate an Obstacle that will follow this path, back and forth, or in a loop according to the properties you give it.
To draw the path, we'll use the polyline tool of Tiled :

And here is an animation showing how easy it is to create an ObstacleMoving... once you typed all the code, haha.

Modifying the Obstacle.java
First, obviously, this ObstacleMoving requires a PolylineMapObject instead of a RectangleMapObject, thus we can't use the Obstacle.java as is. We need to add a creator that takes into account the PolylineMapObject.
Here is the new creator in Obstacle.java :
public Obstacle(World world, OrthographicCamera camera, PolylineMapObject polylineObject){

    }
Yes, this creator is empty. It's only here in order to be able to create a subclass, ObstacleMoving.java, that uses a PolylineMapObject.
And here is the code of the ObstacleMoving.java :
public class ObstacleMoving extends Obstacle{

    private float speed;
    private boolean backward, loop;
    private Vector2 direction;
    private Vector2[] path;
    private int step;

    public ObstacleMoving(World world, OrthographicCamera camera, PolylineMapObject polylineObject) {
        super(world, camera, polylineObject);

        //SPEED
        if(polylineObject.getProperties().get("Speed") != null)
            speed = Float.parseFloat((String) polylineObject.getProperties().get("Speed"));
        else speed = 5;

        //DOES THE PATH MAKE A LOOP ?
        if(polylineObject.getProperties().get("Loop") != null)
            loop = true;
        else loop = false;

        //WIDTH OF THE MOVING OBJECT
        if(polylineObject.getProperties().get("Width") != null)
            width = Integer.parseInt((String) polylineObject.getProperties().get("Width")) * GameConstants.PPT * GameConstants.MPP/2;
        else
            width = 2 * GameConstants.PPT * GameConstants.MPP/2;

        //HEIGHT OF THE MOVING OBJECT
        if(polylineObject.getProperties().get("Height") != null)
            height = Integer.parseInt((String) polylineObject.getProperties().get("Height")) * GameConstants.PPT * GameConstants.MPP/2;
        else
            height = 2 * GameConstants.PPT * GameConstants.MPP/2;

        path = new Vector2[polylineObject.getPolyline().getTransformedVertices().length/2];
        for(int i = 0; i < path.length; i++){
            path[i] = new Vector2(polylineObject.getPolyline().getTransformedVertices()[i*2]*GameConstants.MPP, polylineObject.getPolyline().getTransformedVertices()[i*2 + 1]*GameConstants.MPP);
        }

        polygonShape = new PolygonShape();
        polygonShape.setAsBox(width, height);

        bodyDef = new BodyDef();
        bodyDef.type = getBodyType();
        bodyDef.position.set(path[0]);

        fixtureDef = new FixtureDef();
        fixtureDef.shape = polygonShape;
        fixtureDef.density = 0.0f;
        fixtureDef.friction = 0.0f;
        fixtureDef.restitution = 0f;

        body = world.createBody(bodyDef);
        body.createFixture(fixtureDef).setUserData("Objet");
        body.setUserData("Objet");

        polygonShape.dispose();

        direction = new Vector2(path[step].x - body.getPosition().x, path[step].y - body.getPosition().y);
        body.setLinearVelocity(direction.clamp(speed, speed));
    }

    @Override
    public BodyType getBodyType(){
        return BodyType.KinematicBody;
    }

    @Override
    public void active(){
        if(!loop){
            if(!backward){
                if(!new Vector2(path[step].x - body.getPosition().x, path[step].y - body.getPosition().y).hasSameDirection(direction)){
                    step++;

                    if(step == path.length){
                        backward = true;
                        step = path.length - 2;
                    }

                    direction.set(path[step].x - body.getPosition().x, path[step].y - body.getPosition().y);
                }
            }
            else{
                if(!new Vector2(path[step].x - body.getPosition().x, path[step].y - body.getPosition().y).hasSameDirection(direction)){
                    step--;

                    if(step < 0){
                        backward = false;
                        step = 1;
                    }

                    direction.set(path[step].x - body.getPosition().x, path[step].y - body.getPosition().y);
                }
            }
        }
        else{
            if(!new Vector2(path[step].x - body.getPosition().x, path[step].y - body.getPosition().y).hasSameDirection(direction)){
                step++;

                if(step == path.length){
                    step = 0;
                }

                direction.set(path[step].x - body.getPosition().x, path[step].y - body.getPosition().y);
            }
        }
        body.setLinearVelocity(direction.clamp(speed, speed));
    }
}
About this code :

OK now we have these nice pistons, Major Tom can get crushed by them, making the player lose the game.
Detecting the event "Tom gets crushed" happens in the ContactListener we set in the GameScreen, to detect collisions between bodies.
Remember, the ContactListener has 4 methods :
The one that interests us here is the postSolve method. The postSolve method gives us access to the impulse that a body undergoes after a collision. The idea is that the more the hero is crushed, the higher the impulse he undergoes. Thus, if the impulse exceeds a predetermined value, the hero dies.
Here is the code of the postSolve method of the ContactListener in the GameScreen.java :
public void postSolve(Contact contact, ContactImpulse impulse) {
                Body bodyA = contact.getFixtureA().getBody();
                Body bodyB = contact.getFixtureB().getBody();

                //Hero death by crushing
                if(bodyA.getUserData().equals("Tom") || bodyB.getUserData().equals("Tom")){
                    for(int i = 0; i < impulse.getNormalImpulses().length; i++){
                        if(impulse.getNormalImpulses()[i] > GameConstants.CRUSH_IMPULSE){
                            System.out.println("Oh noes ! Major Tom has been crushed !!");
                        }
                    }
                }
            }
About this code :
public static float CRUSH_IMPULSE = 300;
The value of 300 is completely arbitrary. I'll probably change it when the time of fine tuning comes.
And here is the result ! Simple, isn’t it ?

Notice : The code I put in the postSolve will also detect any collision that produces an impulse that exceeds the threshold, for example if the hero flies at very high speed and hit a wall. I could make a condition that the hero dies only if he is crushed by a piston, but I like the idea that he could die by a high-speed collision, that would add challenge to the game. So for now, I stick with that code.