
Indie game storeFree gamesFun gamesHorror games
Game developmentAssetsComics
SalesBundles
Jobs
TagsGame Engines

Hey Charlie,

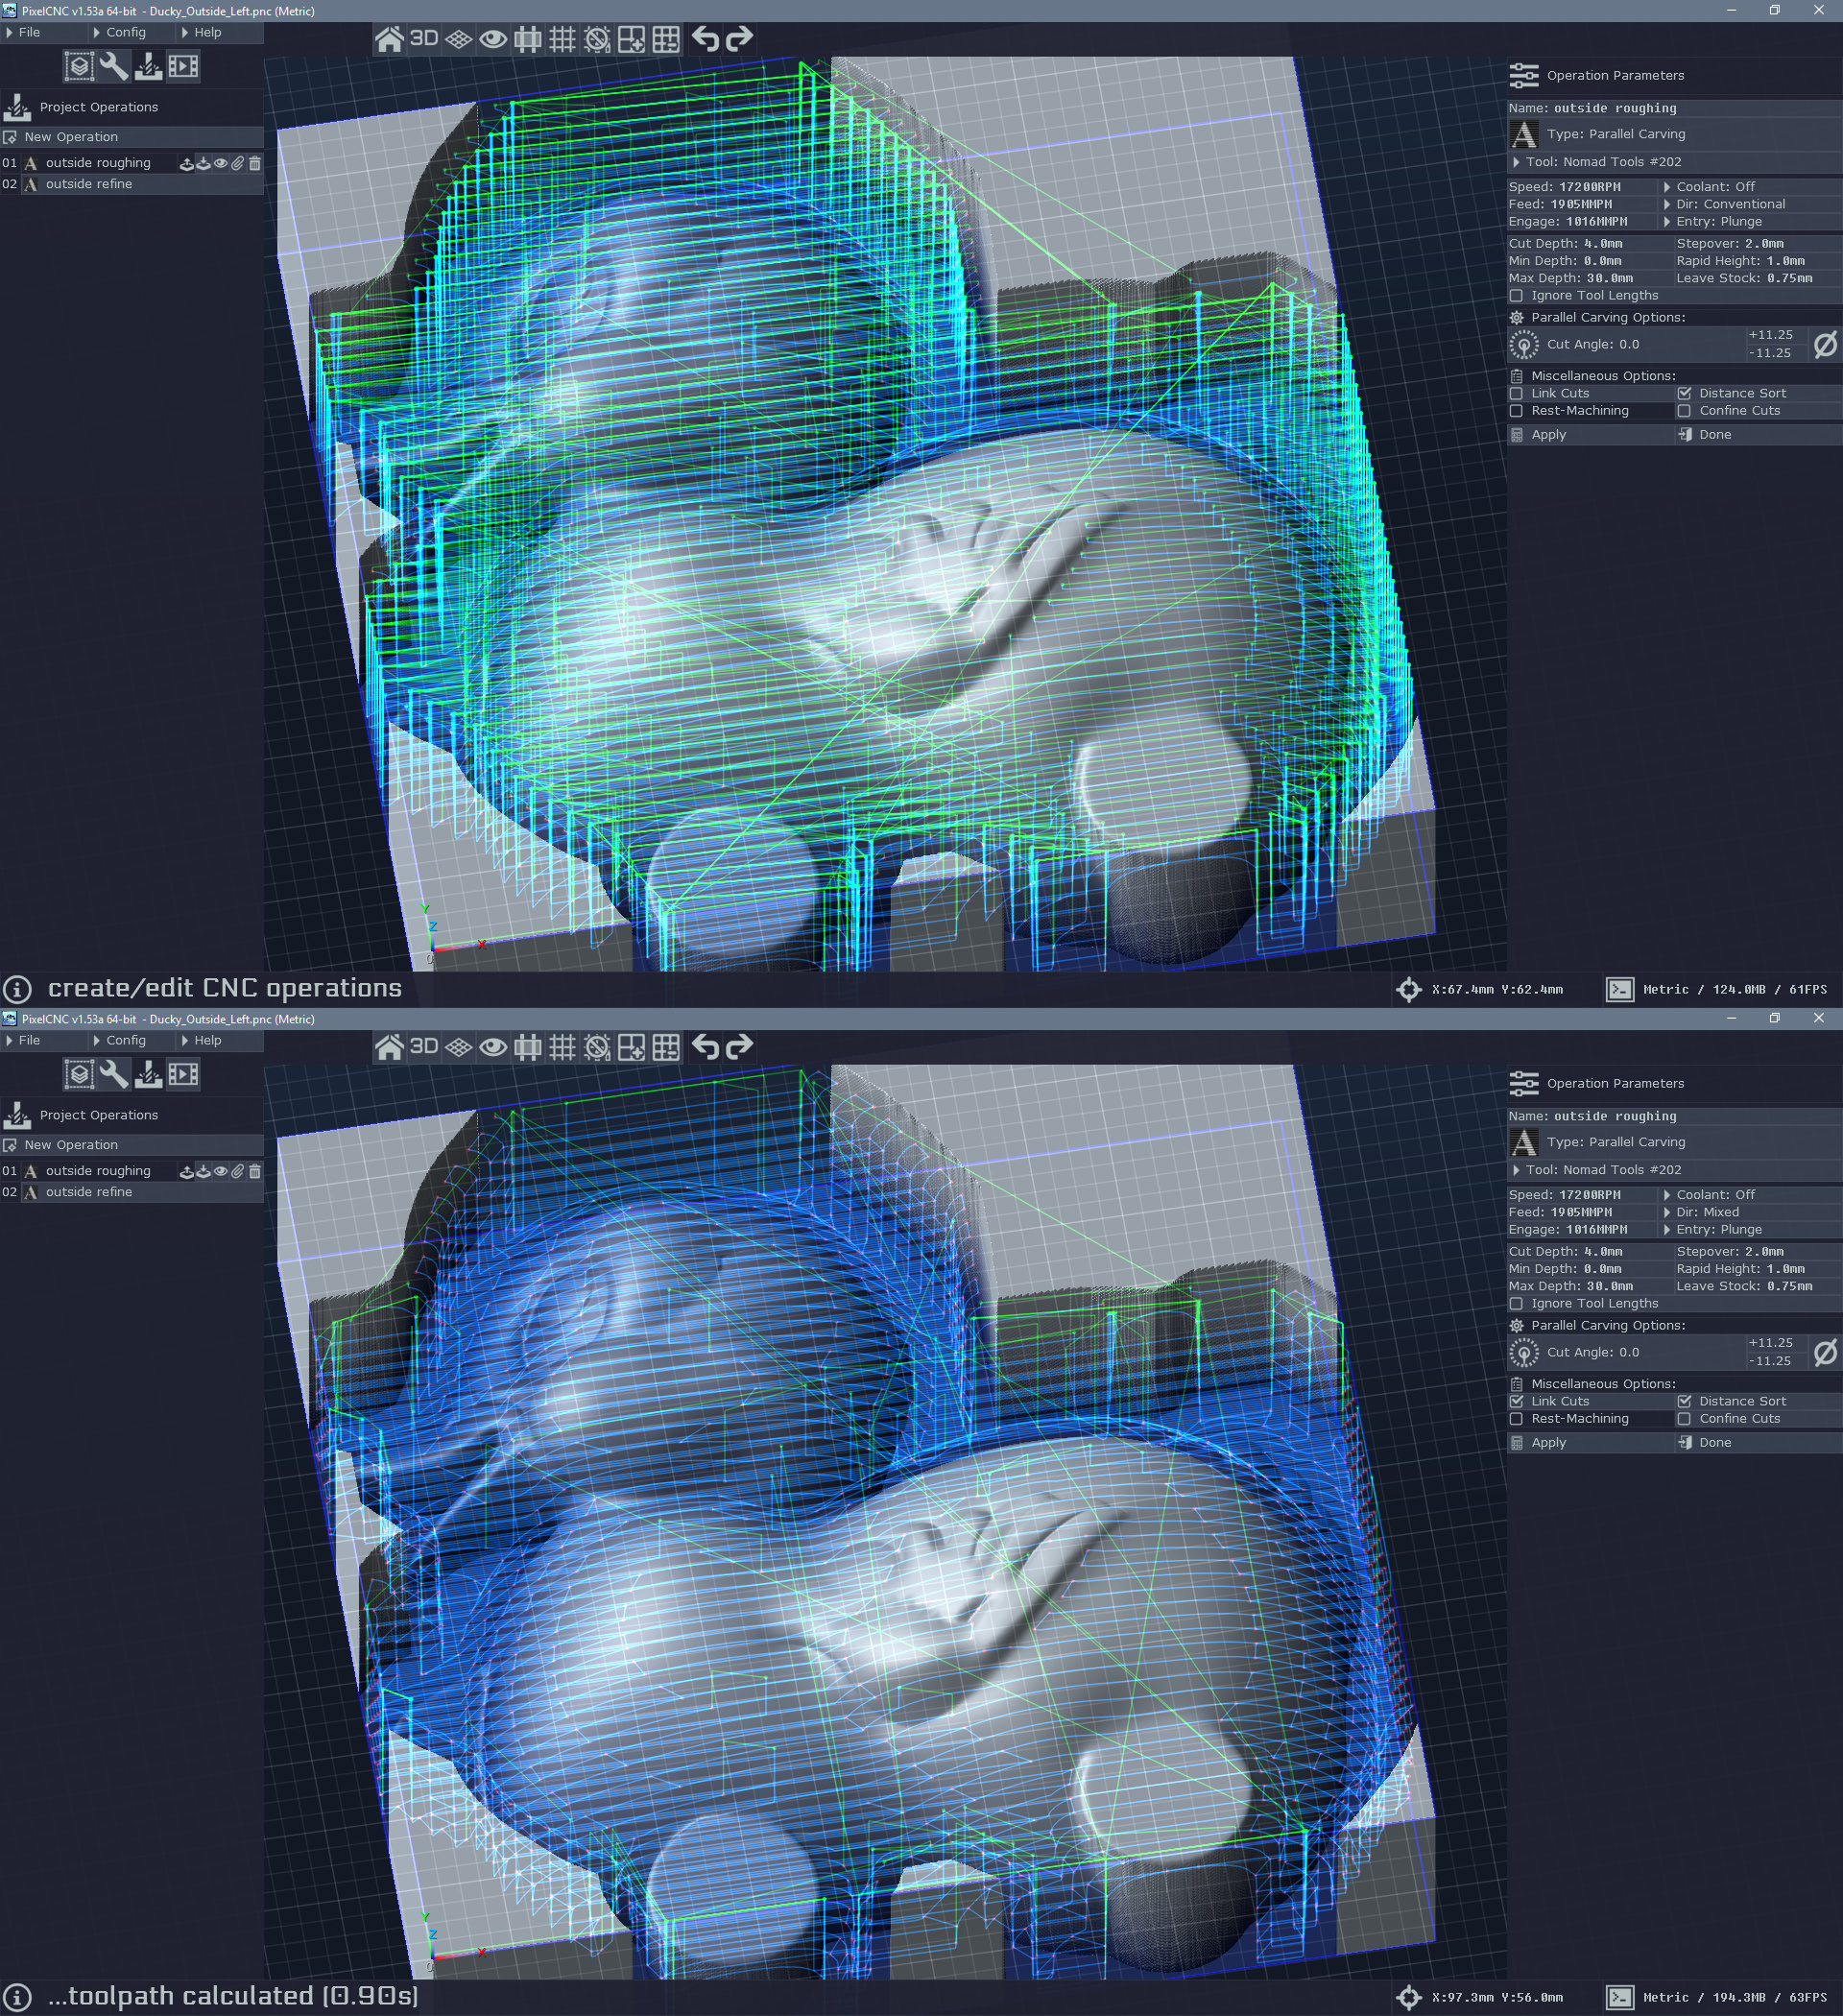
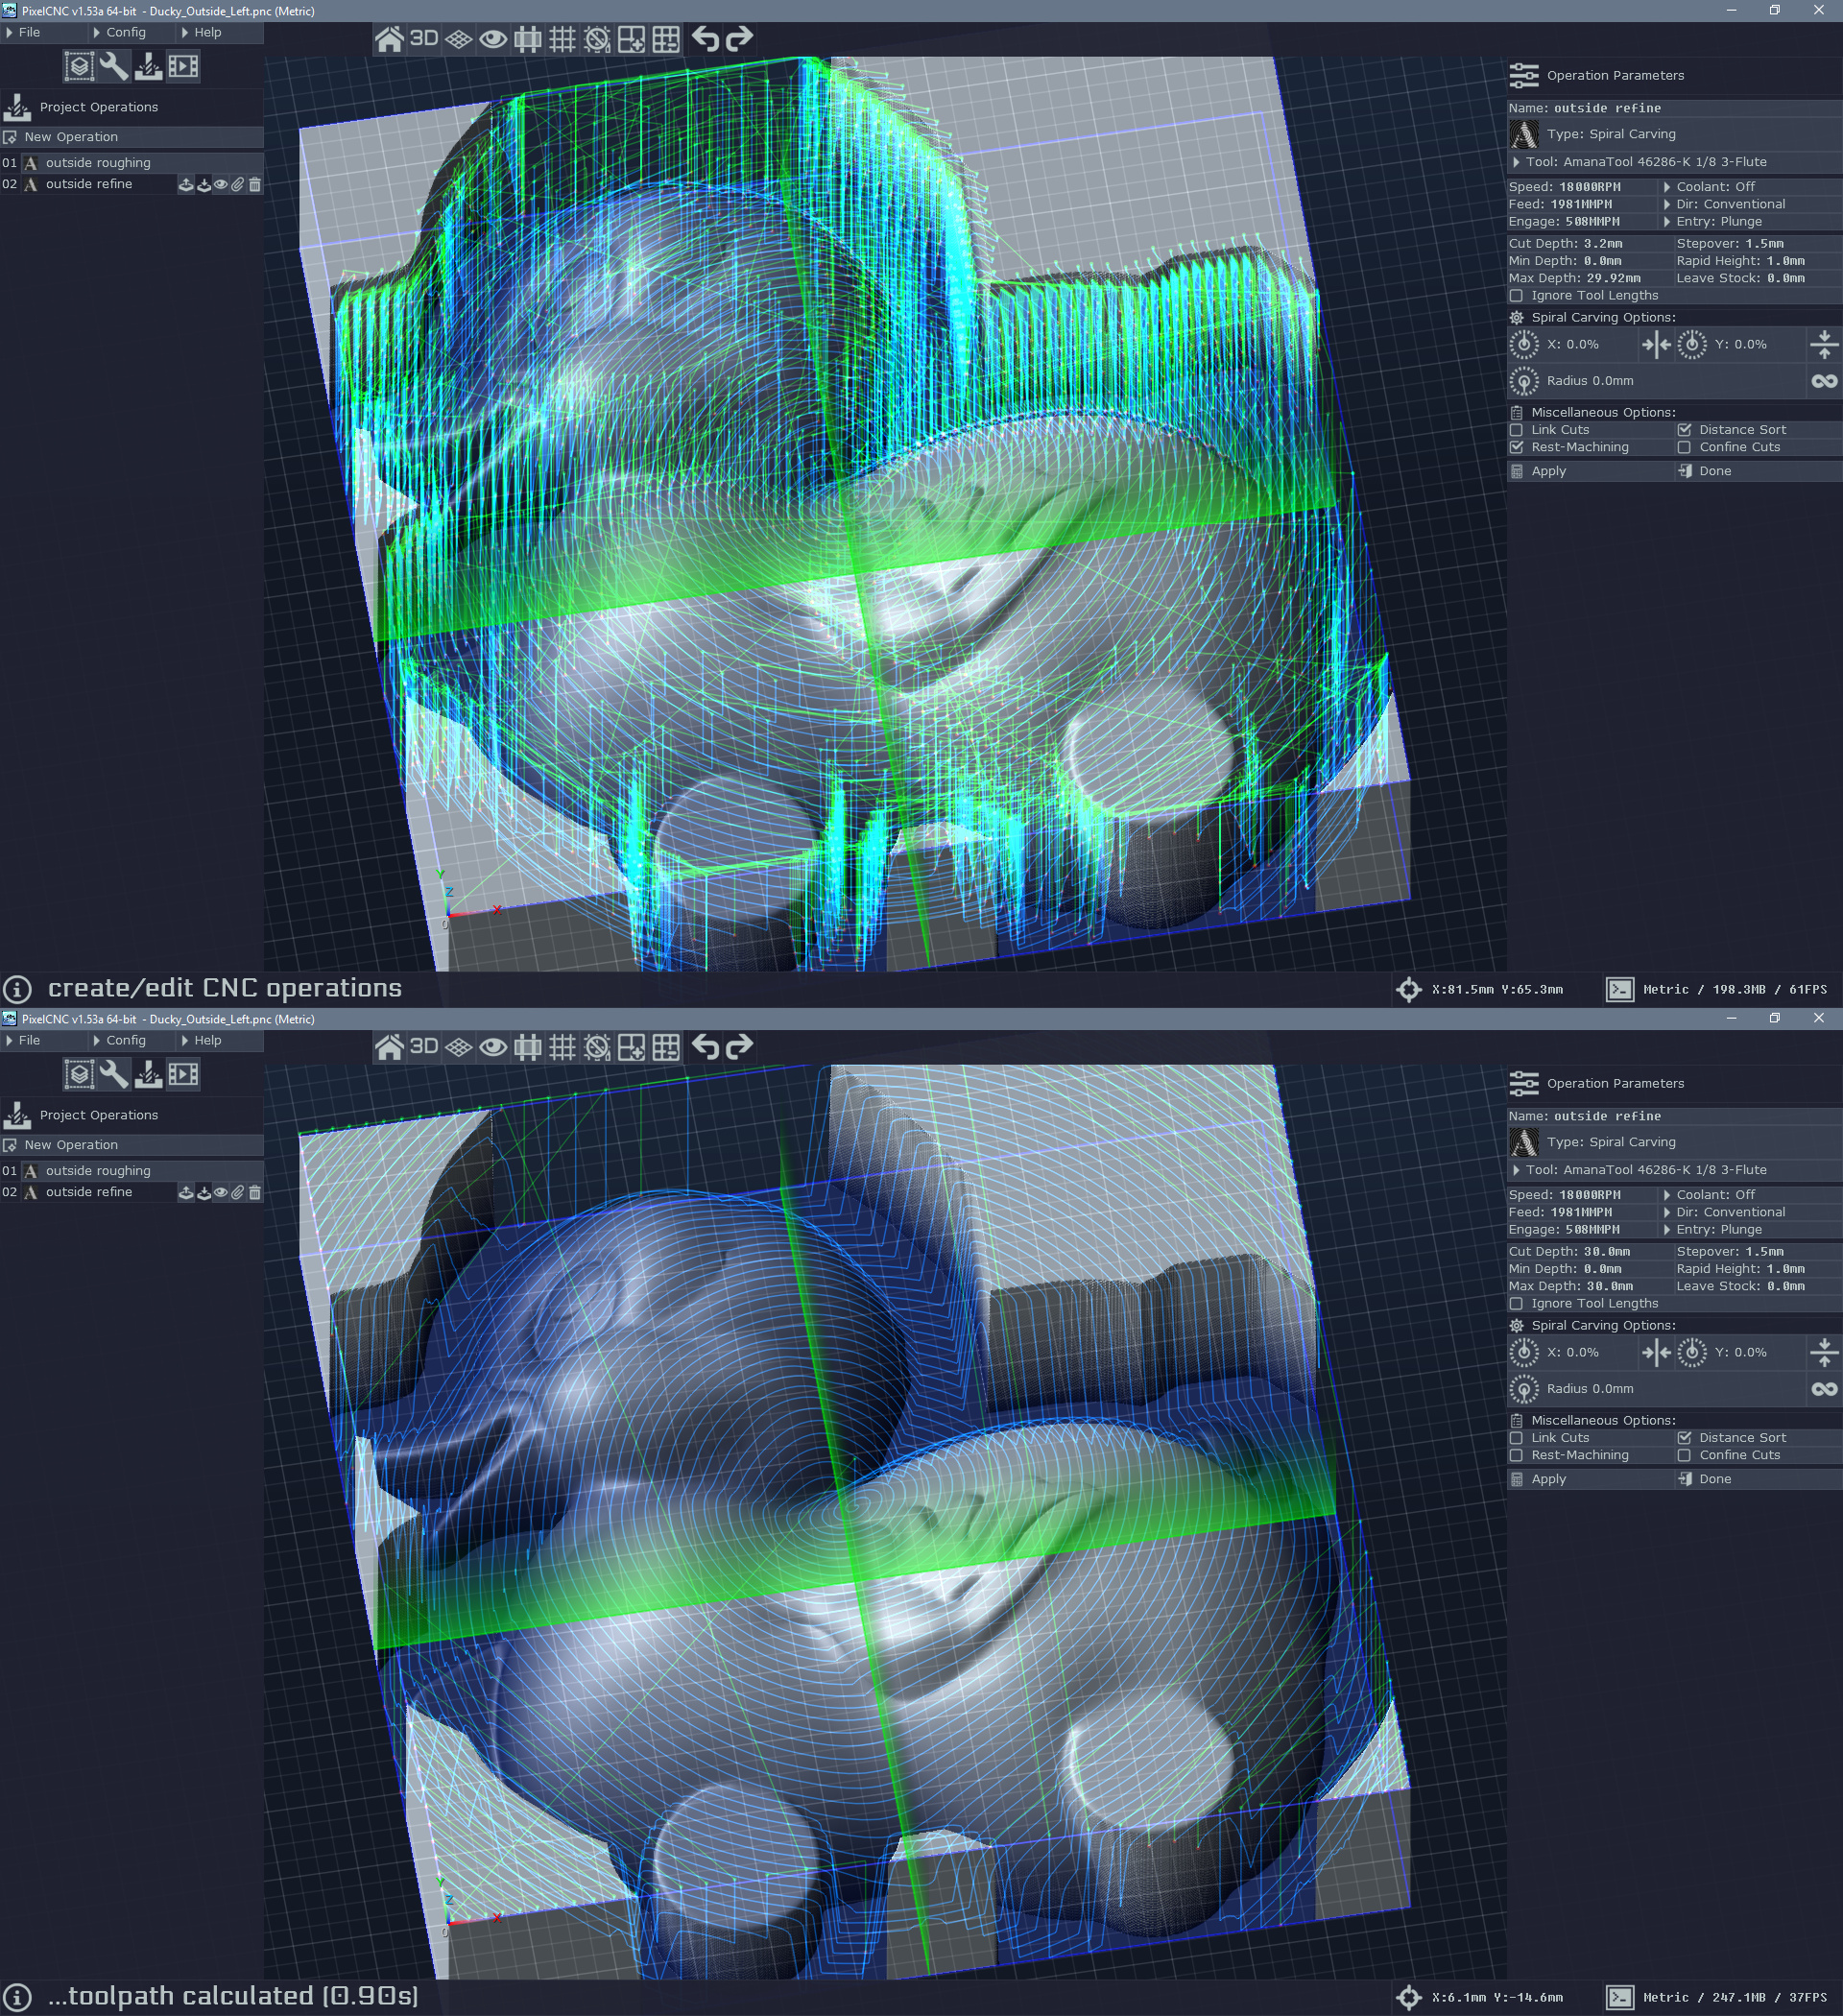
Thanks for getting back to me so quickly. I'll send you that file when I get done this cut. Yeah, lol, this same cut.  But while I wait, I want to ask about those rapids.  I'm using rest machining and would have thought that would not rapid all the way up to the stock surface but instead rapid to just above the roughing pass. And yet, as you see, the rapids are absolutely killing me here. How can I keep those to just above the material left during the roughing pass?

You can try using the Distance Sort option which will re-order the cuts by finding the next cut closest to the end of the current cut. It still could use some work to better optimize how it orders cuts for certain things at times but it can bring huge speedups.

There's definitely a plan to improve the rapid height when cutting where material has already been removed so that each rapid move doesn't have to be at the Safe Z height above the top of the canvas, but instead just a margin above the highest point along the rapid's path itself, or by using the state of the workpiece after previous operations - similar to how the Rest Machining operation works except that uses the simulated cuts to clip cutpaths against. I was thinking I could re-use that existing mechanism to implement a cut masking feature but it would use a designated raster or model layer instead of simulation heightmap :P

For projects like your ducky I tend to just let it rough out the corners and make sure my roughing operation is pretty fast, without a lot of  long rapids (use Link Cuts), and then have my finishing pass come in with a Mixed cutting direction (when using the Parallel Carving op for instance) while also setting the Cut Depth equal to the Max Depth so that the cutter can reach all the way down in one pass - which can require that Ignore Tool Lengths is enabled if your cutter's flute length is shorter than the Cut Depth and just let it just cleanup the bottom of the pocket there around the shape being cut out. There's a bug in v1.53a that causes Ignore Tool Lengths to not properly allow Cut Depths that are larger than the cutter's flute length like it is supposed to - fixed in the next version - but in the meantime you just have to make sure your tool definition is long enough to accommodate it.

If you were to do a + or L shaped object that has a lot of empty space in the corners then it can definitely be a lot of extra time unnecessarily cutting them, and a legitimate masking feature would be nice to have for those situations :)

 Charlie

(+1)

Ok, I took a look at the ducky project and there was definitely room to speed things up a bit!

So the first major thing is that your roughing operation, which is of the Parallel Carving type, was not using Link Cuts. This perhaps is an option that should just be removed entirely and permanently enabled because I can't really see why anybody would want it off :P

The next change was to go from a conventional milling toolpath type to mixed, allowing the cutter to change directions - which with a roughing operation isn't as big of a deal as when finishing where a machine can flex or the cutter can not produce as good of a finish when cutting one way vs the other.


This greatly reduces the number of rapids, and the overal rapid distance which in the simulation mode shows that we reduced them from 35 meters of total rapid travel down to just under 4 meters! The current public build of PixelCNC, v1.53a, does not include rapids in the estimated runtime readout (this has been changed for the next release, which includes machine max and acceleration settings to properly calculate rapid travel times).

Next, for the cleanup/finishing operation, which is a Spiral Carving type, we can just cut at the full depth now that the roughing operation should've removed the majority of the material that's in the way, rather than at 3.2mm depth increments. The project is 30mm deep but the cutter being used (the 1/8" tapered ballnose) only has a 25.4mm (1 inch) flute length. As I mentioned earlier v1.53a has a bug in its Ignore Tool Lengths option in an operation's parameters (this has been fixed for the next release) so to make sure we can use a 30mm Cut Depth we can just cheat a little and edit the tool's definition to have a 1.25" flute length:


Now we can set the Cut Depth and Max Depth to 30mm. In the next release this little "hack" isn't necessary, and users will be able to just use the Ignore Tool Lengths to let their cutter reach the full depth of their project - just make sure material has been properly roughed out beforehand!

We can also disable Rest Machining now that we're just going to be cutting all the way down and following the canvas surface.

Here's the before/after:


Once again we have a lot less rapids now! In fact, I would hazard saying that you can do away with the mask around the ducky and just let the machine cut everything out now because it will be significantly faster than before, even while removing that material in the corners :)

According to the simulation we've reduced the total rapid travel for the operation from just over 49 meters to ~2.5 meters.

Hope this helps! ;)

 Charlie