Indie game storeFree gamesFun gamesHorror games
Game developmentAssetsComics
SalesBundles
Jobs
Tags

There's a mix of shape and sprite particle effects (it's using Game Maker's built-in particle system) so there's example code for both.

The animation system uses a 2D skeletal animation system, the editor should be available in the demo. It works by you defining keyframes (this is what the animation editor exports), then you can set up an animation as a list of keyframes. Once an animation is in place, it's one line of code to use it, and as many objects as you want can use the same animation.

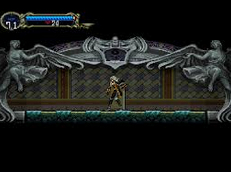
Normal sprite animation also works, some enemies like the Harpy and the bosses use standard sprites. The player is hardcoded to use the skeletal animation system right now, but you could remove all skelani_ function calls in the state machine and replace them with their standard sprite equivalents.

(1 edit) (+1)

thanks again for the answers. I will buy it in the next few days, just need to figure out a few things! i saw the animation system in the demo, just thought it was incomplete as i could not figure out how to make key frames, and how to generate animations between them.

All of the keyframe handling is done in GML scripts, there's no specific animation preview tool. There's two export options in the animation editor: saving as a file, and copying to clipboard. Saving as a file saves it in a format that can be loaded later, the usual ol' editor stuff. Copying to clipboard creates a preformatted snippet of GML code you can just paste into a script directly, though, and that's what you'll be using to define a keyframe. (It just needs one manual change, providing the animation index - that's needed so the animation data can reference the keyframe somehow later)

(1 edit)

Thanks. I just bought it.

A few last questions then im ready to jump into it.

1: tiles.. how is the layout? should i just create tiles with the exsame layout, or could i remove some of the items on the right? What if i dont want to use slopes?

2: so how would you begin a new project with this. just import this, and delete all the data/rooms/tiles.. and start from there?

3: any autotile function? it seem

4: in the world editor, it crashes if i right click outside a room?

(1 edit)

Thanks for the patronage! ^__^

To answer your questions:


1: There's an example tileset called tileset_template which is a bit more readable than the normal tilesets, it's probably the best reference when making new tilesets.

Tiles are arranged in columns where only the tile's x coordinate matters, except that slopes are arranged in alternating rows of alternating floor/ceiling tiles with different collision checking, and autotiling using tiles from the rows you've currently selected in the tileset. The layout goes like this:

  • 1-block uphill (1 tile)
  • 1-block downhill (1 tile)
  • 2-block uphill (2 tiles)
  • 2-block downhill (2 tiles)
  • Solid blocks (5 tiles)
  • Decorative tiles without collision (5 tiles)

The exact coordinates for each type of tile are defined in the macros script, lines 100-105. They are checked in reverse order when collision checking (pixel_vacant script is the only place that handles collision checks, but the editor also uses the tile types), so setting all slope types to 0 and then also the solid type to 0 should remove collision checking from slopes entirely. (You might wanna remove them from pixel_vacant as well to save on processing power)


2: To start a completely new project, import the source file, then go to "included files" and delete the world map and level files:

When editing the world map and levels, files will be created in the game's AppData folder (the sandbox location where save files normally are created - this can be changed in the game's platform Preferences). This is convenient during development, but don't forget to add them as included files when you plan to make a release.


3: There are two autotile functions.

  • Press T to enter "Auto Floor/Ceiling" mode. Click to place points (you must do this from left to right). Press Enter to create a floor under the points, or Insert to create a ceiling above it. In both cases, all the space between the points you created and the edge of the room is filled with random tiles from the currently selected row of tiles, creating slopes to match the points as accurately as possible.
  • Press Shift+T to enter "Terrain Chunk" mode. This is similar to the "Auto Floor/Ceiling" mode, but instead of going to the edges of the room, it creates tiles around a center point (which is stored when you press Shift+T). You can create points both above and below the center point, and when you press Enter, the area delimited by these lines get filled with tiles.

The idea is that you draw a handful of lines and then the functions fill them up with random tiles, so you can design a level in just a few quick strokes (and the randomness looks more natural than human-placed tiles).


4: This is a bug, thanks for finding it! I'll try to upload a new version with this fixed as soon as feasible. In an existing project, you can fix it by changing the obj_editor_wmap Global Right Mouse event like this:


(1 edit)

Thanks again for the good explanations. A few last things i think :D

1: is it possible to use more than one texture set in the same room? (i think not its ok just want to be sure)

2: how do i set where the player starts? i dont seem to be able to find any player spawn object in the object list?

3: can i have more than one entry to the same room. Like in room A there is 2 exits both lead to room B, just in 2 diffrent locations? and how do i tie rooms togerther? i can see i need to place the door stuff from array(obj_door_sideways,obj_door_vertical,obj_door_background,NONE,  obj_door_bg_1way_front,obj_door_bg_1way_back,obj_lockeddoor_door,NONE,  obj_checkpoint_inactive))

4: How to remove or add classes? is it enought to edit "init_player_class" and "init_player_classes" ?

This is really awesome work though!

1: It's not possible. My idea was that it should be easy to reuse the same room layouts with a different tileset, so rooms are hardcoded to only use one tileset. (This is also why the tileset layout is forced to be the same for every tileset for collision checking purposes) I guess it might've been a mistake.


2: In the script config_quickclone_features, at the bottom. You provide the starting level, and the pixel X / Y coordinates.


3: The player will snap to whatever door is the closest to the edge of the screen you entered from, measured from the center of the map grid cell you moved to, so it's possible to have more than one sideways door from one room to another, but it's a bit finicky if they're placed too close to each other - as a rule of thumb you can only have one door per map cell of each type [=background, left, right, up, down].

(Map cells are indicated in the room editor, so hopefully this shouldn't be too hard to deal with.)

The world map data is used to connect levels - when you go through a door, the player is moved to whatever level is on the adjacent cell on the map. So rooms that are next to each other in the world map editor will be connected... but only if you place a door in them in the level editor. It's a bit disorienting at first, but the nice part is that the doors connect completely automatically.


4: Editing init_player_classes to add more lines of data should be everything you need, the character creation menu reads from this data when it is constructed. If you add/remove classes (instead of just changing the default classes) you also need to update the macro PLAYERCLASS_MAX to match the new value, since that is how many entries the menu reads. There's a handful of other places where the player class data is used (status and file select menu displays the name of the character's class) but these should also "just work" since they read from the same data array.

(5 edits)

i change these lines

//Quick starting position configuration
global.qccfg_starting_level                         = 0      //First level to load when starting a new file
global.qccfg_starting_direction                     = efd_LOADSAVE
global.qccfg_starting_pix_x                         = 230 //Pixel coords to start at (when using efd_LOADSAVE - others will snap you to a door)
global.qccfg_starting_pix_y                         = 100


but i seem to always start at some other cords, no matter what i set those to. Another bug or me that is doing it wrong?


on the character class i change this:

#macro PLAYERCLASS_MAX 1


and removed all classes but one from init_player_classes

but i throwns an error form script: gml_Script_minit_title_charactercustomization (line 13)

for(c = PLAYERCLASS_MAX - 1; c >= 0; c--){
    class_name_array[c] = global.player_class_data[c,pcd_NAME]
}


is the connecter biodome something special? the object args i can set on doors/ and obj sideways/up/down are they fore more advanced controls of connecting rooms? how is the door locked/unlocked controlled?`if i place the obj_door_background can that be connected to any rooms? i tried to place one, and add x and y args, but nothing happens when it opens?


one feature request would be able to load level without having to going out of the level editor and then back in.. nothing huge, would just be nice :)

The script player_load_starting_coordinates is called to load all the starting coordinates normally, if you changed the start flow (e.g. skipping the player creation menu) you might have removed that call so it won't happen. (Try adding a debug message to show global.saved_room_pos_x / global.saved_room_pos_y when loading - if they're different from the coordinates you defined something is wrong with reading them)


If you remove all classes, you should set the macro to 0. (It's better to have a placeholder class that has the default stats, though - they're used when finalizing the character customization)


The connector biome has a very neutral tileset and no music, it's inspired by the loading rooms from Symphony of the Night:


Only background doors can take arguments. These arguments are the map cell for the target room (you can see this in the world map editor). If the door doesn't do anything after opening, that means there's nothing in that cell on the world map. So basically these doors are teleporters.
One-way doors work the same way as normal background doors, but you need to open them from the back before they become usable from the front side.


(3 edits)

i hope its not to anoying i keep asking, hopefully others can use the answers aswell :)

when i change the players cord, to the image you can see here, i still spawn a completly diffrent place as you can see from the little movie i made https://imgur.com/a/2GjvfN2

if i change the classes to only allow the knight, it works fine, if i do anything else it crashes with:

https://imgur.com/a/oLU5fEh

ERROR in
action number 1
of Create Event
for object obj_charactercustomization_setup:

Variable obj_verticalmenu.class_name_array(102753, -2147483648) not set before reading it.
 at gml_Script_minit_title_charactercustomization (line 20) -        ggui_menu_add_option_multichoice(mev_adjustmultichoice,     "Class",            "Character profession. Has large impact on abilities.",     pcust_CLASS,        current_customization[pcust_CLASS],         class_name_array,                                 
############################################################################################
gml_Script_minit_title_charactercustomization (line 20)
gml_Object_obj_charactercustomization_setup_Create_0 (line 96) -     minit_title_charactercustomization()

also happens if i set #macro playerclass_MERCENARY 0 and KNIGHT to 3.

It seems the KNIGHT one is hardcoded to be used as a default in a lot of places? 

the enemy is calling script_execute(state) where is that state script? the search in gml does not seem to find it?

how is the animation set on player/enemies?

the light around the player what controls that? i want to implant night/day so having the light controled by an item would be nice. (light radius).

i can see some areas has 2 pictures for paralex, and some have 3? how is that controlled? 

Any way to expand the tileset to allow for more tiles? i an see i can easy extend it to allow for more background objects like trees? what if i want more tiles to paint levels with, that has collision? (the reason i asked is becaus i bought this tileset 

and i would like to keep some more of the tiles to paint levels with. it does not matter if the auto tile system does not use it, as long i can place it to fine tune the level with.