
Indie game storeFree gamesFun gamesHorror games
Game developmentAssetsComics
SalesBundles
Jobs
TagsGame Engines

Hello, Brittle Lizard!

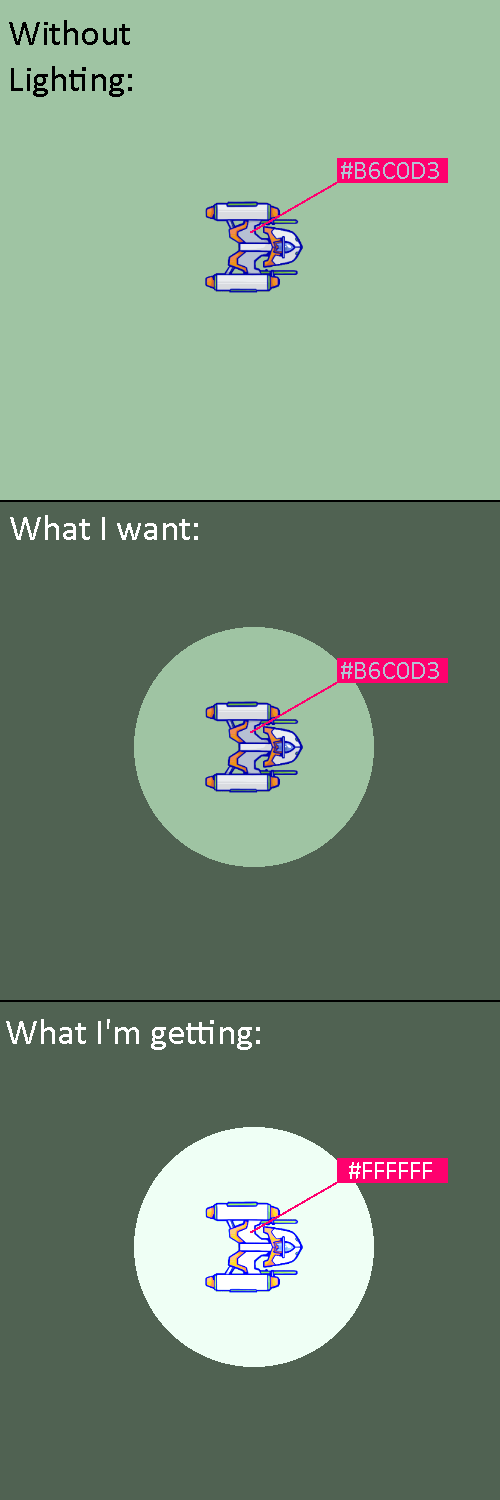
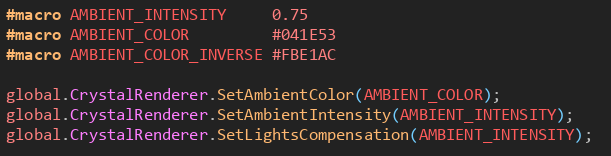
Yes, for this to work, the ambient light intensity usually needs to be above 0 (so you can see the darkness area), and you need to set the intensity of the lights to 1 (default) using .SetLightsIntensity() and .SetLightsCompensation(). It might also be helpful to change the global blending type of the lights if desired.

Even with adjusted intensity, the lights still seem to affect the colors of anything caught in them slightly. ^^'

It doesn't look bad on its own, but I'm wondering if there is a way to actually, explicitly and exclusively cut a hole through the ambient lighting. I.e., I want to be able to color-pick a screenshot of the player and know definitively 100% I will get the same hexcode if I color-pick the raw sprite in my art program. Basically how a lot of simpler lighting frameworks (like Bulb) do things by default if you don't explicitly try to color the lights or add any extra effects.

Low-intensity spot lights can get close, but they still seem to brighten the image under them a bit.

Hopefully this image illustrates what I'm looking for a bit better. 

Thanks for the screenshots, they're very helpful :D

You can try disabling HDR for the lights using .SetLightsHDRenable(false). Let me know if this helps.

Disabling HDR didn't really have an impact. I never specifically enabled it, so I'm not sure if it would have been visible regardless...? I messed around a little more with what you gave me, and I think I figured out what works though:


or alternatively:


Basically, as long as you force the actual lights to be the exact inverse of the ambient color like this:
...it will perfectly punch out a hole in the ambient color, hitting the ambience with the exact inverse of itself at the exact same intensity to cancel it out. (The default black/white of the ambience and lights respectively works fine for this, of course.)

Like the comment in the second screenshot says, I think what mixed me up a bit is that the default light compensation is 3, but the jsdoc says it's 1. I was just getting a little confused trying to get here lol

Thank you for offering your time! I'm really excited to dive deeper into Crystal.

(1 edit)

Lights compensation works similarly to intensity, but it multiplies after blending (basically an exposure control). Oh yes, the default "lights compensation" is 3. I was going to change it to 1 and even wrote it in the documentation, but at the last minute I went back to 3 because I realized that this could cause confusion like "my lights got weak in this update" ^^'.

That's an interesting observation; I believe it must be due to the mathematical equation of blending, but basically, the lights are "multiplicatively additive" in the scene, so perhaps that explains the behavior.

No problem, thanks for the kindness =]