
Indie game storeFree gamesFun gamesHorror games
Game developmentAssetsComics
SalesBundles
Jobs
TagsGame Engines

PixelCNC Has Moved: deftware.org

CAM software developed by artists for artists to create unique and original works on a 3-axis CNC router or mill. · By Deftware

To Z fill or not to Z fill

A topic by hegartype created May 25, 2025 Views: 263 Replies: 8
Viewing posts 1 to 6

Hey all, 


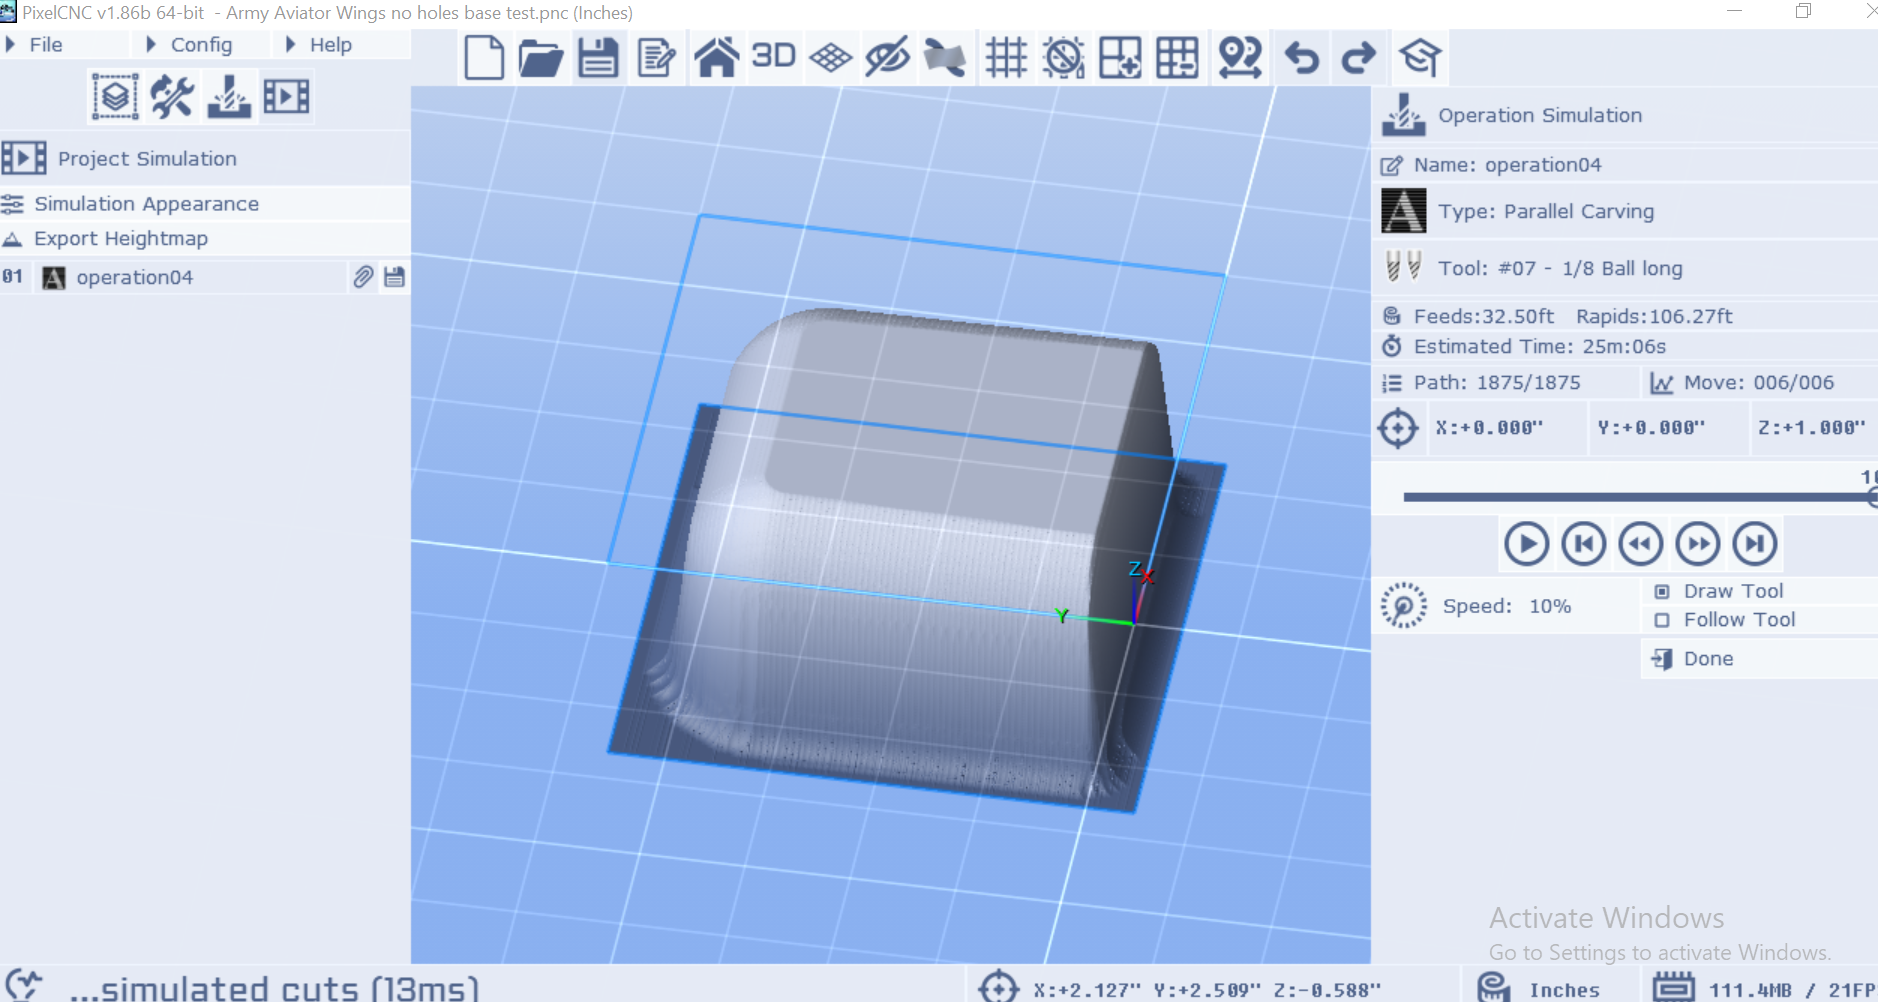
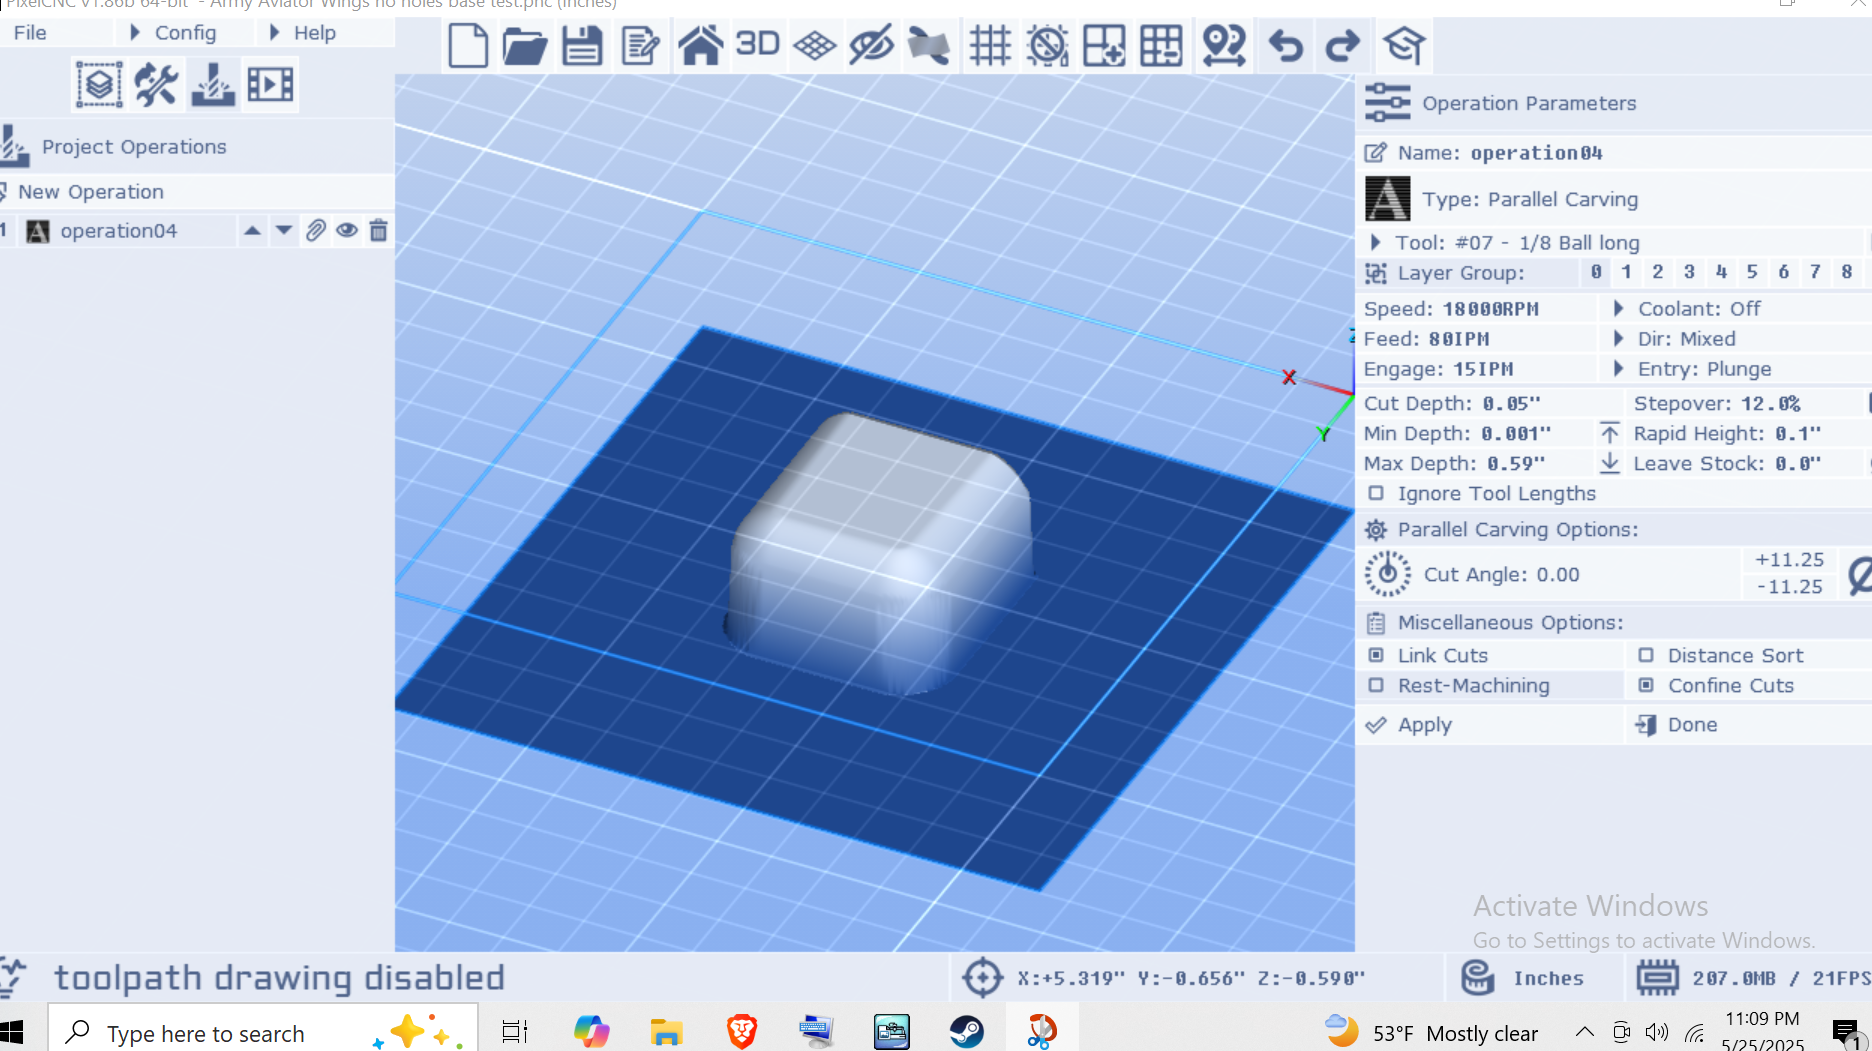
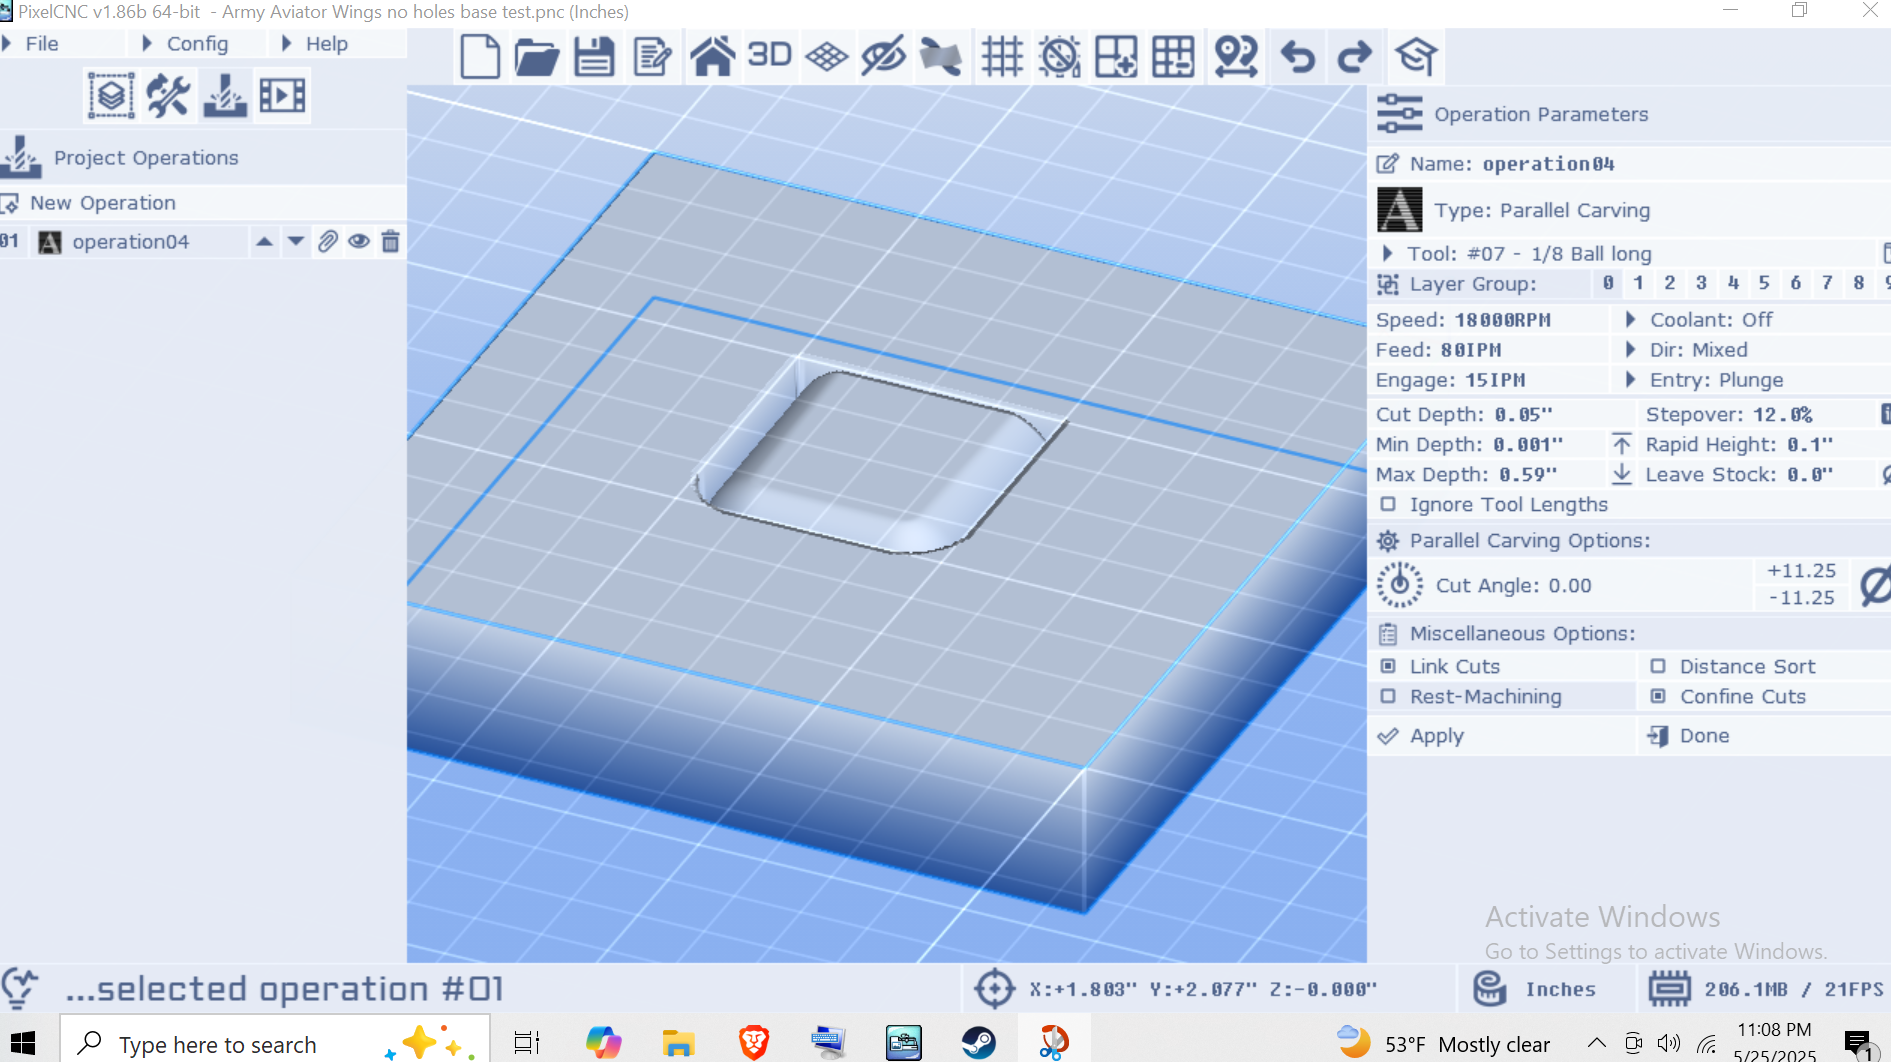
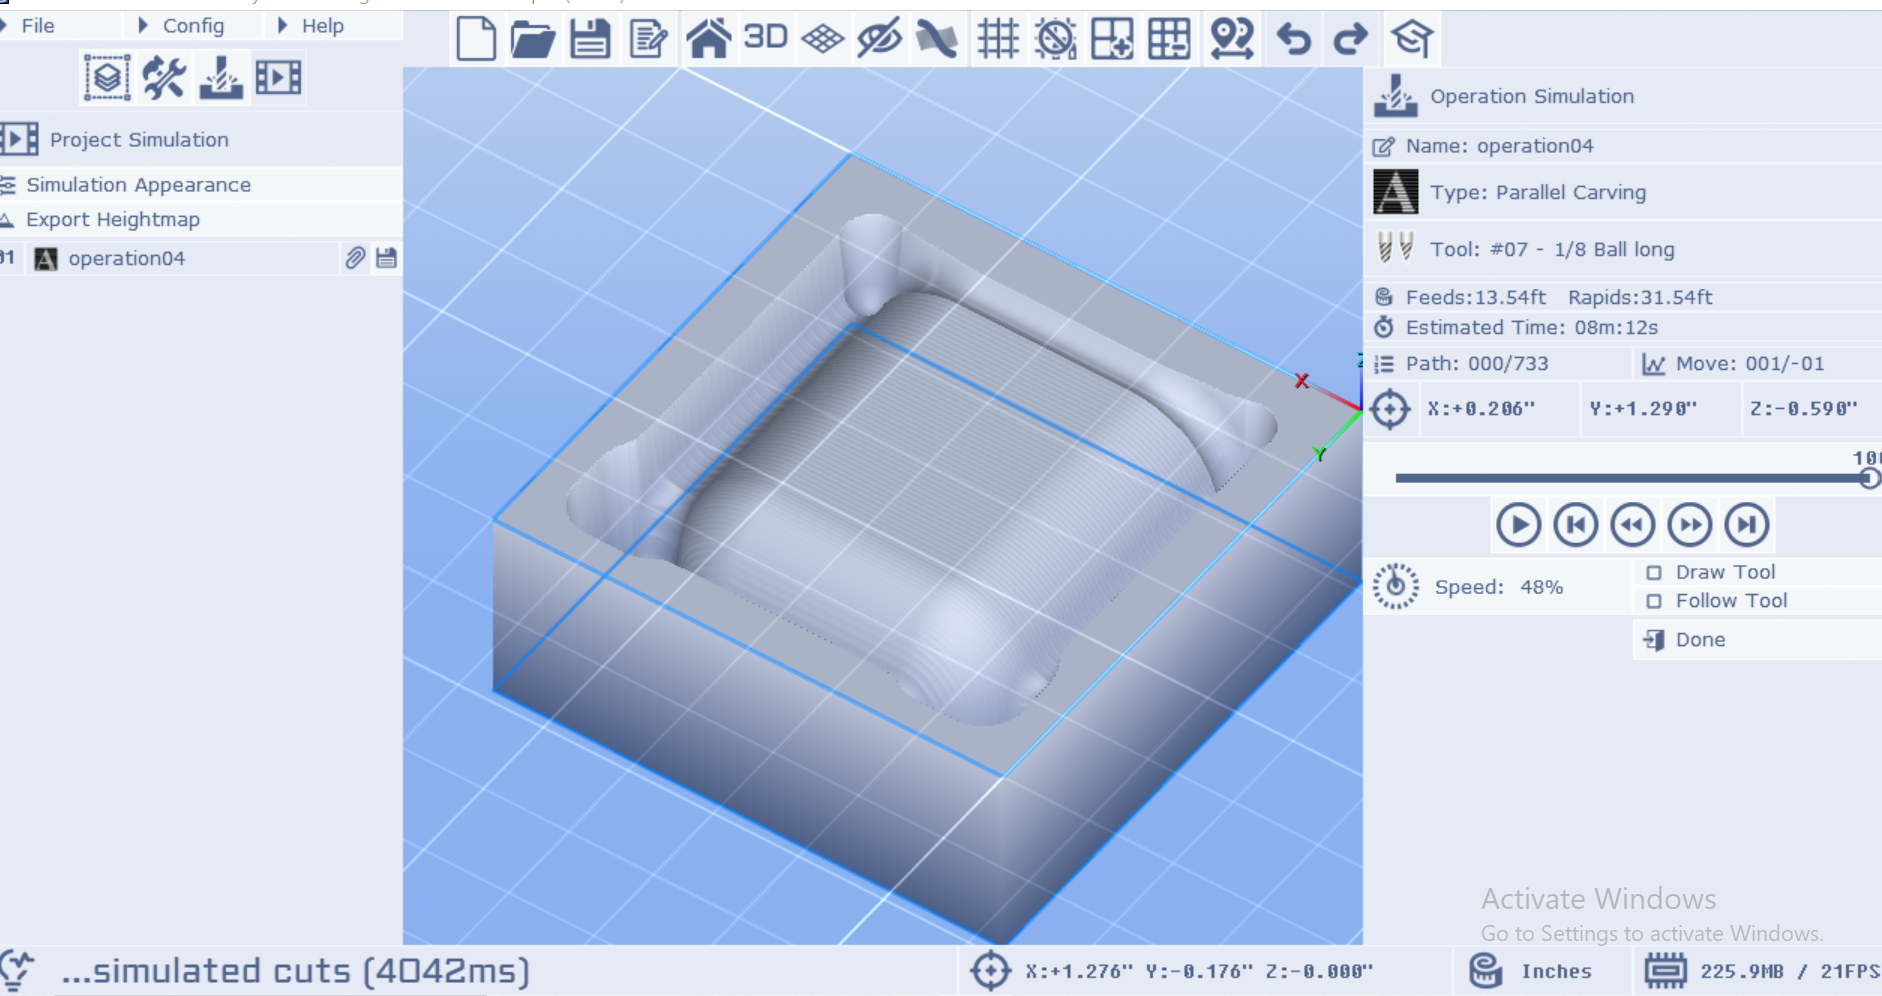
Got another issue,  I'm carving an STL with .25 radius along a few edges.  Normally when I do a parallel carve on an STL I use Z fill or it will try to cut the entire board instead of just the model, however in this instance it doesn't want to cut the whole radius.  I tested a small 1.25x1.25 piece with no Z fill, ie cutting down the "whole" canvas and the radii came out just fine.  So how can I fix this?  I feel like I'm just missing a step or an easy fix.

Thanks in advance 


Developer

Hi Hegartype,

It sounds like the issue is that the canvas is too small to accommodate the cutter around the STL model. You might be able to get away with just disabling the "Confine Cuts" option on your operation parameters, which will effectively open up the canvas by half of the cutter's diameter so that it can cut outside of the canvas. This will only allow the center of the cutter to reach the extents of the canvas volume in X and Y, so if that still doesn't allow for enough room then you will still need to open up the canvas' dimensions a bit further.

Let me know how it goes!

 - Charlie

(+1)

hey Charlie, thanks for getting back.   Canvas to small = No.  Maybe these pics will  better illustrate it.  First is no Z fill, 1x1 model on a 3x3 canvas.  all material round the model is removed, perfect bevel, but wasteful.  

Then with Z fill, we only get about 1/4 of the bevel.  plenty of canvas.  Now it does seem like the program thinks the bit won't fit, but there is no reason for it not to.  Physically at least.


Even in this view from the operations tab, it's modelling the bevel, but it won't cut it.  Is there a way to add a buffer... or something around the outside the model?  I'm at a loss, thoughts?

Developer

Hi Hegartype,

Ah, I think I understand what's happening. OK so with the Z-Fill raised up, there's not enough room around the model. What you can do is set the canvas' Z-Fill to the top of the canvas (instead of the layer's Z-Fill) and then create a new blank raster-layer, size it to be the "buffer" around the model, and set its blend mode to "Minimum". This raster-layer will need to be below the model-layer in the Canvas Layers list, so that it pushes down the canvas' Z-Fill to make a clearing for the model-layer to sit in.

Let me know if that makes sense, or if you need more explanation and detail :]

 - Charlie

Yes, I think that's it, Thank You Charlie!

(+1)

Hey Charlie,


A follow up on this one/new issue.  is there a way to stop from cutting the outer wall of the raster layer?  In relation to my previous post regarding times as well, part of the problem is the program insisting on touching the outer wall of the raster layer leading to a lot of tiny cuts especially towards the bottom of the model, I'm talking the last 20% of the cut taking an additional 3 hrs. on top of an already 3 hr. cut.  I had convinced myself this was unavoidable and that had to be done to make room at the bottom of the model, but I did some tinkering and there is definitely wasted cutting happening, to illustrate, I exaggerated the raster out a good bit

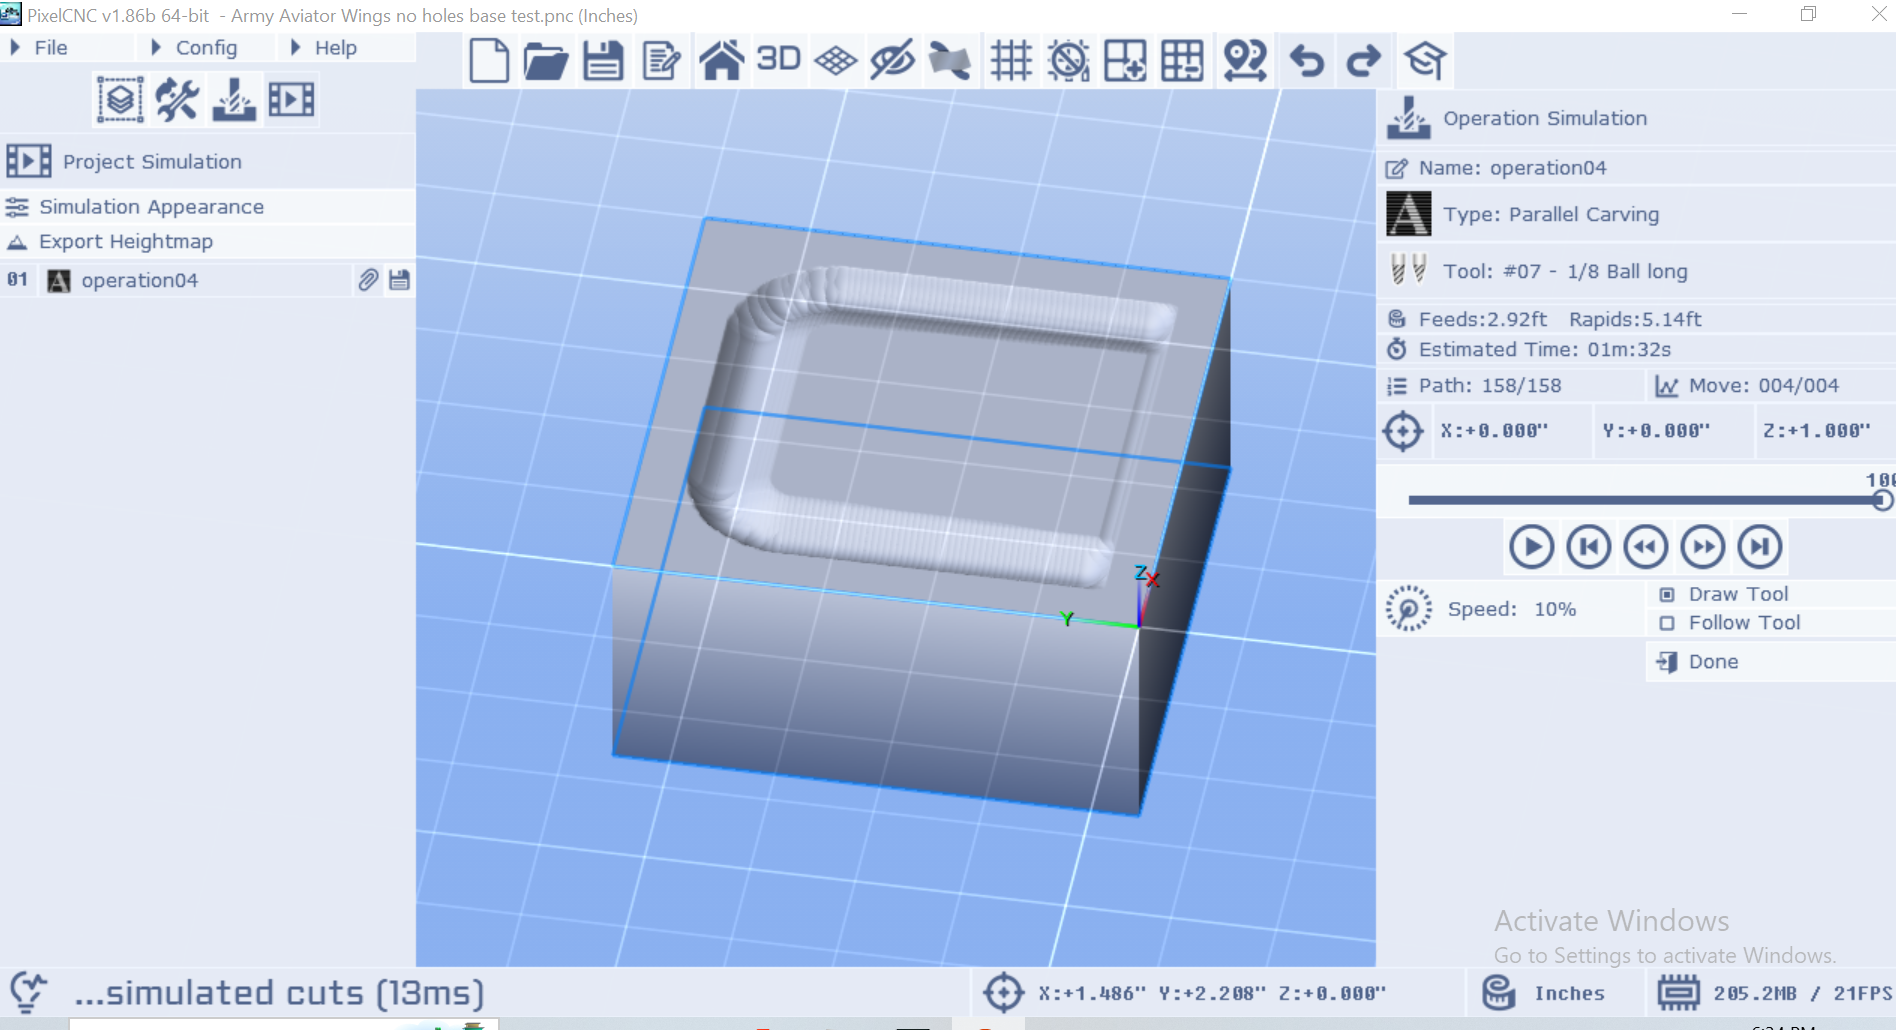
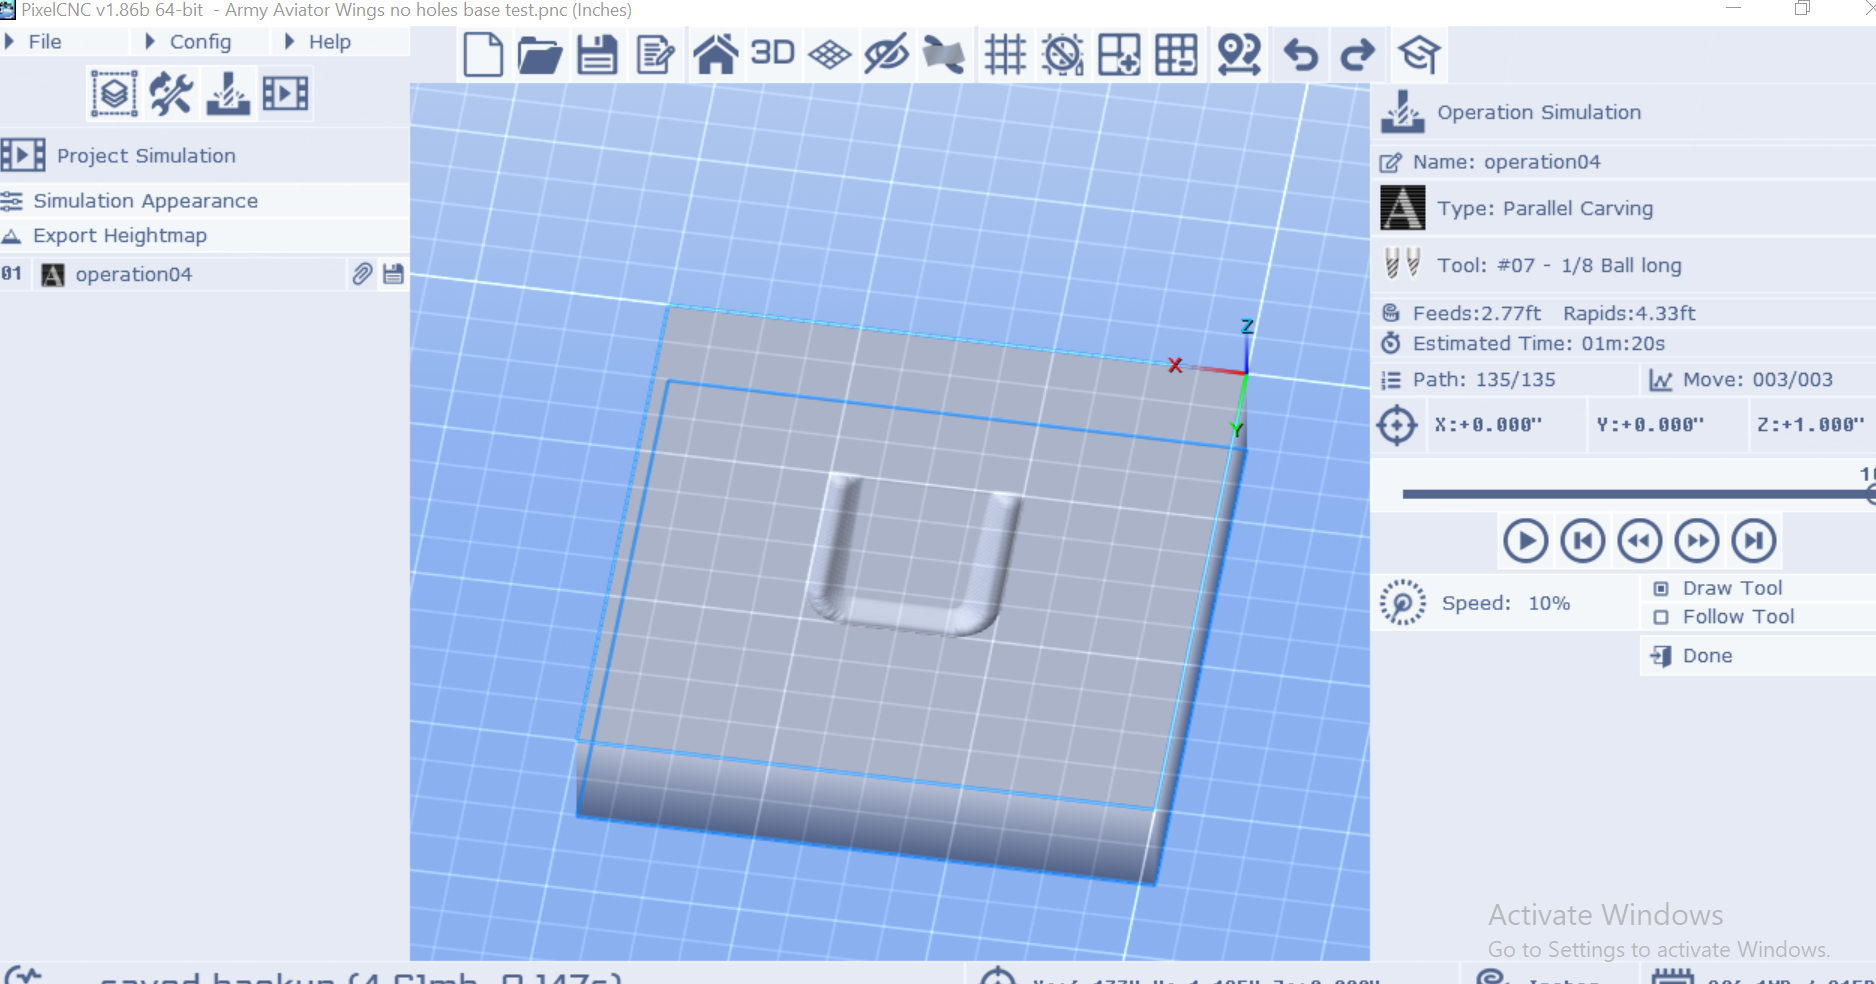
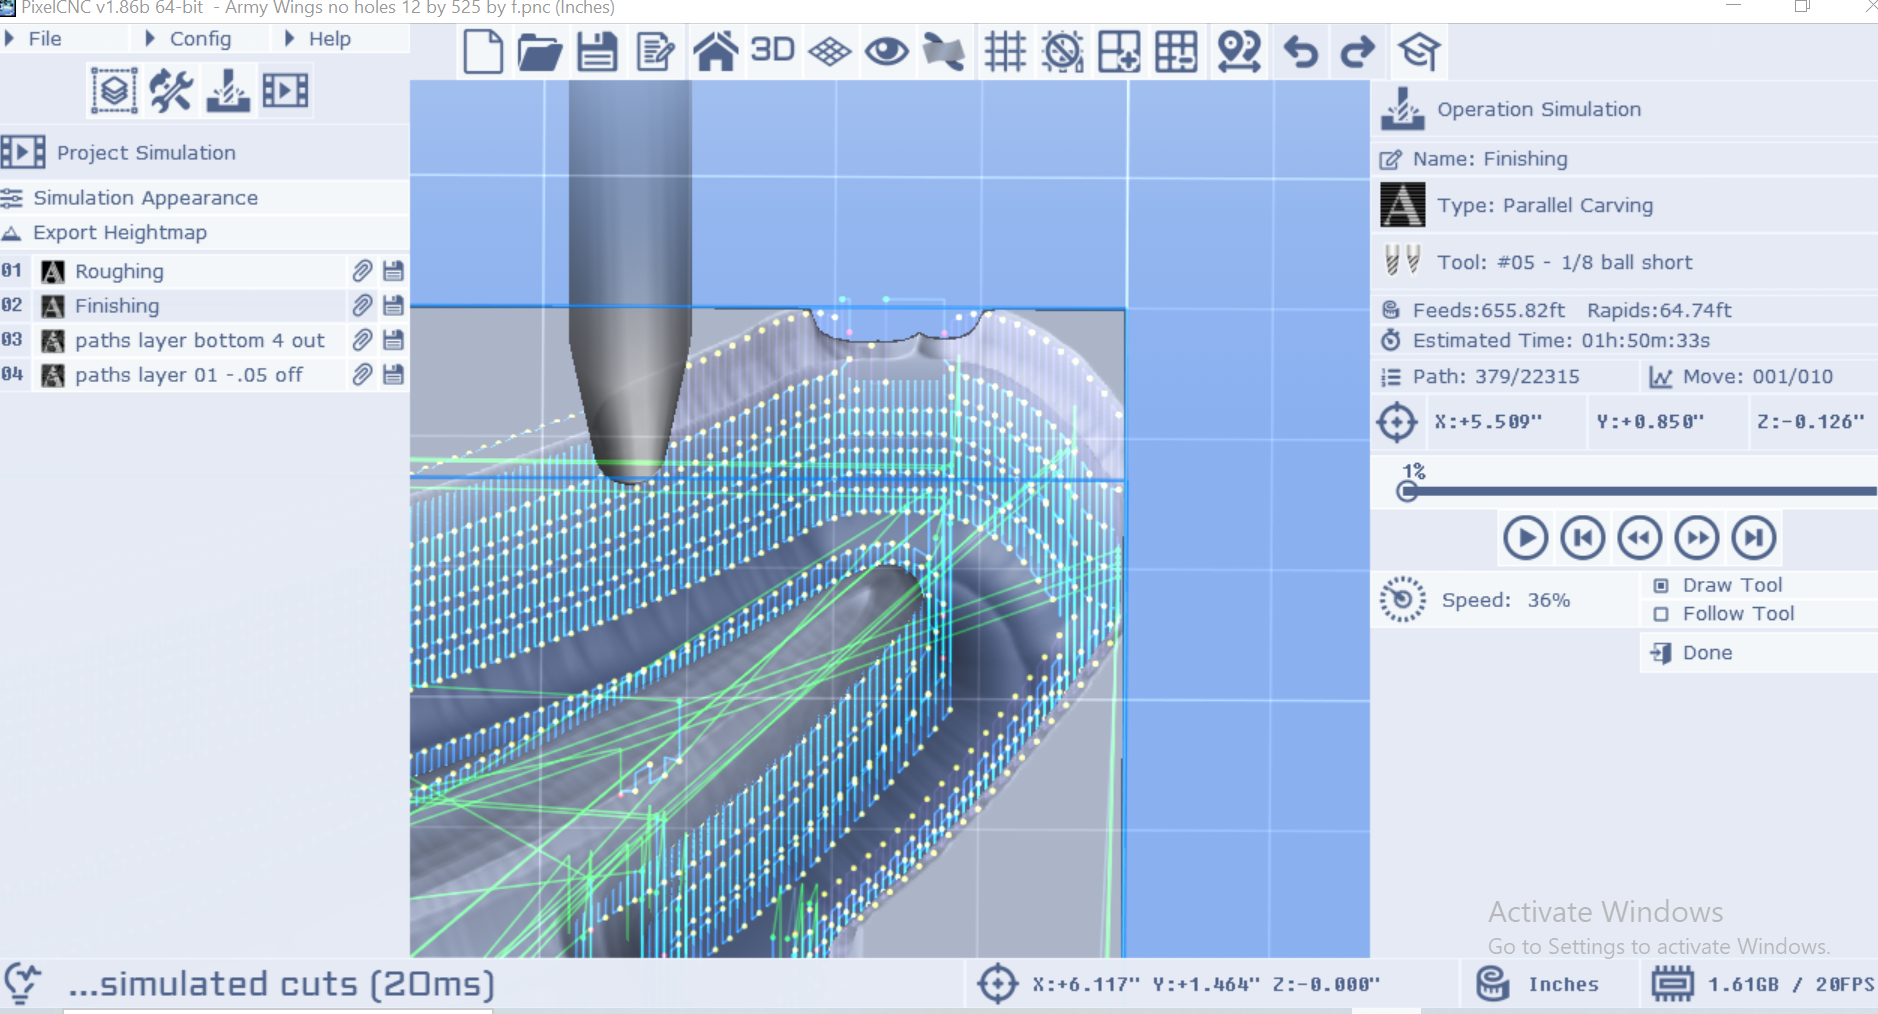
After the roughing pass there is no material near the model that would need to be cut away to make room for a bit but the finishing pass still insists on touching the outer wall of the raster layer.  Is there any way to stop this or is that just the way it is?  
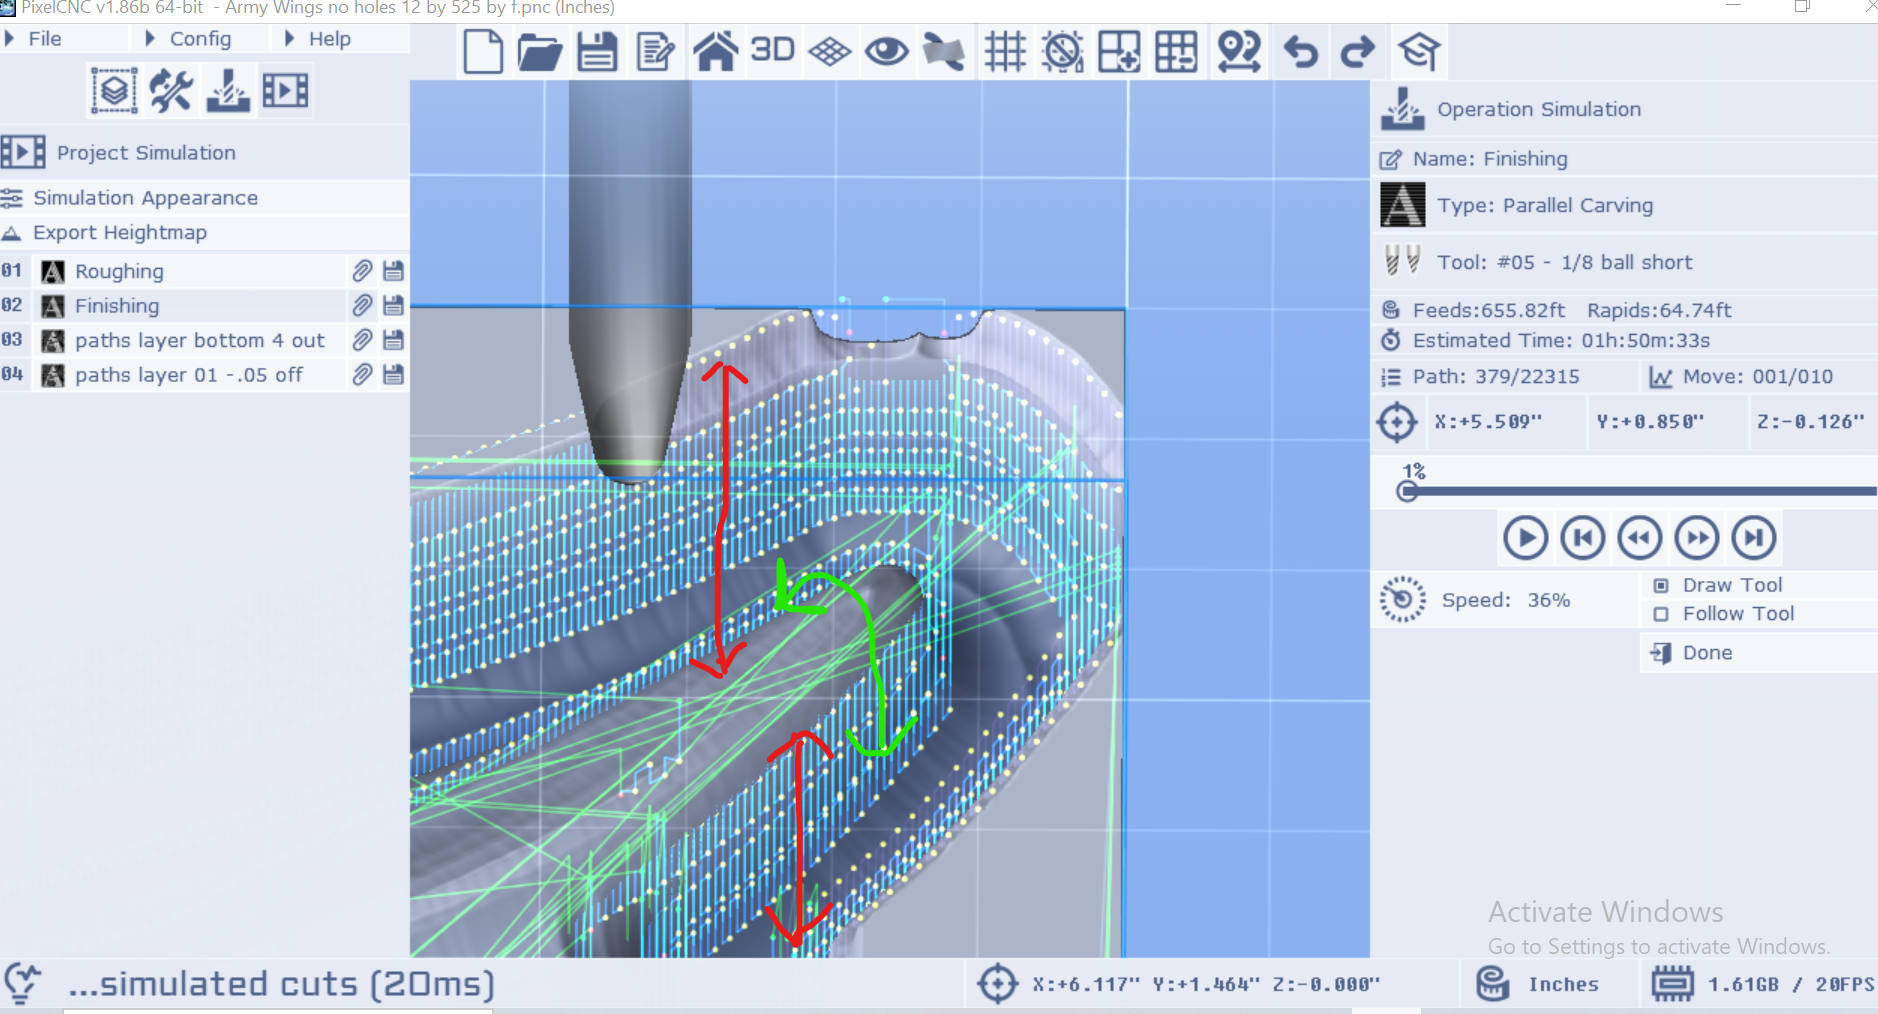
It's doing the red arrows when it really only needs to be doing the green arrow.  Hope that makes sense, looking forward to hearing your thoughts

Developer

Hi Hegartype,

It looks like what you need to employ is the Rest Machining option on your Parallel Carving operation, in combination with the Distance Sort option to ensure that most of the run time isn't taken up by rapiding between unsorted cuts.

If you're already doing this then all you need to do is use different layer groups for your roughing operation and your finishing operation, where the roughing operation clears out a larger area (represented with one layer group) than the finishing operation is toolpathing off of.

Take a look at this project as an example: https://cdn.shopify.com/s/files/1/0308/9658/6890/files/Sea_Ornaments.pnc?v=17497...

Layer Group 1 is used to rough out the shape of the ornaments from the workpiece, with a wider area around them to accommodate the cutter. Layer Group 2 uses a smaller margin around the ornaments for a finishing operation, in combination with the Rest Machining and Distance Sort operations to minimize total cut time by restricting cuts exclusively to the shape of the ornaments themselves. Layer Group 0 is then used by two Profile Milling operations, one to mill out the loop holes for the ornaments and another to cut them out of the workpiece.

The goal is to have a roughing operation clear out an area slightly larger than what the finishing operation will be toolpathing off of, to get the Rest Machining functionality to recognize that cuts do not need to extend into the area that has already been roughed out. This can sometimes require a bit of finesse as far as the Z extent goes. That is to say that it can be beneficial to allow the roughing operation to travel down farther around the desired relief shape than the finishing pass will, so that the cutpaths are properly confined to the Z range of the relief, but every project is different.

Hope that helps. Let me know how it goes! :]

 - Charlie

(+1)

Ha! Yes!  that helps  ton.  Thank you!

Developer

That's what I'm here for! Let me know how she goes :]