

All pictures come from the in development builds so some may be outdated.
Feedback and questions are very welcome! At the bottom of the this page is a Post in which you can leave your feedback or ask questions. Or you can just click Questions & Feedback Topic
1 The Hub Area
This is the hub where you start. Currently there is no story but in short: You play as an ordinary woman who got captured by a witch and your goal is to escape.
In the hub you can prepare yourself for the next run, view achievements and spend your well earned credits for unlocks.
Like in most roguelites, most features and items need to be unlocked first. Unlocks that are tied to achievements can be viewed in the hub area as well.
2 The Run's Structur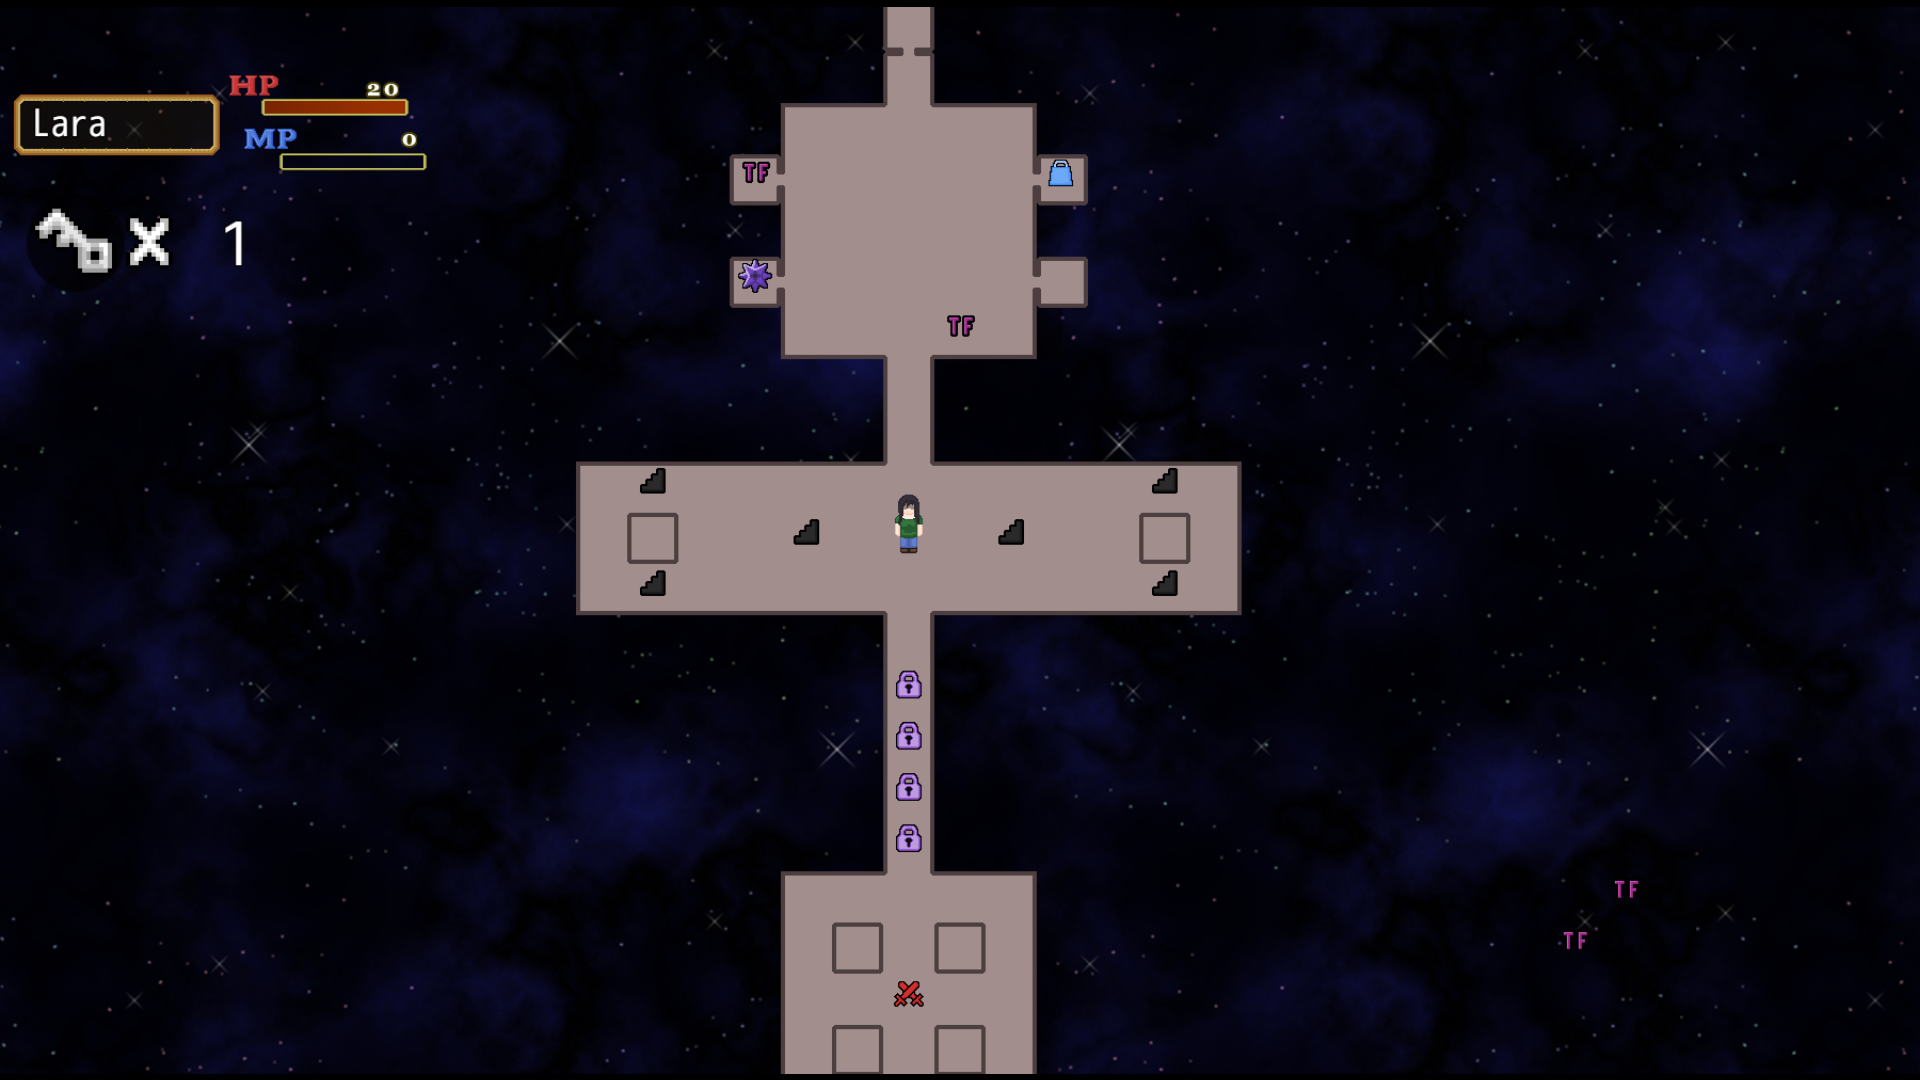 Once you start a Run you will be in the first dungeon area, The old Catacombs. To advance to the next Dungeon Area you need to defeat the area's big boss which is behind four locked doors in this case.
To gather the magic keys you will need to explore the area by using the stairs. Each pair of stairs leads to a randomized floor.
The floors layout as well as what events will spawn in each floor is random. At the end of every floor is a mini boss and one of the needed magic keys. So you need at least beat three floors to advance to the big boss of the area.
Currently the Game features two levels. The Starting Area the Ancient Catacombs and the second area the underground Gardens. More are planned to be added later as well as the witch as the final boss at the end.
3 The Floors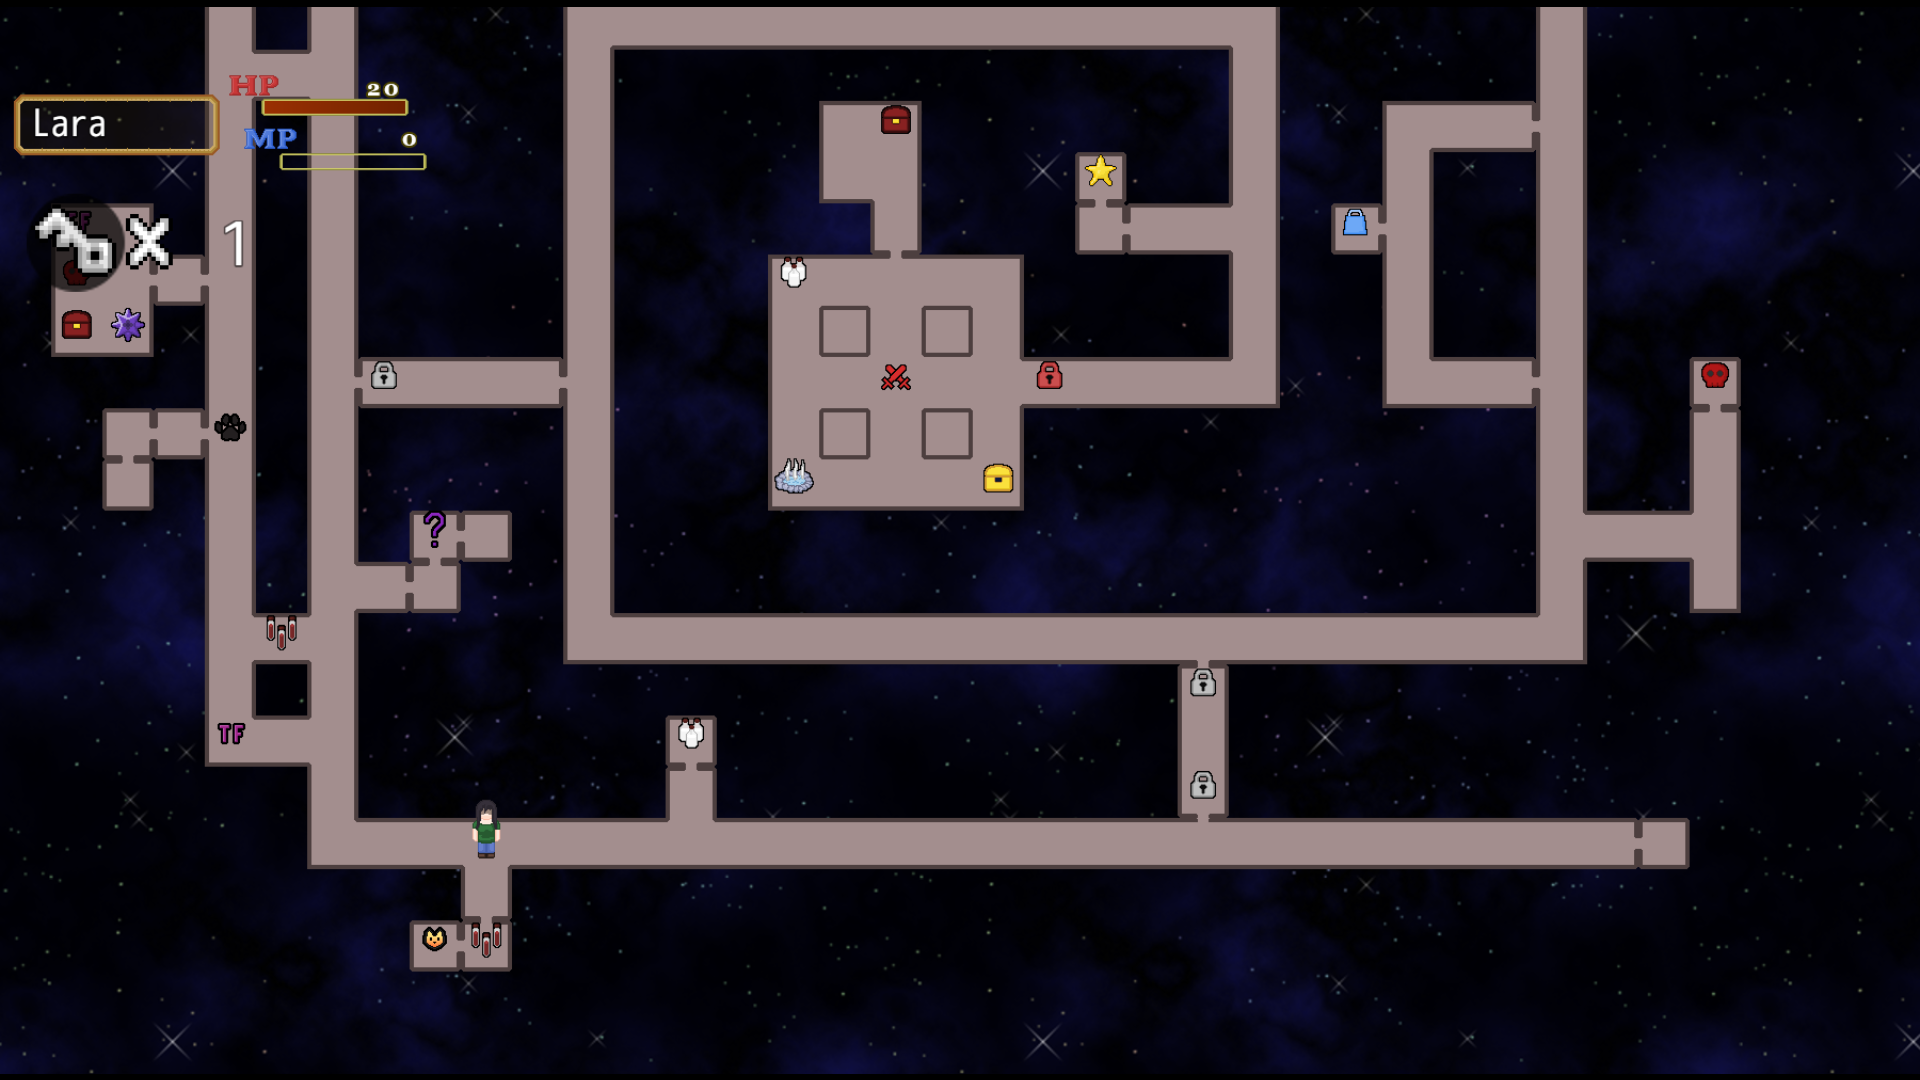 The main meat of the runs, in these randomized floors you will spend most of the runs. Usually the floors are much darker and let you see less but for demonstration purposes this floor is lit.
The floor layout as well as the events that spawn are randomized as well. What will spawn and in which quantities is based on difficulty, acquired perks and/or how far the run advanced.
4 Transformations are the key to escaping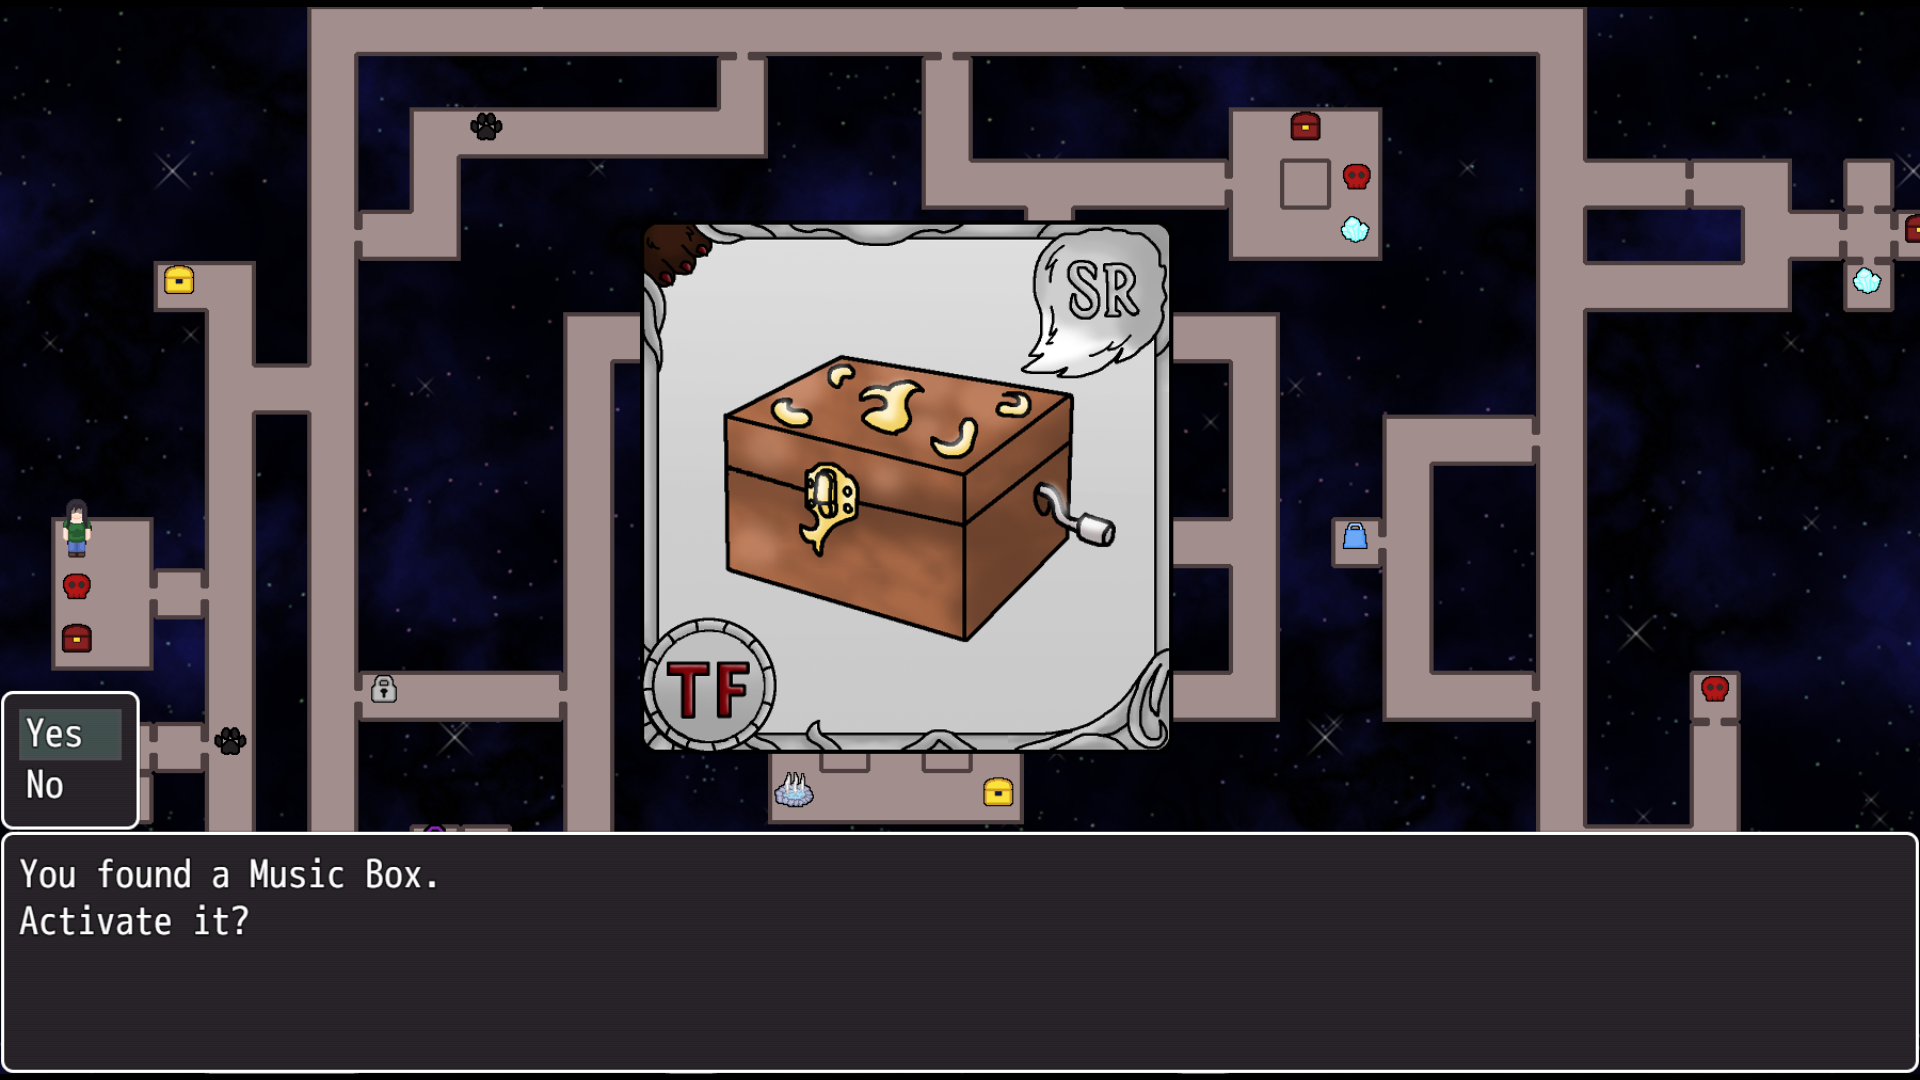 While traveling the various floors you may come across transformation artefacts. Using one will transform one random part of your body. The transformation depends on what artefact was used.
All body part transformation can be freely mixed with other ones, allowing for a wide variety of skill sets and looks.
Learning what each artefacts does will help in future runs so you can choose if you take them with you or not.
5 What does Transformations grant you? Each body part transformation gives you either a Active Ability or Passive Trait. Each transformed body part also increases your Max HP, further increasing your survivability.
If the transformed body part gets overwritten with another one you also will lose the associated skill. There are some ways to keep some of the skills though.
Gathering multiple transformation of the same species also grants a special passive trait of that species.
6 The Combat
The battle system is turn based again, similar to my previous game. But this time all your battle skills and strategies come from the transformation you gain and iems you pick up in a run. So each run may feel very different from each other.
You are also fighting alone. Being unprepared or making bad calls may come with heavy consequences. Maybe you can find allies in the depths of the dungeon?
If you should be defeated, worry not about your safe file. You will loss all your runs progress, items, artefacts, money and transformations and will be send back to the hub. But you will keep all the Credits that you found in your run.
7 Usable Items & the Shop
In your runs you will come across various different useful items that will help you escape. Most of them are selfexplanatory like Keys and HP Potions. But there are more special ones like Transformation Potions, Flash Grenades or Eternity Potions.
On most floors a shop also has a chance to spawn. Sometimes the Shop even sells powerful artefacts.
8 Gathering Powerful Artefacts
Besides the normal usable items there are also Artefacts & Cursed Artefacts. Obtaining such will grant you permanent buffs until the end of the run. These buffs can come in many forms as stat boosts, new active skills or even things like lowering shop prices. Collecting a lot of them will increases your chances of escaping.
But there are also Cursed artefacts. They are very similar to the normal ones but are often way more powerful but also come with a price to pay, often in form of forced transformation or debuffs.
Once obtained you can always look at all your artifacts and items in your menu. Rumor has it that there might be ways to see the effects deciding to take it.
9 The Price to Pay
Each transformation item and artefact comes with a price, in form of increasing your corruption level. If it should reach 100 it will be an instant game over, sending you back to the hub as well.
Having a higher level of corruption isn't only a bad thing, it also increases atk power and some skills are also buffed by it.
There are also various ways to slow down corruption gain and also lower it. Artefacts and Potions can help out.
10 Gaining new Perks
Winning against bosses or finding treasure spots will reward you Credits. Those can be used after each run in the hub area to unlock new permanent abilities in the form of Perks. Those will stay even then losing a Run.
The perks you can learn are divided into three skill trees.
Preparation, Battle and Exploration
Preparation Perks focuses on perks that for example let you start with more money or potions. Or makes them more efficient. Or having an easier time to find potions in runs.
Battle Perks focuses on mostly on things related to fights, like healing some HP after each battle, or getting one free hit at the start of each battle, to increasing the Credit gain from bosses.
Exploration Perks are a little bit different since they mostly unlock new stuff that can appear in Runs or increasing your odds at random events to have a more favorable outcome. The Perks in here are the most varied.
Certain things like new artefacts and transformation items are locked behind achievements that need to be cleared first.
11 Customizations
Not gameplay affecting in anyway but through some means you can unlock alternative colors and costumes.
For example the basic Fox Fur color is Orange but it can be set to other colors like Yellow once unlocked. There also will be costumes for the main character.
It serves no gameplay purpose but I think it will be a nice thing to add.
12 Companions
You also team up with a trusty companion who can help out in combat as long as they have Stamina left.
Your companion is weak but makes the beginning a lot more manageable when you having not much skills or unlocks. They also can be upgraded.
13 Lastly Difficulty
Like in most games a higher difficulty means stronger enemies which here is also the case.
Here it changes a lot more: shop prices increases, healing is less effective, less visibility in dungeons, more enemies spawn. But it also offers some good things like more credits are gained and more tf artefacts spawn in each floor.
The difficulty can always be lowered or increased in the hub area.
If the game is getting to easy for you worry not. Many modifiers can be turned on to give yourself quite the challenge.
There are also options turn turn some visual things of if you choose so, not wanting the transformations becoming too overloaded. It's just visually and does not affect gameplay.