
Hey, I'm back. Today I want to talk a bit about selective outlines or "selout". What is a selective outline? I think the definition may be kind of complicated to understand but my simple way of understanding it is to think of it as a shaded outline.
So normally an artist would draw a sprite, once the subject is shaded and rendered they would:
(A) Leave the sprite as is without having an outline at all.
(B) Apply a black outline.
(C) Apply a selective outline.
If you want to achieve (C) but you're new to drawing selective outlines, it helps to start with (B). Let's take the apple with the black outline.

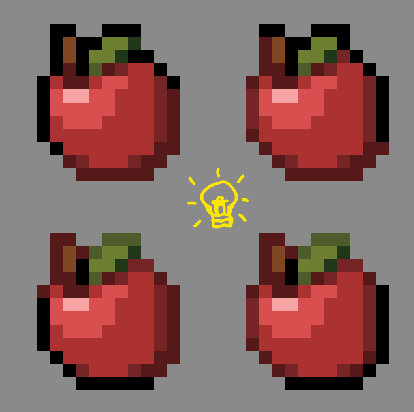
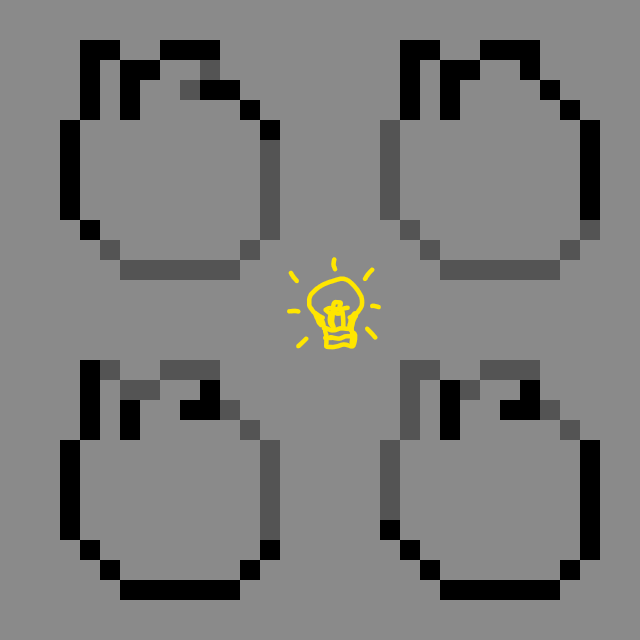
Now lets say I want to replace the black outline with a selective outline. To do this we need to identify where light will apply. There's various ways to go about it, it all depends on you. Where do you want light to apply? If you look here, I show various possible solutions. Here, the light (for the outline only) comes from the center of all four apples. You can even use multiple light sources if you really wanted to. One careful thing to note here though is that the shading of the actual apple themselves are completely identical to each other, the selout light source does not affect them at all.
So what exactly is going here? Let's break it down. There a few other minor factors that can also play into selective outlining such as anti-aliasing but to keep it simple, just focus on the outlines and take note of how the light affects the values where it reaches. Just a little disclaimer, I modified the values a slight bit just to illustrate my point but this is more or less how it would appear.
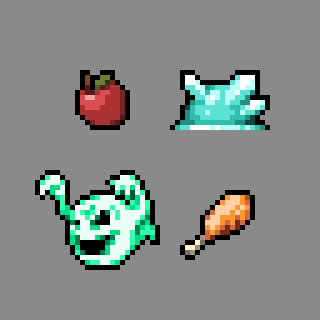
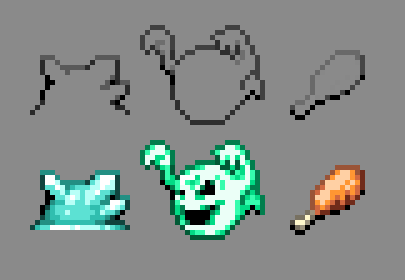
Here are some more examples. The idea is the same, but the light sources between each subject vary. Sometimes the light can come from above, other times below, or both, but the method I use is the same.
So in conclusion, selective outlines are pretty much "shaded" outlines. The simple way I come of with the selout values is I take the bordering pixel values of the sprite, then I go one shade lower for the outline. I hope this tutorial makes sense because that's all I can say! Keep drawing and I'll see you in another tutorial!