Today I dedicate a tutorial to slimes! I made a slime tutorial in the past but it probably wasn't that great so have another! This tutorial won't be covering animation though, just specifically on drawing some different variations of slimes. Slimes are often depicted as green gooey round creatures but that's not always the case. They often slide or bounce towards the player in many games and try to attack them. Sometimes they have eyes, sometimes not. Sometimes they have limbs or can even carry weapons! Sometimes they are elemental. The list goes on but you probably get the idea. For now we're starting simple, we're drawing a simple green glob with eyes. First we need to make a good silhouette.
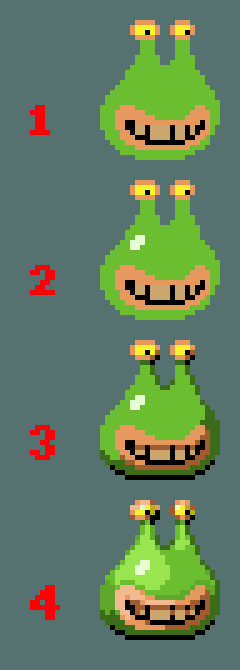
1) Most artist know how to sketch the general shape of a slime, but I suggest making the bottom of the slime spread out just slightly.

2) Define your light source(s), the brightest color will make this pretty obvious in most cases. On the left slime light is coming from the left, on the middle slime light is coming from the front, and on the right slime light is coming from above. These are general representations of how the light would appear on the 3 examples of slimes below.

3) Once you've done step "2)" you might have a general idea where the shadows will go (or where the sprite gets "colder") but if not, I will show some rough examples here.

4) Now that we know our light and shadow areas, we just soften the transitions between the two and add more contrast to the silhouette .

5) So if you want an expressionless slime that's it, but if you want you want to add a face go ahead. You might want to blend in the edges of his eyes and mouth to have smoother transitions as well.

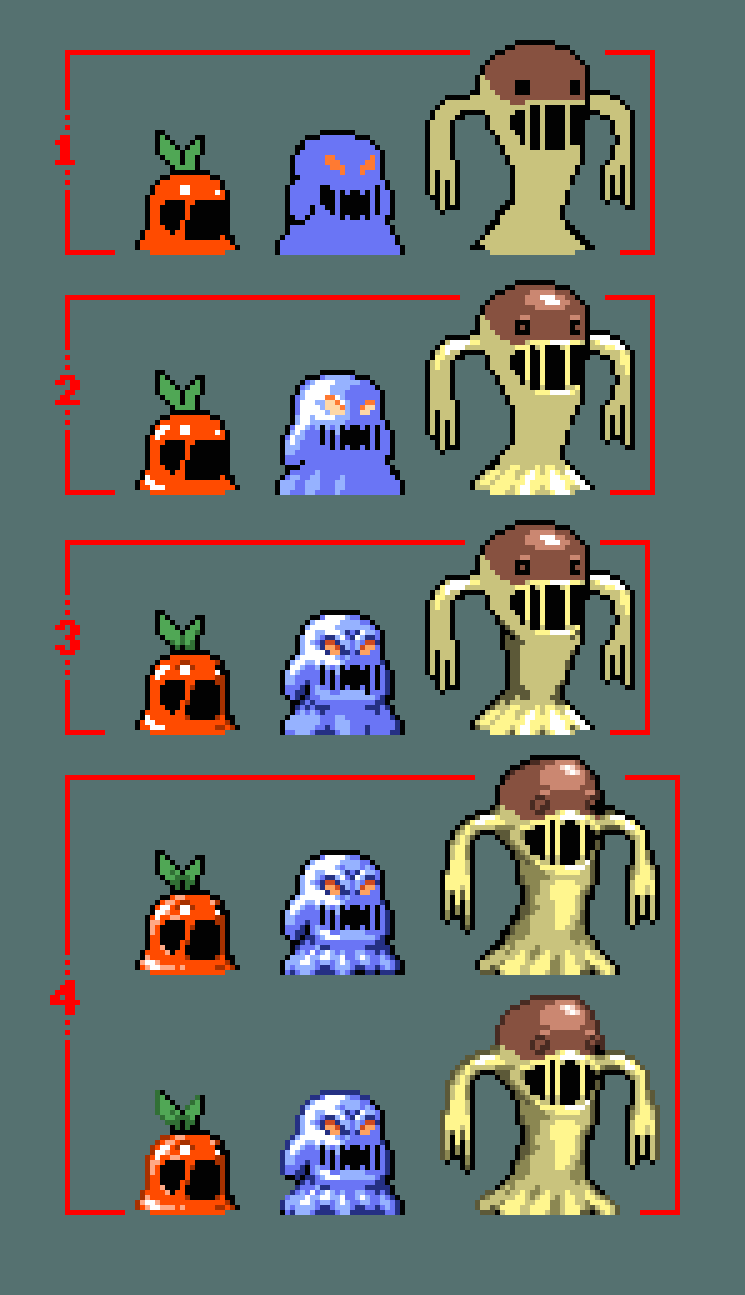
That just scratches the surface of how to draw slimes. I want to show more examples going through more or less the same process so you guys have a better understanding. Here below is a Chu Chu slime from Zelda: Majora's Mask.
1) Sketch.
2) Light.
3) Shadow.
4) Improve shading.
5) Polish.

Another example. This time, Final Fantasy flans! With step "4)", I combined shading and polish into one step to keep it simple because I think shading is a big part of the polishing process anyway but only difference between the upper row and lower row is the outline style, upper being black outlines, and lower being selective outlines.

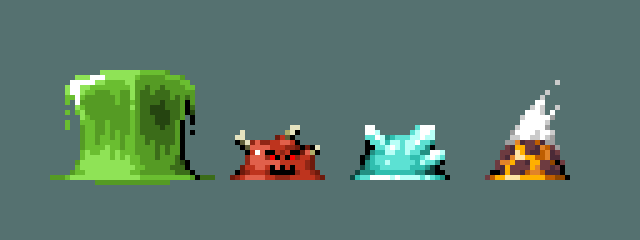
Once you get good at drawing enough slimes, you can start getting creative and creating your own interesting variations. Here are some extra I did just for fun and I thought they'd serve as some good reference. You have your cube slime, blood slime, ice slime, and magma slime.

So anyway I wish everyone the best of luck with this tutorial I hope you learn a lot from it. See you later!

