
(by Jin)
Welcome back to ACM Studio at UCLA’s second bite-sized tutorial! Today we’ll be focusing on making our sphere move, with simple inputs, rigidbodies, some physics, and colliders.
This tutorial starts from where we left off last time. If you haven’t had a chance to read that yet, we suggest going there first!
Rigidbodies and Physics
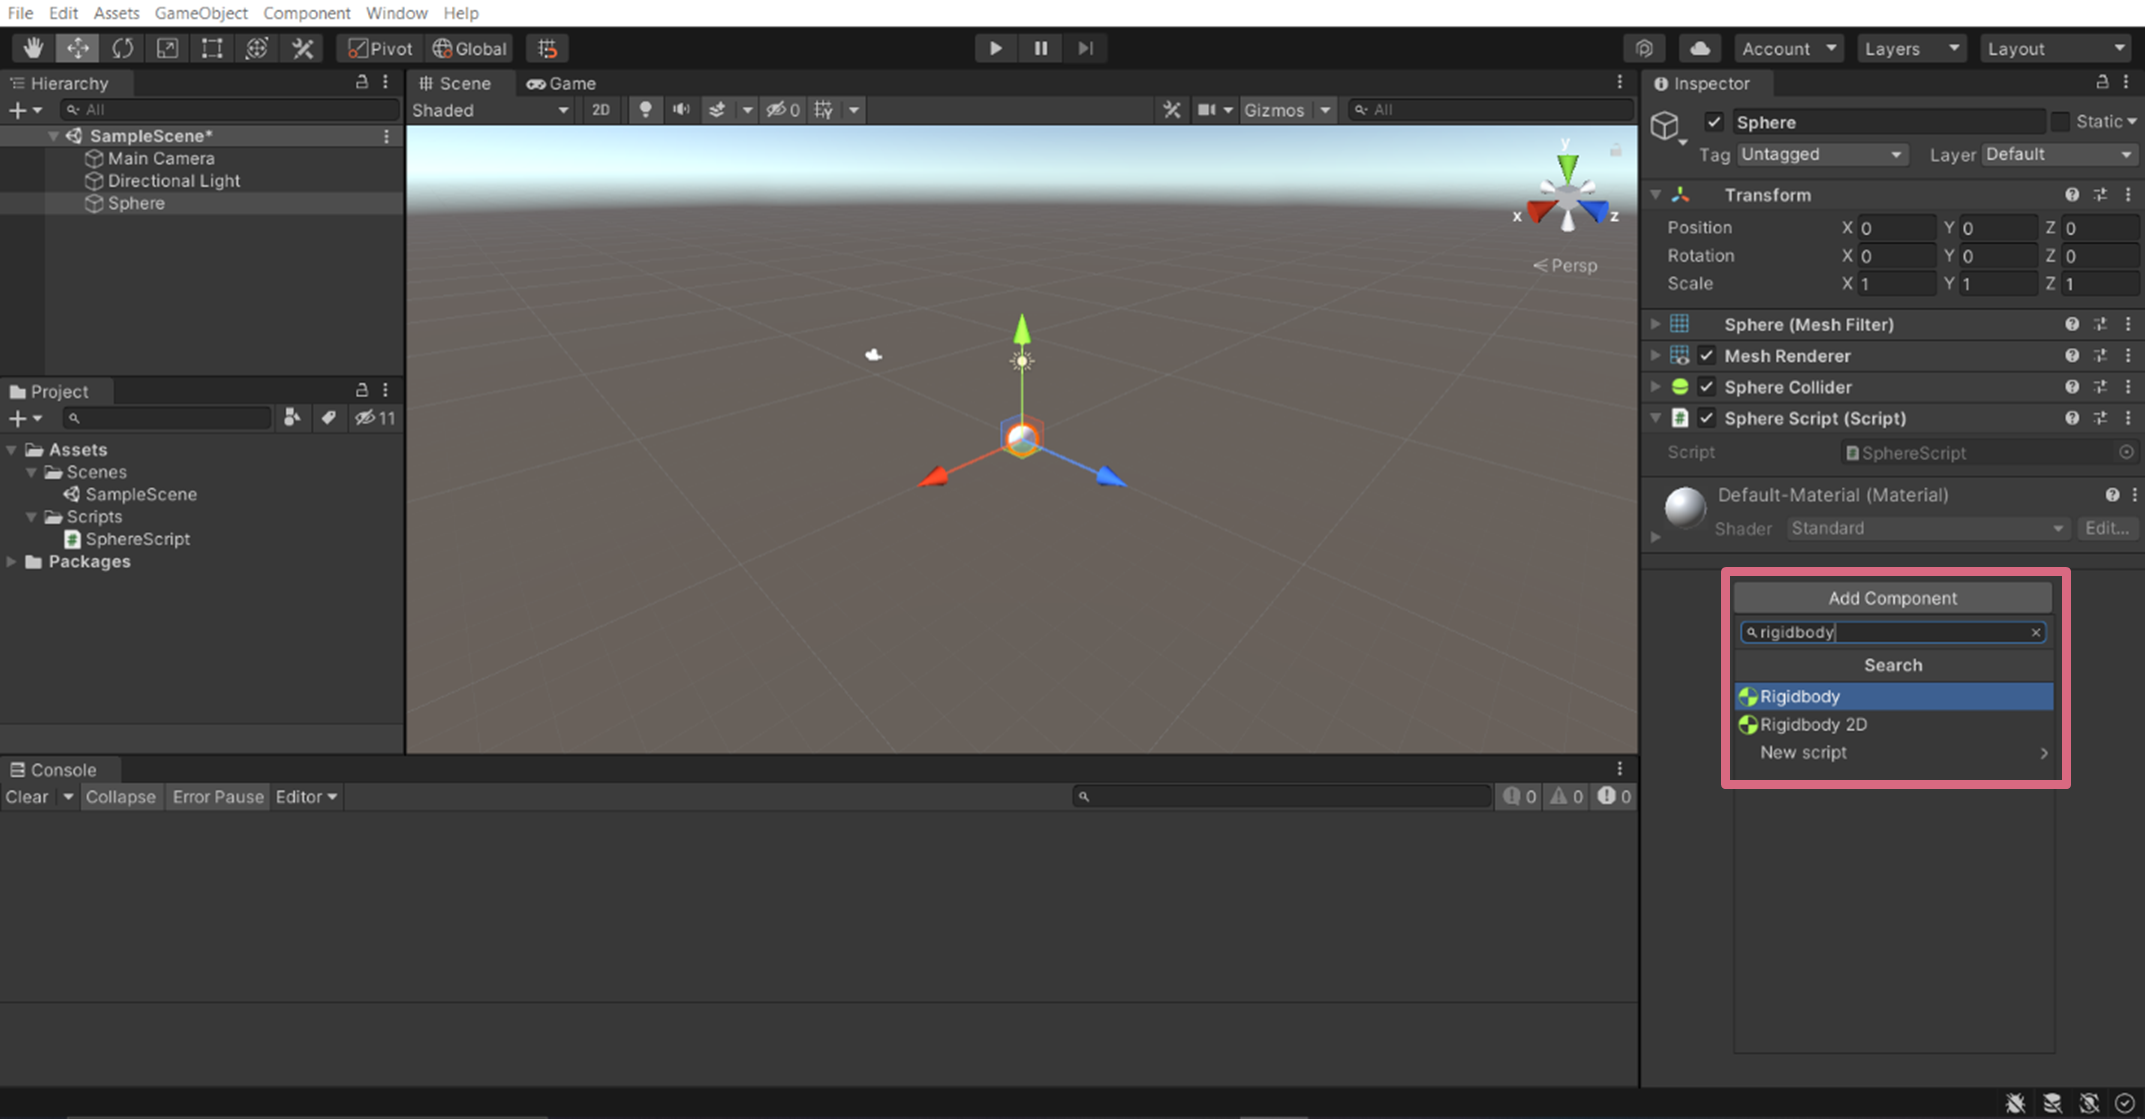
Generally, if we want something to move in Unity, we want it to obey the rules of physics first. Currently, our sphere just hangs there, defying gravity. To make it obey physics, add a Rigidbody component to the script by selecting the Sphere in the Scene Hierarchy, going to the Inspector on the left, scrolling to the bottom, and clicking the Add Component button. Add the Rigidbody component from the dropdown list.
If we now click play, the sphere falls down properly (yay).
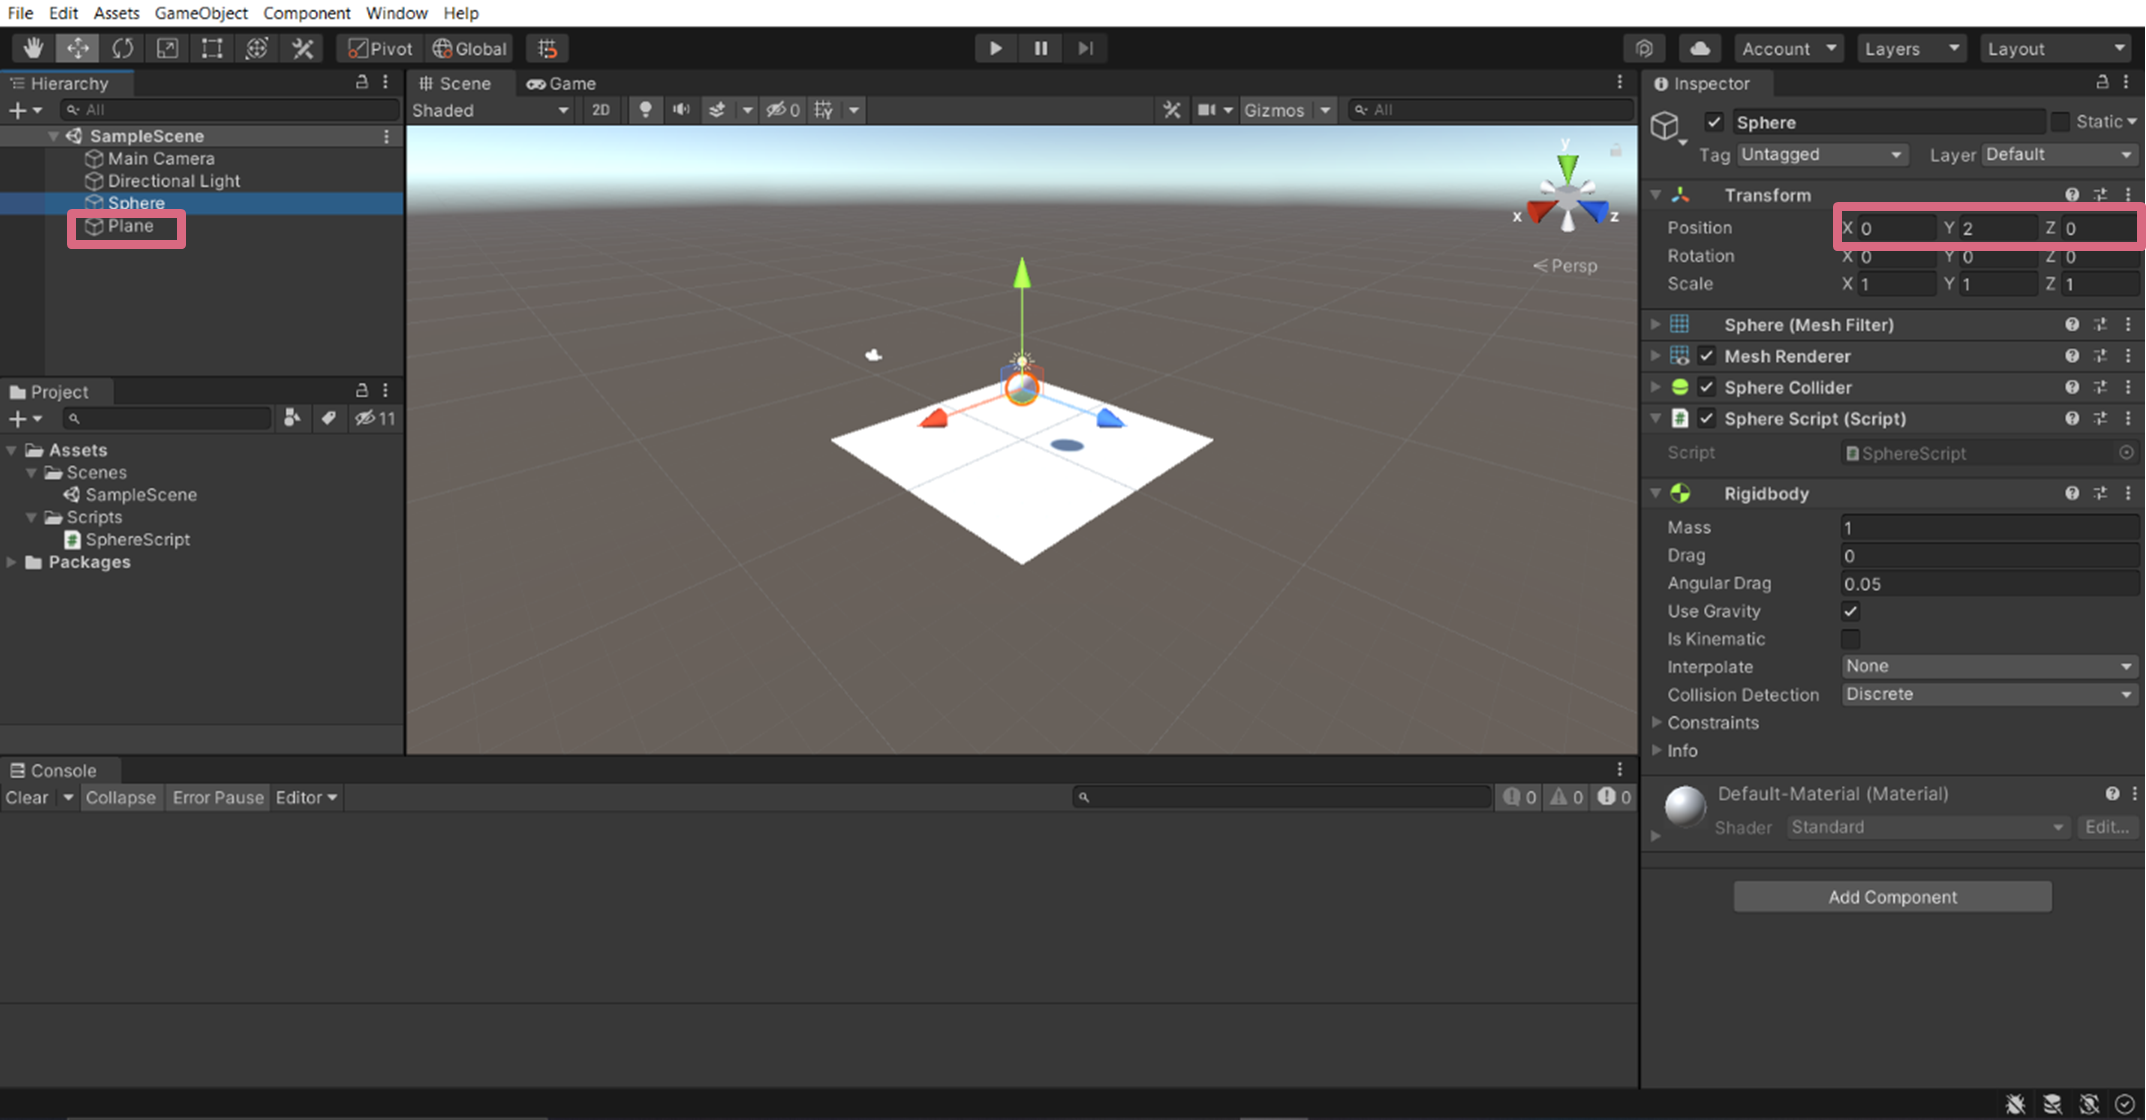
To make a ground that we can move the sphere on, create a new plane by right clicking on the Scene Hierarchy and selecting 3D Object -> Plane. Recall: this plane is also a Game Object!
Let’s move our sphere slightly above the plane by tweaking its Transform’s position have a Y value of 2. Recall: Transform is a component that governs the position, rotation and size (scale) of the Game Object it is attached to.
We’ll end up with something like this:
If we click play, the sphere falls a short distance onto the plane.
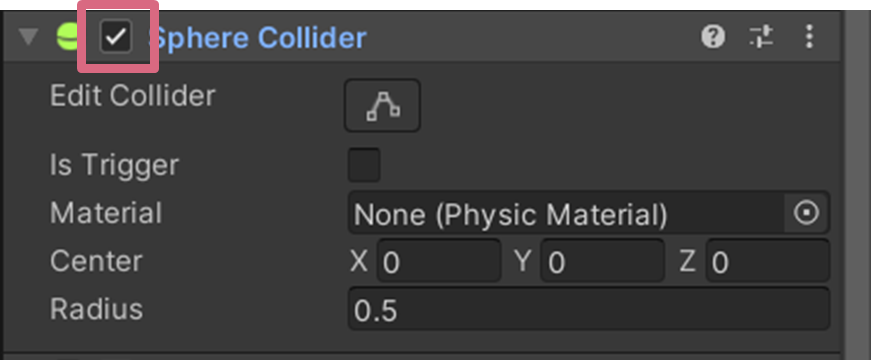
The sphere collides and is stopped by the plane thanks to a Collider component in both the sphere and the plane. Take a look at their components in their inspector and you’ll see Unity has automatically added a Sphere Collider and a Mesh Collider (for the plane). You can try disabling one (or both) of these by deselecting the checkmark beside the component, and the sphere will fall right through the plane!
Scripting: Inputs and Movement
Recall: to control Game Objects in Unity, we attach Monobehavior scripts on them. Our sphere already has SphereScript.cs attached to it. Let’s open it up by double clicking the script in either the Project Hierarchy or in the Inspector of the sphere. I’ve commented out the two lines of code we used previously to showcase what Start and Update by adding the two forward slashes // before the lines of code.
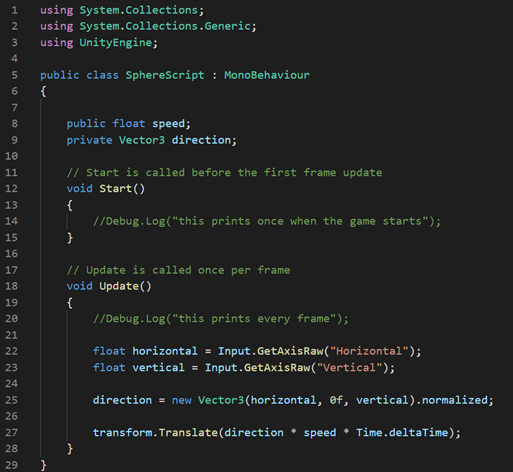
Type the following 6 new lines of code in.
After saving the script, go to the sphere’s Inspector and change the value of Speed to something reasonable (like 3). This corresponds to the variable speed declared in Line 8 of the script, which will determine how fast the sphere moves (it’s speed).

If you press play, you now can move the sphere as you would control a player character with the arrow keys or the WASD keys.
Let’s go over the lines and what they do. Don’t worry if you don’t understand everything perfectly right now. The intuition behind the code comes with practice and messing around with Unity!
Lines 8 and 9 declare two variables that the entire class can access:
- speed: a float (decimal) value, which we'll use to specify how fast the sphere should move. The scope of this variable is set to public, so we can go into the inspector and see/change its value there (which is what we did above).
- direction: a Vector3 value (which has three components: x, y, and z). We will use this variable to store the direction the sphere should move in. The scope is set to private, so this variable can only be accessed within this class’s script (and not in the inspector).
Lines 22 and 23 take in input from the player:
- We create two temporary variables horizontal and vertical. These are type float (decimal) and will store the two directions we want the sphere to move in.
- Input.GetAxisRaw() returns a value from -1 to 1 for the desired axis. E.g., Input.GetAxisRaw(“Horizontal”) would return -1 if you press the left button.
- For keyboard these values are discrete (-1, 0 and 1), while for joysticks there are decimal values in between
- Recall: Update is called every frame the entire duration the game runs. This means the script will continuously take new inputs every frame, and move the ball accordingly (see the two lines of code explained below).
- We also cannot access horizontal and vertical outside of Update, since they are temporary (declared within Update), which means they will be created and destroyed each frame (which is okay since we only want them to hold the current instance’s input).
Line 25 creates the direction vector:
- We combine both the two values in horizontal and vertical into a Vector3 (in Unity, the Y component is the component that above and below our plane, while X and Z are on our plane, so the Vector3 created has horizontal as its X component and vertical as its Z component; the Y component is just set to zero since we don't want any movement in this direction). This is stored in our previously declared variable direction
- We also normalize direction with normalized() so direction has magnitude 1 (we’ll be scaling this up later with the speed variable). This makes sure the sphere doesn’t move faster while moving diagonally
Line 27 moves the sphere:
- This is the line that actually moves the sphere. We translate (move) it’s transform (position) by a distance of speed * Time.deltaTime (this is just the time that has elapsed since the previous frame) in the direction specified by direction
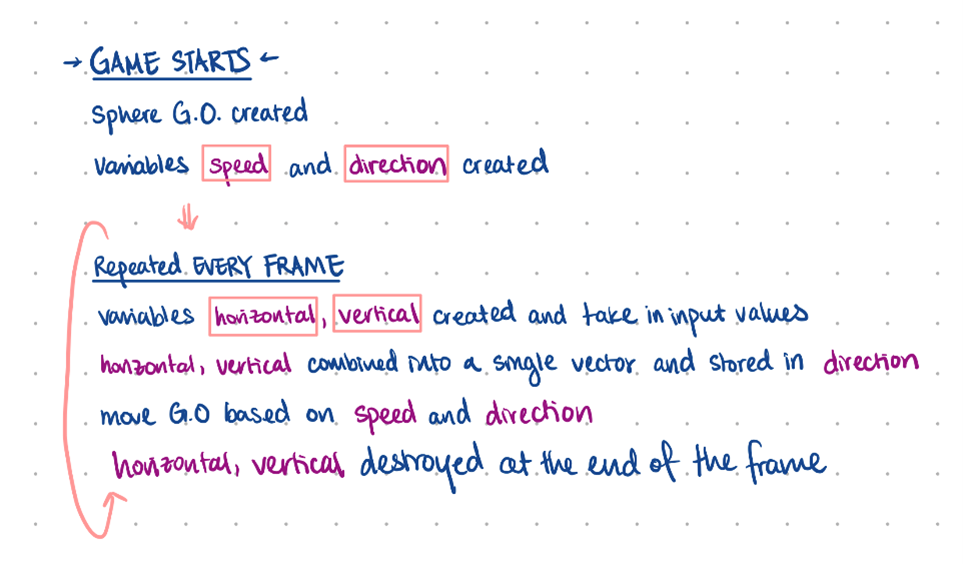
Here’s a quick recap diagram about the order the code runs:
There are other ways to make an object move, for example by changing the velocity of the Rigidbody, or by adding force to the Rigidbody. Some argue that these methods are better, since they aim to model physically accurate movement. However, they also have their own caveats, so the most straightforward way of moving something by changing (translating) it’s position (transform) was presented here. (Note that our current code using transform.Translate doesn’t require the Game Object to even have a Rigidbody. You can remove the sphere’s Rigidbody and it will still move with inputs, hanging midair.)
Unity Documentation!
If you’re curious to learn more in depth about all the Unity functions mentioned above (like Input.GetAxisRaw(), normalized(), transform.Translate(), Time.deltaTime etc.), go to Unity’s own C# documentation and search up the function you’re interested in. This is seriously your best resource and reference in learning Unity and C#, since the documentation presents basically everything you need to know about a specific concept/topic/function in a concise and compact way.
Tweaking the Camera
You’ll notice that the camera’s angle is rather awkward right now. Let’s move and rotate this camera so that it looks directly down at our plane. Do this by changing the fields in the Camera’s transform to the following values:
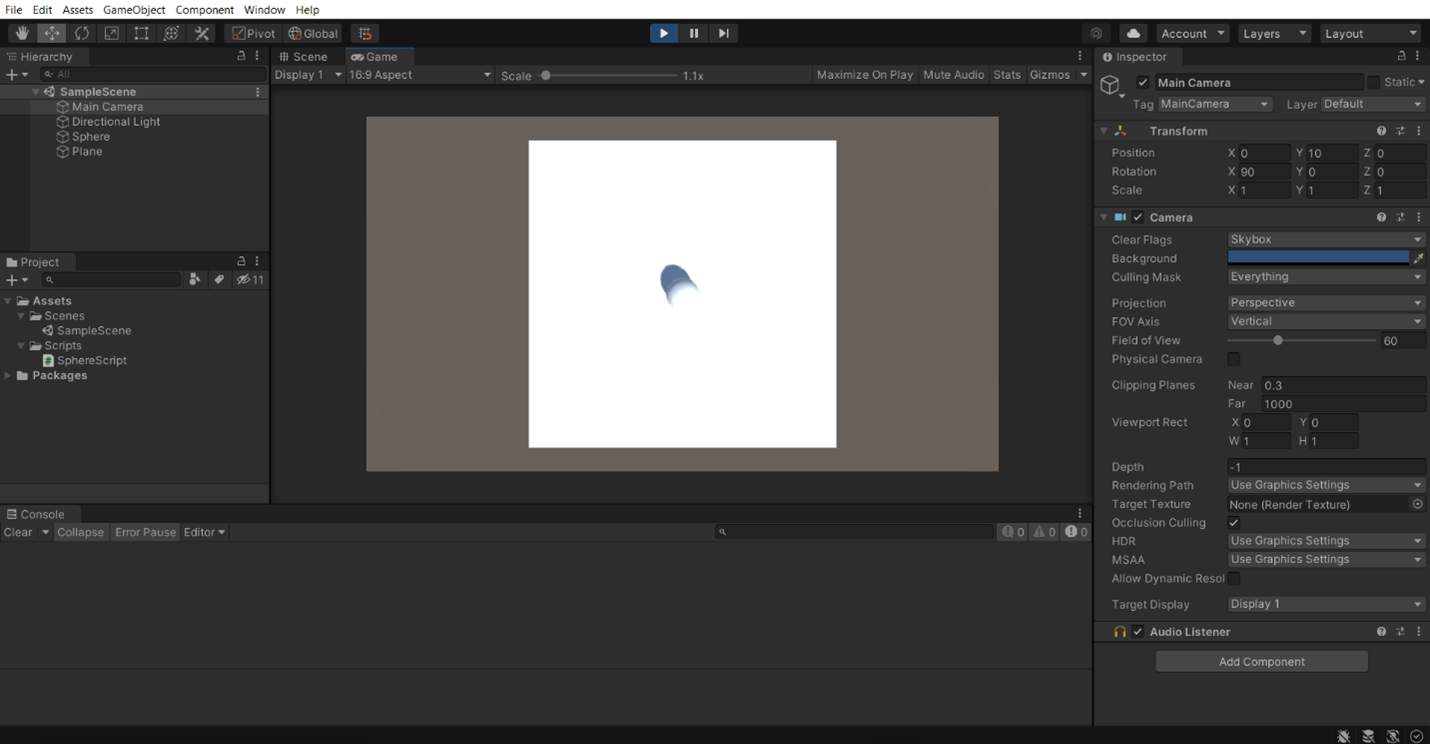
The position (0, 10, 0) moves the camera up directly above the plane, while the rotation (90, 0, 0) rotates the camera to look down.
More Resources
Other than Unity’s own documentation mentioned above, here is a good tutorial if you want to build a more fleshed out 3D player controller.
And that is all for this tutorial! Come back next time for a discussion on how to make your games accessible to everyone!