
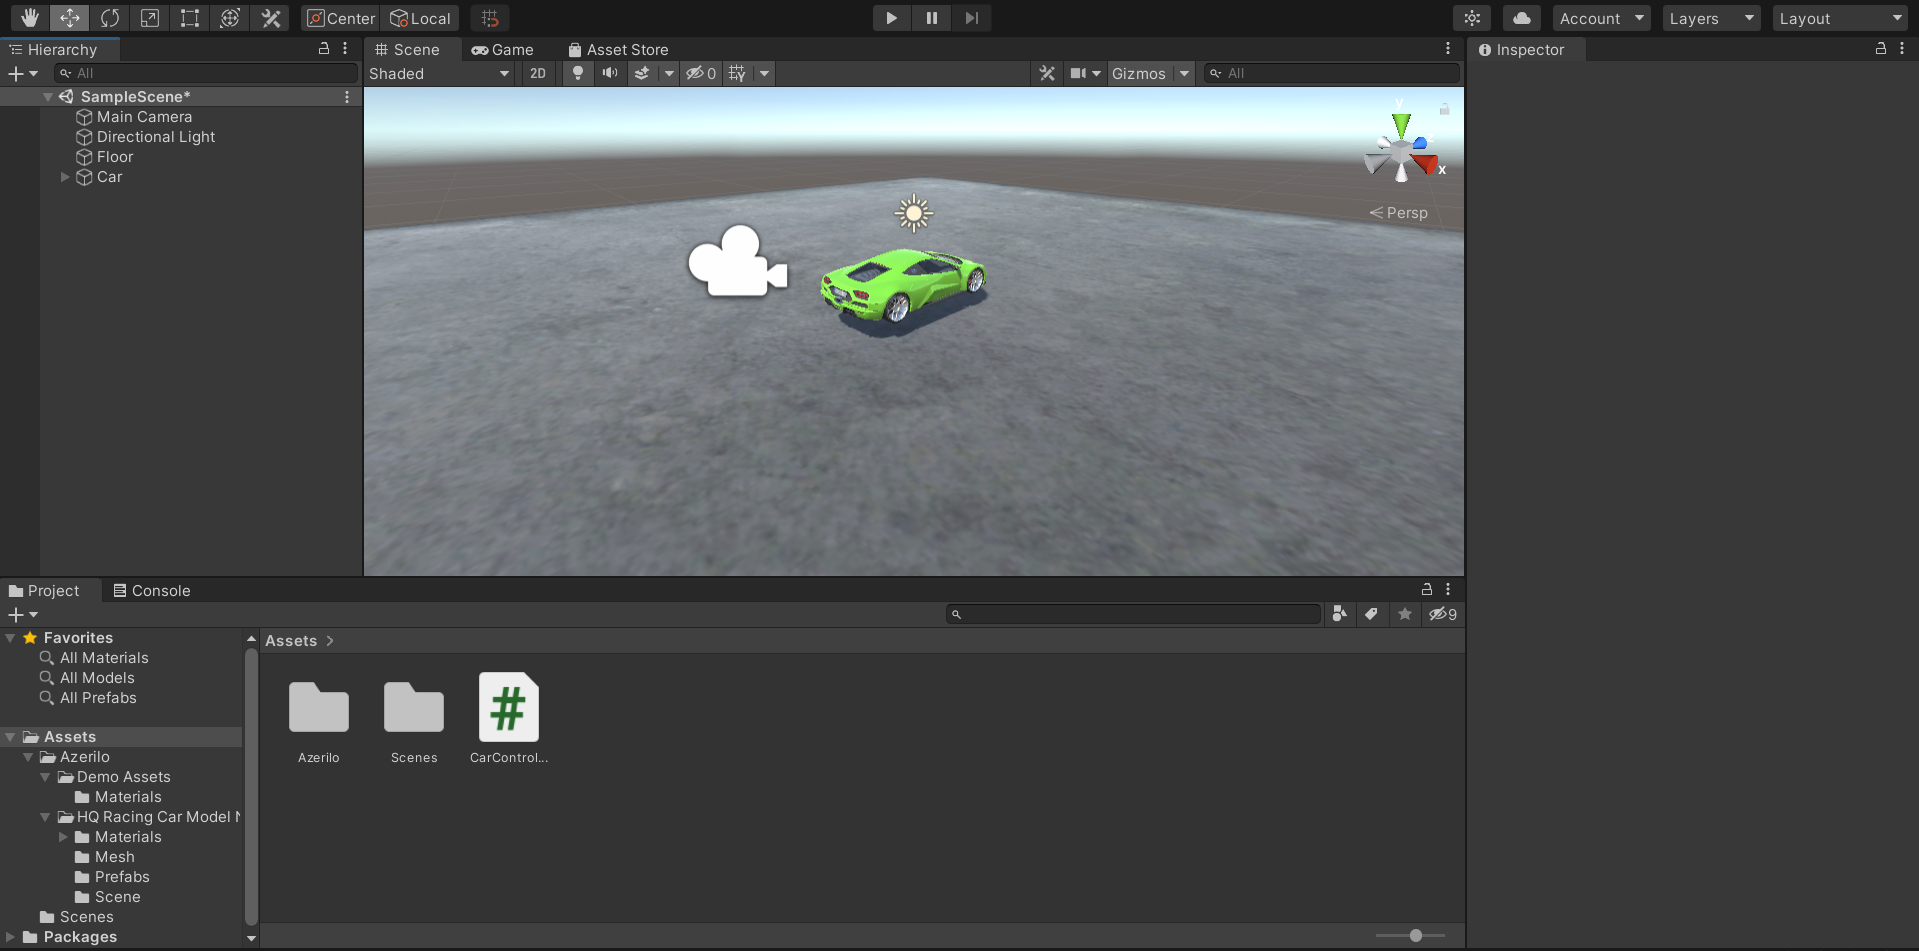
As a beginner in game development, there is a lot of stuff that I have yet to explore and and there is a lot of stuff to know for me in this field. In our first game developing project for us students of the CSE with specialization in Game Technology branch of VIT Bhopal which was a very enjoyable experience, our team first chose to make a racing game. We discarded the idea later on but while searching throught he internet on how to make the game, I came across a neat method to create a drivable car in unity using Wheel Collider. It may be common knowledge for many experienced developers but for us new developers, it maybe some useful information. The end product will look somewhat like the image below.
Step by Step Procedure:
1) Import a suitable car asset from the asset store into your assets menu. There a variety of free good looking car assets in the asset store from which you can choose anyone.

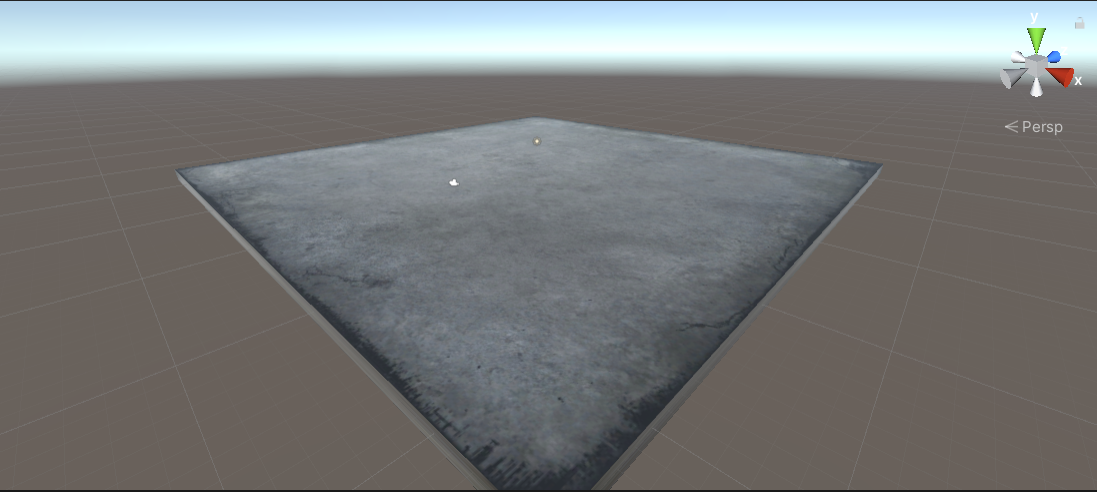
2) Create the floor on which the car will run by creating a 3D Object Cube using the method GameObject -> 3D Object -> Cube and name it "Floor". Now transform the X and Z axis scales to 50 each and we will have a big enough platform or road for the car to run in. The floor starts up being white but preferably you can add any colour material to it or even use the asset store to import concrete colour like I did.
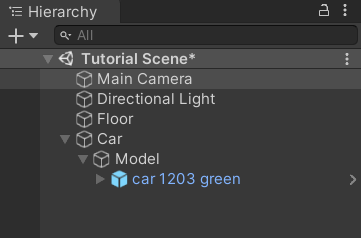
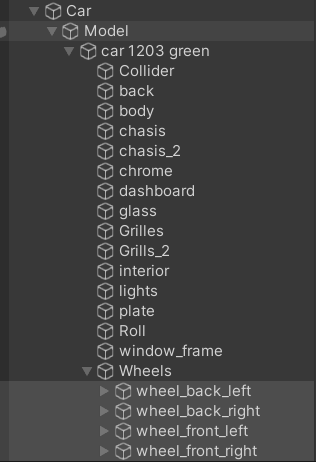
3) Now create an Empty Game Object using the method GameObject -> Create Empty and name it "Car". Create another Empty Child under it using the method GameObject -> Create Empty Child and name it "Model". Here we will store the model of the car or rather the asset that we imported. Kinda like below.
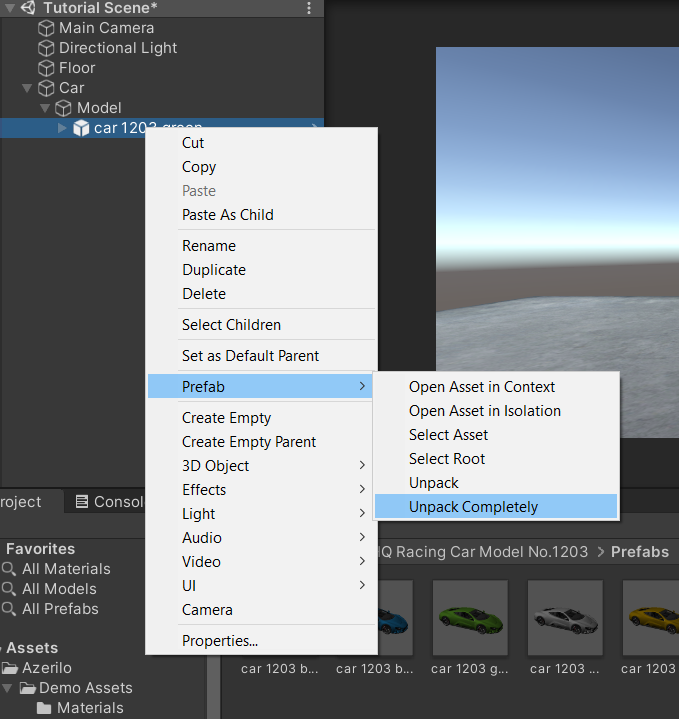
4) Now here we can see that all the wheels are already in the package. But we need to keep the wheels in under an Empty Game Object. So first unpack the package by the method Asset -> Prefab -> Unpack Completely.
5) Now add the wheels in under an Empty Child and name it "Wheels". Like this.
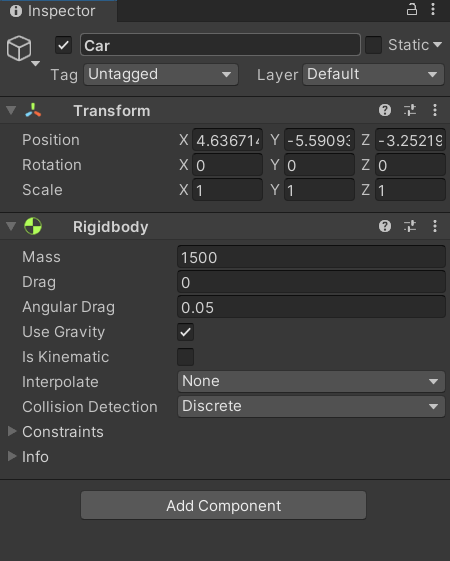
6) Now before moving on to the coding part, there is a very important thing to do. We have to add the Rigidbody Component to the Car Game Object. Without this component, physics won't act on the game object. And lets set to mass to 1500 so that the car have some weight.
7) Now lets move on to the most entertaining or most tiring part of the process as some might say, that is, the coding. Create a new C# Script in the Assets menu and name it CarController. Double click on it and the script editor will open. The code I used is given below:
using UnityEngine; using System.Collections; using System.Collections.Generic;
public class SimpleCarController : MonoBehaviour {
    public List<axleinfo> axleInfos; // the information about each individual axle
    public float maxMotorTorque; // maximum torque the motor can apply to wheel
    public float maxSteeringAngle; // maximum steer angle the wheel can have
    public void FixedUpdate()
    {
        float motor = maxMotorTorque * Input.GetAxis("Vertical");
        float steering = maxSteeringAngle * Input.GetAxis("Horizontal");
        foreach (AxleInfo axleInfo in axleInfos)
        {
            if (axleInfo.steering)
            {
                axleInfo.leftWheel.steerAngle = steering;
                axleInfo.rightWheel.steerAngle = steering;
            }
                if (axleInfo.motor)
                {
                    axleInfo.leftWheel.motorTorque = motor;
                    axleInfo.rightWheel.motorTorque = motor;
                }
            }
        }
    }
[System.Serializable]
public class AxleInfo
{
    public WheelCollider leftWheel;
    public WheelCollider rightWheel;
    public bool motor; // is this wheel attached to motor?
    public bool steering; // does this wheel apply steer angle?
}</axleinfo>
Now attach the script to the Car Game Object.
8) Next, move on to visual wheels. As you can see, a Wheel Collider doesn’t apply the simulated wheel position and rotation back to the Wheel Collider’s Transform, so adding visual wheel requires some tricks. So now change the controller script to:\
using UnityEngine;
using System.Collections;
using System.Collections.Generic;
[System.Serializable]
public class AxleInfo
{
    public WheelCollider leftWheel;
    public WheelCollider rightWheel;
    public bool motor;
    public bool steering;
}
public class SimpleCarController : MonoBehaviour {
    public List<AxleInfo> axleInfos;
    public float maxMotorTorque;
    public float maxSteeringAngle;
    // finds the corresponding visual wheel
    // correctly applies the transform
    public void ApplyLocalPositionToVisuals(WheelCollider collider)
    {
        if (collider.transform.childCount == 0)
        {
            return;
        }
        Transform visualWheel = collider.transform.GetChild(0);
        Vector3 position;
        Quaternion rotation;
        collider.GetWorldPose(out position, out rotation);
        visualWheel.transform.position = position;
        visualWheel.transform.rotation = rotation;
    }
    public void FixedUpdate()
    {
        float motor = maxMotorTorque * Input.GetAxis("Vertical");
        float steering = maxSteeringAngle * Input.GetAxis("Horizontal");
        foreach (AxleInfo axleInfo in axleInfos)
        {
            if (axleInfo.steering)
            {
                axleInfo.leftWheel.steerAngle = steering;
                axleInfo.rightWheel.steerAngle = steering;
            }
            if (axleInfo.motor)
            {
                axleInfo.leftWheel.motorTorque = motor;
                axleInfo.rightWheel.motorTorque = motor;
            }             ApplyLocalPositionToVisuals(axleInfo.leftWheel);
            ApplyLocalPositionToVisuals(axleInfo.rightWheel);
        }
    }
}
References:
1) https://docs.unity3d.com/Manual/WheelColliderTutorial.html
2)
3)
Without these references I may not have learned how to create the drivable car. So many thanks to them.
I hope that this tutorial was useful to you. Thank you for reading the entire way. And as I said earlier, I am a complete beginner so I'll be open to criticism so I can improve myself. Thank you.
- Biswadeep Bhattacharjee (20BCG10025)
- VIT Bhopal (CSE with specialization in Gaming Technology)