Indie game storeFree gamesFun gamesHorror games
Game developmentAssetsComics
SalesBundles
Jobs
TagsGame Engines

midy03

12
Posts
7
Topics
A member registered 29 days ago · View creator page →

Creator of

Recent community posts

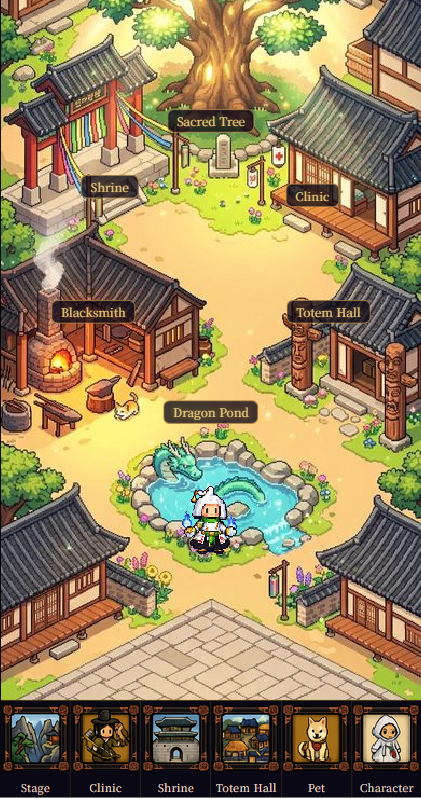
Mongdal: The Last Shaman is a Vampire Survivors-style roguelite set in a world built from Korean shamanism and folklore. 

You recruit companions pulled straight from Korean folk tales 

— dokkaebi (goblins), underworld reapers, the grandmother goddess of birth — 

to fight back against a crisis threatening the spirit realm.

You start weak 

— one weapon, barely surviving. 

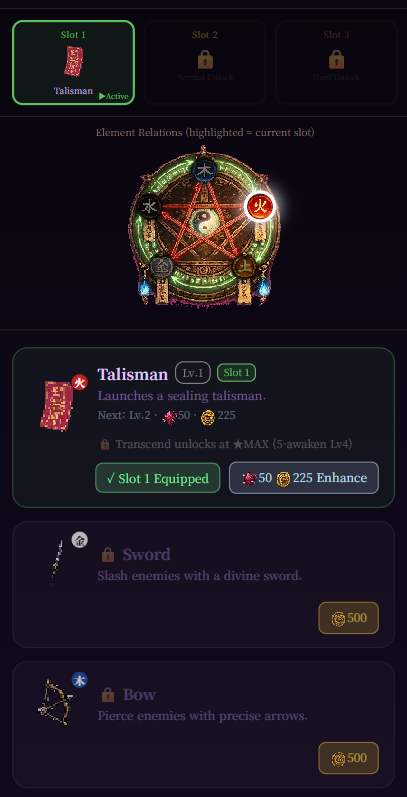
But as you progress, you unlock a 2nd and then a 3rd weapon slot, 

and once companions join the fight, the whole feel of the run changes — 

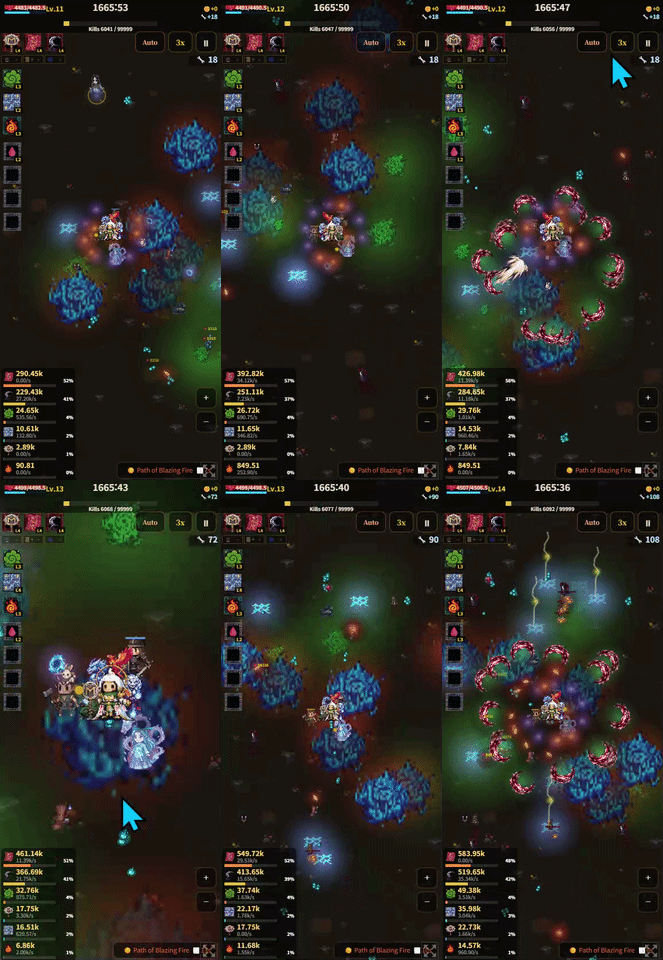
what starts as a tense scramble to survive turns into a screen-filling onslaught.

5 seasons, 50 chapters of content

20+ companions, 20+ pets, each with their own combo synergies

Free to play, made solo


Play here: https://midy03.itch.io/mongdal-the-last-shaman


The new infinite-milestone achievements were paying out way too many diamonds... Toned the reward down. Diamonds you've already earned are untouched.

Improved auto-progression convenience 

previously, certain milestone stages would kick you back to the lobby on every clear (even after you'd already unlocked everything there), which got in the way of Auto-Retry farming. Now that only happens the first time.


자동 진행 편의성 개선 

이전에는 특정 마일스톤 스테이지를 클리어할 때마다(이미 보상을 모두 해금한 상태여도) 로비로 강제 튕겨 나가게 되어 자동 재도전(매크로/반복) 파밍에 방해가 되었습니다. 이제 이 현상은 최초 클리어 시에만 발생합니다.

Performance / 성능 개선

  • Fixed a major hot-path inefficiency: findNearestEnemies() (used by every weapon fire, including the default Talisman) was fully sorting the entire alive-enemy list even when only the single nearest target was needed. Replaced with a partial top-N selection — cost now scales with the number of targets needed, not total enemy count. 무기 발사마다(기본 부적 포함) 호출되는 findNearestEnemies()가 가장 가까운 적 1마리만 필요할 때도 생존한 적 전체를 매번 정렬하고 있던 비효율을 수정했습니다. 필요한 개수만 유지하는 부분선택 방식으로 바꿔, 비용이 전체 적 수가 아니라 필요한 타겟 수에 비례하게 됩니다.
  • Removed two more per-frame full-array sorts (Scythe bounce targeting, Charm retargeting), replaced with a single-pass nearest search. 저승낫 바운스 유도, 현혹 재타겟팅에서도 매 프레임 전체 배열을 정렬하던 부분을 단일 순회 탐색으로 교체했습니다.
  • Enemies, XP orbs, gold drops, and treasure drops were each re-generating a radial gradient glow effect from scratch every single frame. These are now pre-rendered once per color/size and reused as cached sprites — this mattered most for XP orbs, since a single kill can spawn several at once and they linger on screen until collected. 적, XP오브, 골드 드랍, 재화 드랍이 각각 매 프레임 발광 그라디언트를 새로 생성하던 것을, 색상/크기별로 한 번만 미리 그려두고 재사용하도록 바꿨습니다. 킬 하나당 여러 개씩 쏟아지고 자석에 끌려오기 전까지 화면에 계속 남아있는 XP오브에서 특히 효과가 컸습니다.
  • These changes should reduce stutter when a lot of enemies/drops pile up (e.g. Infinite Dungeon runs), and ease GPU load enough to stop it from affecting other apps/tabs running alongside the game. 적/드랍이 많이 쌓일 때(무한 던전 등) 버벅임이 줄고, 게임과 같이 켜둔 다른 탭/프로그램에 영향을 주던 GPU 부하도 완화될 것으로 기대됩니다.

Heads up — since this guide is about dungeons and currencies, there are no screenshots this time :)

알림 — 이번 가이드는 던전에 대한 설명이라 캡쳐가 없습니다 :)


So many currencies, so little time! Here's a quick cheat-sheet for what each one does, and where to farm it.

재화가 참 많죠! 각 재화가 뭘 하는지, 그리고 어디서 파밍하는지 빠르게 정리해드립니다.


Step 1: The Currency Cheat-Sheet

Gold and Diamonds are your universal currencies — Gold for most upgrades, Diamonds for premium pulls and the Exchange Shop.

골드와 다이아는 만능 재화입니다 — 골드는 대부분의 강화에, 다이아는 프리미엄 뽑기와 재화 교환에 쓰입니다.


Beyond that, each building has its own dedicated material: Enhance Stones for weapons at the Forge, Sky Stones for building upgrades, Spirit Fruit for pets, and Taeguk Stones for both weapon slots and Sacred Tree upgrades.

그 외엔 건물마다 전용 재료가 있습니다: 대장간 무기 강화엔 강화석, 건물 강화엔 천운석, 펫 강화엔 천령과, 무기 슬롯 해금과 신목 강화엔 태극석.


Later on you'll also run into Dimension Stones, Soul Stones, Chaos Stones, and Sunri Stones — these unlock as you clear further into the story, so don't worry about them yet.

더 진행하면 차원석·영혼석·혼돈석·순리석도 만나게 되는데, 이건 스토리를 더 진행하면서 순서대로 해금되니 지금은 신경 쓰지 않아도 됩니다.


Step 2: Dungeons Are Where You Farm Them

Once the Seonang Shrine unlocks (Stage 15), you'll find a dedicated Dungeon for almost every material currency — clear one to farm that specific resource.

서낭당이 해금되면(스테이지 15), 대부분의 재료 재화마다 전용 던전이 있는 걸 볼 수 있습니다 — 각 던전을 돌면 해당 재화를 파밍할 수 있습니다.


There's also an Infinite Dungeon (endless survival for Gold) and a Boss Rush (endless bosses for Diamonds), for when you just want to grind the universal currencies instead.

만능 재화가 필요할 땐 무한던전(골드, 끝없이 생존)이나 보스러시(다이아, 끝없이 보스전)를 돌면 됩니다.


Step 3: In a Hurry? Use the Exchange Shop

If you'd rather not grind a specific dungeon, the Shop's Currency Exchange lets you convert Diamonds directly into most materials.

특정 던전을 파밍하기 귀찮다면, 상점의 재화 교환에서 다이아를 대부분의 재료로 바로 바꿀 수 있습니다.


It's not a full replacement for farming, but it's a handy shortcut when you're missing just a little to hit your next upgrade.

파밍을 완전히 대체하진 않지만, 다음 강화까지 조금만 부족할 때 유용한 지름길입니다.

(1 edit)

Ready for the deeper stuff? Let's talk about the Five Elements system and how it rewards smart loadout building.

좀 더 깊은 이야기를 해볼까요? 오행 시스템과, 이게 어떻게 편성을 똑똑하게 짜도록 보상해주는지 소개합니다.

Step 1: Everything Has an Element

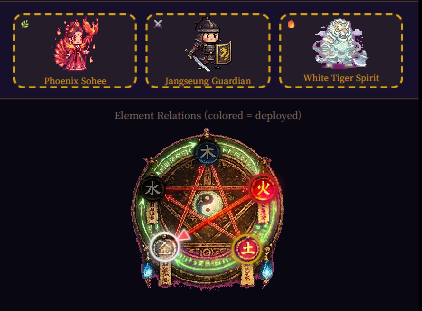
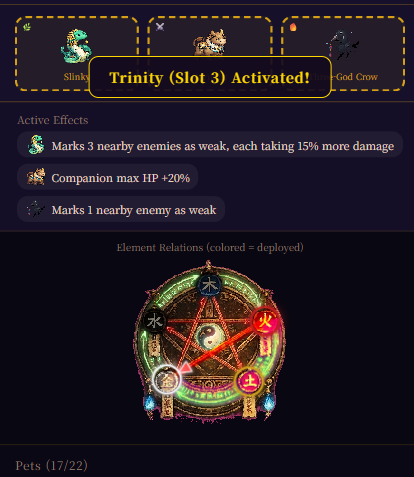
Every main weapon, companion, and pet belongs to one of five elements: Metal, Wood, Water, Fire, or Earth.

모든 주무기, 동료, 펫은 금(金)·목(木)·수(水)·화(火)·토(土) 다섯 속성 중 하나를 가지고 있습니다.


You can check an item's element on its card in the Forge, Uiwon Hall, or Pond.

대장간, 의원당, 용왕연못의 카드에서 각 항목의 속성을 확인할 수 있습니다.

Step 2: Generating vs. Overcoming (상생 vs 상극)

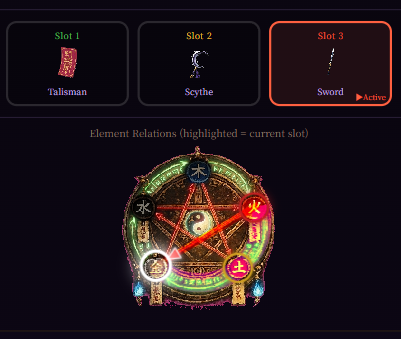
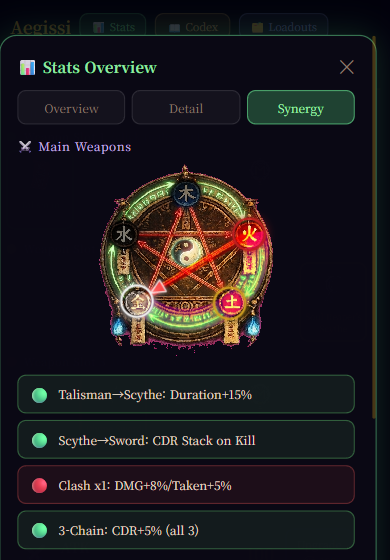
Elements follow a cycle — some generate each other, some overcome each other. Pairing weapons in a Generating relationship grants each of them a unique bonus effect (like extra range, burn damage, or cooldown on kill).

오행에는 상생과 상극이라는 순환 관계가 있습니다. 상생 관계의 무기를 함께 편성하면 각각 사거리 증가, 화상 피해, 처치 시 쿨감 등 고유 보너스 효과를 얻습니다.


Pairing weapons in an Overcoming relationship boosts both their attack power — but also increases the damage you take, so it's a riskier, more aggressive choice.

상극 관계의 무기를 함께 쓰면 서로 공격력이 오르지만, 받는 피해도 함께 늘어나는 만큼 공격적인 선택입니다.

Step 3: Trinity — Match All Three in a Slot

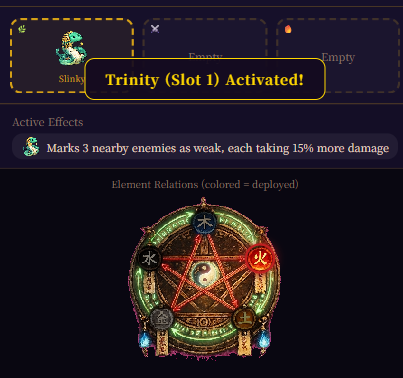
If your main weapon, companion, and pet in the same slot all share the same element, you trigger a Trinity: a bonus effect plus a glowing orbit that circles your character.

같은 슬롯의 주무기·동료·펫이 모두 같은 속성으로 일치하면 삼위일체가 발동됩니다 — 보너스 효과와 함께 캐릭터 주위를 도는 발광 궤도 이펙트가 생깁니다.


You can check your current synergy status anytime from the Character screen's "Stats" popup, under the Synergy tab.

캐릭터 화면의 "능력치확인" 팝업 안 시너지 탭에서 현재 시너지 상태를 언제든 확인할 수 있습니다.

Step 4: Save Your Favorite Combos with Loadouts

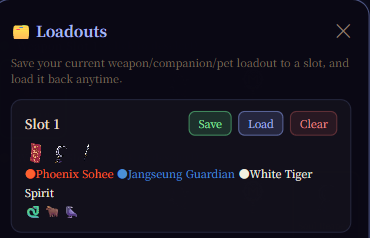
Once you've found a Trinity combo you like, don't lose it — the Character screen's "🗂️ Loadouts" button lets you save your current weapon/companion/pet setup to one of 5 slots and load it back instantly.

마음에 드는 삼위일체 조합을 찾았다면 잊지 마세요 — 캐릭터 화면의 "🗂️ 무기셋" 버튼으로 현재 편성을 5개 슬롯 중 하나에 저장해두고 언제든 즉시 불러올 수 있습니다.

This makes it easy to switch between a safe farming setup and an aggressive high-risk Trinity build without re-equipping everything by hand.

덕분에 안전한 파밍용 편성과 공격적인 고위험 삼위일체 편성을 매번 손으로 다시 맞출 필요 없이 손쉽게 전환할 수 있습니다.


This part rewards experimenting — try a few combinations and see what clicks with your playstyle!

이 부분은 직접 실험해볼 때 진가를 발휘합니다 — 여러 조합을 시도하며 자신의 스타일에 맞는 걸 찾아보세요!

(1 edit)

Time to expand your team! Here's how companions, dungeons, and further building unlocks work.

이제 팀을 키울 시간! 동료, 던전, 그리고 이어지는 건물 해금 방법을 소개합니다.


Step 1: Recruiting Companions

Clear Stage 10 to unlock the Uiwon Hall, where you can recruit companions and set your battle formation.

스테이지 10을 클리어하면 의원당이 해금되어, 동료를 영입하고 전투 편성을 구성할 수 있습니다.

Pull companions with Gold or Gems at the Shop, then equip them in the Uiwon Hall.

상점에서 골드나 다이아로 동료를 뽑은 뒤, 의원당에서 장착하세요.


Step 2: Unlocking Dungeons

Clear Stage 15 to unlock the Seonang Shrine, home to Dungeons.

스테이지 15를 클리어하면 던전이 있는 서낭당이 해금됩니다.

Dungeons are where you farm the special materials — like Upgrade Stones — needed to actually upgrade your weapons at the Forge.

던전은 대장간에서 무기를 강화할 때 필요한 강화석 같은 특수 재화를 파밍하는 곳입니다.


Step 3: Upgrading Your Buildings

Clear Stage 20 to unlock the Jangseung Hall, where you can upgrade the buildings themselves for passive bonuses.

스테이지 20을 클리어하면 장승당이 해금되어, 건물 자체를 업그레이드해 패시브 보너스를 받을 수 있습니다.


Step 4: Rescuing Pets

Clear Stage 25 to unlock the Dragon King Pond, where you can recruit pets to fight alongside you.

스테이지 25를 클리어하면 용왕연못이 해금되어, 함께 싸울 펫을 구할 수 있습니다.

Pets bring their own passive effects — things like healing, gold magnets, or debuffing enemies — so pick ones that fit your playstyle.

펫마다 회복, 골드 자석, 적 약화 등 고유한 패시브 효과가 있으니, 자신의 플레이 스타일에 맞는 펫을 골라보세요.


Step 5: Permanent Upgrades at the Sacred Tree

Clear Stage 30 to unlock the Sacred Tree, your final Season 1 building.

스테이지 30을 클리어하면 시즌 1의 마지막 건물인 신목이 해금됩니다.

Unlike other upgrades, Sacred Tree bonuses are permanent and apply to every run — crit chance, crit damage, attack speed, move speed, and evasion.

다른 강화와 달리 신목의 효과는 영구적으로 모든 플레이에 적용됩니다 — 치명타 확률, 치명타 피해, 공격속도, 이동속도, 회피율까지.


Step 6: You've Got the Full Toolkit Now

Forge, Uiwon Hall, Seonang Shrine, Jangseung Hall, Dragon King Pond, Sacred Tree — with all six buildings unlocked, you have everything you need to grow stronger for the long haul.

대장간, 의원당, 서낭당, 장승당, 용왕연못, 신목 — 6개 건물이 모두 해금되면 장기적으로 강해지는 데 필요한 모든 것을 갖춘 셈입니다.

From here on, it's all about pushing further into the stages and watching your character grow. See you out there!

이제부터는 스테이지를 더 깊이 밀고 나가며 캐릭터가 성장하는 걸 지켜보시면 됩니다. 다음에 만나요!

(1 edit)

Let’s get stronger step by step! Here is an introduction to unlocked buildings and basic upgrades. 

조금씩 강해지자. 해금 건물 소개와 기본 강화 입니다.


Step 1: Basic Upgrades

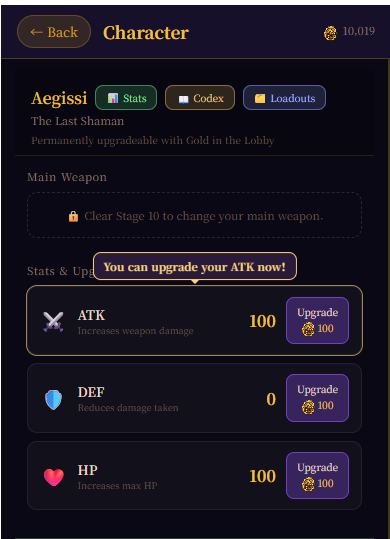
Once you clear Stage 1 and return to the lobby, you can upgrade your character by tapping the Character menu. 

스테이지 1을 끝내고 로비로 돌아오면 캐릭터 창을 눌러 강화를 할 수 있습니다.


Make active use of the rewards from Stages 1 to 20 to power up! 

1~20 스테이지 까지 주는 보상을 적극 활용하여 강해지세요!!!


Step 2: Unlocking the Forge

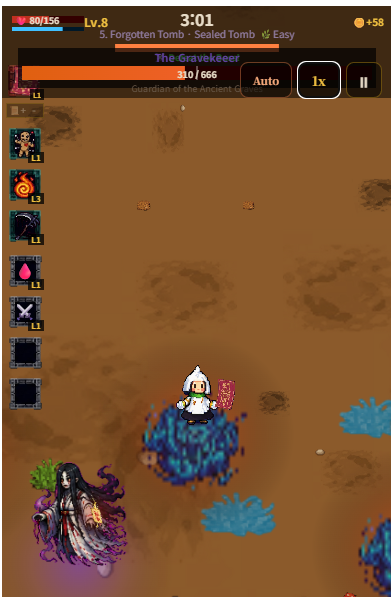
As you progress through the stages, you will encounter your very first boss at Stage 5. 

스테이지를 진행 하면 5스테이지에서 최초의 보스를 조우 하게 됩니다.


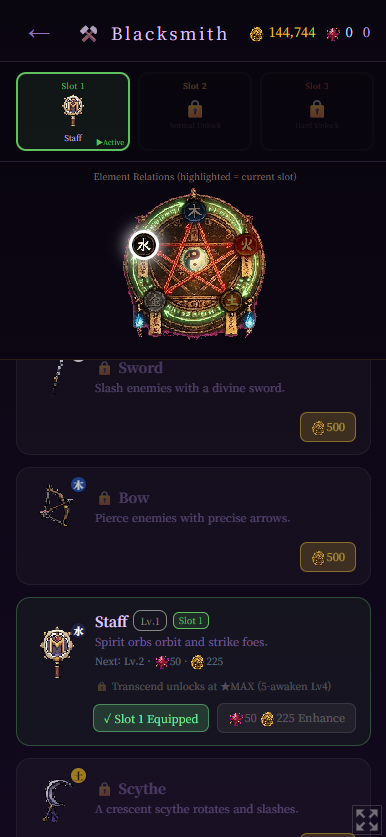
Defeat the boss, and you will unlock your first building: the Forge! 

보스를 클리어 한다면 최초로 해금 되는 대장간 건물이 해금 됩니다.


Step 3: Upgrading Equipment

Unfortunately, you cannot upgrade gear at the Forge just yet. As you advance further, you will be able to upgrade your equipment using Upgrade Stones, a resource obtained from Dungeons.

아쉽게도 지금은 대장간에서 강화를 할 수 없습니다. 

게임이 진행 되며 던전에서 획득하는 재화인 강화석을 이용하여 강화를 할 수 있습니다.

However, you can change your equipped weapon right now! 

다만, 지금 무기는 변경 가능 합니다.


Keep unlocking buildings, upgrading your weapons, recruiting allies, and rescuing pets in this way! 

이러한 방식으로 건물을 해금 하고 무기를 강화하면서 동료를 획득 하고 펫을 구하세요!!


Combat Basics (Your character fights automatically, you just need to survive!)

전투 기초 (캐릭터는 알아서 싸우니, 여러분은 생존만 신경 쓰면 됩니다!)

1. Auto-Attack (자동 공격)

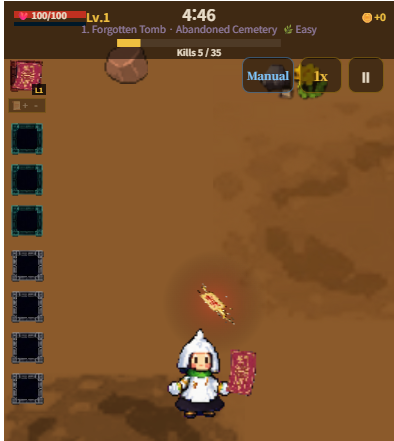
You don't attack manually — your equipped weapons fire on their own. Your only job is to move and stay alive.

직접 공격하지 않습니다 — 장착한 무기가 알아서 발사됩니다. 여러분이 할 일은 이동하며 생존하는 것뿐입니다.

2. Main Weapon (주무기)

You start with one main weapon slot (Talisman). Clearing a stage on Normal or Hard difficulty unlocks a 2nd and 3rd slot, so you can equip multiple main weapons at once.

주무기 슬롯은 처음엔 1개(부적)입니다. 노말/하드 난이도로 스테이지를 클리어하면 2번째, 3번째 슬롯이 열려서 여러 주무기를 동시에 장착할 수 있습니다.

3. Sub-Weapons & Leveling Up (서브무기와 레벨업)

Killing enemies drops XP orbs. Collect enough and you'll get to pick 1 of several level-up cards: a new sub-weapon, an upgrade to one you already have, or a stat boost.

적을 처치하면 경험치 구슬이 떨어집니다. 일정량을 모으면 레벨업 카드 중 하나를 고를 수 있습니다: 신규 서브무기, 이미 가진 서브무기 강화, 또는 스탯 강화 중 선택.

4. Dodging Damage (피격 회피)

There's no block or parry — just move away from enemies and projectiles. After getting hit, you get a brief invincibility window, so don't panic if you clip one hit.

막기나 반격 기능은 없습니다 — 그냥 적과 투사체를 피해 이동하세요. 피격 직후엔 짧은 무적시간이 있으니, 한 대 스쳤다고 당황하지 않아도 됩니다.

5. Boss Fights (보스전)

Bosses telegraph their attacks with a warning effect before it lands — watch for it and move out of the way in time.

보스는 공격 전에 경고 이펙트로 예고합니다 — 이걸 보고 미리 피해서 이동하세요.

Quick Start Guide (Since we all skip tutorials anyway! 😉)
빠른 시작 가이드 (어차피 우리 모두 튜토리얼은 패스하니까요! 😉)
1. Controls (조작 방법)
  • Mobile: Use the virtual joypad to move.
    • 모바일: 가상 조이패드로 이동합니다.
  • Web: Use the W, A, S, D keys to move.
    • 웹: W, A, S, D 키로 이동합니다.
2. The Lobby (로비)
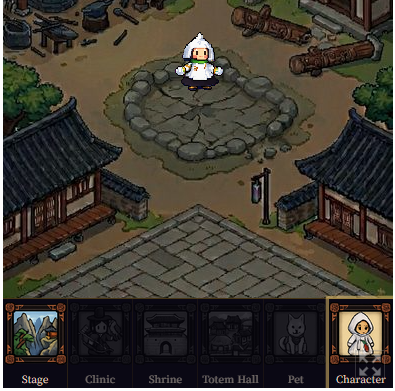
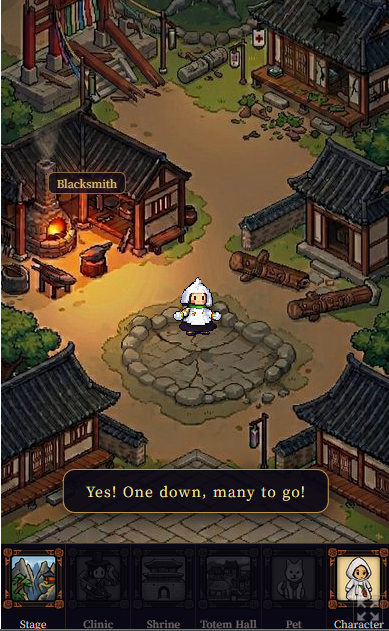
  • You can move around freely in the lobby. (It’s just for moving—no special functions here!)
    • 로비에서 자유롭게 이동할 수 있습니다. (이동만 가능하며, 특별한 기능은 없습니다!)
3. Getting Started (게임 시작하기)
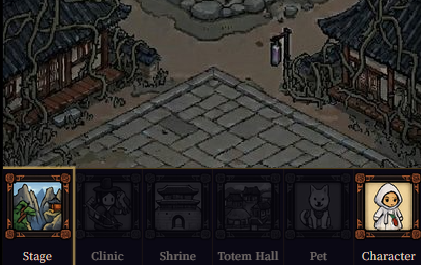
  • Only the two options at the bottom are unlocked when you first start. Tap Stage to begin.
    • 처음 시작할 때는 화면 아래에 있는 두 개의 옵션만 해금되어 있습니다. Stage를 눌러 시작해 주세요.
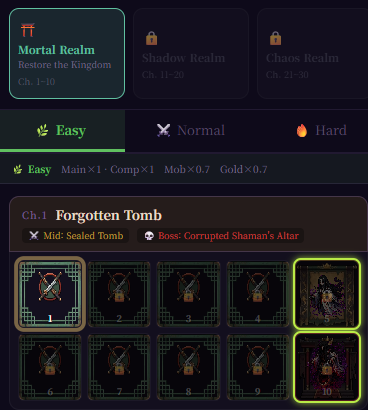
4. Your First Destination (첫 번째 목적지)
  • Currently, Stage 1 is your only available destination. Tap to enter!
    • 현재 갈 수 있는 곳은 Stage 1뿐입니다. 눌러서 입장해 주세요!
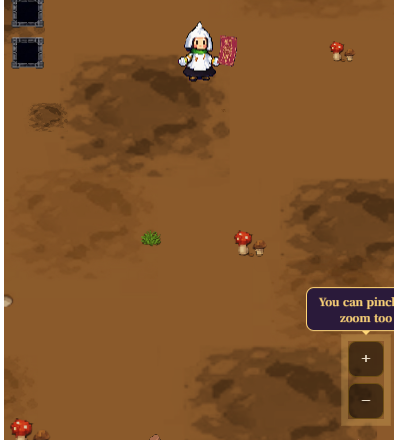
5. Zoom In / Out (화면 확대 / 축소)
  • Mobile: Pinch to zoom in and out (two-finger gesture).
    • 모바일: 두 손가락으로 화면을 벌리거나 좁혀서 확대/축소가 가능합니다.
  • Web: Use the mouse scroll wheel.
    • 웹: 마우스 휠을 사용해 조절합니다.
6. Speed & Auto-Play Modes (배속 및 자동 플레이 모드)
  • Speed: Switch between 1x, 2x, and 3x speed.
    • 속도: 1배속, 2배속, 3배속 중 선택하여 변경할 수 있습니다.
  • Manual: You control all movement and level-up rewards. You have to manually pick up loot from the ground, but this gives you the maximum profit.
    • 수동: 이동과 레벨업 보상 획득을 직접 조작합니다. 바닥에 떨어진 전리품을 직접 주워야 하지만, 효율과 이득이 가장 좋습니다.
  • Auto: Your character automatically runs away when enemies get too close and auto-claims level-up rewards. However, it will not automatically pick up loot. If you win, it will automatically loop the next stage (unless you unlock a specific building).
    • 자동: 적이 가까이 오면 캐릭터가 알아서 도망치며, 레벨업 보상도 자동으로 획득합니다. 단, 바닥에 떨어진 재화나 아이템은 자동으로 줍지 않습니다. 승리 시 다음 스테이지를 반복해서 진행합니다. (특정 건물을 해금하지 않은 환경 기준)
  • Semi-Auto: An auto-play mode where you still choose and claim your level-up rewards manually.
    • 반자동: 조작은 자동이지만, 레벨업 보상만큼은 유저가 직접 수동으로 선택해 획득하는 모드입니다.
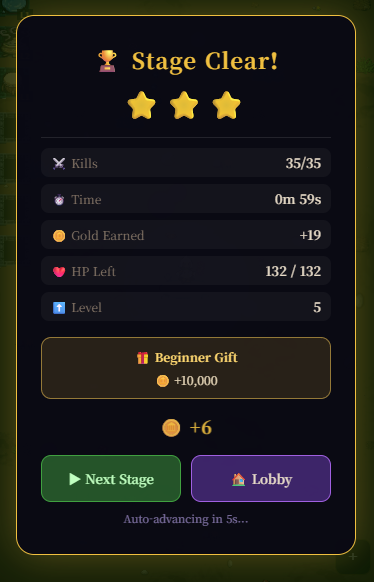
7. Newbie Rewards (Stages 1–20) (초보자 지원 보상: 1~20 스테이지)
  • We’ve got special welcome gifts for Stages 1 through 20!
    • 1부터 20 스테이지까지 각 스테이지별 초보자 환영 선물이 준비되어 있습니다!
  • Even if you've already reached Stage 19 when this reward update drops, don't worry. Simply use the Redeem Code to claim the difference you missed out on!
    • 이 보상 업데이트가 적용되었을 때 이미 19 스테이지에 도달해 있으셨더라도 걱정 마세요. 리딤 코드(Redeem Code)를 입력하시면 받지 못했던 이전 스테이지들의 차액 보상을 한 번에 획득하실 수 있습니다!

모두가 즐겁게 게임을 즐겼으면 ㅂ니다!

v0.1.4 hotfix (2026-06-29)
Separated stage and dungeon monster scaling — stages are now more forgiving (HP ×0.4/wave, speed +5/wave), while dungeons stay brutal (HP ×0.667/wave, speed +9/wave). Should feel more fair on normal runs without making dungeons easier.