Indie game storeFree gamesFun gamesHorror games
Game developmentAssetsComics
SalesBundles
Jobs
Tags

New Module: Decker Dialogizer

A topic by Internet Janitor created Oct 13, 2023 Views: 679 Replies: 13
Viewing posts 1 to 9
Developer(+2)

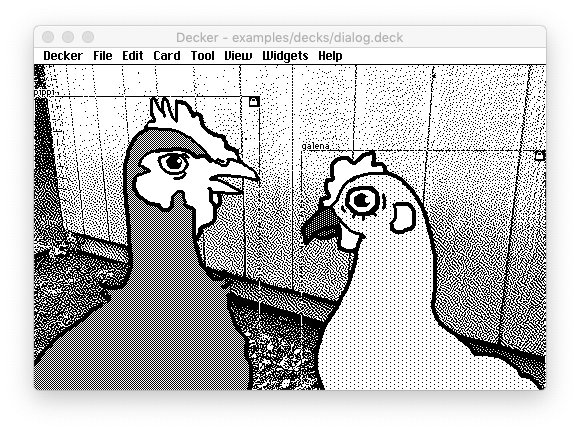
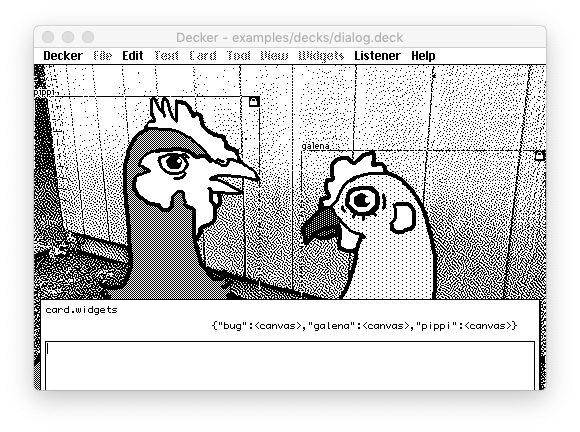
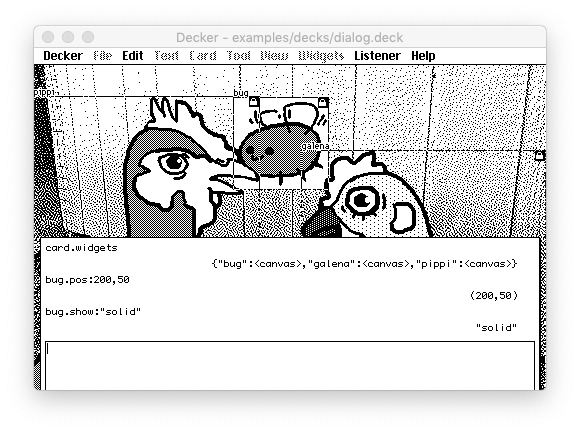
Decker v1.31 includes a new example deck, "dialog.deck", with a module that provides a highly customizable modal dialog system suitable for making visual novels:

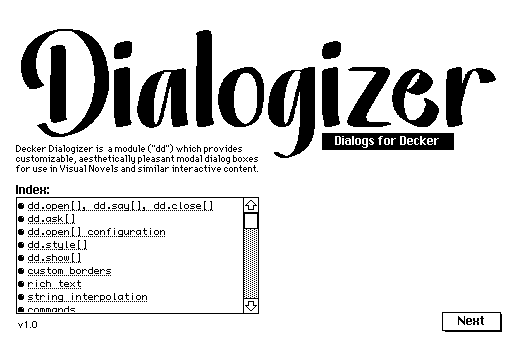
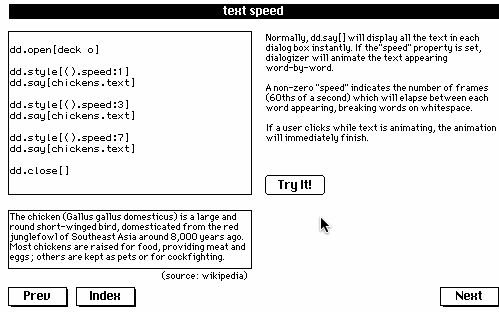
You can read the interactive documentation and tinker with examples from your browser.

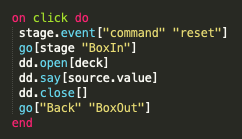
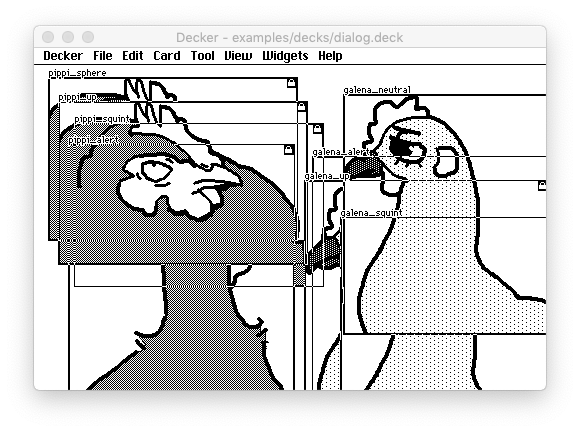
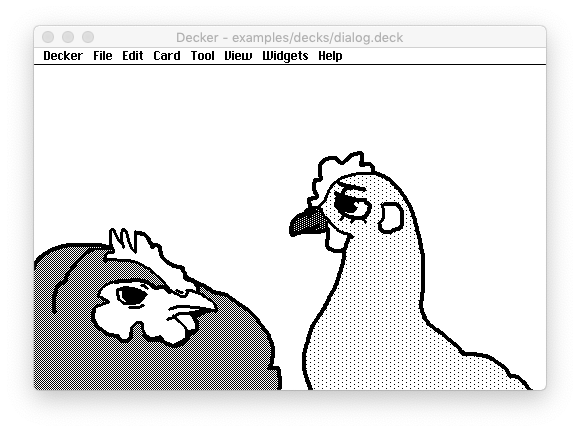
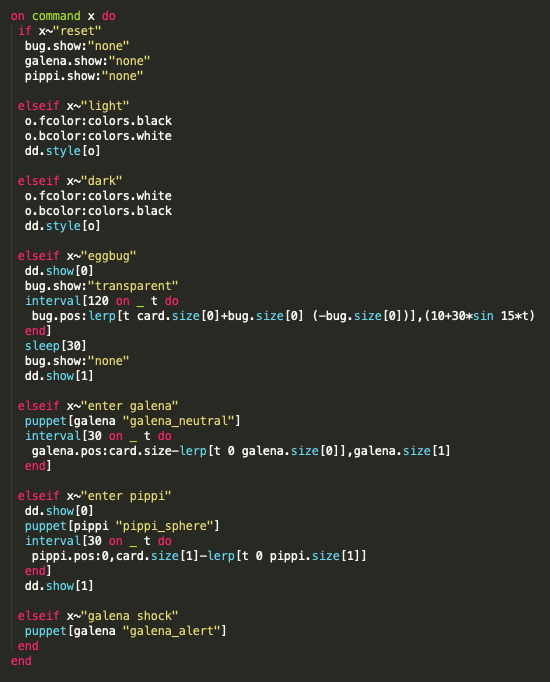
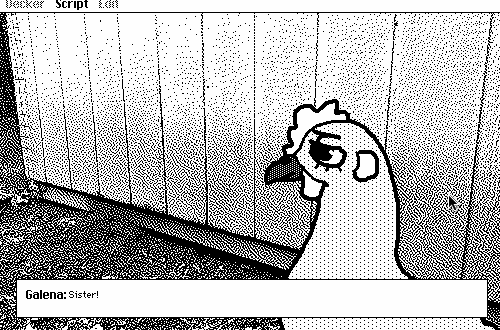
Perhaps the most exciting aspect of Dialogizer is that it allows you to orchestrate complex cutscenes:

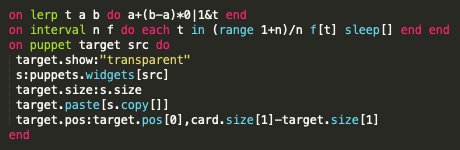
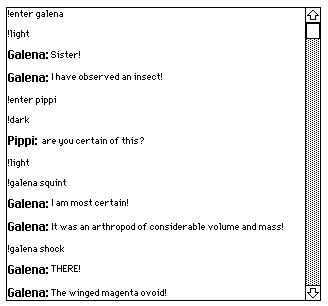
With most of the "script" expressed as rich text in a field interspersed with user-defined "commands" to control the action:

Dialogizer won't instantly make Decker a replacement for Twine or Ren'Py, but it can help you get a lot closer without having to write very much Lil!

If anyone has questions or comments, please let me know- I'd love to hear what you folks think!

(+1)

wow well done. This looks super impressive!

(+1)

this looks amazing — just the push i needed to get me back in and playing around with decker. thank you so much for building and sharing this!

(+1)

I have a basic grasp of Decker but I can't really figure out how I'd make a cutscene of my own. In my mind, the "shock" (for example) must be a canvas being used like a sprite(?) with the command toggling its visibility or something (or in the case of "!galena show" then show is somehow defined as rising up from the bottom of the screen...) But I can't really tell how to pull apart the example deck to see for myself. 

Anyone have any tips for me on where to look (or point me to a more simple example?)

Looks wild though!

Developer(+1)

A cutscene like the above demo is by far the most complex way to use Dialogizer, so please do make sure you've read through and tinkered with the simpler examples in the documentation before diving in the deep end. The card "a complete cutscene" in the Dialogizer deck includes a brief description of where all the parts live, but I can try to provide a bit more detail.

On that card, there is a button labeled "Try It!" with a short script that fires things off:

Note that this references "source.value", the rich text content of a field on the same card, which contains the prose and commands that drive the overall cutscene. The first thing it does, though, is navigate to the card "stage", where the cutscene takes place.

Here's how the stage card might look if we enter "Widget" mode and turn on widget names (View -> Show Widget Names):

The "pippi" and "galena" canvases are in their position and animation state from the last time this cutscene was executed. If we use the Listener, we can observe that there's actually a third canvas here for the Eggbug:

The "bug" is offscreen to begin with (as we could determine for ourselves by checking "bug.pos"), but we can manually reposition it and make it visible if we want:

The stage card itself contains a script (Card -> Script) which is responsible for handling all the !commands in the rich text source.

First, it defines some helper functions:


  • "lerp[]" linearly interpolates a value from "a" to "b" based on a time value "t" which should range between 0 and 1.
  • "interval[]" executes a loop which calls a function "f" repeatedly with a value between 0 and 1, sleeping for a frame between each call, where "n" specifies how many frames the interval should last.
  • "puppet[]" takes a "target" canvas and the name of a "src" canvas which can be found on a card named "puppets". It resizes and bottom-aligns the target canvas to suit the dimensions of src and copies in the image from src. This is used to animate the "actor" canvases on our stage.

If you take a look at the card "puppets" referenced above, you will find a pile of canvases with various animation frames:

You can reorder them in widget mode (Edit -> Move to Front, etc), but for convenience the card also has a script which will catch any "click" events in Interact mode and pull them to the front of the stack:


The following card (which happens to be named "card2") reveals something about how these puppets were made; some plain drawings on a scratch card background:

I made initial drawings of my chickens in roughly the composition I wanted for my scene, and then individually copied their sprites to the clipboard. (Tool -> Lasso, make a selection, Edit -> Tight Selection, Edit -> Copy Image.) Then I'd navigate to the "puppets" card, switch to the widgets tool, and choose Edit -> Paste as New Canvas (or Paste into Canvas to make corrections.) With a few extra working cards and some copying, pasting, and tweaking, it was pretty quick to make all the alternate poses I'd planned out. One important detail for making sprites like this is using Transparency Mask mode (View -> Transparency Mask) to make sure my drawings were transparent and opaque in the right places before cutting them out and storing them on my puppets card:

Let's return to the script on the "stage" card, with a few command clauses elided for brevity:


Each clause here corresponds to the text following the "!" in one of the commands of the source rtext. "light" and "dark" configure styles, "eggbug", "enter galena" and "enter pippi" carry out animations using interval[] and lerp[], and "galena shock" is an example of a command handler that simply changes the animation frame for one of the "actors".

One of the nice thing about these being ordinary event handlers on a card's script is that we can test many of them interactively from the Listener by sending our own synthetic "command" event:

Making a complete cutscene like this is somewhat involved and requires comfort with many of Decker's features, but now we've at least seen all the moving parts.

For a game with multiple cutscenes we may have several different stages and piles of puppets to populate them with. It is possible to "lift" some or all of the functions in the command handler up to the Deck-level script (File -> Properties... -> Script...) so that they can be shared across many stages. There may well be room for another module and/or some new Contraptions to make things easier; Dialogizer is primarily concerned with the dialog boxes themselves.

Does any of that help clarify things?

(1 edit) (+2)

I can see that using it like that really does stretch Decker's legs -- and I doubt I'm up to working with it at that level -- but your writeup really does help make sense of it all. It really does help, thank you so much for writing that out

p.s. Listener is such a handy feature

(+1)

i'm probably just missing something simple but i'm having trouble getting the most basic example to work. if I do it in the example deck it works but if i copy the widgets to a fresh deck it won't work anymore. is there some basic thing i'm not doing? sorry if this is super obvious!!

Developer(+1)

One step you might have missed is importing the actual Dialogizer module from "dialog.deck" using the Font/DA Mover:

This module is the "dd" that the example scripts refer to.

(+1)

oh thank thanks thats it :3

Developer(+1)

Made a few minor enhancements to Dialogizer v1.2 that provide additional styling parameters  for making your dialog boxes a little bit "juicier":

  • The "speed" parameter, if set to a nonzero number, will cause Dialogizer to animate in the text in dialogs a word at a time. If the user clicks while text is animating, it will immediately finish.

http://beyondloom.com/decker/dialog.html#textspeed

  • You can now set up sound effects that will be played when dialogs open, advance a page, confirm a choice, or continuously while text is animated:

http://beyondloom.com/decker/dialog.html#soundeffects

hey there, internet janitor! 

could you tell me if there is a way to mess around with dialogizer's window size and position?

Developer

Currently there aren't any configuration options exposed for size and position apart from the padding defined when you configure a custom border.

What did you have in mind?

(1 edit)

thanks for the swift reply :)

i see! i was just playing with a custom border i drew when i thought of changing the size and position of the whole text window. i wanted to create different card compositions by throwing the textbox around in different moments of the story i'm coming up with. 

maybe i'm thinking about a mix between a canvas (or field) and the dialogizer box, where i can choose the place where the window will pop when prompted.

example. i wanted it to look like a tv but all stretched out like this it gets a bit alien (although it's still nice)