
On Sale: GamesAssetsToolsTabletopComics
Indie game storeFree gamesFun gamesHorror games
Game developmentAssetsComics
SalesBundles
Jobs
TagsGame Engines

PixelCNC Has Moved: deftware.org

CAM software developed by artists for artists to create unique and original works on a 3-axis CNC router or mill. · By Deftware

Add Depth

A topic by hegartype created 7 days ago Views: 42 Replies: 3
Viewing posts 1 to 3
(+1)

Morning All, Charlie,  

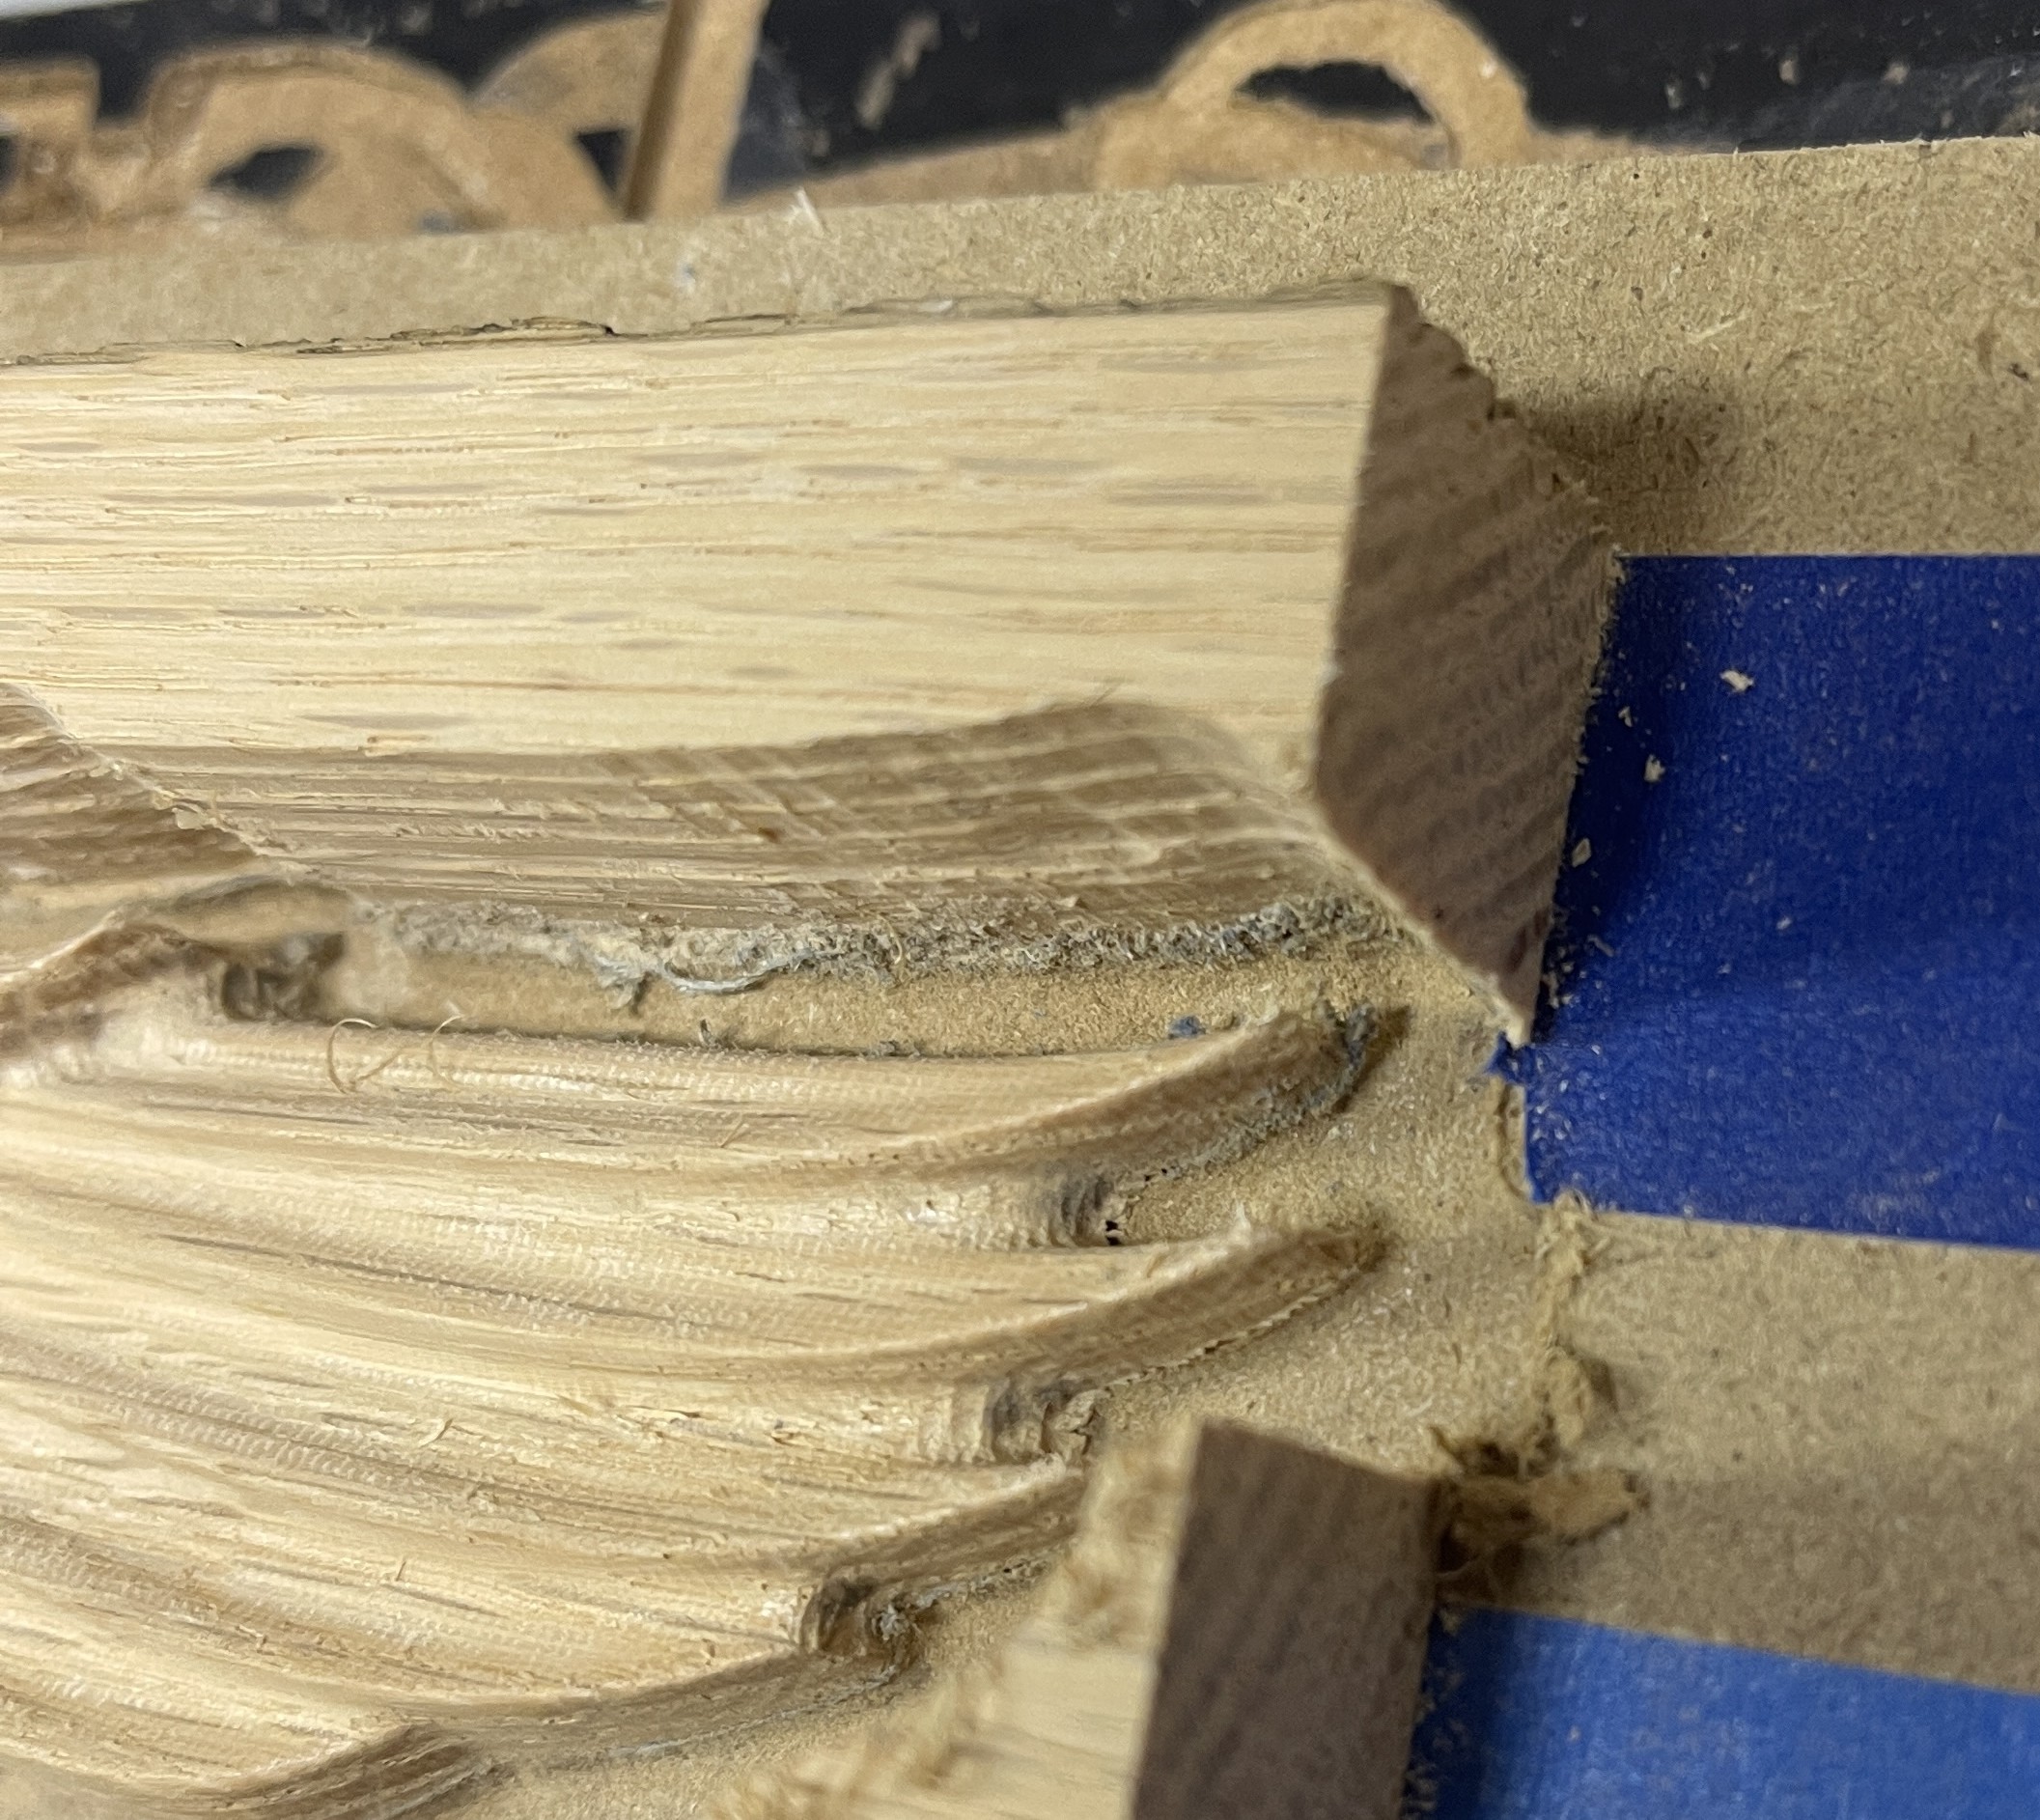
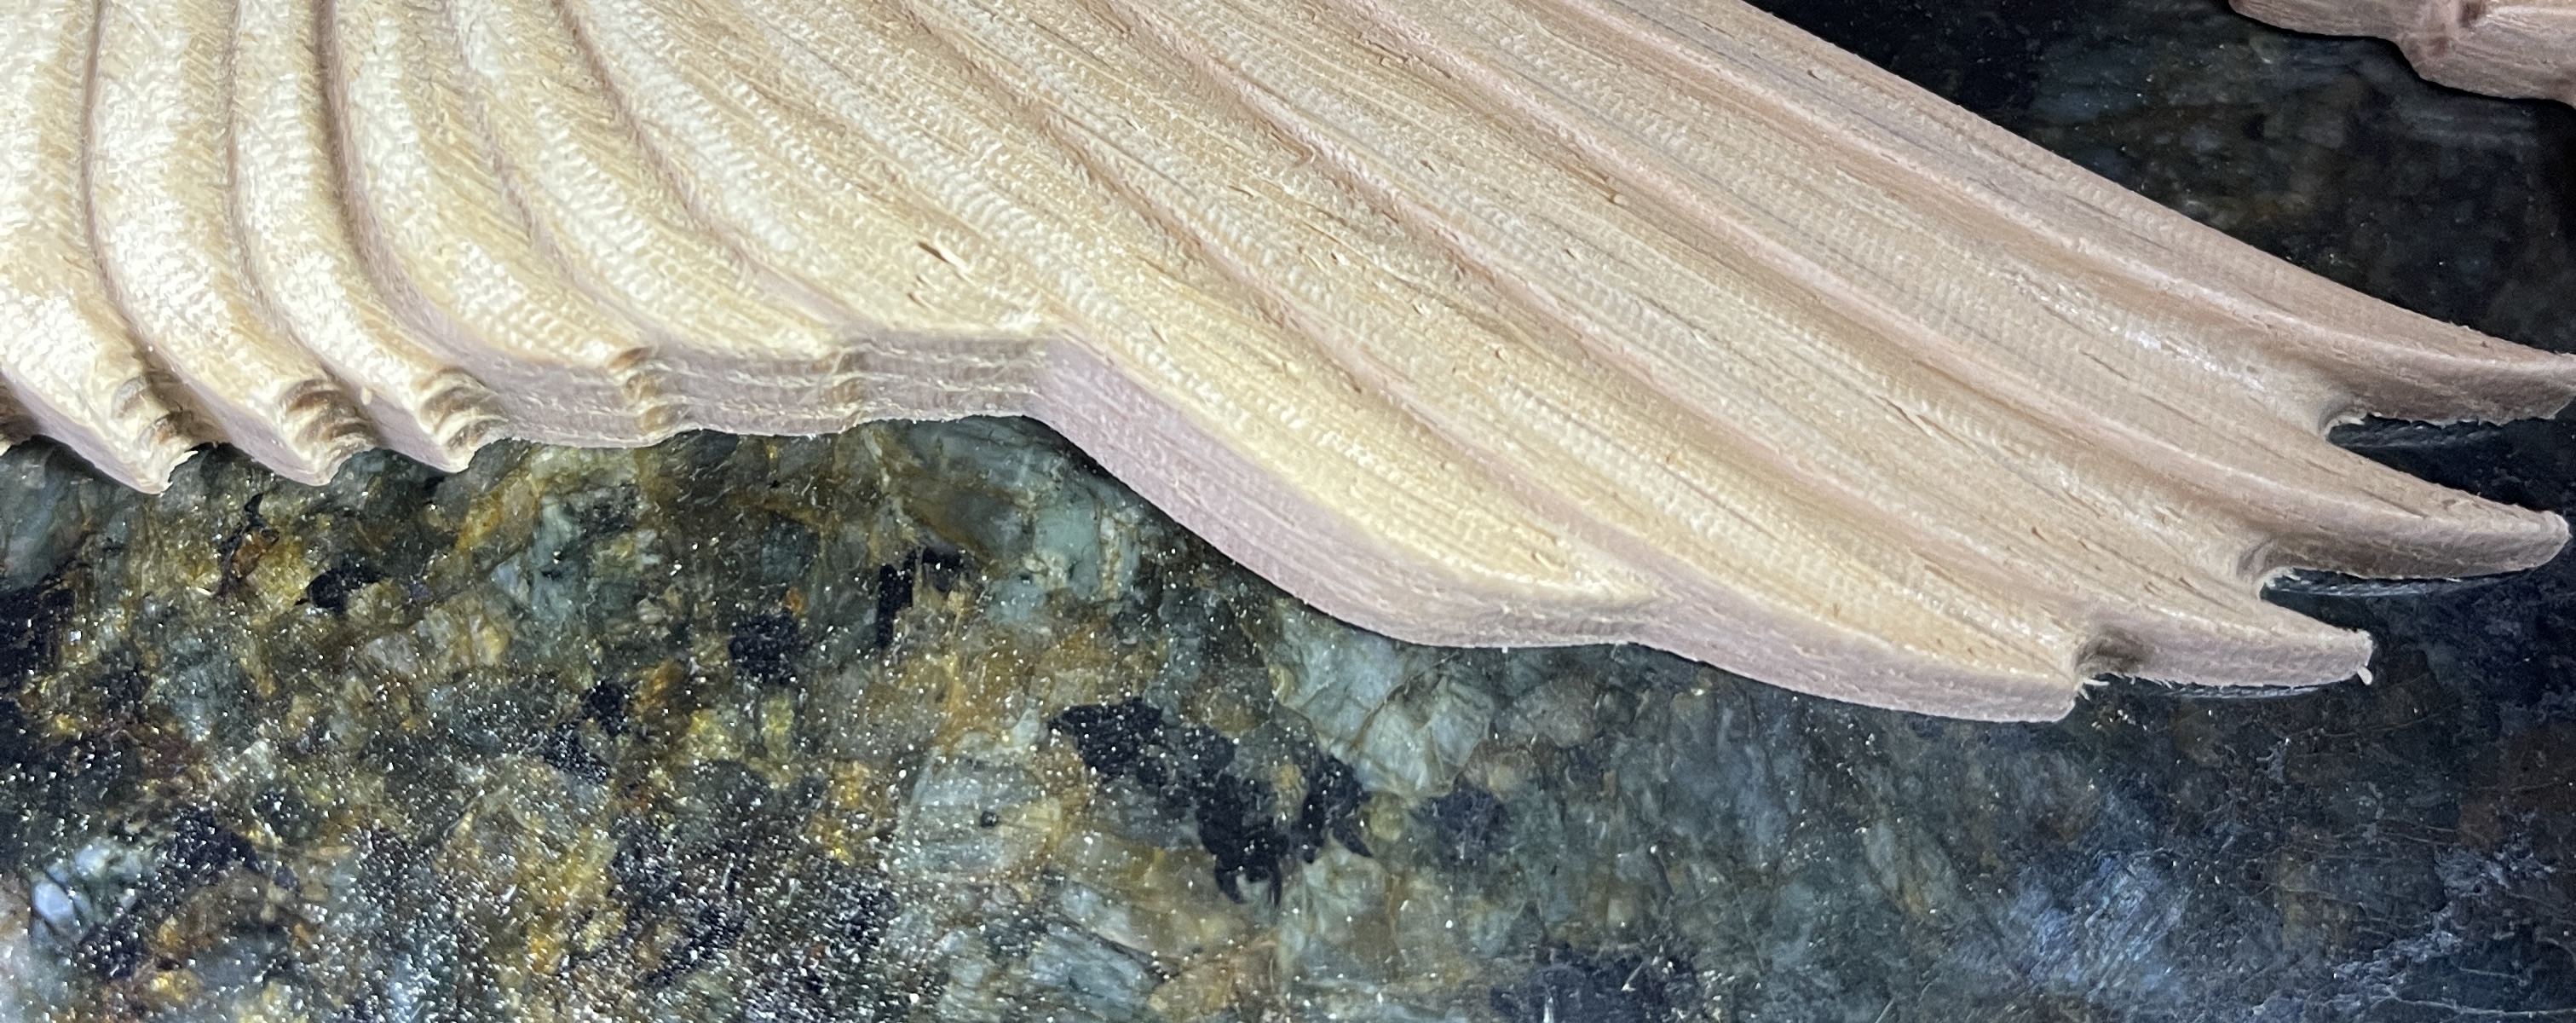
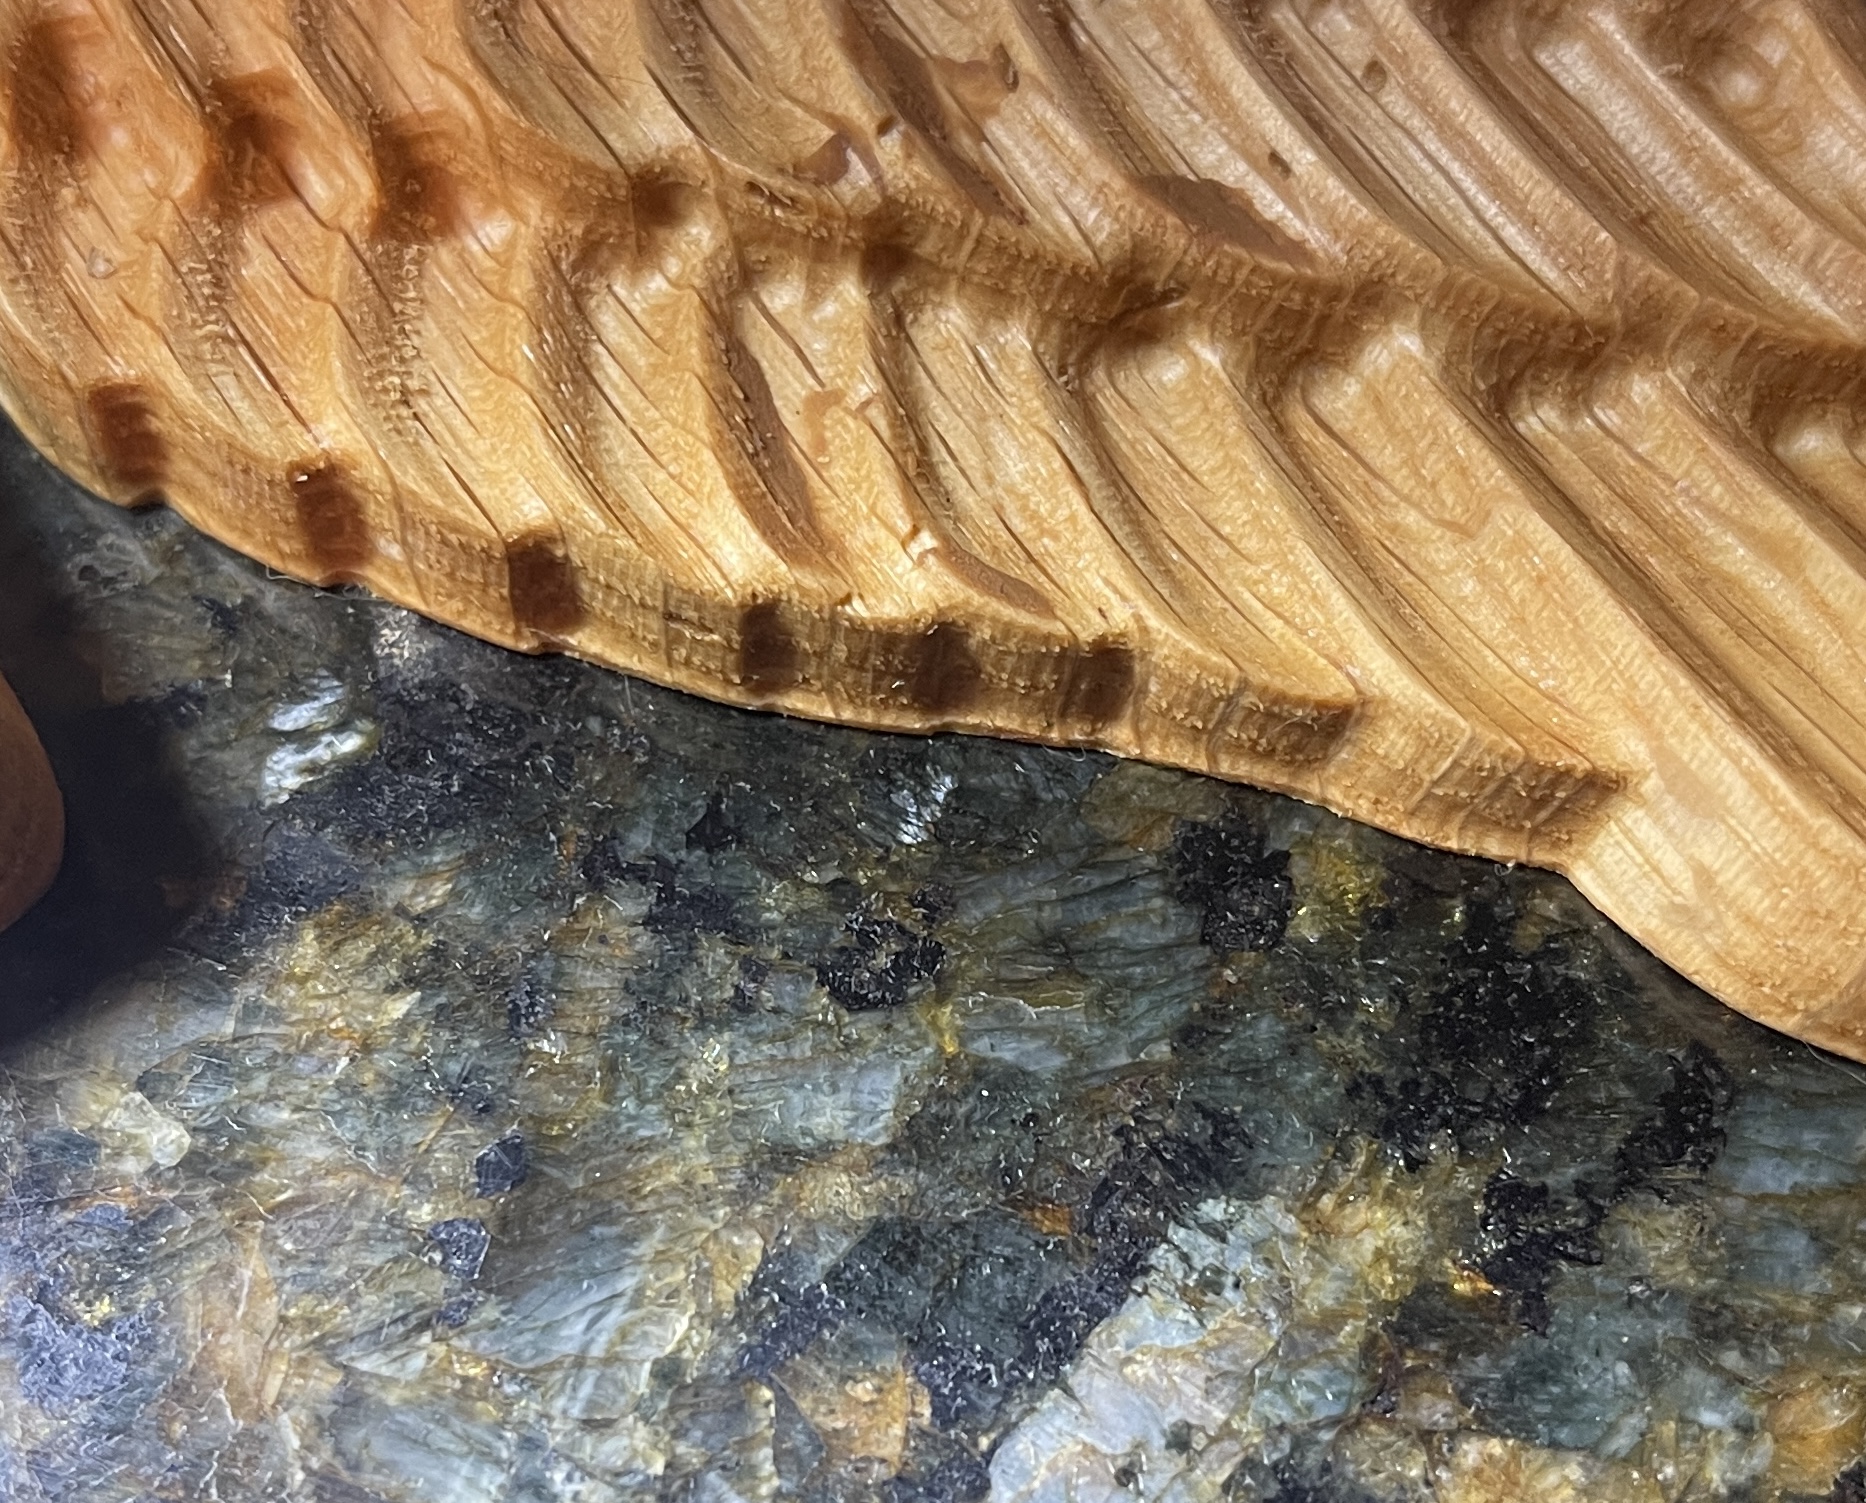
When parallel carving models, using a 1/8th ball, I end up with a "rind" left around the edge.  The inside radius of the ball.  It proves to be a real pain to sand off, especially in tight little spots, and doing an outline pass with an endmill only works sometimes, again not good in details.  Another program I used to use had an add depth feature that I think might have worked but I can't figure out how to do it in PixelCNC.  I though perhaps floating the model's Z origin up equal to a bit radius....but when i tried to do it, it stopped making sense....I would love to hear your thoughts on this, Thanks

Developer

Hi hegartype,

Can you post a screenshot so I can understand better what you're referring to? Thanks!

 - Charlie

(+1)

Hi Charlie,

Here are some pics.  the first is the best example I have on hand, it's that lip on the bottom.  I got my planned correction straight in my head and tried it, here are the results

I added .0625 to the project canvas, kept the Z of the model right at the top, also added .0625 to my leave stock setting on the roughing pass.  When I did the finishing pass(1/8th ball nose) it cut down that extra .0625 into the spoil board leaving a nice clean edge, very little sanding needed.  It was a little more murderous on the spoil board than I had hoped, but I guess that is what it is there for.  So does that make more sense and is that the right way to do it?

Developer

Hi Patrick,

With tapered ballnose cutters their geometry tends to be the root cause of the issue. It's basically just physically impossible for a tapered ballnose to create a perfect edge due to the radius of the ballnose causing the piece to have a skirt that flares out at the bottom. The only resolution is what you've opted for, which is to come in with a different cutter and remove all of the material after the relief portion is carved. Typically I'll use a 1/8" endmill to mill out a relief, using the 2D Profile Milling operation. This can still result in a sort of discontinuity between the relief and the edges due to the cutters having different geometry. Typically the tapered cutter will have a smaller radius than the endmill and so is able to fit into smaller areas that the endmill cannot.

It looks like you managed pretty well on your own with your attempt! Sometimes finessing the actual geometry being carved can help as well, such as smoothing out the geometry on the edges so that the endmill that's tasked with carving the piece out can reach all of the same areas as the tapered cutter. Sometimes you can get away with using the tapered cutter to cut out a piece, but this can also result in discontinuities at times if the geometry being carved out doesn't entail the tapered cutter reaching all the way down around the piece where a profiling cutpath would traverse. It's a little difficult to explain but the result is that a profiling operation puts the cutter places that it didn't or doesn't go when relief carving, because profiling follows a contour extracted from a single Z plane whereas relief carving follows the geometry at all points. Hopefully that makes sense.

It really just takes some finesse on a case-by-case basis depending on what's being cut and what cutters are being used.

Let me know if you have any other questions or need help with anything else. Cheers! :]

 - Charlie