
Unofficial Tutorial: DIY Head Tracking
DISCLAIMER: THIS IS NOT A RAHITUBER FEATURE. IT'S A CREATIVE WAY OF USING SOME SOFTWARE ALONG WITH IT AND THERE ARE NO GUARANTEES THAT THIS WILL WORK FOR YOU.
Did you add mouse tracking to your RahiTuber model, but your favorite game loves to hold your mouse for itself and leave your character still as a... Well, a PNG?
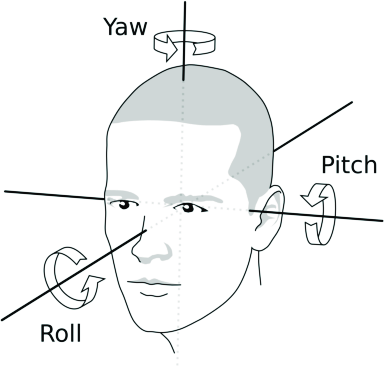
Luckily, with the addition of Controller tracking, you can now use opentrack to get some basic head tracking (Yaw, Pitch and Roll).
Requirements
This should also be possible on Linux, but I lack the knowledge to do so, so this tutorial will be focused on getting it working under Windows 10/11 (Windows 10 32-bit is not compatible).
The only hardware requirement is a webcam with at least 640x480 resolution at 30fps (lower resolutions/framerates might work, but at the cost of movement quality or delay).
We will use three pieces of open source software:
- opentrack, a program originally meant for tracking user's head rotation and transmitting it to flight simulation software and military-themed video games.
- vJoy to simulate a controller that RahiTuber can use.
- HidHide to hide said controller from games and make vJoy work as intended.
Only the opentrack and vJoy versions linked above will make this setup work and we will have to follow some steps to make them work together.
I also made a basic demo model for you to test the setup and analyze how it works. Unzip it in your RahiTuber folder.
Installation and initial setup:
- Install opentrack, but don't run it yet.
- Install vJoy and restart if asked to.
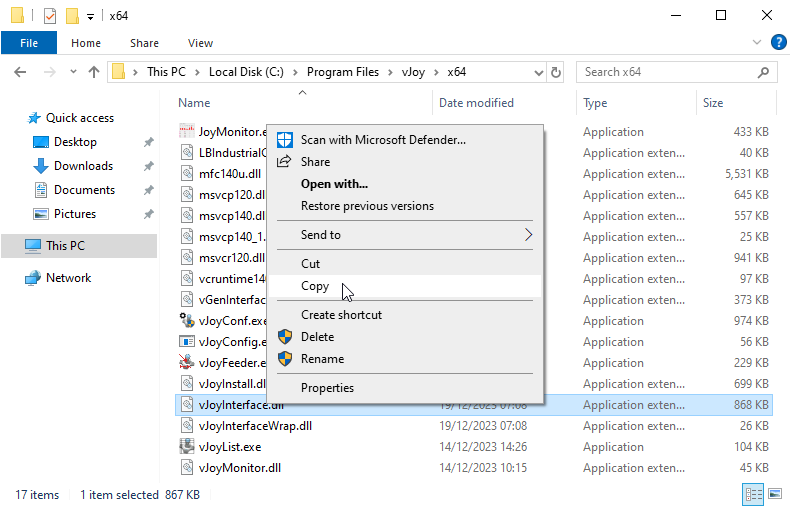
- Go to vJoy's install folder (“C:\Program Files\vJoy” by default) and copy the file vJoyInterface.dll that's inside the x64 folder.
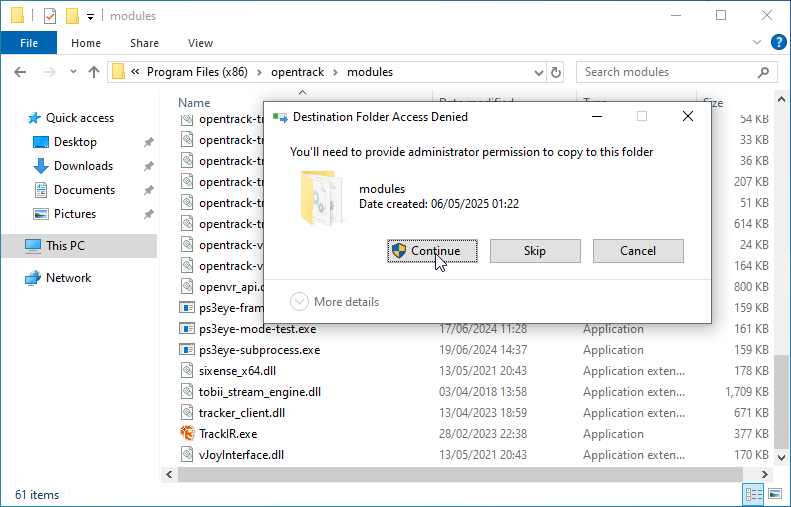
- Go to opentrack's install folder (“C:\Program Files (x86)\opentrack” by default) and replace the file inside the modules folder with the one we copied (you will be asked to provide administrator permission to that action).
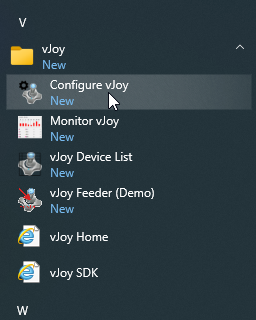
- Go to your Windows Start menu and look for the vJoy folder. Click “Configure vJoy” inside of it.
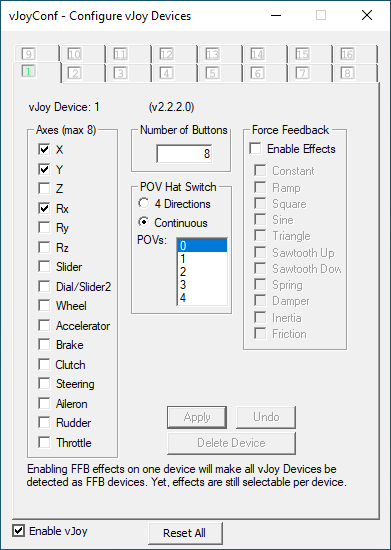
- Deselect all of the axes except for X, Y and Rx. Click “Apply” and wait for it to finish saving the configuration before closing the window.
- Install HidHide and restart if asked to.
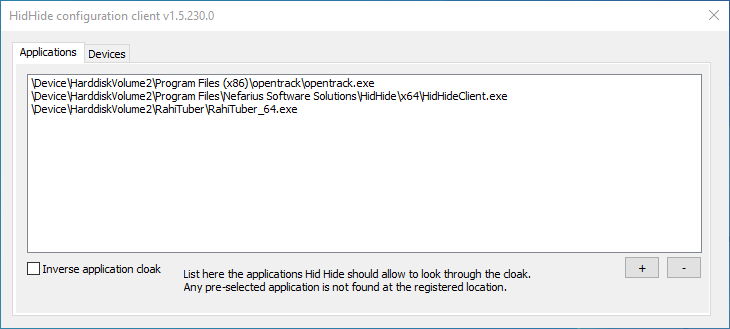
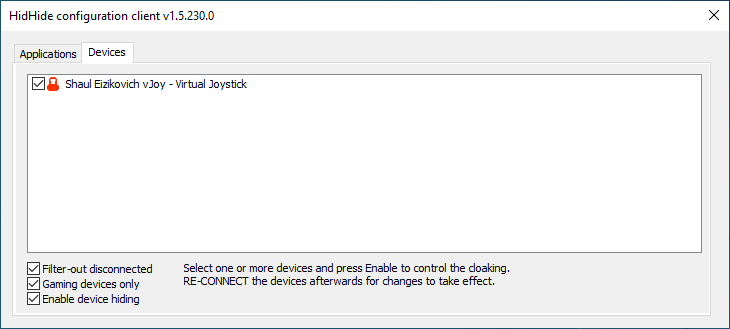
- Run HidHide. In the Applications tab we will add any program that we want/need to see our virtual controller. Click the + button and add opentrack's executable (That's “C:\Program Files (x86)\opentrack\opentrack.exe” by default) and do the same for RahiTuber (add “RahiTuber.exe”, “RahiTuber_64.exe” or both). If you move your RahiTuber folder down the line, you will need to add it here again. In the Devices tab, check the Virtual Joystick entry and the “Enable device hiding” option. You can close HidHide now.
- Run opentrack.
Opentrack configuration
First, I will give you the basic settings you will need for this to work, and I will give you my personal recommendations for a smooth result later.
Main window
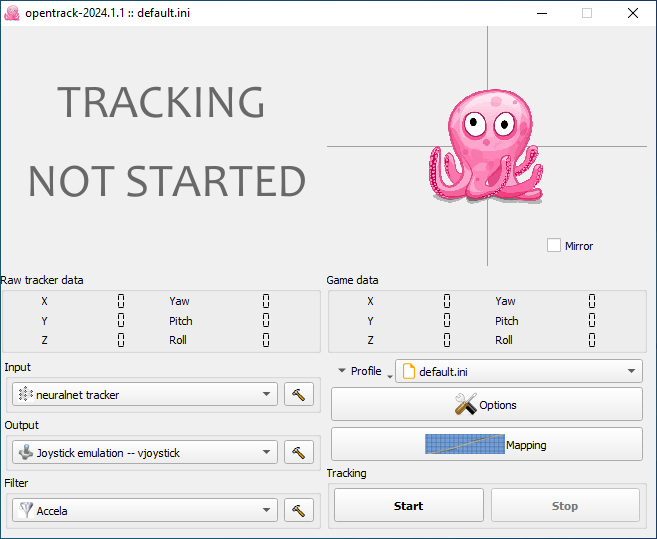
Here we need to set our Input (the head detection) and Output (the virtual controller). We can leave the Filter option by default for now, we'll talk about this later
- Input: “neuralnet tracker”
- Output: “Joystick emulation -- vjoystick”
Options window
Output tab
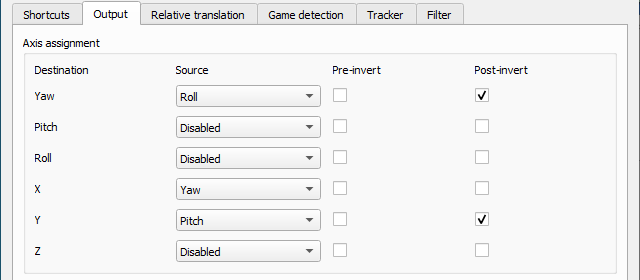
For some reason, only 3 of the six axes work for our purpose: Yaw, X and Y (this is why we configured vJoy to only use those axes and prevent unwanted effects). We need to re-assign where they get their data from:
- Yaw <- Roll (Post-invert)
- Pitch <- Disabled
- Roll <- Disabled
- X <- Yaw
- Y <- Pitch (Post-invert)
- Z <- Disabled
This will make the preview octopus placeholder move funny when it's running, but don't worry, that’s normal.
Tracker tab
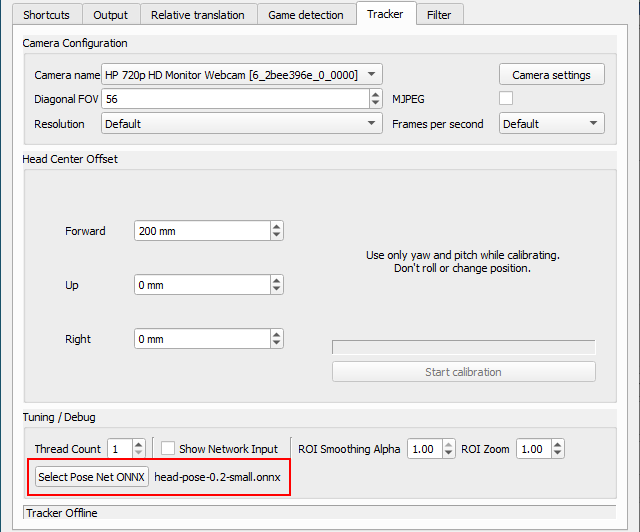
We could leave this tab untouched and it would work, but changing the model used for head tracking to the newer model will use less CPU and give a smoother result (try the big version if your camera is too noisy, but be advised that it is more CPU intensive):
- Select Pose Net ONNX (last option at the bottom): head-pose-0.2-small.onnx
You can now hit opentrack’s Start button, run RahiTuber and load the demo model to test it. If the smiley face imitates your head movements, congratulations! You've made it through the hardest part!
Personal recommendations
There are some settings that depend on your particular hardware/illumination/webcam and you'll need to fine-tune them. These are my suggested starting points, but don't feel afraid to try and find what suits you best!
Filter
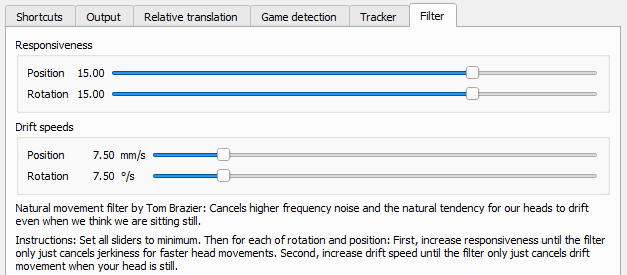
The default Accela filter can be a good starting point, but I personally recommend using the NaturalMovement one. Next we can click the hammer icon next to it (or go to the Options>Filter tab) and adjust its settings. I set both Responsiveness sliders to 15 and the Drift speeds to 7.50 as a starting point. If you like the result, you can leave it there, but if you need to fine-tune it, lowering the Responsiveness will reduce jerkiness and increasing Drift speeds will make it so you will need faster head movements for them to register. Try to find your sweet spot.
Shortcuts (Options window tab)
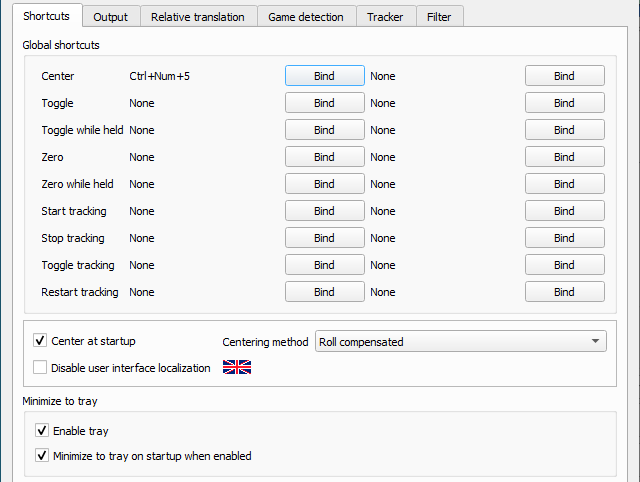
It's a good idea to set a keybind to Center, that way you can recalibrate your head position to neutral any time you want. Enable tray and Minimize to tray on startup are recommended for less screen clutter.
Relative translation (Options window tab)
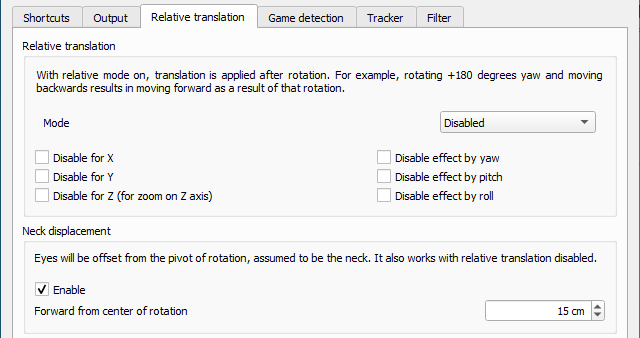
Enabling Neck displacement can make your movements register better. 15 cm is a good starting point for me, but increase or decrease it if you think your head is somewhat larger or smaller than standard.
Game detection (Options window tab)
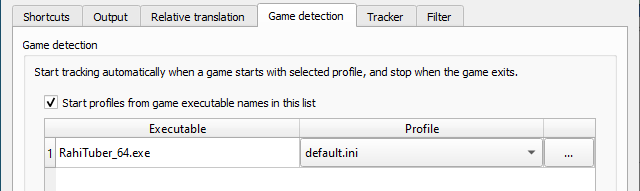
If you add a program to this list, opentrack will auto-start tracking when you launch said program, so it's recommended to add RahiTuber's executable using the + button.
Tracker (Options window tab)
If you know your webcam's FOV, enter it here for more accurate calculations. If your camera uses MJPEG it may be a good idea to check the option to reduce CPU use.
Mapping
In this window you can adjust the ranges of movement you need to do. As we routed the output axes, the tabs are now:
- Yaw tab is your Roll. Start at 20º and tune from there to your liking (this is your real world angle, so the lower it is the more exaggerated the model’s roll will be)
- X tab is your Yaw. The default numbers are a good starting point. The higher/lower the input number is, the more/less angle movement you need to do in real life.
- Y tab is your Pitch. Same as the X tab but for vertical movement.
You can also modify the response curves if you need more control over it. Vertical axis is the "gamepad" output and Horizontal axis is the head detection input.
How to use
If you set up your motion tracked layers to use Controller -> Left axis they will follow your Yaw and Pitch.
Any layer you set to use the Right axis will register your Roll movements as an horizontal movement. You can get different effects by using only Rotation Limits or by combining it with Movement Limits, but only the horizontal field will have an effect.
Feel free to see how the demo model is set up to better understand it.
Get creative!
I’ve shown you a way to use this, but the real fun begins when you get creative with it. Does your character have wings, long ears or other appendages? Why not use “Roll” to make them move at will? And remember you can always mix mouse and controller tracking if you want to! Please, do share how you use it, I'd love to see it!

