

How to install:
- Move the addons folder from the .zip into your project's main folder.
- Go into Project > Projects Settings > Plugins and enable it (change DialogueSystem2's status to Active).
- Go into Project > Input Map and add an input called
continue_dialogue. You will use this input to skip through the dialogue.
You're ready to go.
This will add a new file into your Autoloads. That one file (Dialogue.tscn) is your gateway to all the nodes used in the framework.
Dialogue.tscn also contains some basic settings:

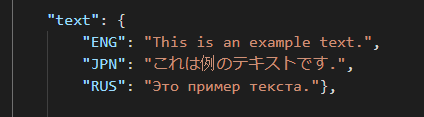
Language - change the language the dialogues will use. It is pointing to a value in the "text" dictionary, inside a dialogue file.
Perspective - (used for Bubble Messages) switch between 2D and 3D. Change it depending on what kind of scenes you're using (Node2D vs Spatial). In the demo, it is done automatically in a _ready() function in the level's root node. Keep in mind that the 3D perspective needs a Camera node somewhere in the scene tree (it uses it to calculate the position of the bubble).
Selected Type - which type of messages you want to use. If set to Auto, the system will check for a is_box value in each dialogue node.

Dialogue Next Input - (only in older versions) name of the action defined in Project Settings > Input Map that goes to the next dialogue node.
Main files structure:
- Dialogue.tscn
- BubbleMessage.tscn
- Text.tscn
- Choices.tscn
- BoxMessage.tscn
- Text.tscn
- Choices.tscn
- BubbleMessage.tscn
This simple diagram shows how nodes communicate with each other. The tasks are separated into different nodes like this. I will explain this and other topics in more details soon.