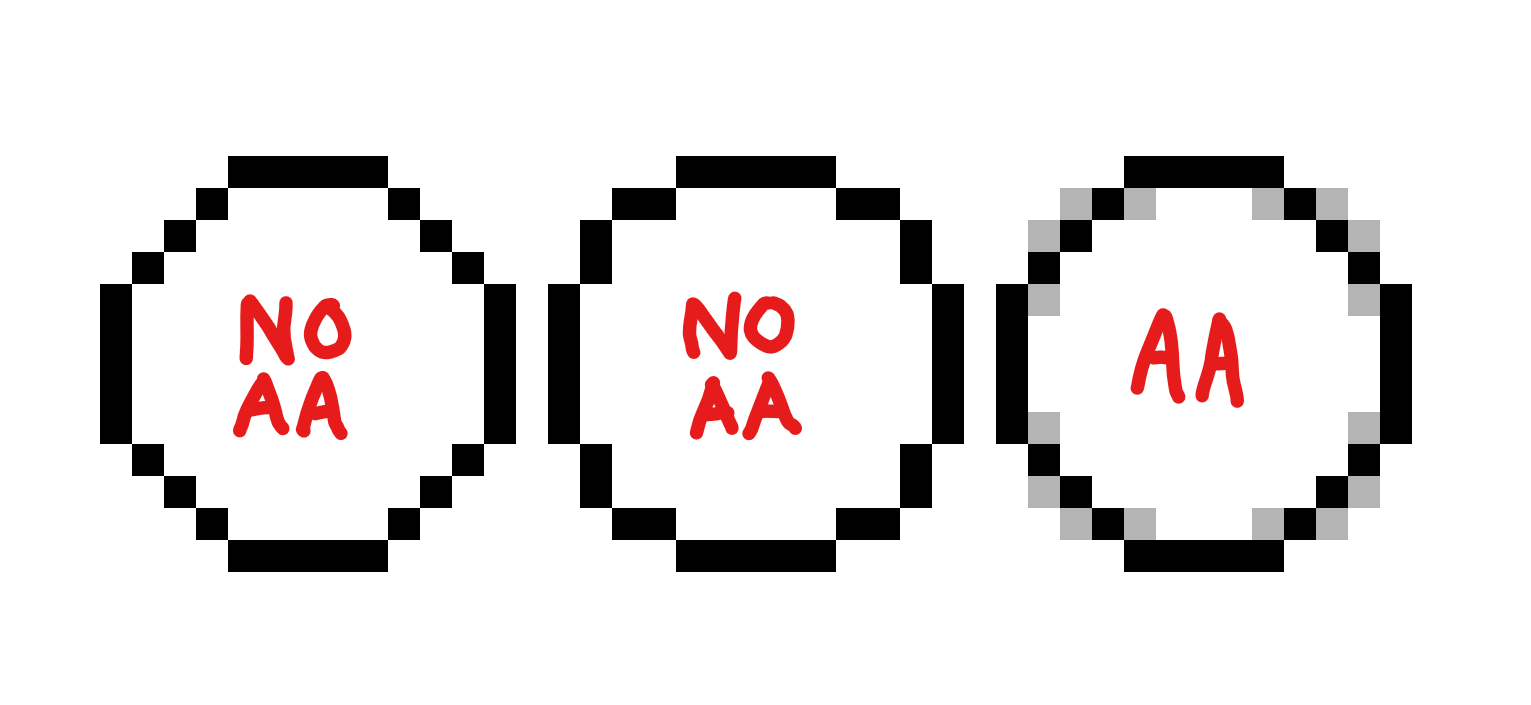
If you don't know about anti-aliasing (AA), AA essentially blurs digital images. With pixel art, this is useful when you want to hide jaggies. To do this, you pick a "blur" color found by mixing the colors where you want to apply AA, then use it to serve as middle ground for your pixel placement.
Example: Circle
Here are 3 circles. The examples on the left and center you can see are circles, but they contain jaggies on the corners. The 3rd circle has the smoothest curve, but requires the addition of a blur color. In this case, the blur color is made by mixing the black of the circle, and white of the background, which results in gray. Since it's impossible to make a perfect circle at this resolution of pixel art, we use blur to give the illusion of more accurate and circular pixel placement.

Example: Straight lines
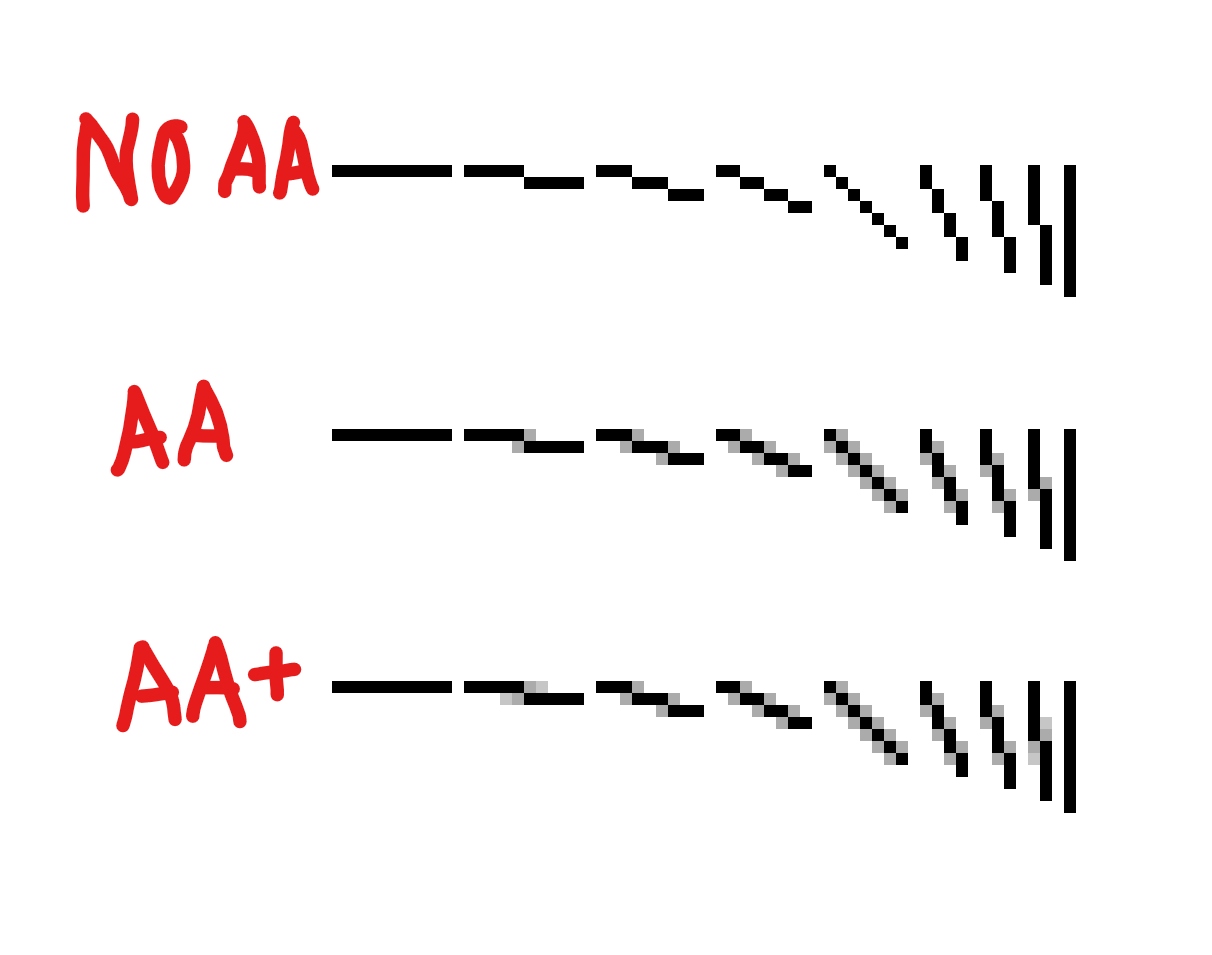
Straight lines can also have jaggies. You can also apply the same technique here for smoother looking lines. Notice how 2nd and 2nd last line examples in the "AA" example still look a little jagged. You can use extra blur colors to make your pixel art appear even smoother if one blur color isn't enough for you, demonstrated in the "AA+" example.

So that's my little tutorial on anti-aliasing. I hope you found it useful!

