
Boko Clubs are weapons commonly used by Bokoblins in Zelda: Breath of The Wild. They are made of wood and have bands on the handle for extra grip. They vary in size and shape but they all have one thing in common and that's that they're used for combat. Here are some images of Boko Clubs.
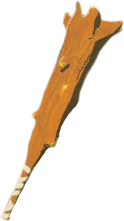
Boko Club


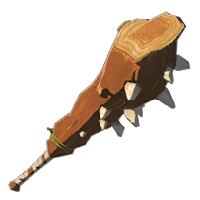
Spiked Boko Club


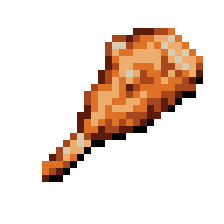
Boko Bat

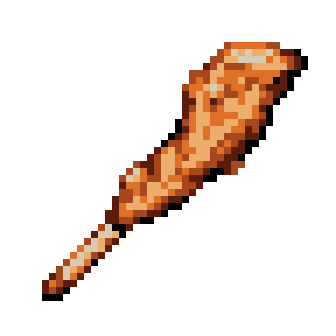
Spiked Boko Bat

Today I drew a few but there are other variations of Boko Clubs and similar weapons wielded by "Moblins". Here are the ones I drew although the tree branch doesn't really count as a club.

In order to draw these sprites, we're going to need to know how to draw wood for sure so that's why I though drawing the tree branch was a good warm-up. The tree branch sprite was rather simple to make because it doesn't need a whole lot of texture since it's so thin. We can start by drawing the silhouette and adding some basic coloring.

This is already half way there for the tree branch the next step is to basically polish the sprite with better shading and texturing.

I'd say this is good enough. There aren't many noisy pixels in the sprite. The shading on the wood is pretty smooth and readable. The individual leaves are pretty well defined. I think it's time to take things to the next level so we're drawing a basic Boko Club now. We can start with a simple silhouette as usual then adding colors.

All that's missing now is shading and texturing. To start the shading, we can compare the shading to that of a cylinder. I know they're not exactly the same but there is enough similarity to use as reference. So looking at the cylinder, I added some basic lighting to the head of the club.

The texturing is a bit complex but hopefully I can explain it so that it's a bit easier to understand. Here is my finished Boko Club.
So basically, I made the texture very rough and lumpy because that's what you'd expect from the texture of tree bark. There should be little cracks and irregular bumps on the club because it basically comes from the chopped remains of a tree. This might take a while and a bit of practice but once you learn this, the future clubs should be a lot easier to draw. Next up is the Boko Bat which is basically a larger version of the Boko Club.
Since the Boko Bat is very similar to the Boko Club, we can actually use the original Boko Club to start with. I took the head of the original Boko Club and just extended it out a bit. The silhouette should be narrow by the grip and get wider towards the other end.

Since hopefully you didn't skip ahead and we both now know how to draw wood texture, I'm pretty sure you can fill in the blanks. Keep in mind that the Boko Bat head isn't the same original shape as the Boko Club so you might want to change it. The end of the Boko Bat head resembles more of a pointy tree trunk than a chopped stump. Once you finish the bat we can try adding spikes to one.

I drew another variation of the Boko Bat just to add more variation to the new design coming up, the "Spiked Boko Bat".
This is a good base to start adding spikes. As you're adding the spikes, the club would probably catch more shadow around the spikes so keep that in mind as you're shading.

Once you finish the sprite, maybe we can do one more, the smaller "Spiked Boko Club". It's similar to the original Boko Club but flatter with spikes wrapped onto it by ropes. Since it's flat, the shading would be flat as well so there wouldn't be as much shadow around the right side of the club as the original Boko Club did.

This is a good base, now we need to attach spikes. We can blob in some spikes and overlapping ropes to hold them in place. 
After that, the final steps are shade and polish. Similar to the spikes on the "Boko Bat" we drew earlier, adding spikes and ropes to this club would also cause a bit of shadow around them. You'll probably need to zoom in when you're shading here but by the end of drawing this sprite you should see nice dark lines defining the entire shape of the club.

I think that's all I have for today's tutorial. I hope you've reached the end and learned a lot. I'll try to continue adding more tutorials in the future.