
Tutorial By:
Aakash Gupta (20BCG10053) - https://aakashh0-0.itch.io/
Anas Ahmad Khan (20BCG10081)
Students At VIT Bhopal - BTech in Gaming Tech.
1) Create a new Project in Unity.

2) Setting up Environment using Game Objects:
Creating a prefab: Create an object and drag in the assest window. This helps us to build our environment faster.
A prefab is shown in blue colour in the Hierarchy window.

3) Create Enemies:
Create an empty game object and making sphere as its child, to overcome the problem of animation while creating multiple enemies.

4) Adding animation and animator tab to the unity layout:
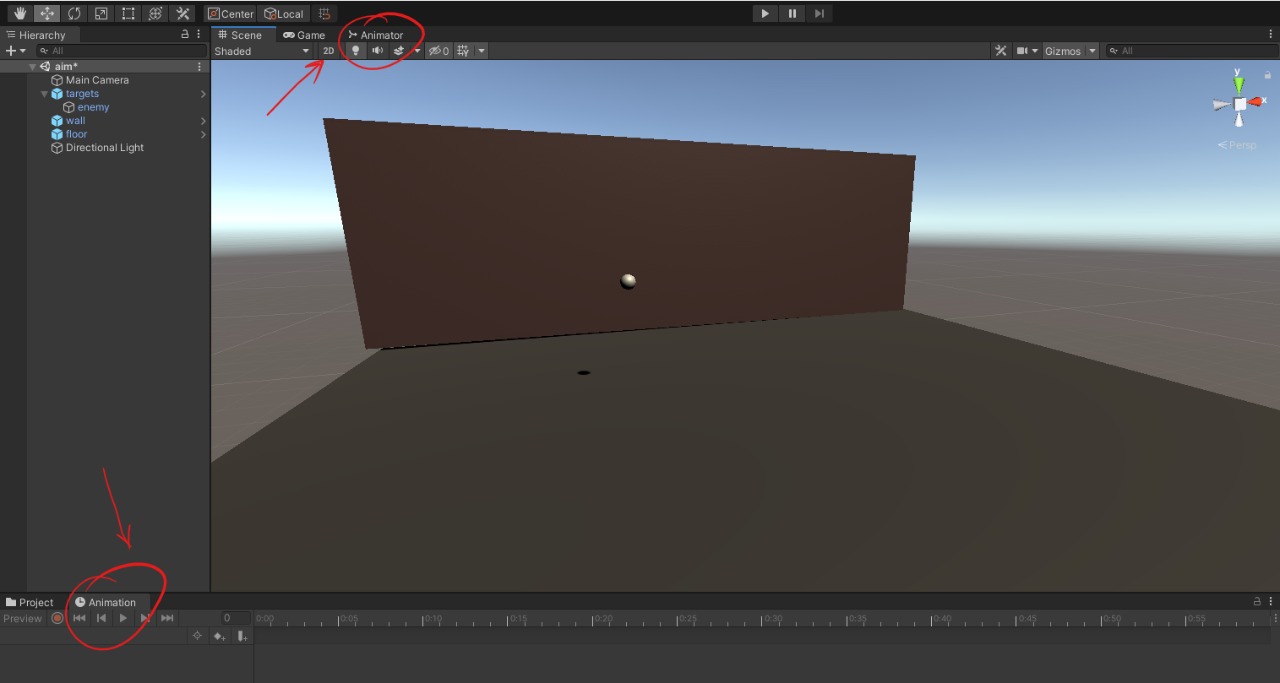 Create and name your animation.
5) Add property to Your animation for its behaviour:
Add Property-> Transform-> Position.


i: Animator sets the initial position.
ii: Start recording your movements.
iii: Take the slider to your desired time, which determines the time duration of the movement in step 2.
Similarly set the Final point.
iv: Assign red colour material to the enemy.
Make this animated object as a prefab.
6) Drag and drop the Prefabs from the asset window to the screen and place it in front of the wall.
Your setup is ready.

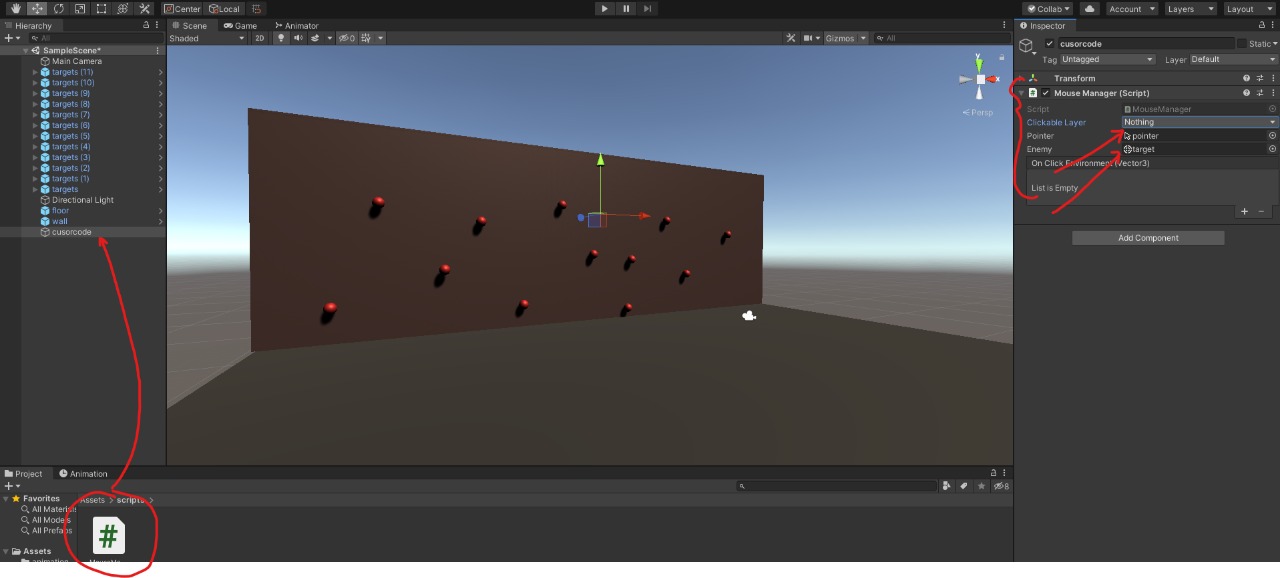
7) Import Cursor png's into the Asset window.
8) Create an Empty Game Object:

Attach the following C# code to the Empty Game Object.

9) Add cursor asset to the variables of the code namely, 'Pointer' , 'Enemy' .
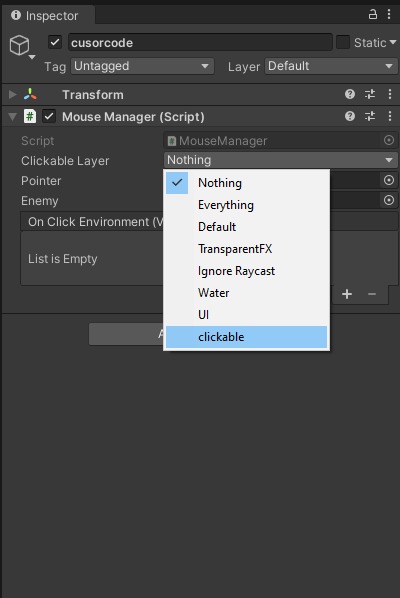
10) Go to Layers -> Edit Layer -> Add Layer(clickable).
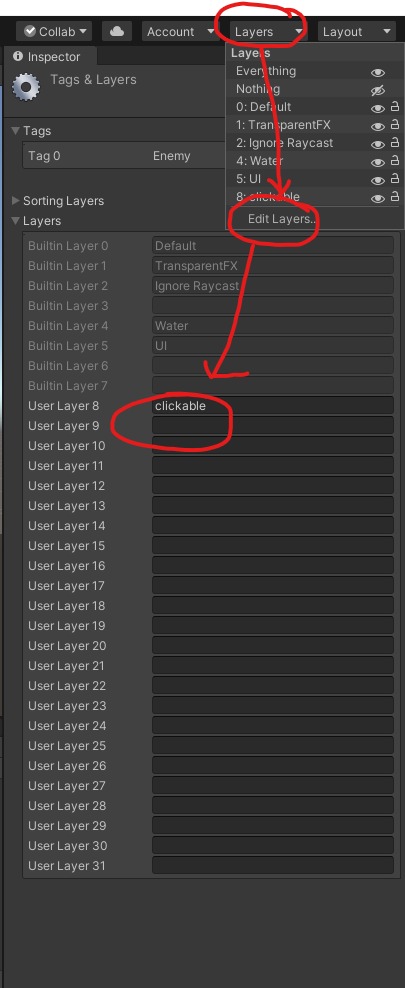
11) In Code Inspector, Add Layer Clickable to Clickable Layer.
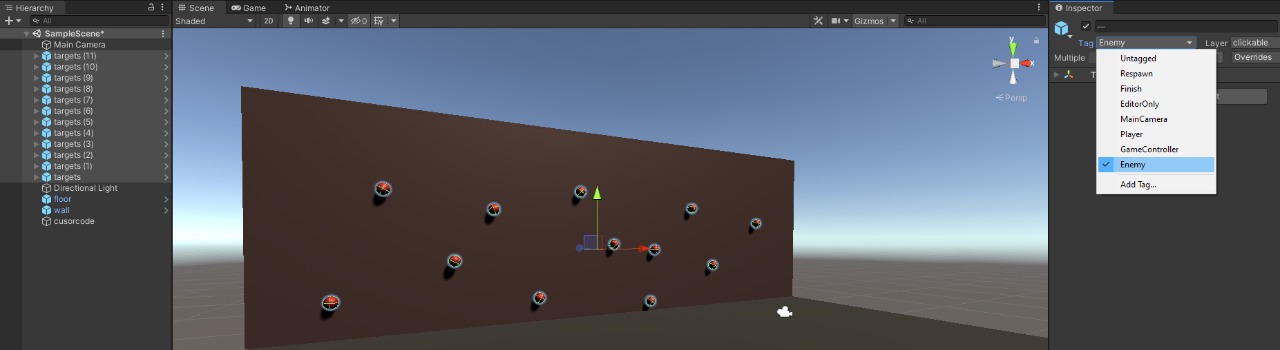
12) Select all the objects and set Layer as Clickable.

13) Select all the Targets Change their tag as Enemy.
You're All Set.
The Gameplay is attached below.
Code and Cursor png's - https://drive.google.com/file/d/1kEsbhSnsmuRXV01Wb56NWCREoVN5mWaq/view?usp=shari...
The above tutorial was made by taking refrences from the following youtube videos:
Thanking the creators of Above.