
On Sale: GamesAssetsToolsTabletopComics
Indie game storeFree gamesFun gamesHorror games
Game developmentAssetsComics
SalesBundles
Jobs
TagsGame Engines

Vizz_206

4
Posts
4
Following
A member registered Sep 24, 2024

Recent community posts

Sorry for the late response,

That seems to have done it! Thanks a bunch for helping me out with setting this up, thanks for your time and take care! :)

Ive been doing the following to update the original textures with the new ones by layering them. The first file name is the image getting layered over by the second file name. The file names remain the same as the original once placed back into the Textures folder for the Neorca model.

Example, "First file name" becomes -> layered over by "Second file name"

Body_baseColor -> Neorca_LatexOutfit_Body_AlbedoTransparency

Body_emissive -> Neorca_LatexOutfit_Body_Emission

Body_metallic -> Neorca_LatexOutfit_Body_MetallicSmoothness

ORCA_UVed_Body_Normal -> Neorca_LatexOutfit_Body_Normal

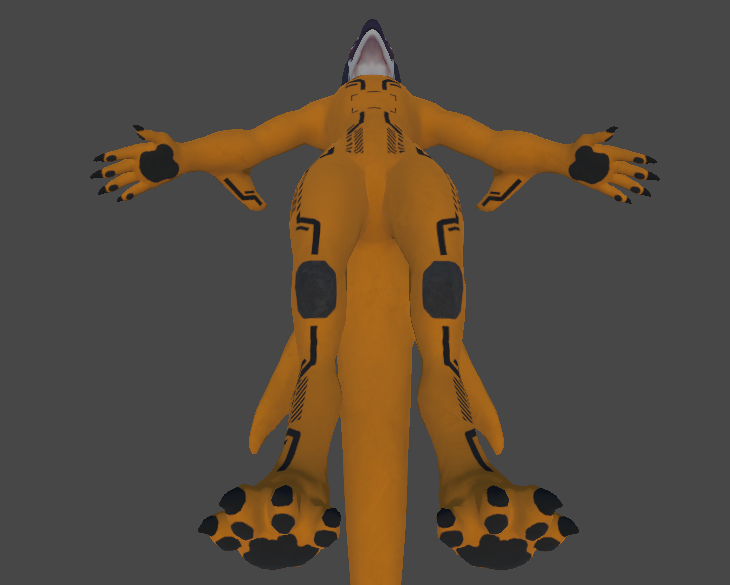
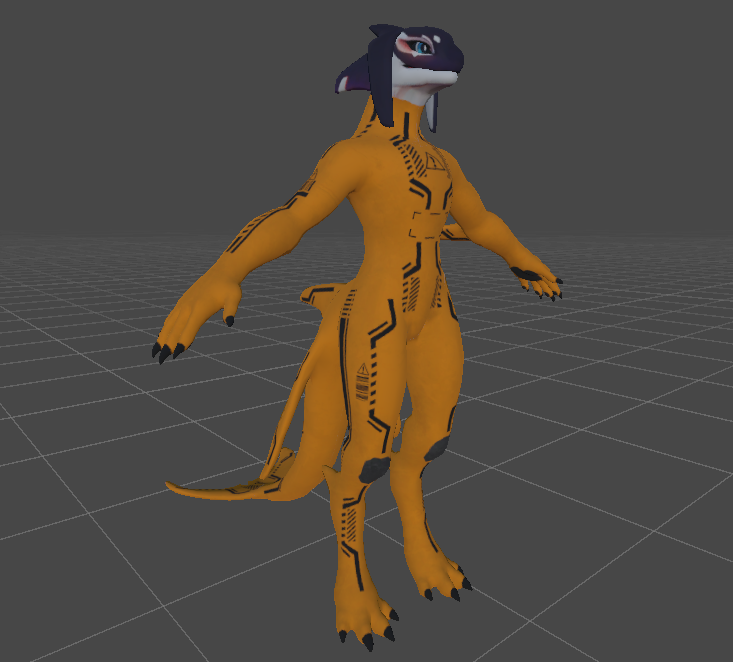
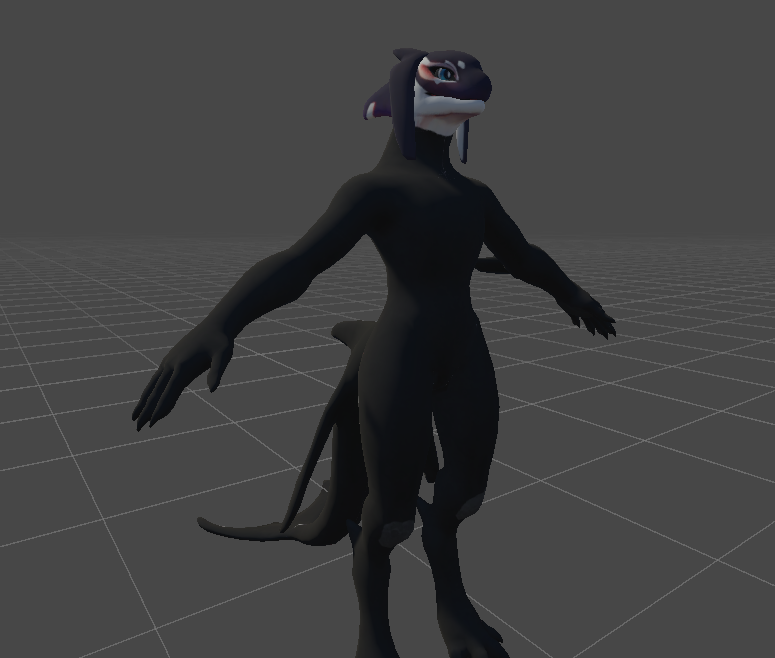
However, after performing these steps for both the prison and all black outfit, I end up with the same results ive been getting. The model still ends up looking matted and lacking the changes done with the UV. Heres a few images of what it ends up looking like for me, the prison outfit better showcases it due to the black outfit being dark to see the smaller details. The scene lighting is off for better visibility in these images.

Is there anything else you suggest I try doing?


I'm still struggling with getting further than the previous point I've been able to get to. I've been using Unity.

In either outfit variant for the clothing set, there's four body textures. Would it be possible to know what original textures from the model to pair each of them with, when layering them with GIMP? I've been pairing each texture I combine with the name and contents of the texture itself, but I'm still ending up stuck.

Like for example, model texture "Body base color" is paired with outfit texture "Body albedo".

Sorry for asking for so much help, I hope I'm not being too much of a bother!

Hey there,

It's been nice to see your work show up every now and then across the platforms I've seen them on over the years!

I'd like to know if I'd be able to get some pointers on what I might be doing wrong that's keeping me from compiling the textures together properly for this clothing set. Going off of some previous comments people have left on other products, I've been using GIMP and layering the textures with the original models. Everything seems to go well enough until as far as my limited knowledge gets me into to the same dead end. 

I end up at a point where the texturing doesn't look 3d with the mappings and ends up looking flat. Additionally, though I'm not really sure if the end product is meant to look exactly the same as the images, I haven't been able to replicate the shine effect on any of the features. I think I was able to have it look 3d once but ended up reverting something on accident and lost my sense of direction.

I don't really know what'd be the easiest way to walk someone through setting this up who, doesn't exactly have much knowledge on this other than jumping in headfirst, but is there a specific order I should be following for this, or a guide of sorts?


If you ended up reading this, thanks for your time! haha :)