Indie game storeFree gamesFun gamesHorror games
Game developmentAssetsComics
SalesBundles
Jobs
TagsGame Engines

Soul Art Toys

9
Posts
15
Followers
A member registered 6 days ago · View creator page →

Creator of

Recent community posts

(1 edit)

Pro-Tactics for a 60-Second Win:

  • Don't Overthink: Unlike 9x9 Sudoku, you don't have time to look for the "perfect" spot. If a number is legal in a column, drop it immediately in the first available row.
  • Focus your Fire: Pick two rows or two columns early on and try to prioritize those. If you roll a column that isn't one of your "targets," just dump the number in a way that doesn't block your target lines.
  • The "Surge" Save: If you have 5 out of 6 numbers in a line and you roll a 6, use the Surge rule (if you have an error) to clear your head, or just placement-spam to fishing for that final number.
  • Rolling Technique: Use a small dice tray or roll close to the card so you aren't chasing the die across the table. Every second your hand isn't writing, the bomb is winning.

Good luck, you will need it!

To help your players understand the flow, here is an example of the first three days of a journey in SHRINE OF CORRUPTION.

Character Setup

  • Class: Necromancer.
  • Starting Stats: 8 Life, 12 Mana.
  • Passive: Grim Harvest (On a 6-9 Discovery, can choose +1 Life instead of +1 Mana).

Day 1: The Journey Begins

  • Draw: 7 of Hearts.
  • Suit Theme: Hearts (Undead)—The physical toll of the crypts and rotted horrors.
  • Encounter: Discovery (Rank 6-9).
  • Action: I find a rusted locket among the remains of a fallen guard.
  • Stat Change: Normally +1 Mana, but I use Grim Harvest to gain +1 Life instead.
  • Journal Entry: "The crypts are cold, but the locket I found reminds me of the world before the massacre. I feel a flicker of strength return to my tired limbs."
  • Current Stats: 9 Life, 12 Mana.

Day 2: A Brutal Encounter

  • Draw: 10 of Spades.
  • Suit Theme: Spades (The Abyss)—Arcane ruins and the fraying of sanity.
  • Encounter: Hazard/Boss.
  • Action: A Unique Demon, a wraith of the Abyss, lunges from the shadows.
  • Stat Change: Lose 2 Life and 2 Mana.
  • Journal Entry: "A shadow with eyes like dying stars tore through my defenses. My mind reels from the void-touch of the Abyss. I am bleeding, and my magic feels thin."
  • Current Stats: 7 Life, 10 Mana.

Day 3: A Glimmer of Hope

  • Draw: King of Diamonds.
  • Suit Theme: Diamonds (Wilderness)—Harsh terrain and damp caves.
  • Encounter: Staff Fragment.
  • Action: Hidden within a hollowed-out tree in the freezing wilds, I find a piece of the Horadric Staff.
  • Stat Change: No stat change, but I have 1 of 4 Kings needed to escape.
  • Journal Entry: "The wind howls through the mountain pass, but my hands are warm. I have found the first fragment. Three more, and the portal will open."
  • Current Stats: 7 Life, 10 Mana. (1/4 Staff Fragments Collected).
(1 edit)

"I'm so glad you're enjoying the descent!

To answer your question: No, you do not automatically recover Stamina between chambers. In Cinder & Ash, your Stamina represents your current momentum and physical limit. To get it back, you have two main options:

  • The Recover Action: You can regain 2 ST during an encounter, but it leaves you vulnerable, and the enemy will hit you freely that turn.
  • The Bonfire: Rolling a 5 on the Chasm Table allows you to rest and fully restore both HP and ST.

Managing that limited pool is the heart of the game's challenge—knowing when to strike and when you're forced to catch your breath while under fire.

BUT... If you feel the game is becoming too difficult, you could consider a "house rule" where you regain 1 ST after successfully clearing a combat encounter.

UPDATE

Fixed a typo on the pdf manual:

* Strike (1 ST): Roll 1d6. If result > Enemy DEF, deal 2 DMG.

This section: If result [ > ] Enemy DEF.

Solo Session: The Vault of Rust

System: CORE & COIN Scenario: The Heist

The mission is simple: secure three ancient data-coins from the center of a 2'x2' scrap yard. My warband, The Scavengers, faces off against a relentless Auto-Bot sentry unit.

The Warbands

  • The Scavengers (Player):
    • Kael (Warrior): 3 Health, Hits on 3+.
    • Midge (Scout): 3 Health, Hits on 4+, Moves 7".
    • Rook (Deadeye): 3 Health, Hits on 4+, 12" Range.
  • The Sentries (AI): 1 Warrior, 1 Scout, 1 Deadeye.

Round 1: Opening Moves

Initiative: Player rolls 5, AI rolls 2. The Scavengers go first.

  1. Midge (Scout) moves 7" toward the center objective. She uses her second action to Interact and claim the first coin.
  2. AI Turn (Deadeye): I roll a 4 on the AI table. The Deadeye Advances: it moves toward the center and attacks Midge.
    • Solo Rule: The AI "Burns the Luck". Coin Toss: Heads!.
    • The attack is an automatic, perfect success. Midge takes 1 Damage (2/3 Health remaining).
  3. Rook (Deadeye) moves to a shipping crate for Cover and fires at the AI Scout. Roll: 5 (Hit!). The AI Scout takes 1 Damage.

Round 2: The Melee Lock

Initiative: AI rolls 6, Player rolls 3. The Sentries go first.

  1. AI Turn (Warrior): I roll a 6. The Warrior Agresses, moving toward Midge (the weakest player) and attacking.
    • Roll: 4 (Hit!). Midge is down to 1 Health. Midge is now in Melee Lock.
  2. Kael (Warrior) moves 5" to intercept the AI Warrior. He attacks.
    • Roll: 2 (Miss).
    • Burn the Luck: I flip a coin. Tails!.
    • Kael fumbles and his activation ends immediately. Note: Because Kael is a Warrior, he ignores this first "Tails" flip of the game. He stays active and uses his second action to attack again.
    • Roll: 5 (Hit!). The AI Warrior takes 1 Damage.

Round 3: Attrition

  1. Midge (Scout) is desperate. She tries to Recover. Roll: 6. She heals to 2 Health. She then tries to Disengage from the AI Warrior.
    • Roll: 5 (Success!). She moves 7" away toward the second objective.
  2. AI Turn (Scout): I roll a 2. Since the Scout is at range, it Defends: moves to cover and attempts to Recover.
    • Roll: 2 (Fail). No healing occurs.

Round 5: Final Tally

After five rounds of trading shots and repositioning:

  • Kael (Warrior) managed to strike down the AI Warrior. (+1 Point)
  • Midge (Scout) held onto 2 Objectives. (+6 Points)
  • Rook (Deadeye) was taken out by the AI Deadeye. (AI gets +1 Point)

Final Score:

  • The Scavengers: 7 Points.
  • The Sentries: 1 Point.

Victory: The Scavengers successfully extract the data-coins!.

Gameplay Example: The Maiden Voyage of The Brass Kestrel

To help you get started, here is a look at the first three turns of a typical expedition.

The Setup

Our cartographer names their vessel The Brass Kestrel and draws an [X] in the center of an A4 sheet. They place a small copper coin on the [X] and draw four circles (O) in the corners of the page to represent the Beacons. They start with 5 Steam Tokens.

Turn 1: Setting Sail

  • The Roll: 2, 4, 6.
  • Navigation (2): North (Up).
  • Throttle (4): Move 4cm.
  • Aether-Scan (6): Anomaly!.
  • Result: The player draws a 4cm line straight up from the Capital. At the tip, they draw a Jagged Bolt [ϟ]. Because of the Anomaly, they lose 1 Steam Token (4 remaining).

Turn 2: Evasive Maneuvers

  • The Roll: 1, 1, 3.
  • Navigation (1): North.
  • Venting Steam: The player doesn't want to go further North into the edge of the paper. They spend 1 Steam Token (3 remaining) to change the Navigation die from a 1 to a 3 (East).
  • Throttle (1): Move 1cm.
  • Aether-Scan (3): Floating Island.
  • Result: The player draws a 1cm line to the right and sketches a small Cloud/Island shape. This is now a Safe Harbor for future refueling.

Turn 3: Reaching the First Beacon

  • The Roll: 4, 6, 2.
  • Navigation (4): East.
  • Throttle (6): Move 6cm.
  • Aether-Scan (2): Clear Skies.
  • Result: The 6cm line is long enough to touch the top-right Beacon (O).
    • Step A (Event): They roll a 1d6 and get a 1 (Steam Vent), gaining +2 Steam (back up to 5!).
    • Step B (Upgrade): They choose the Reinforced Hull, increasing their maximum Steam capacity to 7 for the rest of the game.

Current Map Progress

  • Beacons Lit: 1 / 4
  • Steam Reserves: 5 / 7
  • Hazards Plotted: 1 Anomaly
  • Total Path Length: 11cm (-11 points so far).

The Brass Kestrel is fueled up and upgraded, but with three Beacons left and a growing web of flight lines to avoid, the descent has only just begun.

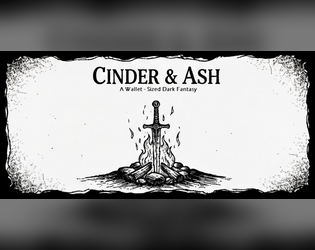
Welcome to Cinder & Ash, let’s follow a lone traveler through a single Chamber and a desperate moment at a Bonfire.

Character Status

  • Vitality: 10/10 HP
  • Stamina: 3/3 ST
  • Souls: 0 SO

I. The Ascent

You roll a 1d6 on the Chasm Table. You roll a 3, encountering a Hollow Sentry (HP: 4, DEF: 3, DMG: 2).

II. The Stance (Combat)

Round 1

  • You (Strike): You spend 1 ST (now 2). You roll a 4. Since 4 > 3 (Enemy DEF), you deal 2 DMG.
  • Enemy (Turn): The Sentry is still alive (2/4 HP). It swings its rusted blade for 2 DMG.
  • Status: HP 8, ST 2, SO 0

Round 2

  • You (Strike): You spend 1 ST (now 1). You roll a 2. 2 < 3, so you miss!
  • Enemy (Turn): It strikes again for 2 DMG.
  • Status: HP 6, ST 1, SO 0

Round 3

  • You (Dodge): You are low on Stamina and HP. You spend your last 1 ST (now 0) to Dodge.
  • Enemy (Turn): The Sentry attacks, but you roll past the blade. 0 DMG taken.
  • Status: HP 6, ST 0, SO 0

Round 4

  • You (Recover): You have no Stamina left to Strike. You stand your ground and catch your breath. You regain 2 ST.
  • Enemy (Turn): Because you Recovered, you cannot Dodge. The Sentry hits you for 2 DMG.
  • Status: HP 4, ST 2, SO 0

Round 5

  • You (Strike): You spend 1 ST (now 1). You roll a 5. 5 \ge 3, dealing 2 DMG.
  • Enemy (Death): The Sentry falls. You harvest 1 Soul.

III. The Fading Light

You are battered (4 HP) and decide to search for a Bonfire before moving to the next Chamber.

  • The Roll: You roll a 5—Success!
  • The Rest: You collapse by the flames. Your Vitality returns to 10 HP and your Stamina to 3 ST.

Note: Since you only have 1 Soul, you cannot afford an Ascension yet. You need 4 more Souls to permanently increase your stats.

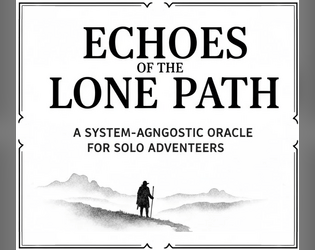
Lone Path Echo Example Session

Scene 1: The Journey Begins

Kaelen crests a ridge of obsidian sand. I want to know if he sees a landmark in the distance. I’ll use The Fate Table.

  • Question: Is there a visible tower or shelter on the horizon?
  • Roll: 2
  • Result: No, and it's worse than you thought.

The horizon is an endless, blurring heat haze. Not only is there no tower, but a massive dust storm is whipping up, obscuring the path behind him.

Scene 2: An Oracle Intervention

As Kaelen seeks cover from the rising wind, he enters a new region of jagged rocks. It’s time to roll on The Core Oracle.

  • Roll: 3
  • Result: Sudden Weather Shift.

The dust storm hits with unnatural force, a heavy mist of grey grit that forces Kaelen to hunker down beneath a narrow rock overhang.

  • Prompt: Which memory from your past haunts you while you wait for the sky to clear?

Kaelen stares into the swirling grey and remembers the day he left his sister at the gates of the Silver City. He promised to return in a month; it has been three years. The guilt feels heavier than the stone above him.

Scene 3: The Search for Resources

Hours later, the wind dies down. Kaelen is parched. He searches the nearby rocks for any sign of moisture.

  • Question: Does he find a trickling spring in the rocks?
  • Roll: 5
  • Result: Yes, but there is a cost.

He finds a small pool of water trapped in a basin of stone. It’s cool and clear, but as he drinks, he realizes he has dropped his only whetstone into a deep, narrow crevice to reach it. His blade will grow duller now.

Scene 4: A Moment of Rest

Exhausted, Kaelen finds a small, sheltered alcove to set up camp for the night. I roll on The Core Oracle again.

  • Roll: 10
  • Result: Absolute Peace.

The twin moons rise, and for a brief moment, the biting wind stops and the Wastes look like a sea of silver. The world feels perfect.

  • Refresher: Kaelen recovers 1 point of Will/Stamina (Total: 4).
  • Prompt: Who would you write a letter to right now?

He pulls a crumpled piece of parchment from his bag. He doesn't have a pen, but he "writes" a mental letter to his sister, finally admitting that he is lost—and that he's sorry.

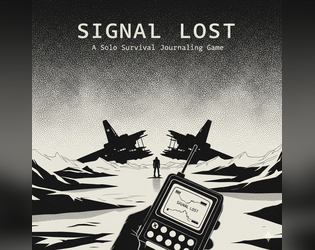
/// Signal Lost: Example Mission Log ///

Survivor Status:

  • Hull: 10
  • Supplies: 10
  • Beacon Components: 0/4


Day 1: The Descent

Card Drawn: 9 of Diamonds Event: Discovery

The dust from the crash hasn’t even settled, but the geological scans of this canyon are already yielding results. I spent the morning scaling a jagged obsidian ridge and discovered a vein of crystalline phosphorus. It's not food, but it provides a steady heat source for my portable stove, saving me from burning through my primary fuel cells.

  • Consequence: Gain +1 Supply.
  • Current Stats: Hull 10, Supplies 11.


Day 2: The Screaming Wind

Card Drawn: 10 of Clubs Event: The Hazard

A localized electromagnetic storm rolled over the wreckage of the ship today. The mechanical shrieking of metal against metal was deafening as a loose hull plate tore free and slammed into the life support module. I had to vent a significant amount of pressurized oxygen to prevent a total blowout, and the repair drone I was using was fried by a static discharge.

  • Consequence: Lose 2 Hull and 2 Supplies.
  • Current Stats: Hull 8, Supplies 9.


Day 3: A Piece of the Puzzle

Card Drawn: King of Clubs Event: Beacon Component

I returned to the engine room today once the static cleared. Digging through the charred remains of the internal comms array, I found it: the Long-Range Transponder. It’s covered in soot, but the internal circuitry is still humming with a faint, hopeful standby light. That’s one piece of the SOS secured.

  • Consequence: 1/4 Beacon Components found.
  • Current Stats: Hull 8, Supplies 9.


Day 4: The Monolith

Card Drawn: Jack of Spades Event: The Landmark

While searching for more wreckage, I stumbled upon a series of obsidian pillars. They are arranged in a perfect circle and hum at a frequency that vibrates through my very marrow. They aren't natural. I sat in the center of the ring for hours, watching the alien stars, feeling a strange sense of peace despite the crushing isolation.

  • Consequence: No stat change.
  • Current Stats: Hull 8, Supplies 9.


/// Transmition interrupted... ///