Indie game storeFree gamesFun gamesHorror games
Game developmentAssetsComics
SalesBundles
Jobs
TagsGame Engines

CodeCrunchers

21
Posts
20
Topics
A member registered Aug 04, 2023

Creator of

Recent community posts

Hayden Rodgers

10-7-2023

This week I was tasked with creating a cave assets to show where the AI will spawn within the level. Upon searching throughout the epic store I came to no conclusion of assets that worked well with the theme of the game. So I ended up creating the assets using the assets we already had with the modeling tool. I have never used the  modeling tool and there was a slight learning curve to it when creating the different caves. I attempted to use the union button on a lot of the models when creating them but for some of the more intricate or detailed models it would cause tearing at the joining of polygons. In order to fix the tearing I had to either weld the pieces together or split the assets in order to get them to look good.

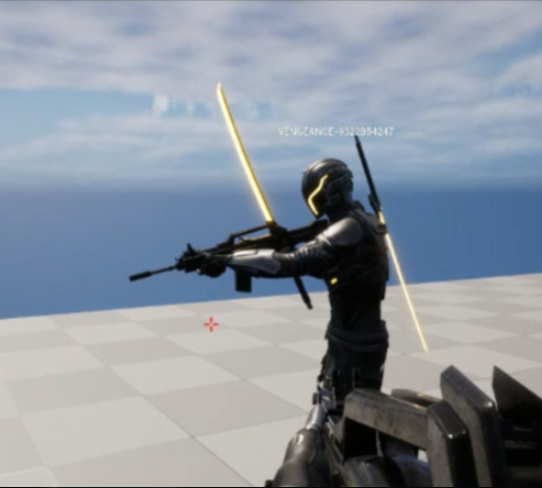
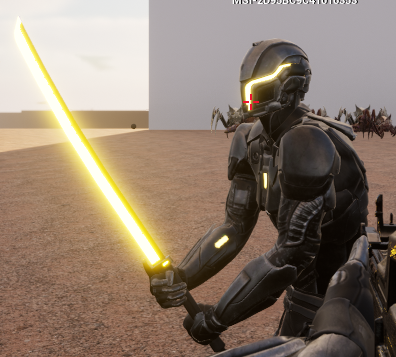
This week, I ran into an issue where I could not get the Samurai Sword's mesh visibility to properly be hidden for the owner which led to the annoying result you see in the first figure. 


The sword is both attached to the hand socket and the sheathed socket.
In order to fix this issue, I had to figure out why the mesh's visibility would not be removed from the first person perspective. After looking into the Actor Class a bit, I noticed that when attaching an Actor to Actor the owner does not get updated to that of the parent. By setting the new owner of the sword to the character itself, I was able to properly manipulate the weapon meshes to be visible at the proper times.

After a weeks worth of adding content and writing code it was time to do the build and play test. I made sure to have all of the updated files from the rest of the team and hit build project. After a few minutes I got an error message saying the game couldn't build due to unknown errors. I went through the build log and saw several areas with multiple errors.


I confirmed with my teammate about a few things and got to work on fixing the issues. I got to the point where the build was still failing but the log wasn't showing anything helpful other than just "Unknown Error". After some tweaking I found the issue to be some code in a specific file where new config stuff was being added for convenience in the editor. The code worked in the editor but caused issues with the build. Once that code was commented out, the build succeeded and we were able to start testing everything we implemented for the week.

(1 edit)

Author: Hayden Rodgers
Date: 09/15/2023

The main issue that I had this week was when I created the brute. I attempted to just reuse most of the behavior trees for the brute. unfortunately that did not go to planned. When I created the  behavior trees for the other AI in the project, they were all designed to be around the same size. Due to the size difference between the brute and other AI I had ran into issues where the brute would not behave the way that it needed to. While upon fixing this I had found a game breaking bug that would cause a crash when a player had died.

To fix the issues and bug that were from the brute I had to create a new behavior tree for the brute for that it could not reuse the tree that the grunt and elite share. In the new tree I had to add in a stop distance and have it so that the AI would not envelope the player. Though the crash that was created when a player had died was due to some oversight that I had. Due to having to create a new behavior tree I had forgotten to change variable in the Controller class to make the AI target a dead player. Due to having used previous code I mistakenly kept the Brute targeting dead players at half the size of its stopping distance. Due to that I had to change the targeting of the dead player to be reflective of the stopping distance that I had to change.

This week our team found an issue regarding the Dash Ability when used on sloped surfaces. Essentially the player's Direction Vector would not get updated to match the new pitch of the surface they were approaching. In order to fix this issue, I decided to remove the gravity force and the friction with the ground to enable an glide-like effect along the surface. This fixed the issue but caused another. When near the edge of a surface such as a stair case, the player would gain increased velocity and distance when dashing from those edges. I decided to apply a slight gravity increase along with reducing the amount of velocity applied when the angle between the player and the surface was outside a certain range. This solution allowed for the proper velocity and distance to be achieved.

This week, I implemented the character's ability UI elements. The initial plan was to make the UI appear bright, signaling its readiness for use by the player. Once activated, the image would fade to gray, and a timer would commence, counting down from 10 atop the grayed-out image. When the timer hit zero, the image would brighten again, accompanied by a sound to indicate its availability for use once more. This task may sound straightforward, but in reality, it took me six times longer than my original estimate. Collaborative game development with multiple team members can lead to unforeseen complexities.


In my initial conception, I thought I could create the UI on the HUD, then establish a variable that would guide the code to access the HUD and trigger the specified functions when the player activates their abilities. I spent nearly two full days convinced I was overlooking a fundamental step. I managed to make the transition from the character skill to the HUD function, displaying on-screen debug messages, which suggested it was on the right track.


However, as soon as I attempted to implement anything beyond the debug messages, the game would crash, even with validity checks in place, leaving me baffled. It was only later that I discovered there was no trace of the items in memory. I had to reconfigure how I called the functions from the character's C++ code to the HUD. Instead of a direct transition from the character to the HUD, I had to route it through the player controller, a HUD class, and then to the HUD containing the functions. Eventually, I managed to get everything I added to the HUD to function correctly in the game, as long as I followed this revised approach.

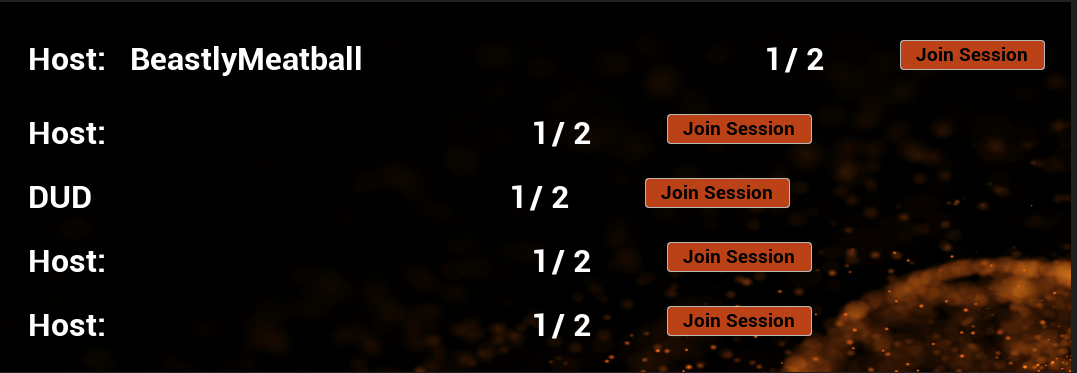
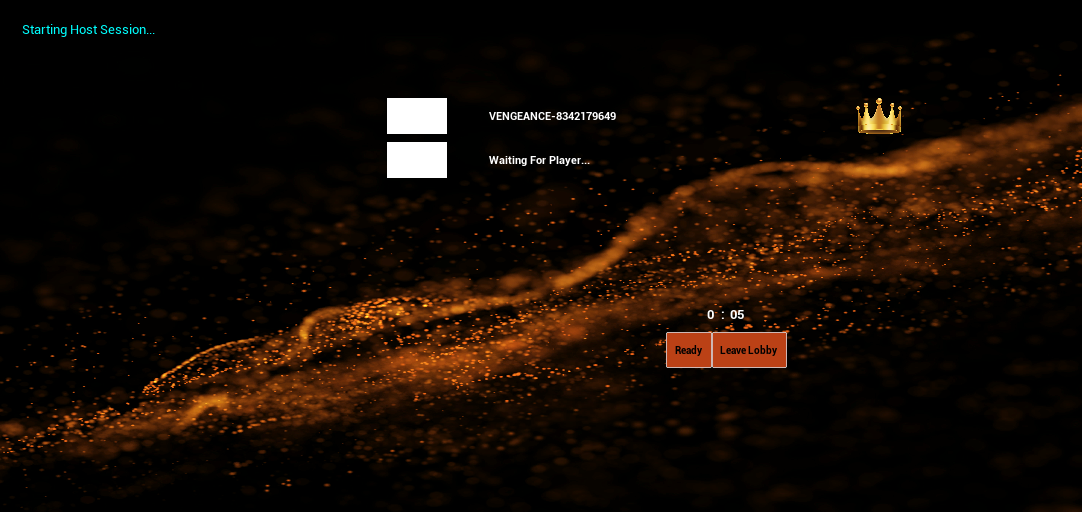
Joinable Sessions:Joinable Sessions:This week, our team implemented a more user friendly way to see which session you are joining when opting in for Multiplayer. Since our Online Subsystem was designed to limit the amount of overhead used on miscellaneous processes involving the search, each sessions was stored as a weak object reference which gets destroyed after the session had been established. Due to this structure, we had to find a way to display the sessions and then join them without destroying that weak reference which led to some complications when trying to call On-Click events for our corresponding UI elements. In order to accomplish this task, I created a struct that had the necessary data needed such as Open or Closed Connection, Number of Public Connections allowed, Session ID and Host Name that retrieved the information when the initial session was searched for. Once the player chose to join, it compared the Session ID from the struct to the Session ID's from the list and then joined the corresponding session. This issue presented multiple learning moments as I had to connect with our UI Designer in order to test and build some elements along with diving deep into the way Unreal's Online Systems works with our own Online Subsystems.

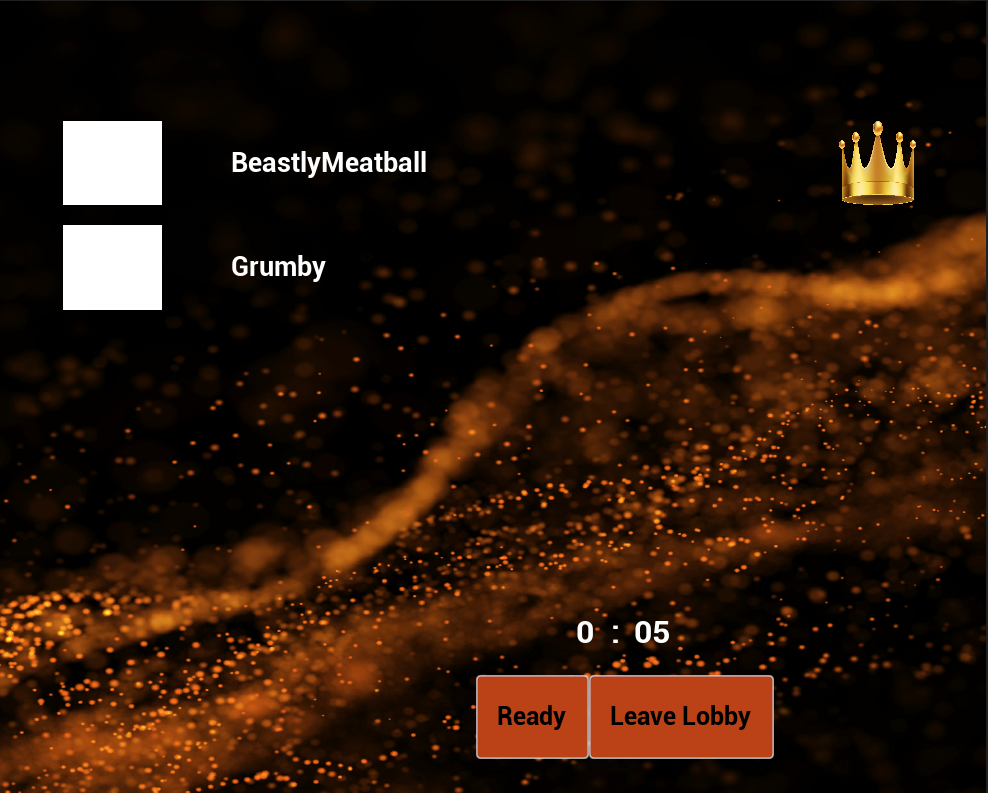
Lobby Screen Post Join:


Joinable Sessions Screen:


Author: Hayden Rodgers
Date: 09/08/2023

This week a difficult portion of the work that I did during the week was creating the spawning system for the AI. The main issue was having the spawner to be dynamic with its spawning locations and spawning at those dynamic locations. After working for a long time of trying to create a dynamic spawning location, I had come up with the idea of creating an array that holds all of the spawner locations that were created to be placed in the scene. At the start of the level the spawner will search for all spawner locations which was a blank actor with a sphere collider around it. This had allowed for easy access and visibility when placing them with in the world and accessing it by code. In order for the spawner to know where these locations are I created an array that references each spawner location within the scene. Once this data is acquired then the spawner would go through the list at random and choose a spawner to spawn the ai. To get the ai to spawn at the dynamic  spawn locations I created a function that gets a RandomVector Locate within a 7.5 m radius around the spawner. For a visual I included this video

up 
(1 edit)

Author: Johnni Beal

Date: 09/08/2023

Working alongside a teammate on our game development project was quite the adventure. We both had our areas of expertise, which made it a perfect match. I focused on the UI design and some coding, while my teammatehandled most of the networking side. Our strategy was clear: divide and conquer.

For two days, we diligently pushed code to our shared repository, merging our skills and ideas. It wasn't always smooth sailing, though. New errors seemed to pop up with each code push, and problem-solving became our daily routine. Despite the challenges, we managed to build the game's menus and networking features to a basic level. While we knew there was more work ahead, our teamwork and dedication had set a strong foundation for future improvements. This experience taught us the value of collaboration, problem-solving, and the joy of building something together.


(1 edit)

Author: Johnni Beal

Date: 09/01/23


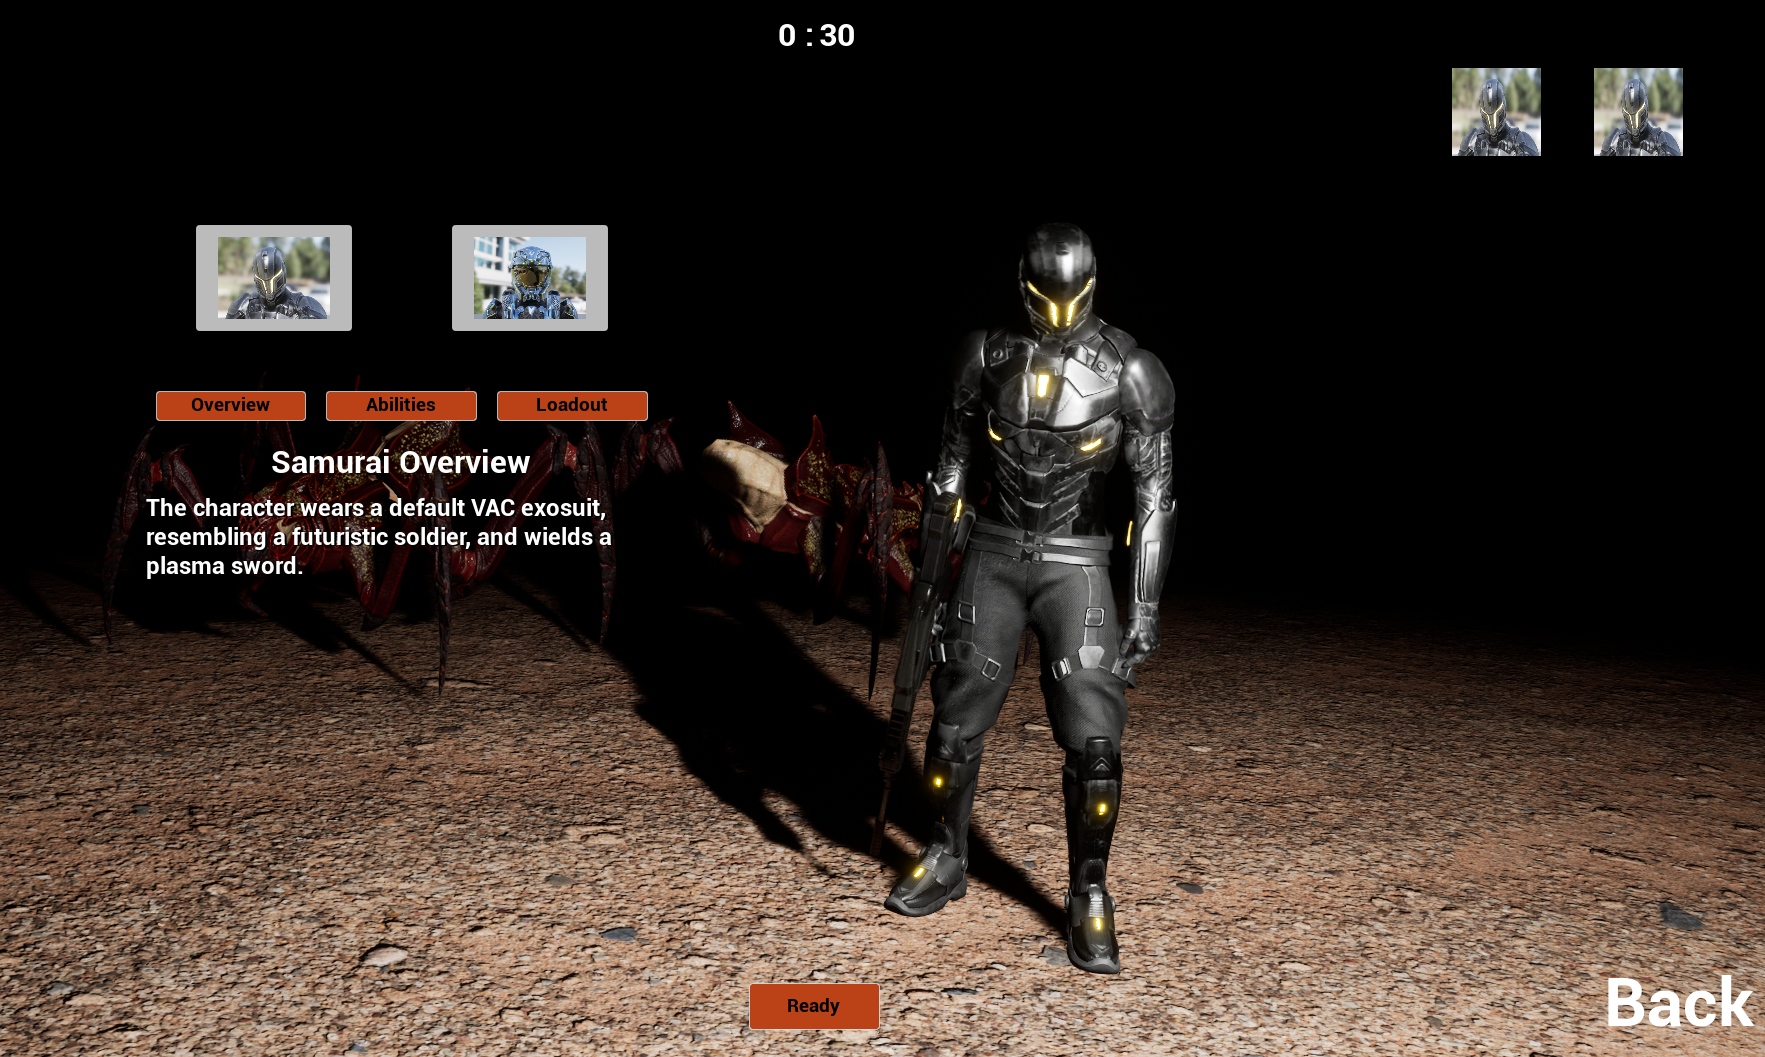
Creating a compelling UI is a continuous process that goes hand in hand with game development. This week, we made significant strides in setting up character selection and lobby widgets, two essential components that will enrich the player experience in our upcoming game. With networking functionality on the horizon and a commitment to user-centric design, we're excited about the journey ahead and can't wait to share our game with the world.

Character Selection Widget - This component is critical for allowing players to select their characters. A well-thought-out character selection UI can set the tone for the entire game. The character selection widget is set up to showcase multiple unique characters, each with their own distinct abilities and characteristics, adding depth and strategy to our gameplay. Now that I have the outline complete I can get to work on design.

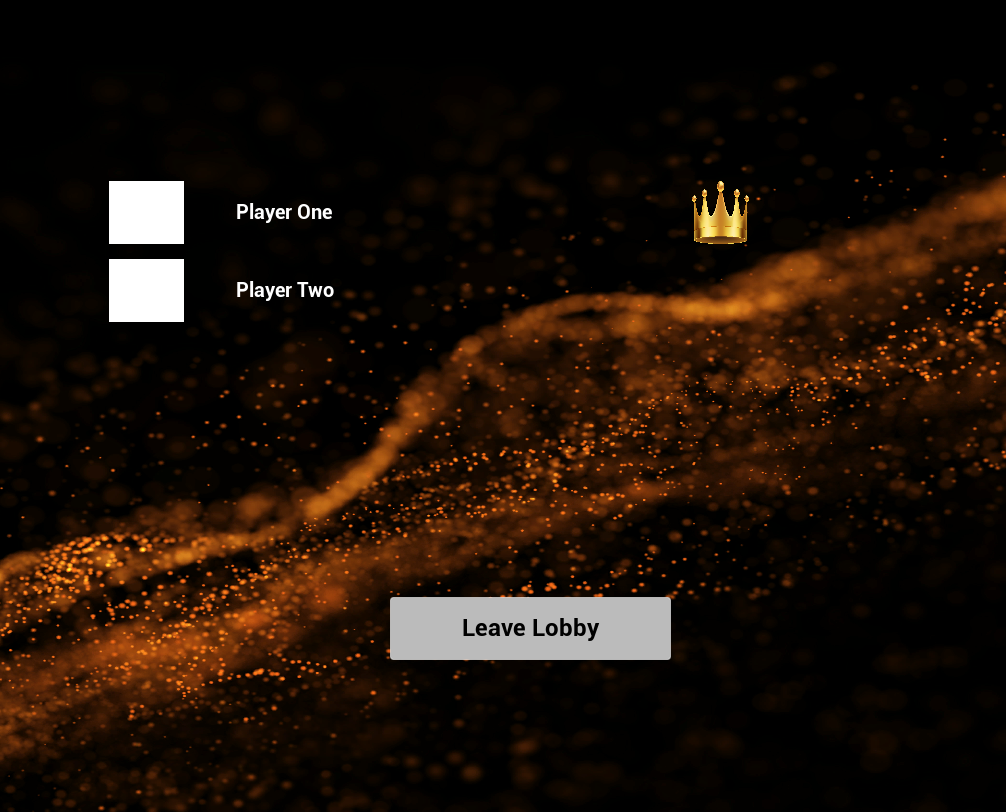
Lobby Widget - In multiplayer games, the lobby is the virtual meeting place where players gather before starting on their gaming journey. This is the place where bonds are forged, tactics are planned, and players ready themselves for combat.

Our lobby widget was designed with these factors in mind. We aimed to create an inviting and user-friendly space where players can interact with ease. A visually appealing interface with clear options for matchmaking ensures that players can swiftly dive into the action.

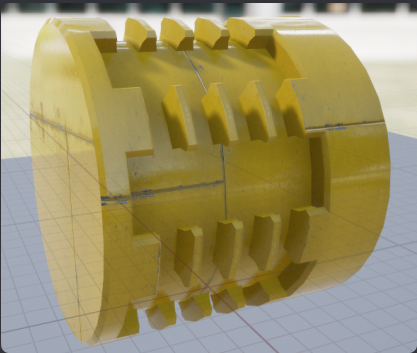
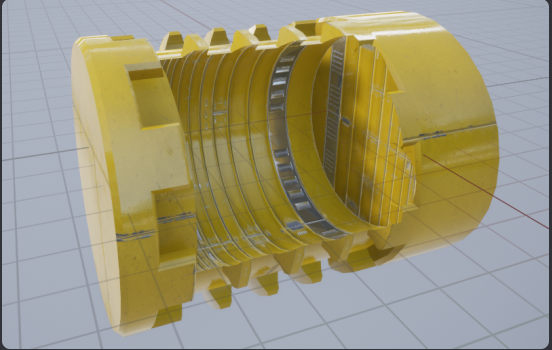
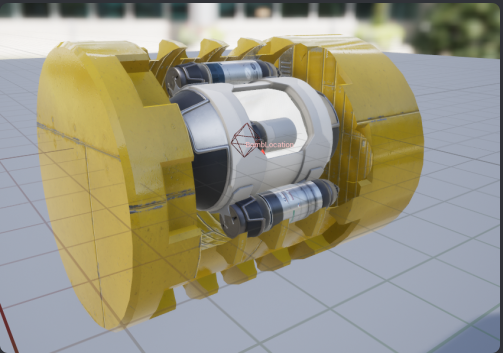
When the supply pod is called in, the Equipment Storage slides out of the right-hand side to display the Explosives and Laser Cutter. With this static mesh, there is not a visible slot to see the explosives which prevented the user from grabbing the supplies. In order to fix this asset, I went into the Modeling Mode and chose the MeshBool operation. I created a basic cylinder shape that had the same scale as the Explosives to be the stencil when carving out space from the Equipment Storage. After setting the new Material to the Supply Pod interior, it gave a layered look to the asset with some depth for the Explosives and Laser Cutter. 
Before:

After:


(1 edit)

For the last two weeks I have been working on the spitter ai for the game. During that time I have encountered different challenges while creating it. There were two major issues that caused me much grievances during the creation of them. One of the two was with the projectile being able to hit the grunts, and other spitter.  In order to fix this problem I had to reincorporate the team id's that I had created for the ai to detect their allies. With this it allows for the spitters to shoot through all its allies without damaging them creating for a unique experience where the player has to kill off the grunts before getting to the spitters.  As for the other issue it was with the mechanic for the spitter to runaway. When originally implemented at its basic state the Ai would runaway from the player headed straight back from where it was standing. In order to fix it I changed the algorithm so that it would look for a location behind it then look with in a 25m radius where it would select its destination to runaway. This has created for a fun interaction with the spitter to where if you run at them they will runaway at a random direction and distance from the player. Which was causing us to have to fight a new line up of grunts that would get in between us and the spitters.


Author - Hayden Rodgers

In game development, creating the main level is like painting a masterpiece on a blank canvas. Just as artists start with a plain surface, game designers begin with an empty virtual space. While placing rocks, trees, and other elements might seem time-consuming and tiring, it's a labor of love that lets designers build captivating virtual worlds for players. 

The process involves carefully putting rocks, trees, and more into the game world. It takes time, but the result is rewarding. Each piece added changes the environment, like rocks giving stability and trees creating a lush vibe. Designers can make serene forests or tough mountain areas by arranging these elements. As the level takes shape, a sense of accomplishment arises. Completing the design is a proud moment, knowing the world's transformation will captivate players and bring the game's vision to life.

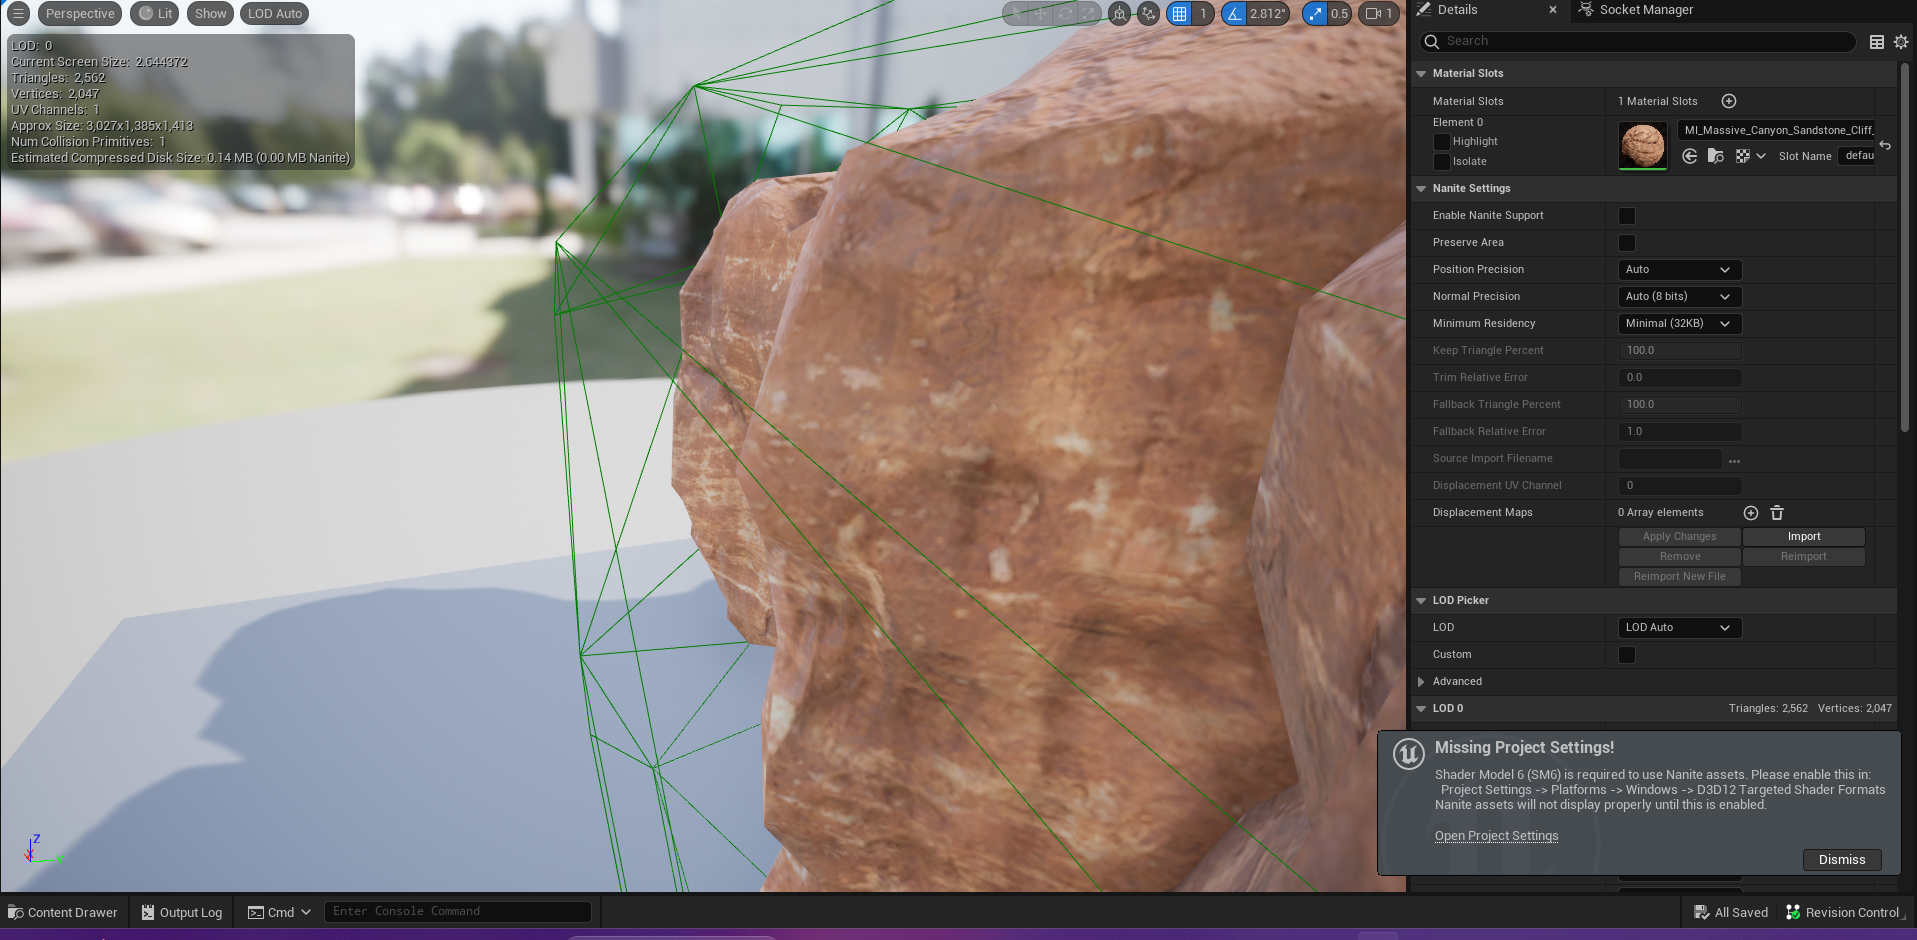
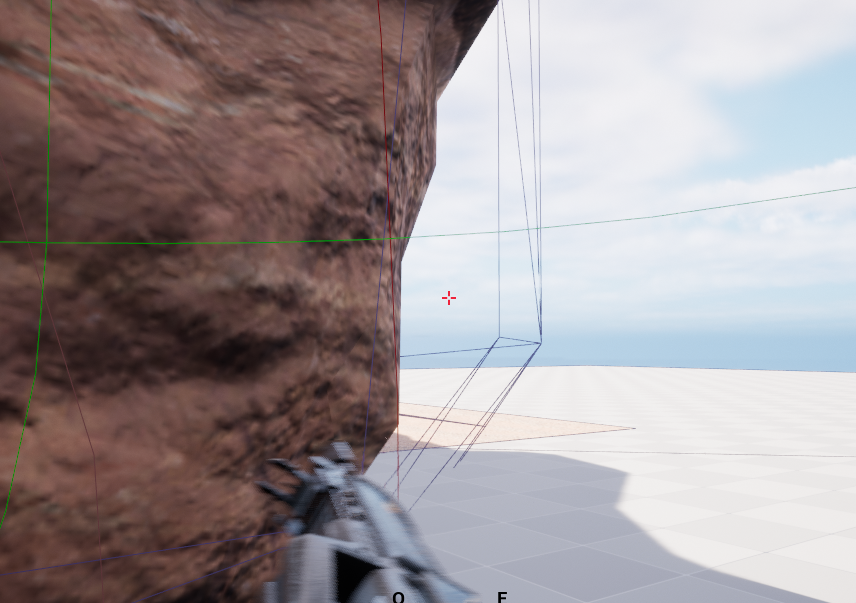
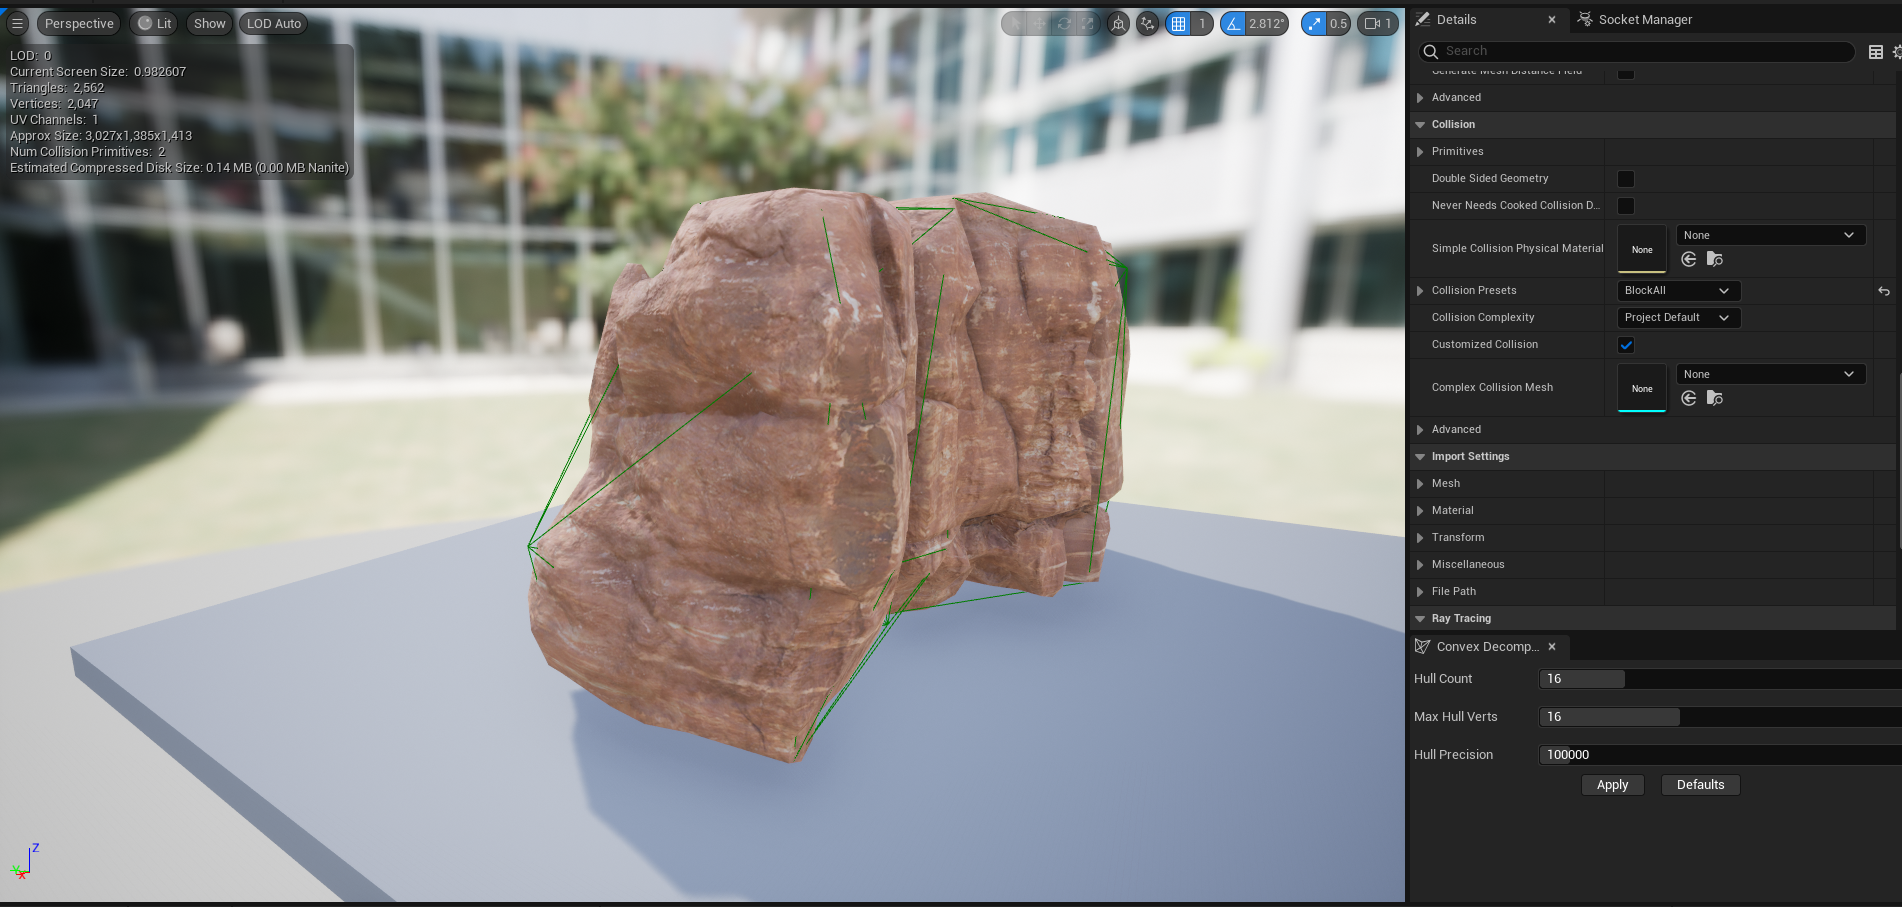
This week, I created the initial layout for the first part of our level. I did many tests to ensure players have a clear path and can't find sneaky shortcuts. Positioning the big rocks is crucial to make the world feel real. After placing everything, I noticed that the collision on each rock wasn't snug enough. As a result, when players run or shoot around corners, the collision prevents smooth movement and can inconveniently block bullets.


It is a simple process to fix the Collisions size but it can be takxing on the system to increase the vertices of each one, but in this case it can be worth it.


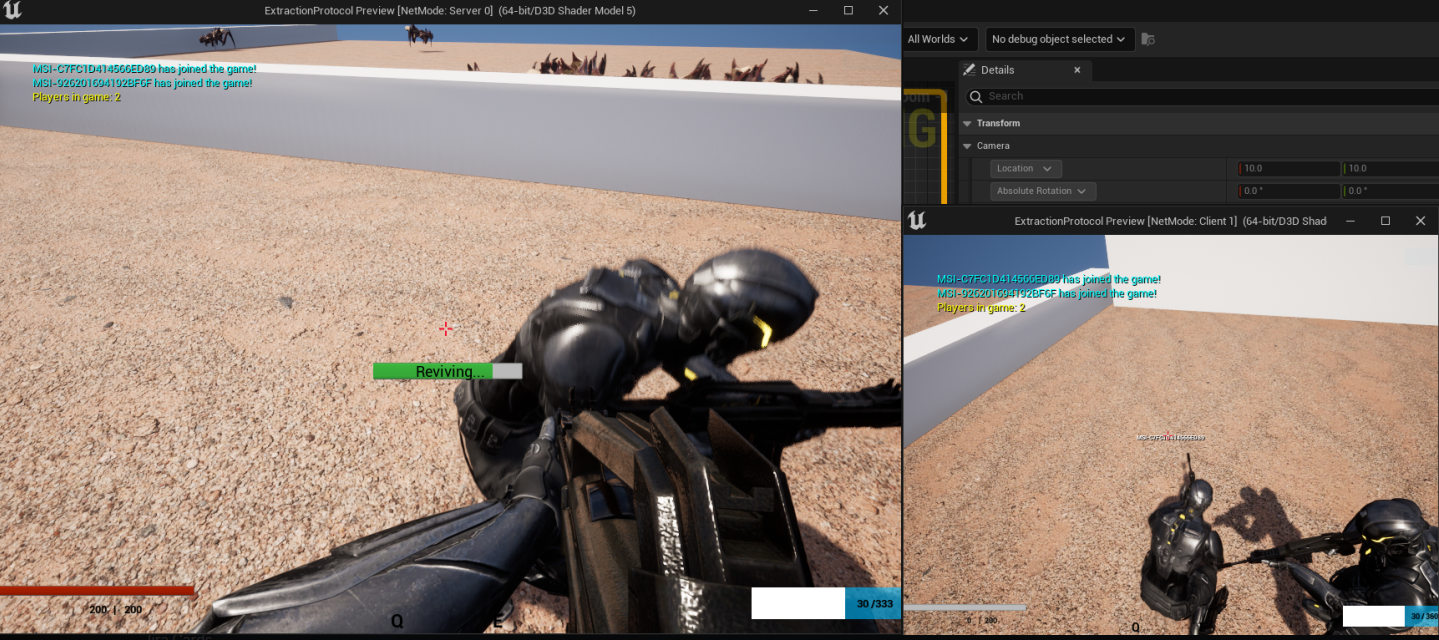
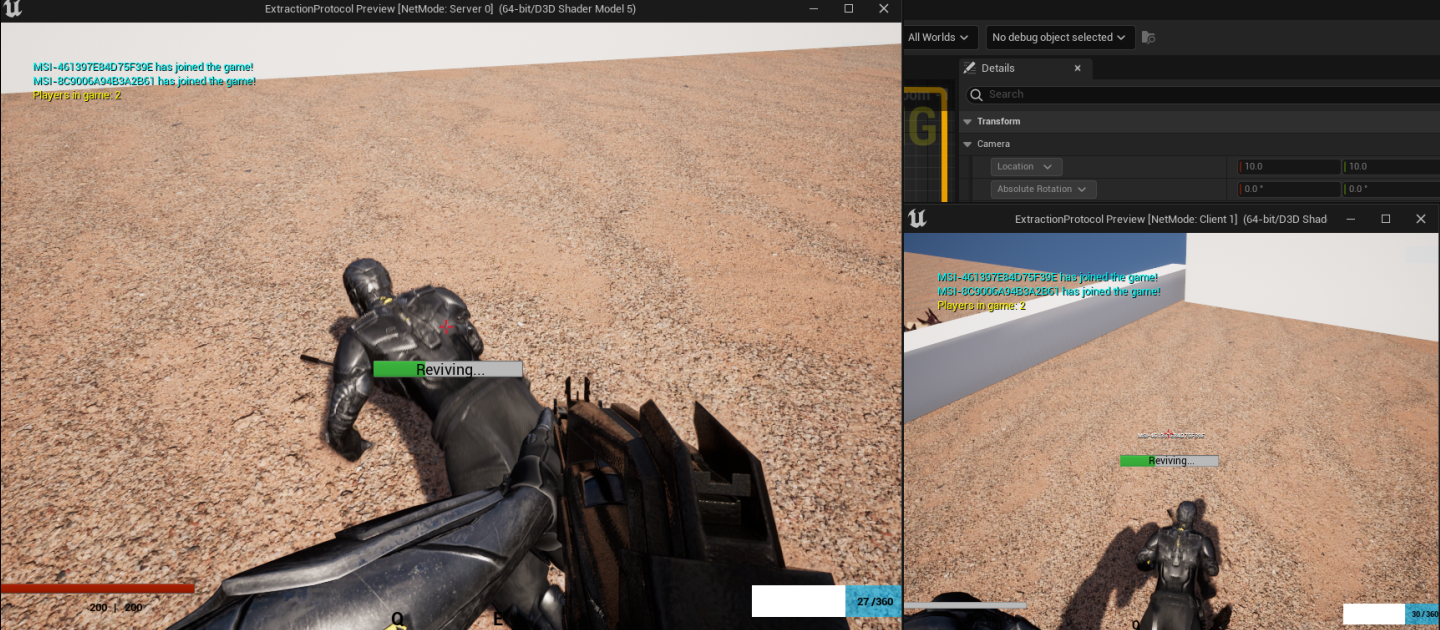
This week, I ran into an issue where the Client was not receiving any updates on their HUD when getting revived. When the player is downed, both a small animation and a progress meter is expected to appear to indicate the revive process is occurring. While having one of these elements is enough to indicate what is happening, we wanted to include both since the Client was unaware how long the revive process would take. After looking more in the Unreal Engine class hierarchy, I noticed that the HUD class that our player controllers utilize does not get replicated. The reason for this is because the HUD class is Client-Side only and only pertains to the controller the HUD is attached to. With this information, I was able to set up a Client side function that would enable the progress meter both the downed player and for the reviver when overlapping with the downed player. This new information also opened a few older HUD related bug fixes that were able to receive more permanent and reliable fixes.


HUD Before:

HUD After:

(1 edit)

I was on the brink of achieving a significant milestone, with my tasks almost complete and progress well ahead of schedule. Everything seemed to be falling into place until an unexpected hurdle threw a wrench in my plans. I was all set to push my work to the repository, only to be greeted by a stubborn error courtesy of Perforce, our version control system.

Hours slipped away as I tried everything to resolve the issue. I tried restarting the application, even my entire computer, hoping for a quick fix. When that failed, I resorted to uninstalling and reinstalling the application, grasping at straws to try to fix the issue. Seeking help, I turned to my fellow developers and teachers for support. Three teachers step in, each offering their expertise, but the elusive solution remained out of reach. As time ticked away, stress mounted, and the pressure to deliver intensified.

Later that same evening, another one of my teachers reached out to me and asked if we could chat and for me to share my screen. I agreed, and together we took a close look at the situation. In just about 20 minutes, he skillfully reset my repository back to the current build. It was a huge relief. Now all I needed to do was migrate over the work I had completed from my other version of the project. As I started reintegrating my work, a cascade of new challenges emerged. With determination fueling me, and plenty of coffee and monster, I attempted to tackled every problem, determined to meet the approaching code freeze deadline. Fatigue set in, and the late hours blurred together, yet I persevered. In the end, I had to make a tough call – I couldn't fit everything I had planned into the build. Instead, I shifted my focus to refining existing elements. After all this, I learned that problems are normal in game development. This showed me how being strong and able to adjust is important, and it also showed me how great the game development community is at helping each other. Remember, my mentors were there to guide me when things were tough. This really showed me how dedicated they are.

In the end, my story is a reminder that even when things don't go well, solving problems makes you better. As you work on your own games, know that problems are just things you can overcome with the right attitude and help. You'll come out even stronger.


Author: JohnniK. Beal

Date: 8/11/2023


The video did not save so here it is reposted

When firing a weapon, the Sever was able to appropriately hit the target but the Client was unable to shoot in the desired direction. This was frustrating for the user since their inputs would not be registered as valid hits when playing and could not kill any of the AI.

Upon further investigation, I noticed the line trace that is used to determine if a hit is valid was using the proper start point, but the end point was location on the Character's Camera forward vector. I knew this had to be the issue, so I started testing if it was server or client side. The server's vector was properly updated but the clients was staying zeroed out. After a series of failed attempts at replicating the proper vector, I remember that the APawn class has a method called GetBaseAimRotation(). For player controlled pawns, this will return the center camera transform which is almost what we needed. I converted it to use Vector.X which should simulate the same Forward Vector and sure enough, the proper trace had been cast for both server and client players.


Author: Johnni K. Beal

08/04/2023

Crafting the options settings for our game turned out to be quite the obstacle. Initially, I encountered a puzzling challenge - the selected user settings simply wouldn't save. It took me a few days of persistent trial and error until the breakthrough arrived. Finally, the chosen settings were successfully linked to the save game file, granting players the power to tailor their gaming experience as they desire.

But, the journey didn't end there. Ensuring the smooth transition of saved settings upon restarting the game proved to be another frustrating task. I had to meticulously map these preferences to the game's UI elements, making certain that the in-game display mirrored the player's choices seamlessly. Finally, I was able to display the appropriate values of the buttons and sliders during loading.

The excitement I felt was beyond words; I couldn't help but revel in the joy of having a fully functional options menu. It was a testament to the dedication and effort invested in making the game an outstanding experience for every player.

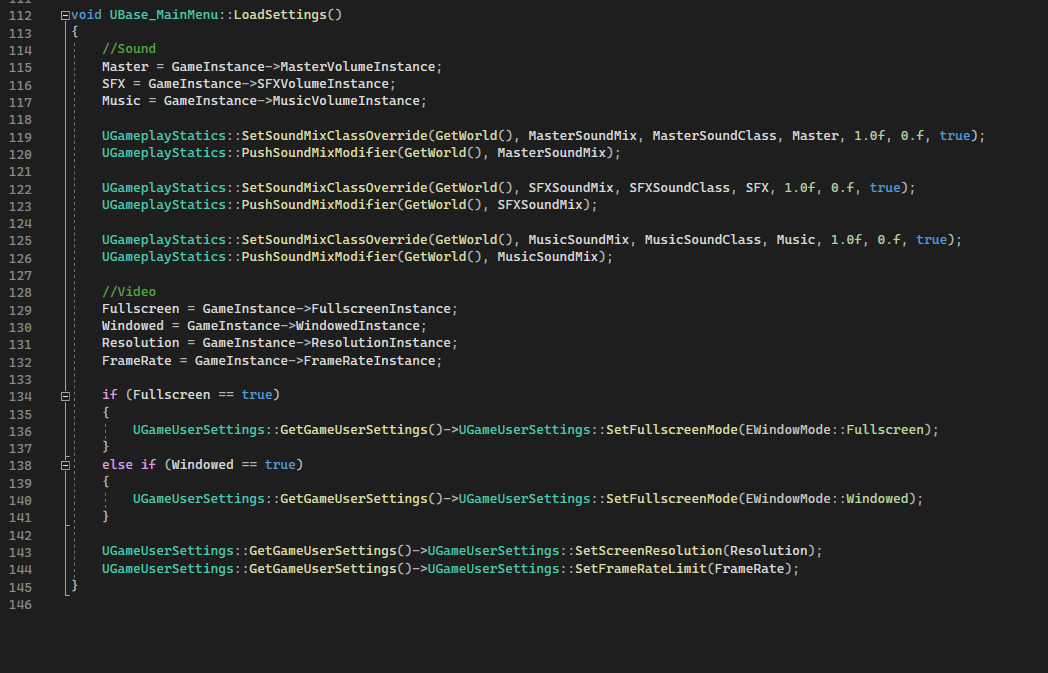
In this step, I seamlessly load all the saved settings from the game instance into the main menu. This ensures that all your preferences are readily available as soon as you start up the game. No more hassle of reconfiguring everything; everything is set up and ready to go, tailored to your liking.


If you're eager to witness the menus in action, I've provided a few links below for you. Go ahead and explore them to see firsthand how the menus function in our game. Your feedback and observations are always appreciated as we continue to refine and enhance the gaming experience. 


Video Menu on YouTube
Sound Menu on YouTube

Hayden Rodgers

6:40 p.m.

This week I worked on making the AI replicate within the multiplayer. When loading with multiple players the AI would crash the game, the fix to this problem was to add a check into the code to see if the AI had an AIController. Had to implement this for the client that would join the host since the AI would not have a controller for the client but the server/host would need to have this since AI is updated through the server.

Another issue of this week was making the AI choose between the different players within a level. The AI would religiously chase after the first player that they would register. To change this I had to set the AI to change the target and the other AI was to have it check if it was within 5 meters of the player that it was chasing

(4 edits)

While testing Online Cooperative Play functionality, the issue of the player mesh disrupting the camera pitch. The solution I implemented last time worked, but when involving more players, the expected outcome was less than satisfactory. After removing the Aim Offset that was driving our camera and animation logic, I attached the  First Person Character mesh to our Camera Component and our Camera to our Character Collider allowing for its pitch and yaw to be taken directly from the Camera Component. After setting the Pitch and Yaw this way, I was able to connect them through our animation logic to set up seamless animations for both our Server Player and all connected Clients.

July 14, 2023

OVERCOMING WIDGET CONNECTION CHALLENGES

    While developing my Unreal Engine 5 game, I encountered a frustrating challenge while trying to connect multiple User Widgets. These widgets played a crucial role in creating interactive menus and interfaces for the players. Initially, I attempted to use a widget switcher to handle the connections between various widgets. However, this approach proved to be problematic as I struggled to get each widget to load correctly. It seemed like I was hitting a roadblock, and I needed to find an alternative solution.

    After some experimentation and research, I decided to take a different approach by loading each menu within the code for its respective widget. This decision proved to be a game-changer. By directly handling the loading process within the widget's code, I gained more control over the connections and interactions between the different menus. it allowed me to link them together seamlessly and overcome the challenges I had previously encountered. By overcoming this challenge and getting the widgets to work together, the end user experiences a more polished and professional game.

Author: Johnni Beal

Posted on 07/15/2023

July 14, 2023

COLLISION FOR THE AI

 author: Hayden Rodgers

Due to the AI not being a humanoid I could not use the standard capsule collider to hand the collision. This would cause for issues later since the hitbox for the AI would not match up to the model. Making gameplay feeling rough for that the player could shoot the legs but not have it count as a hit. This was of high importance in my task for that if not done as soon as possible for the AI it would cause issues later in development where the AI would have to either be fully rebuilt or changed.

After attempting different methods for changing the collision for the AI. The end solution was to turn off the overlap events for the Capsule collider. While also turning the collision on the mesh to pawn and enabling overlap events for the collision. With this it allows for the players to be able to shoot the AI at any body part to inflict damage.

July 16, 2023

SERVER/CLIENT CONTROLLERS

 Problem: Server/Client Controllers

    While building the networking framework for Extraction Protocol, I ran into an interesting issue. When a new Client joined a hosted session, the input controls of the previously joined Client would be inadvertently removed. This became frustrating as map testers could only effectively test the logic for solo sessions.

    Upon thorough debugging, I identified that upon player spawning, each player was being assigned their own player controller. However, this process also caused the removal of the previous player's input controls. The auto possess feature in our character class was enabled, which led to the transfer of input control to Player0 whenever a new client connected to the session. By disabling this feature, each character that entered the session would be assigned their own controller at their respective spawn point, resulting in the expected outcome.

Author: Kyle Worthington

Posted on 07/16/2023


July 20, 2023

AI ATTACKING EACH OTHER

 Author: Hayden Rodgers

This week when working with the AI with multiple of the grunts in the scene they would attempt to attack each other instead of going after the player character. The AI would only register the first entity that would enter the radius. This was causing issues for that the AI would not attack the player unless it was alone or the surrounding AI had been killed.

To fix the issue I had to add in the ability for the AI to register teams. With the team register the AI would look to see if the target that entered their range was a hostile or a friendly. This change helped to have the AI detect the player but there was another issue with the fix. The AI could register the player but do to having a large amount of AI within a scene they would eventually not be able to attack the player due to it detecting a high amount of friendlies near by. To fix this issue I had to implement a bool where the AI would check to see if it had seen the player, making it true if it had sensed the player. This allows for the AI to chase the player upon detection and to ignore the fellow AI by it. 

With the fixes it now allows for this situation where the player can be chased by multiple AI


July 20, 2023

IMPROVING GAME MENUS WITH HOVER EFFECTS: LESSONS LEARNED

 author: Johnni Beal

Posted on 07/20/2023

    To enhance the user experience of my Game menus, I decided to add hover effects to the buttons. Hover effects serve as visual cues, indicating that a button is interactive and clickable. Without these effects, users might struggle to differentiate between interactive and non-interactive elements, leading to confusion and frustration. Implementing hover effects, though seemingly straightforward, presented some challenges. Initially, I tried adding the code directly to the button UI template, but it didn't work. I experimented with different approaches, moving the code to individual menu scripts for each button.

    While this method worked for some buttons, it created problems for others, making it a less than ideal solution. In the end, after clearing out old code and starting anew, everything worked flawlessly. This experience taught me that starting over can lead to unexpected breakthroughs and transform seemingly insurmountable obstacles into successes. As developers, embracing challenges and learning from both our achievements and mistakes are essential for growth and improvement.


July 20, 2023

RESOLVING THE ISSUE WITH CAMERA AND ANIMATION SYNCING

Identifying the Problem:

In the development of our game, an issue arose where the player's mesh and animations were not being properly updated when performing certain actions, such as jumping or adjusting the camera pitch. This discrepancy resulted in a jarring experience for players, affecting both gameplay and visual aesthetics. To create a more seamless experience, I dove into the Player's Script and Animations, identified the root cause, and implemented a solution that synchronized the player's animations with the camera updates.

Implementing the Solution:

When observing the player's actions, it became apparent that the AimOffset, was not being set until after the Camera Update had occurred. Consequently, this led to a misalignment between the player's mesh and animations when performing certain actions, such as aiming or jumping. To address the synchronization issue, I restructured the animation blueprint, using the player's pitch and the AimOffset. By setting the pitch before the animation update, I ensured that the player's animations would accurately reflect their current state, making the character's actions appear more natural.  I modified the Camera Update  to use the updated AimOffsetPitch value which led to a proper sync between the two. To address the jump animation issue, I implemented a blend between the IdleWalkRun Blend Space and the AimOffset pose which allowed for the player to jump and shoot without the animation bending the player's mesh and creating abnormal effects. After implementing these changes, the player is now able to jump and shoot with the animations being properly set as well as the camera being synced to the updated animations

Author: Kyle Worthington  Date: 7/20/2023