Indie game storeFree gamesFun gamesHorror games
Game developmentAssetsComics
SalesBundles
Jobs
Tags

Luna Engine MV

A script that modifies RPG Maker MV UI easily · By Archeia

Menu Scrollbars

A topic by Creative Ed created Jul 19, 2019 Views: 879 Replies: 6
Viewing posts 1 to 3
(1 edit)

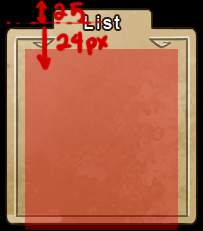
Hi, I was just wondering, will it be possible to  have scrollbars on menus? I am using MogHunters scrollbar plug-in and it works pretty well with every window based plugin, but it doesn't work with this one (and  I will really need it >.<).  Will there be possible  to have an alternative, or is it possible to add compatibility to that plugin?

Developer

There are ""scrollbars"" by default in RM but probably not in a visual way you want. We don't do compatibility patches. You'll have to show us what you want to do.

Yeah , I'm looking to have this type of scrollbar:


I'm using very small vertical menus, and having something like this will be essential for navigation. Here's how my menu looks:


Also, one quick question. As you can see in the "List" window, the arrows are not aligned with its contents because I had to create an offset in order to have the window aligned with the image. However this breaks the window itself, is it possible to give the background image itself an offset? So that I can just fix its position relative to the window. I tried to do it, but haven't figured it out.

Hey,

Youko here. I'm one of the primary testers for Luna.  To answer your offset issue, how did you set up your background image in the first place? If you set it up as an image windowskin for the item menu, you should still be able to freely change the size of the actual window without breaking the imagine too severely. Simply go to the Block 1 section of the config (listed in the documentation) and change the width and height of the window.

The reason it's not naturally lining up has to do with both how you've set up your source images as well as your configurations. I would need to see both to really tell you how to fix it specifically outside of general advice.

(1 edit) (+1)

Hello Youko! Sorry for the late response,  I took  some days off and got back today.
It's just an image, no windowskin. So in order to have the menu fit the image, I either have to change window position relative to the image, or the image relative to the window. Right now I could only offset the contents of the window, which make them leave the window itself.
Here's the stuff you asked:

Window background image:


Code:

(1 edit)

The cleanest way to fix the menu would be the following:


The more "duct tapey" way to fix the problem would be to do what you originally wanted to via giving the "background window an offset". There is no way  to do this in the configs, but you can simply set up your source images to include the transparent white space so it's "offset". That said. I really wouldn't suggest this as it makes it very tedious to change any work you've already done if you decide to do something else down the line, and it adds a bigger lag factor due to larger images to work with.

If you want to understand why changing the above fixes the problem, look at my explanation below. 

I'd also suggest studying the documentation on either the physical document or the wiki closely since it explains a lot of this in extreme detail.

(1 edit)

Here's an explanation:

width value: By changing this, you change the size of the "window", giving your items more space and making it automatically align the arrow indicators in a cleaner fashion. This should move the arrows to the middle. 

height type: By changing this from fitLines to fixed, it tells luna that you want the window to always be a certain pixel height(height value), changing the vertical position of the scroll down indicator and the number of lines of items that can fit.

window padding: Window padding is the amount of space Luna will automatically put between the edge of the window and the contents of the window. Basically, you're telling it only to draw in the red area (assuming the size of the window is the same height and width as your image): 

Since we don't want the image to draw the contents above where it would logically draw according to the image, at this point we use the y contentoffset to translate the draw area down 24 px, resulting in this:


At this point you'll notice that the bottom boundary of the box is too long again, so you can chop it down a bit via making the y of the window smaller (by around 21 px), so we end up with this:

Hopefully, that makes sense to you. Let me know if you need more help.