Indie game storeFree gamesFun gamesHorror games
Game developmentAssetsComics
SalesBundles
Jobs
Tags

Senbir

A pseudo-game about mucking around in a super low-fi virtual computer. · By CliffracerX

Code sharing megathread Sticky

A topic by CliffracerX created Aug 18, 2018 Views: 2,251 Replies: 54
Viewing posts 1 to 12
Developer

For completed projects you want the world to see, you can share code and/or screenshots here!  Friendly reminder that Itch has a "code" format, which can prettify your posts and make things a bit more readable.

If your code was meant for a custom mode, include the CustomPreset.cps file for it, too.  To install someone else's Custom preset, go to your game folder, create a new folder with the preset name (e.g, Compy6c), and drop the CustomPreset.cps file in (or make one, filling it with the appropriate contents - Windows users, make sure you can actually change the file extension on it!), then load it up in-game.

To get started, I'd like to share something straight off.
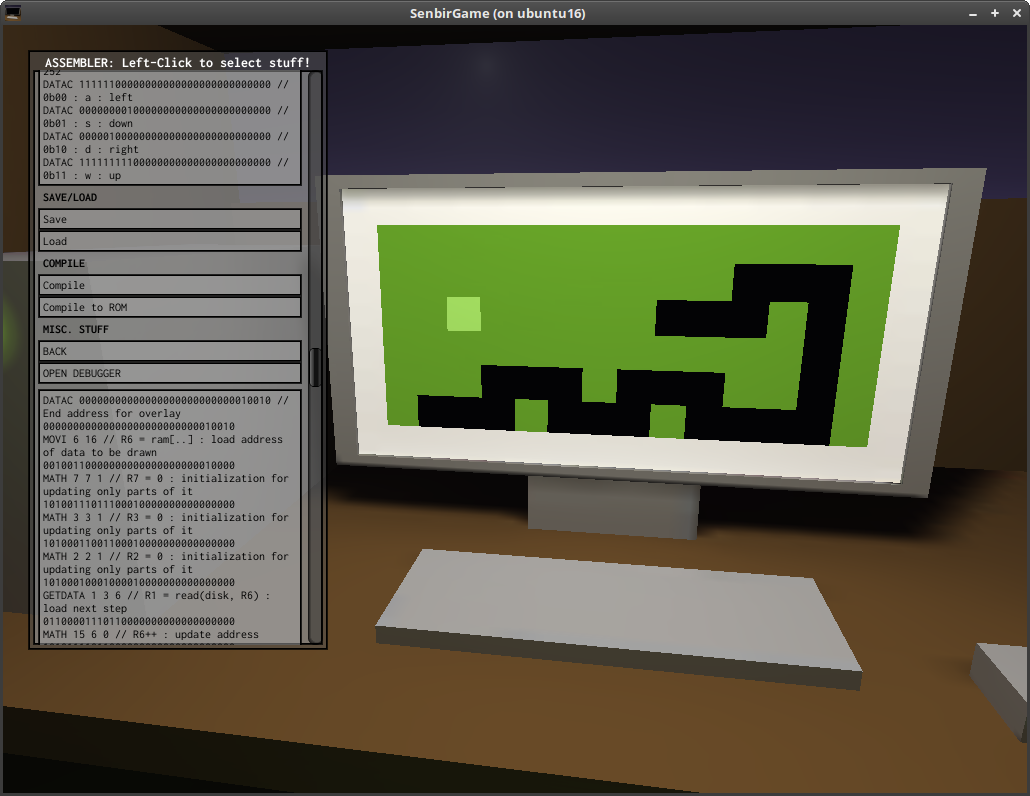
TCPaint

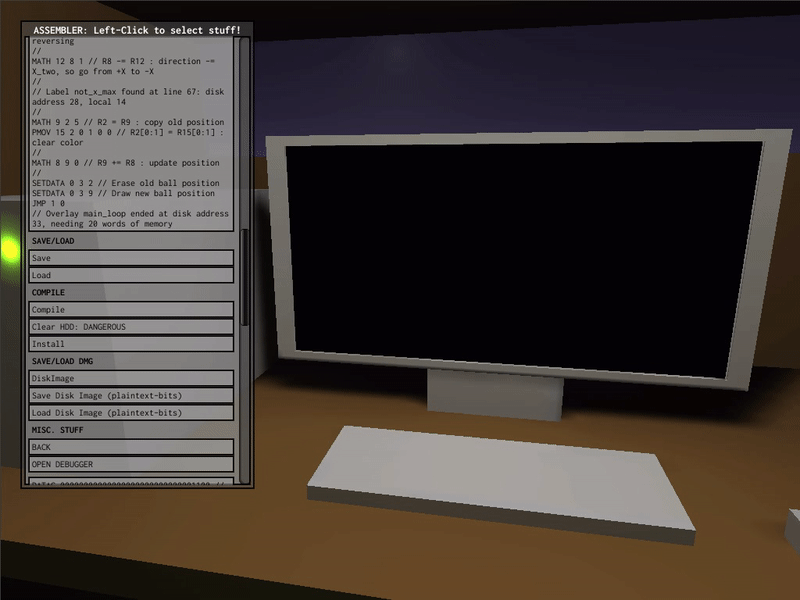
My crowning achievement so far in Senbir is a paint program written for Extended mode, which I'm currently referring to by the moniker "TCPaint".  You NEED to be using the latest version, 0.43a.2 (I'll have a version text up on the main menu one day!), as there were some pretty crippling bugs (mainly in the monitor GetData function) I needed to fix in order for TCPaint to function.

TCPaint Demo

Trying TCPaint in a Custom version of Extended mode w/ a different color palette

//==PAINT==
//WASD to navigate.  Spacebar toggles if you're painting or not.  Use E and Q to shift forwards and backwards through the list of colors, respectively.
//This version was made for EXTENDED MODE, with its 16x8 resolution, and 4-color capability.
//=REGISTER USAGE=
//REGISTER 00: BRUSH DOWN?
//REGISTER 01->2: KEY PRESS THIS TICK
//REGISTER 03: USED FOR IFJMPS
//REGISTER 04: BRUSH X
//REGISTER 05: BRUSH Y
//REGISTER 06: BACKGROUND COLOR REGISTER (USED IF BRUSH IS NOT DOWN)
//REGISTER 07: BRUSH COLOR REGISTER (USED IF BRUSH IS DOWN)
//REGISTER 08: TEMPORARY MODIFICATION REGISTER
//REGISTER 12: INT 16
//REGISTER 13: INT 8
//REGISTER 14: INT 4
//REGISTER 15: INT 1
SET 15 3 00000001 //Set register 15 to the integer 01.  Addr0.
SET 14 3 00000100 //Set register 14 to the integer 04.  Addr1.
SET 13 3 00001000 //Set register 13 to the integer 08.  Addr1.  Yes, I know, there's a duplicate.
SET 12 3 00010000 //Set register 12 to the integer 16.  Addr2.
SET 6 0 00000000 //Set register 6 to have the appropriate color.  Addr3.
SET 7 0 01000000 //Set register 7 to have the appropriate color - white.  Addr4.
GETDATA 2 3 0 //Get the last keyboard input.  Addr5.
PMOV 1 2 0 31 0 0 //Move the last keyboard input into register 2.  Addr6.
IFJMP 0 15 1 //If a key was pressed, jump to the input subroutine.  Addr7.
JMP 2 3 //Otherwise, do nothing.  Addr8.
PMOV 9 2 0 31 0 0 //Put the "brush down" variable in so IFJMP'll accept it.  Addr9.
IFJMP 0 2 0 //Jump to the background restore if the brush isn't down.  Addr10.
JMP 0 2 //Otherwise, jump past it.  Addr11.
SETDATA 0 3 6 //Wipe the old one.  Addr12.
PMOV 4 7 28 31 6 1 //Splice the last 4 bits of the X register (the actual x position) into the rendering register, offset +6 (<28>XXXX -> CCXXXX<26>).  Addr13.
PMOV 5 7 29 31 9 1 //Splice the last 3 bits of the Y register (the actual y position) into the rendering register, offset +9 (<29>YYY -> CCXXXXYYY<23>).  Addr14.
PMOV 7 8 0 31 30 1 //Addr15.
GETDATA 0 3 8 //Get the monitor data.  Addr16.
MATH 1 6 5 //Paste the color in. Addr17.
JMP 0 1 //Addr18.
JMP 0 1 //Addr19.
SETDATA 0 3 7 //Render the brush.  Addr20.
JMP 2 16 //Jump back to the start of the loop.  Addr21.
SET 0 0 01011101 //START OF INPUT SUBROUTINE.  Set Register 0 to the key ID for W.  Addr22.
SET 0 1 11000000 //Set Register 0 to the key ID for W.  Addr23.
GETDATA 2 3 0 //Check the W.  Addr24.
MATH 1 2 5 //Move the result of GetData in.  Addr25.
IFJMP 0 34 1 //If W IS pressed, jump to the appropriate memory position.  Addr26.
SET 0 0 01011000 //Set Register 0 to the key ID for A.  Addr27.
SET 0 1 01000000 //Set Register 0 to the key ID for A.  Addr28.
GETDATA 2 3 0 //Check the A.  Addr29.
MATH 1 2 5 //Move the result of GetData in.  Addr30.
IFJMP 0 32 1 //If A IS pressed, jump to the appropriate memory position.  Addr31.
SET 0 0 01011100 //Set Register 0 to the key ID for S.  Addr32.
SET 0 1 11000000 //Set Register 0 to the key ID for S.  Addr33.
GETDATA 2 3 0 //Check the S.  Addr34.
MATH 1 2 5 //Move the result of GetData in.  Addr35.
IFJMP 0 30 1 //If S IS pressed, jump to the appropriate memory position.  Addr36.
SET 0 0 01011001 //Set Register 0 to the key ID for D.  Addr37.
SET 0 1 00000000 //Set Register 0 to the key ID for D.  Addr38.
GETDATA 2 3 0 //Check the D.  Addr39.
MATH 1 2 5 //Move the result of GetData in.  Addr40.
IFJMP 0 28 1 //If D IS pressed, jump to the appropriate memory position.  Addr41.
SET 0 0 01001000 //Set Register 0 to the key ID for SPACEBAR.  Addr42.
SET 0 1 00000000 //Set Register 0 to the key ID for SPACEBAR.  Addr43.
GETDATA 2 3 0 //Check the SPACEBAR.  Addr44.
MATH 1 2 5 //Move the result of GetData in.  Addr45.
IFJMP 0 26 1 //If SPACEBAR IS pressed, jump to the appropriate memory position.  Addr46.
SET 0 0 01011100 //Set Register 0 to the key ID for Q.  Addr47.
SET 0 1 01000000 //Set Register 0 to the key ID for Q.  Addr48.
GETDATA 2 3 0 //Check the Q.  Addr49.
MATH 1 2 5 //Move the result of GetData in.  Addr50.
IFJMP 0 28 1 //If Q IS pressed, jump to the appropriate memory position.  Addr51.
SET 0 0 01011001 //Set Register 0 to the key ID for E.  Addr52.
SET 0 1 01000000 //Set Register 0 to the key ID for E.  Addr53.
GETDATA 2 3 0 //Check the E.  Addr54.
MATH 1 2 5 //Move the result of GetData in.  Addr55.
IFJMP 0 33 1 //If E IS pressed, jump to the appropriate memory position.  Addr56.
SET 0 0 00000000 //Unset 0.  Addr57.
SET 0 1 00000000 //Unset 0.  Addr58.
JMP 2 50 //Jump back to the render loop.  Addr59.
MATH 15 5 1 //W WAS PRESSED.  Increment Y down by one.  Addr60.
MATH 13 5 4 //Modulo Y just in case.  Addr61.
JMP 2 5 //Jump back to the render loop.  Addr62.
MATH 15 4 1 //A WAS PRESSED.  Increment X down by one.  Addr63.
MATH 12 4 4 //Modulo Y just in case.  Addr64.
JMP 2 3 //Jump back to the render loop.  Addr65.
MATH 15 5 0 //S WAS PRESSED.  Increment Y up by one.  Addr66.
MATH 13 5 4 //Modulo Y just in case.  Addr67.
JMP 2 3 //Jump back to the render loop.  Addr68.
MATH 15 4 0 //D WAS PRESSED.  Increment X up by one.  Addr69.
MATH 12 4 4 //Modulo Y just in case.  Addr70.
JMP 2 3 //Jump back to the render loop.  Addr71.
MATH 9 2 5 //Move the contents of Address 9 (the brush toggle) into 2 for IFJMP use.  Addr72.
IFJMP 0 2 0 //Is the brush up?  Addr73.
JMP 0 3 //Nope.  Addr74.
SET 9 3 00000001 //Turn the brush on.  Addr75.
JMP 0 2 //Skip past turning it off.  Addr76.
SET 9 3 00000000 //Turn the brush off.  Addr77.
JMP 2 7 //Jump back to the render loop.  Addr78.
SET 8 0 00000000 //Addr79.
SET 8 1 00000000 //Addr80.
SET 8 2 00000000 //Addr81.
SET 8 3 00000000 //Addr82.
MATH 7 8 5 //Splice the color in.  Addr83.
PMOV 7 8 0 1 30 1 //THING.  Addr84.
MATH 15 8 1 //Q WAS PRESSED.  Increment COL down by one.  Addr85.
MATH 14 8 4 //Modulo COL just in case.  Addr86.
PMOV 8 7 28 31 30 0 //Splice it back into the renderer.  Addr87.
JMP 2 10 //Jump back to the render loop.  Addr88.
SET 8 0 00000000 //Addr89.
SET 8 1 00000000 //Addr90.
SET 8 2 00000000 //Addr91.
SET 8 3 00000000 //Addr92.
MATH 7 8 5 //Splice the color in.  Addr93.
PMOV 7 8 0 1 30 1 //THING.  Addr94.
MATH 15 8 0 //E WAS PRESSED.  Increment COL up by one.  Addr95.
MATH 14 8 4 //Modulo COL just in case.  Addr96.
PMOV 8 7 28 31 30 0 //Splice it back into the renderer.  Addr97.
JMP 2 10 //Jump back to the render loop.  Addr98.

I'm really quite proud of it, and I think it's a good proof-of-concept to show that you legitimately can build anything in Senbir.

Use F to turn the computer on, then select the keyboard, then WASD to move your cursor, Q/E to cycle through the colors, and spacebar to toggle if your brush is "down" or not (effects whether or not it, well, paints, when you move the cursor) - it's simple, but it'll let you doodle some basic text messages or pixel art.

TCPaint (Extended Edition)

I've also been toying with a Custom preset for a much fancier computer (4kB of RAM, 32 kB drive, 6-bit 128x64 monitor with a proper RGB color palette, clockspeed 180hZ, the apparent maximum on my computer) and made an updated version of TCPaint for it.

CUSTOM PRESET (Compy6c/CustomPreset.cps)

1024
30000
6
7
0
0
0
0.3333333
0
0
0.6666667
0
0
1
0
0
0
0.3333333
0
0.3333333
0.3333333
0
0.6666667
0.3333333
0
1
0.3333333
0
0
0.6666667
0
0.2470588
0.6666667
0
0.6666667
0.6666667
0
1
0.6666667
0
0
1
0
0.3333333
1
0
0.6666667
1
0
1
1
0
0
0
0.3333333
0.3333333
0
0.3333333
0.6666667
0
0.3333333
1
0
0.3333333
0
0.3333333
0.3333333
0.3333333
0.3333333
0.3333333
0.6666667
0.3333333
0.3333333
1
0.3333333
0.3333333
0
0.6666667
0.3333333
0.3333333
0.6666667
0.3333333
0.6666667
0.6666667
0.3333333
1
0.6666667
0.3333333
0
1
0.3333333
0.3333333
1
0.3333333
0.6666667
1
0.3333333
1
1
0.3333333
0
0
0.6666667
0.3333333
0
0.6666667
0.6666667
0
0.6666667
1
0
0.6666667
0
0.3333333
0.6666667
0.3333333
0.3333333
0.6666667
0.6666667
0.3333333
0.6666667
1
0.3333333
0.6666667
0
0.6666667
0.6666667
0.3333333
0.6666667
0.6666667
0.6666667
0.6666667
0.6666667
1
0.6666667
0.6666667
0
1
0.6666667
0.3333333
1
0.6666667
0.6666667
1
0.6666667
1
1
0.6666667
0
0
1
0.3333333
0
1
0.6666667
0
1
1
0
1
0
0.3333333
1
0.3333333
0.3333333
1
0.6666667
0.3333333
1
1
0.3333333
1
0
0.6666667
1
0.3333333
0.6666667
1
0.6666667
0.6666667
1
1
0.6666667
1
0
1
1
0.3333333
1
1
0.6666667
1
1
1
1
1
False
8192

TCPAINT ITSELF (Paint.casm)

//==PAINT==
//WASD to navigate.  Spacebar toggles if you're painting or not.  Use E and Q to shift forwards and backwards through the list of colors, respectively.
//This version was made for the COMPY-6C, with its 128x64 resolution, and 64-color capability.
//=REGISTER USAGE=
//REGISTER 00: BRUSH DOWN?
//REGISTER 01->2: KEY PRESS THIS TICK
//REGISTER 03: USED FOR IFJMPS
//REGISTER 04: BRUSH X
//REGISTER 05: BRUSH Y
//REGISTER 06: BACKGROUND COLOR REGISTER (USED IF BRUSH IS NOT DOWN)
//REGISTER 07: BRUSH COLOR REGISTER (USED IF BRUSH IS DOWN)
//REGISTER 08: TEMPORARY MODIFICATION REGISTER
//REGISTER 12: INT 128
//REGISTER 13: INT 64
//REGISTER 14: INT 64
//REGISTER 15: INT 1
SET 15 3 00000001 //Set register 15 to the integer 01.  Addr0.
SET 14 3 01000000 //Set register 14 to the integer 64.  Addr1.
SET 13 3 01000000 //Set register 13 to the integer 64.  Addr1.
SET 12 3 10000000 //Set register 12 to the integer 128.  Addr2.
SET 6 0 00000000 //Set register 6 to have the appropriate color.  Addr3.
SET 7 0 11111100 //Set register 7 to have the appropriate color - white.  Addr4.
GETDATA 2 3 0 //Get the last keyboard input.  Addr5.
PMOV 1 2 0 31 0 0 //Move the last keyboard input into register 2.  Addr6.
IFJMP 0 15 1 //If a key was pressed, jump to the input subroutine.  Addr7.
JMP 2 3 //Otherwise, do nothing.  Addr8.
PMOV 9 2 0 31 0 0 //Put the "brush down" variable in so IFJMP'll accept it.  Addr9.
IFJMP 0 2 0 //Jump to the background restore if the brush isn't down.  Addr10.
JMP 0 2 //Otherwise, jump past it.  Addr11.
SETDATA 0 3 6 //Wipe the old one.  Addr12.
PMOV 4 7 25 31 13 1 //Splice the last 7 bits of the X register (the actual x position) into the rendering register, offset +6 (<28>XXXX -> CCXXXX<26>).  Addr13.
PMOV 5 7 26 31 19 1 //Splice the last 6 bits of the Y register (the actual y position) into the rendering register, offset +9 (<29>YYY -> CCXXXXYYY<23>).  Addr14.
PMOV 7 8 0 31 26 1 //Addr15.
GETDATA 0 3 8 //Get the monitor data.  Addr16.
MATH 1 6 5 //Paste the color in. Addr17.
JMP 0 1 //Addr18.
JMP 0 1 //Addr19.
SETDATA 0 3 7 //Render the brush.  Addr20.
JMP 2 16 //Jump back to the start of the loop.  Addr21.
SET 0 0 01011101 //START OF INPUT SUBROUTINE.  Set Register 0 to the key ID for W.  Addr22.
SET 0 1 11000000 //Set Register 0 to the key ID for W.  Addr23.
GETDATA 2 3 0 //Check the W.  Addr24.
MATH 1 2 5 //Move the result of GetData in.  Addr25.
IFJMP 0 34 1 //If W IS pressed, jump to the appropriate memory position.  Addr26.
SET 0 0 01011000 //Set Register 0 to the key ID for A.  Addr27.
SET 0 1 01000000 //Set Register 0 to the key ID for A.  Addr28.
GETDATA 2 3 0 //Check the A.  Addr29.
MATH 1 2 5 //Move the result of GetData in.  Addr30.
IFJMP 0 32 1 //If A IS pressed, jump to the appropriate memory position.  Addr31.
SET 0 0 01011100 //Set Register 0 to the key ID for S.  Addr32.
SET 0 1 11000000 //Set Register 0 to the key ID for S.  Addr33.
GETDATA 2 3 0 //Check the S.  Addr34.
MATH 1 2 5 //Move the result of GetData in.  Addr35.
IFJMP 0 30 1 //If S IS pressed, jump to the appropriate memory position.  Addr36.
SET 0 0 01011001 //Set Register 0 to the key ID for D.  Addr37.
SET 0 1 00000000 //Set Register 0 to the key ID for D.  Addr38.
GETDATA 2 3 0 //Check the D.  Addr39.
MATH 1 2 5 //Move the result of GetData in.  Addr40.
IFJMP 0 28 1 //If D IS pressed, jump to the appropriate memory position.  Addr41.
SET 0 0 01001000 //Set Register 0 to the key ID for SPACEBAR.  Addr42.
SET 0 1 00000000 //Set Register 0 to the key ID for SPACEBAR.  Addr43.
GETDATA 2 3 0 //Check the SPACEBAR.  Addr44.
MATH 1 2 5 //Move the result of GetData in.  Addr45.
IFJMP 0 26 1 //If SPACEBAR IS pressed, jump to the appropriate memory position.  Addr46.
SET 0 0 01011100 //Set Register 0 to the key ID for Q.  Addr47.
SET 0 1 01000000 //Set Register 0 to the key ID for Q.  Addr48.
GETDATA 2 3 0 //Check the Q.  Addr49.
MATH 1 2 5 //Move the result of GetData in.  Addr50.
IFJMP 0 28 1 //If Q IS pressed, jump to the appropriate memory position.  Addr51.
SET 0 0 01011001 //Set Register 0 to the key ID for E.  Addr52.
SET 0 1 01000000 //Set Register 0 to the key ID for E.  Addr53.
GETDATA 2 3 0 //Check the E.  Addr54.
MATH 1 2 5 //Move the result of GetData in.  Addr55.
IFJMP 0 33 1 //If E IS pressed, jump to the appropriate memory position.  Addr56.
SET 0 0 00000000 //Unset 0.  Addr57.
SET 0 1 00000000 //Unset 0.  Addr58.
JMP 2 50 //Jump back to the render loop.  Addr59.
MATH 15 5 1 //W WAS PRESSED.  Increment Y down by one.  Addr60.
MATH 13 5 4 //Modulo Y just in case.  Addr61.
JMP 2 5 //Jump back to the render loop.  Addr62.
MATH 15 4 1 //A WAS PRESSED.  Increment X down by one.  Addr63.
MATH 12 4 4 //Modulo Y just in case.  Addr64.
JMP 2 3 //Jump back to the render loop.  Addr65.
MATH 15 5 0 //S WAS PRESSED.  Increment Y up by one.  Addr66.
MATH 13 5 4 //Modulo Y just in case.  Addr67.
JMP 2 3 //Jump back to the render loop.  Addr68.
MATH 15 4 0 //D WAS PRESSED.  Increment X up by one.  Addr69.
MATH 12 4 4 //Modulo Y just in case.  Addr70.
JMP 2 3 //Jump back to the render loop.  Addr71.
MATH 9 2 5 //Move the contents of Address 9 (the brush toggle) into 2 for IFJMP use.  Addr72.
IFJMP 0 2 0 //Is the brush up?  Addr73.
JMP 0 3 //Nope.  Addr74.
SET 9 3 00000001 //Turn the brush on.  Addr75.
JMP 0 2 //Skip past turning it off.  Addr76.
SET 9 3 00000000 //Turn the brush off.  Addr77.
JMP 2 7 //Jump back to the render loop.  Addr78.
SET 8 0 00000000 //Addr79.
SET 8 1 00000000 //Addr80.
SET 8 2 00000000 //Addr81.
SET 8 3 00000000 //Addr82.
MATH 7 8 5 //Splice the color in.  Addr83.
PMOV 7 8 0 5 26 1 //THING.  Addr84.
MATH 15 8 1 //Q WAS PRESSED.  Increment COL down by one.  Addr85.
MATH 14 8 4 //Modulo COL just in case.  Addr86.
PMOV 8 7 24 31 26 0 //Splice it back into the renderer.  Addr87.
JMP 2 10 //Jump back to the render loop.  Addr88.
SET 8 0 00000000 //Addr89.
SET 8 1 00000000 //Addr90.
SET 8 2 00000000 //Addr91.
SET 8 3 00000000 //Addr92.
MATH 7 8 5 //Splice the color in.  Addr93.
PMOV 7 8 0 5 26 1 //THING.  Addr94.
MATH 15 8 0 //E WAS PRESSED.  Increment COL up by one.  Addr95.
MATH 14 8 4 //Modulo COL just in case.  Addr96.
PMOV 8 7 24 31 26 0 //Splice it back into the renderer.  Addr97.
JMP 2 10 //Jump back to the render loop.  Addr88.

NOTES

The color palette is ordered from least blue to most blue, then least green to most green, then least red to most red.  Color slot 1 is a dim red, while 3 is bright.  Color slot 5 is a dim yellow, combining both dim red and dim green.  Etc.  Every 16 colors, the blue level increases.

Compy-6C Color Palette

The color palette used for the monitor of my Compy-6C preset.
Labeled Palette
With the color ID of each one scribbled overtop. Could be useful for development, proper.
(+1)

While admittedly not as neat as your paint program, the program I want to share in this post doesn't need more than the default mode to work. It's an image viewer - that manages to fit both the viewer and the image to show into ROM (doesn't use the harddrive), with some space left over. (Not quite enough space for a screen one bittage larger, but I think it would only need two more words than there is room for, and only for the additional image data - the code itself should only need two numbers changed.)

I actually thought I had been clever by using self-modifying code to do it, but only because I hadn't done the bootloader task yet (I had the idea and wanted to see if I could "cheat" by drawing the image myself instead) - when I did, I discovered that using self-modifying code is actually required for that (since there's no pointers), so I apparently wasn't being quite as clever as I thought... ^_^' :)

Obviously, this program does things a bit differently than the "win" program on the disk does (which I took a look at only after writing mine). Mine only stores the color values for each pixel, and draws them in a fixed order, which goes column by column.

SET 15 3 1 // R15=1 : for doing various math
SET 14 1 10000000 // R14[8:8]=1 : 1-value for incrementing Y
MOVI 10 26 // R10=ram[26] : this instruction is used as data
MOVI 10 18 // R10=ram[18] : load the next word of image data : self-modified
MATH 2 2 1 // R2=0 : initialize loop counter
PMOV 15 3 0 31 4 0 // R3=16 : max value that ends the loop, pixels per word
PMOV 10 1 0 1 0 0 // R1[0:1]=R10[0:1] : copy current color into R1
SETDATA 0 3 1 // write(screen, R1) : write pixel to screen
MATH 14 1 0 // R1+=R14 : increment Y position in R1 (overflows to X position)
PMOV 10 10 0 31 2 0 // R10<<2 : move next pixel into place
MATH 15 2 0 // R2++ : add one to the loop counter
IFJMP 2 5 3 // loop: if R2 < R3 then jump back 5 instructions
MOVI 2 3 // R2=ram[3] : load MOVI instruction at address 3 into R2
MATH 15 2 0 // R2++ : increment address of MOVI instruction
MOVO 2 3 // ram[3]=R2 : overwrite MOVI instruction at address 3
MOVI 3 2 // R3=ram[2] : load instruction at address 2 into register 3
IFJMP 1 3 3 // loop: if R2 < R3 then jump to instruction at address 3
HLT // end of program - image is being displayed
DATAC 11111111111111111101010110101011 // image data: 16x8 pixels, 2 bits
DATAC 11101010010101111110100101101011 // per pixel (hence 8 words total),
DATAC 11101010010101111101010110101011 // stored in column-first order
DATAC 11101010101010111101010101010111 // (so two columns per word).
DATAC 11101010101010111101010101010111
DATAC 11100101101010111110101001011011
DATAC 11010101010101111110101010101011
DATAC 11010101011001111111111111111111

(I grabbed the image from the gif in the game description, but I also discovered that the PC already has a working bootloader built into it - starting the PC without first compiling a program works just fine and shows the "win" image...)

Since I had some room left over, and my initial simple bootloader implementation was rather small, I considered combining them to show an error if the disk program wanted too many words loaded from disk, but it turned out there wasn't quite that much room left over. (I ended up just making the bootloader draw an S instead (for "Size error") if more than 26 words was asked for, since that's the most it could actually do. It still has some room left over that I'm not sure what to do with.)

By the way, thanks for the nice game/sandbox. Already just from the description it reminded me of TIS-100 (which is not a bad thing, quite the opposite), just with a more conventional architecture, and the game itself didn't disappoint on that front. While it does have some rough edges, considering it started as a Ludum Dare entry and thus currently has very little development time behind it (as compared to most games), I'm actually impressed how well it does work. Seeing as you seem to be continuing work on it, I figure those edges will probably be smoothed out over time. Thumbs up from me. :)

Developer

Very cool!  Don't undersell it - writing your own win screen that fits ENTIRELY in Default Mode's 32-address RAM?  That's no small feat!

And yeah - self-modifying code is pretty much a fact of life in world of TC-06 programming, for better and worse.  A major influencer of the assembly language here is Core Wars' Redcode, which was by nature designed to be super self-modifying.  This is definitely a way more efficient win program than mine, and I think it actually looks better, to boot!

(As for the bootloader already being present: it's not a bug, it's a feature!  I wrote it early on and just decided to leave it in as an easter egg of sorts.  ^^)

Finally, you're welcome!  It's not as gamey as I think a lot of people would've liked, being more of a proof-of-concept for the TC-06 architecture itself, but...I'm super proud of it, and seeing other people building programs for it definitely gives me the warm fuzzies.  I do plan to keep working on it, filling out the remaining op-code spaces, polishing up the ones we've got, and so on.  Among other things on the TO-DO list, I'd like to set it up so "Tutorials" can be loaded from text files, meaning it'd be possible to make levels for the game yourself!

Thanks so much for playing!

(+1)

It's not a small feat? Aw, but I tried to make it as small as I could... ;)

As for efficiency, well, mine might be more space efficient than yours regarding image size (though not in program size), but it wouldn't take much to make yours far more time efficient (as in fast). Simply remove the MOVI/PMOV/MOVO triplet and replace the IFJMP/JMP combo with the opposite IFJMP, and it would be down to a very tight 4 instructions per pixel. (To be honest, I've been wondering if this easy optimization opportunity was left in as an easter egg.) I don't think anything tighter (aka faster) than that is possible with the current instruction set, at least without ending up in an infinite loop (which might also cause a black pixel at 0,0). And as a bonus, yours can do animations. All that, in just 11 instructions (if you also move the DATACs). And unlike mine it doesn't assume the initial values of the registers - if it did, it could be just 8.

Besides, while your image format is larger than mine, I don't think it is anywhere near as bad as the image format I came up with in my youth. This was in the DOS era, on an 80286 I believe (16-bit real mode), and I had discovered the (probably 0xA000) memory segment for the video memory, but didn't really understand how it worked. I had library routines that let me draw to the screen, but I wanted to save the drawn image to disk and then load it again later. The obvious way was to do a simple memory dump/restore. I don't remember the exact details, but I think that the image didn't fit inside the offsets of that first segment, so I had to loop through both the segments and offsets until I had enough data for the entire image. So far so good, but in my ignorance I looped through the full 16-bit range of the offsets, for each of the relevant segments. What I hadn't realized is that the segment size was 16, not 64K. Which means that the segment:offset address A000:0010 refers to the same memory location as A001:0000 does. In other words, there ended up being a lot of redundant information in that image file format, and for no good reason... (These days, I'm not sure whether to be more embarrassed or amused.)

The idea about loadable levels is a good one. It also gave me a kinda similar idea: loadable peripherals (to be attached to SETDATA/GETDATA ports). Using something like embedded Lua, it could be possible for people to write their own peripherals (could even have an in-game editor if you wanted to), that could do nearly anything - expanded memory, a coprocessor (8087 anyone?), a port multiplexer, even some kind of networking (fake or real). Imagine a custom mode where you have two (or more) TC-06 computers, and a homegrown peripheral for networking them together. :D (Oooh.... Or a multi-processor machine. Imagine the chaos (and obfuscated code) you could generate by "self"-modifying the code the other CPUs are running, in realtime... :) )

I'm not sure if such custom peripherals could provide "physical" objects for the 3D environment, for user interaction, as I don't know enough about gamedev/3D/etc. to say whether it would be realistic to do that via such a scripting language - but many possible peripherals wouldn't really need that anyway. Of course, if it can be done... virtual blinkenlights anyone? :)

Those peripherals wouldn't necessarily be intended to make the player's life easier either - someone could e.g. make a disk peripheral that it takes a few cycles to read from or write to, like it does for real disks, and then the player has to handle that response time in their code to succeed on that (custom) level.

Developer

I wish it was an easter egg!  I'm still learning my way around Assembly, and that was genuinely the best win screen I could think of at the time.  One thing worth noting about IFJMP and JMP - they will immediately run whatever they jump to, essentially meaning they take no clock cycles.  Realistic?  Probably not.  But an important quality of life feature?  Definitely.  At the low speeds the TC-06 runs at, every IFJMP requiring a full clock cycle just to get to whatever it's supposed to run would have a drastic performance impact.

As for image format sizing, honestly, I'd just say to have a giggle about it.  Everyone does goofy stuff when they're still learning their way around computers - I know I did!  Took an embarrassingly long time for me to learn that file formats are more than their extension - I got started with modding Morrowind waaaaay back in the day, and I, on several occasions, tried to make "models" by renaming various image files and such.  Wasn't till a bit later that I found Blender and got started actually modeling.

On modded peripherals?  I'd love to.  Adding new 3d ones might be harder, but I think it'd be doable.  I KNOW I want to ship a functioning network peripheral (or several) for use in the base game, and then work on making some kind of internet system go with it (like TCP/IP) - making the grand finale of the built-in levels be an actual hacking mission or something would be super cool.  Given my noobness at Assembly, I have a feeling it wouldn't be that hard to break, even for the average player.  As a bonus, with actual over-the-internet support for the network peripheral, you could even engage in hacking battles with other players, which would probably be tons of fun.

... Heh. You just led me to finding an easily reproduced crash. (Well, I can reproduce it easily anyway, and I expect you can too.)

One of my first thoughts on hearing that fact about IFJMP/JMP was not so much that it wasn't realistic (which it indeed isn't), but that it was risky. So I decided to test what I had in mind, to see what effect it would actually have. I figured it could be anything from already being handled, to locking up in an infinite loop, to crashing (which is what it turned out to be).

Up to you how to fix this (assuming you don't want to keep that crash), there are ways to do it without making these instructions take a cycle. (Though those ways are probably more complicated to implement, depending on how your code works right now - I haven't really looked at it.)

I'll also note that this crash only happens with JMP - the equivalent test case with IFJMP seems to take a cycle on each instruction in the debugger, and doesn't crash the game without the debugger either. As far as I can tell, it takes a cycle whether or not the condition matches. So, are you sure it isn't just JMP that has this behaviour?

Test steps: with the computer selected, enter the following program, compile it, compile to ROM, and start the computer. (If in debug mode, click the step button.)

JMP 0 1
JMP 2 1

Expected result: Game continues to work fine; virtual computer can be turned off to change the program, etc.. (If in debug mode, debugger continues to work.)

Actual result: Game crashes with a "Segmentation fault" message in the terminal (not in the log file).

Developer

Huh, maybe IFJMP doesn't auto-run what it jumps to after all?  I'll have a look at that later.

As for the crash - that's...odd.  I understand why it's crashing (function recursion and all), but I'd expect it to just lock up and stop responding, rather than have a segmentation fault.  Best idea I've got would probably be to have it automatically halt and stop execution if a given clock cycle for the TC-06 takes more than a certain amount of time, or maybe if a certain function runs more than a certain number of times per tick.  I'm loathe to add an op-code limiter, considering it would, well, limit possible programs, but...it might be necessary.  Or I just say it's a feature, not a bug?  Putting in stuff that will obviously blow up the computer should, well, blow up the computer.

I have a feeling why it crashes is that it makes temporary variables (a lot, actually) in each function, and when that function's getting run recursively, the data piles up fast, so fast the garbage collector can't catch up, and thusly, the program segfaults a moment later when it runs out of memory to put stuff in.

(+1)

I kind of mostly expected it to lock up as well, actually, but that's not what I got.

About blowing up the computer; in any regular computer, this kind of loop wouldn't actually blow it up - it would just make it sit there apparently doing nothing, while actually working very hard (at changing the instruction pointer).

With the semantics of immediately running the targeted instructions, I can see it being a problem for the TC-06 though - but since those semantics aren't documented, and no other computer works that way, having JMP work that way here is rather unexpected. Having it blow up the computer is thus not obvious, and would probably surprise most developers.

While my test case is indeed obvious, that's because it was constructed to be (for demonstration purposes), and was already in a context where we talked about the JMP semantics. I can easily see some player accidentally creating such a loop if they're not careful enough while changing their program - and if the game crashes, then their program is probably lost, so they can't really figure out what the problem was later, either. They're more likely to think the game just crashed on its own, not due to the program they put in.

So if you want it to blow up the computer, maybe detect it and blow up the virtual computer instead of the game itself?

(Come to think of it, these semantics might be the cause of some trouble I had with figuring out how the jump offsets work by looking in the debugger - if, after executing a JMP instruction, it shows that the next instruction to be executed is the one _after_ the one I was trying to jump to, then the most obvious explanation seems to be that the jump offset was wrong, not that the computer already executed the targeted instruction. I'm not sure if this was really it, though, because I think I've mostly been using IFJMP, not so much JMP.)

--

About the crash; if you're using recursion for JMP, then it's probably a stack overflow - that's a common reason for getting a segmentation fault, especially if the system uses guard pages to protect the rest of the program's memory from such overflows.

A stack overflow is not something GC can help with, not just because all of those objects are still technically reachable (it must assume the recursed-into method will return eventually), but because the call stack contains not just the pointers to those objects, but also other things like the return address, which obviously can't be removed anyway before the called method returns. (Unless you used proper tail recursion, but I don't know if .NET/Mono supports that.) So even if you didn't have any local temporary variables, an infinite recursion would still overflow the stack, though it would probably take longer to do so (as in, freeze a bit first, then crash, instead of crashing quickly).

As for how to fix it without introducing limitations, I'll suggest a solution I've used to protect similarly recursive code: keep a set of states, initially empty, and check if that set already contains the state I'm about to call from/to - if it does, then abort to avoid a loop, otherwise, add the state and do the call.

The most tricky bit is usually to figure out what that state should be, especially to maintain reasonable performance - but here I think it's actually pretty easy. As far as I can tell, none of the JMP instructions can modify any state that any of the JMP instructions depend on to figure out where they're going to jump to. (And if you hit a non-JMP instruction, which could change that state, then you're done jumping anyway.) So the only state that seems to matter is which JMP instruction you're about to execute, which is completely determined by its address, which is a simple integer. I don't expect a (rather small) set of integers to cause any performance issues.

To be specific, I think that you can keep a set of addresses, which starts out empty at the start of a clock cycle - and when you're about to execute a JMP instruction, you first check to see if its address is already in the set. If it is, then you have already executed this instruction in this clock cycle, so you're in a loop. In that case, don't actually do the jump, just return. Otherwise, you add the address to the set, and do the jump (aka recursive call).

I believe this would have the effect of making the computer seem to stop at the first instruction in the loop, since it would go around the loop and find the same instruction, and stop there. Then, the next clock cycle, it would do the same thing again, stopping at the same place.

(Note that you can't just keep the address of the first JMP of the clock cycle, since that might be jumping into a loop that it isn't itself a part of.)

With this solution, the computer would at most go through every instruction in memory once per clock cycle (if they're all a big loop), which wouldn't be good if you have a custom mode with a lot of memory, but would at least be better than an infinite recursion. If that computer has enough memory, you could still overflow the stack that way, but that's impossible to avoid with a recursive solution (without tail recursion anyway).

Of course, this is just a suggestion for your consideration. You might have better ideas. (Also, feel free to tell me to shut up if you'd prefer to figure out how to do things on your own (or at least without me butting in).)

P.S. I just remembered - the TIS-100 has an explicit "Halt and Catch Fire" instruction. IIRC it just rebooted the (virtual) computer though. I think there was an achievement for finding (and running) it.

P.P.S. I just thought of an even simpler test case. "JMP 0 0". Which sounds like the kind of thing I might put in as a placeholder, intending to look up the numbers I need to insert later. Which it would be easy to forget to actually do...

Developer

So it wouldn't blow your COMPUTER up, but your fans might fly to pieces trying to cool it down.  :p

I'll include a documentation update with the next update - JMP and IFJMP should definitely have some more detailing, both on the running functions/explodey aspect, and just in general, considering they're both heavily influenced by Redcode and thusly likely to confuse folks.

I know it's not immediately related to the JMP discussion, but should I think about adding an auto-save whenever you compile a program?  E.G, to [ProgramName].autosave.casm?  That way if your game explodes, you're not gonna lose your code.  Same for the drive, maybe do an autosave of it at regular intervals?

An in-game flame-out animation might be kinda fun - if it detects the loop, the halt light comes on and steam comes outta the box.

--

public List<int> runAddresses; //assume it's initialized elsewhere
public int currentCounter; //self-evident
public int[] RAM; //self-evident
void TimedUpdate() //this runs at the computer's clockrate to execute code and such
{
    //code surrounding halts and such goes here
    runAddresses.Clear();
    DoProcess();
}
void DoProcess() //this actually executes op-codes & whatnot
{
    runAddresses.Add(currentCounter);
    int data,opCode,arguments; //data is the memory data at RAM[currentCounter], and arguments is the last 28 bits of said data
    //insert all the other functions and such
    if(opCode==4) //JMP
    {
        int destAddress; //assume this is set by reading the arguments & whatnot
        if(runAddresses.Contains(destAddress))
        {
            DoFlameout();
        }
    }
}

Rough pseudocode for how to integrate the recursive loop prevention as you suggested it.  Clear the list of run addresses before running op-codes, and add the current program counter to the list of run addresses at the beginning of the op-code-runner function.  If the list of run addresses contains whatever JMP is supposed to be jumping to, cause a flame-out animation & halt the processor, rather than running it.

This SHOULD catch all possible recursive JMP loops that'd cause a stack overflow, without breaking things like the Blinkenlights loop.  Only situation I can think of would be something with self-modifying code looping, but...that shouldn't even be an issue (since a non-JMP call will reset the list of addresses) in the current version of the game.  A multithreaded two-core version of the TC-06 could encounter problems with that, if your modification was happening on the other processor, though.  :/

I do appreciate the suggestions & bug reports - thank you for providing them!

(As for halting and catching fire - I think that should literally just be "run JMP 0 0 for a special surprise" or something :P)

(+1)

Some kind of auto-save would probably be a good idea, yes - much like for a text editor, since it includes one - and I do agree that it should not auto-save by overwriting the proper (manual) save file(s). I believe the approach you suggest should work - not sure if it's the best one, or whether it should be a game-wide auto-save file, I suppose it depends on how/when you want to detect and load it. (As in, on game start, or when a user tries to load a previous save, or when they re-enter a level with any auto-save file, or what. Also consider asking first instead of just loading, in case the auto-save itself got corrupted enough to crash the game when loaded.) Whether to auto-save the entire game state in one file, or several, probably depends on what features you want to have as well - e.g. if you want to allow save/load of disk state separately from program or level, keeping them separate (and separately restorable) is probably better, but keeping the entire auto-save in one file would probably be easier if you (maybe later) find you want to save other parts of the game state as well (e.g. which stage of a tutorial the player was at).

To be honest, I think that's the largest and in many ways most difficult part of creating something like this - deciding how exactly you want it to work, to be properly user-friendly. I don't have any real answers for that part, it's not really my field - so you should consider anything I say about it to be just suggestions for things to consider when you make your own decisions about it.

--

Your pseudocode is pretty much it, yes - or close enough anyway. (Assuming the recursion only happens in the else branch of the inner if.) Not exactly what I had in mind (ends up halting at a different instruction), but I believe it should work.

Actually, come to think of it, assuming that no instruction should be able to be repeated (via recursion) in the same clock cycle without a flameout, there's a slightly simpler and safer variant that would catch loops of any instruction, not just a JMP. The additional safety comes from the code being concentrated in fewer places, and not needing to be duplicated for each relevant instruction.

... (the rest is same as before...)
void DoProcess() //this actually executes op-codes & whatnot
{
    if(runAddresses.Contains(currentCounter))
    {
        DoFlameout();
        return;
    }
    runAddresses.Add(currentCounter);
    ... code for each instruction goes here, no further checks needed...
}

Of course, if you ever add any instructions that should be able to re-run the same address immediately (e.g. an "overwrite self and immediately re-execute" instruction), this won't work and you'd have to spread it out per instruction again. But I'd suggest against adding something like that, since it's rather dangerous (it could overwrite itself with itself, and then there's a loop again. Better to say that the overwrite requires a clock cycle, even if the implicit jump-to-self that follows doesn't).

And yes, this solution would somewhat limit a two-core version of the PC, but logically, if such a loop would break a single-core CPU, then it should also break the core that ran the loop in a two-core setup as well, even if the other core would still work afterwards. (Which it might not, since the first core breaking might also break something on the motherboard that the second core needs to function.) It's also easy to work around - just ensure that your busy loop includes a non-JMP instruction to give the second core a moment between instructions to modify the first core's memory. (It's kind of arguable whether it matters which of the two instructions it modifies...) Or use IFJMP instead, since that's not instant. (Unless you intend to make it be?)

(+1)

OK, I now have another program I want to share. Or, kind of two. But one uses the other, so... The combination is one program? Maybe? I dunno.

This program also works in the default mode, and is primarily meant as a demonstration of a pretty old technique for handling code that won't fit in RAM. (I was introduced to it back in my DOS days, using Turbo Pascal... 5 I think? or 6?)

As such, this demonstration program basically goes the other way than my previous one, being far larger - in fact, as currently written, it fills most of the disk drive, taking up 240 addresses. Many of those are due to NILLISTs, though, which I included primarily because they made the development work easier. (More details below.)

The technique is known as overlays, and essentially entails loading only a part of the program at any one time, and then when a different part is needed, that part is loaded instead, on top of the other code, thus overlaying it - hence the name.

There's essentially two main parts of this program - one is the overlay loader, which stays resident in RAM at all times, and can be used by any program to load a chunk of code from the disk - while the other part is the demonstration program that uses overlays.

The overlay loader

In my implementation, the bootloader is also the overlay loader, since the task is essentially the same - in fact, the exact same code is used for the initial bootloading as for the overlay loading. Thus, my overlay loader is in ROM, not on disk - and isn't counted in the size of the demonstration program. This bootloader does still work for programs that don't use overlays, like the original win program.

Each overlay on disk is expected to have a one-word header, which contains the last address to be loaded. This works for non-overlay programs being  bootloaded because they start at address 0, which makes the number of words to load be the same as the last address to load.

A few things worth noting:

  • The loader initializes register 15 to 1, and expects you to never change it.
  • The loader uses register 14 internally, and expects you to never change it.
  • When called, the loader expects register 2 to be the disk address to load from.
  • The loader changes registers 1, 2 and 3 (and 14), but leaves the rest untouched.
  • Calling the loader is typically done with "JMP 3 9".
  • Each overlay can be at most 22 words long (so it doesn't overwrite the loader) in the game's default mode.
  • After loading an overlay, the loader always jumps to address 0.

Of course, all of these (except the last) can be ignored if you don't intend to use overlays. In that case, the loaded program can use 4 more words (26 total in default mode) before the loader has overwritten so much of itself that it can't load any more.

The main reason for using the suggested way of calling the loader is that it works even if the machine has been given more memory, as long as the loader itself has been adjusted accordingly (which you probably would want to do anyway to enable loading larger programs) - without needing to modify the program or overlay being loaded.

Here's the code for the {boot,overlay }loader:

SET 15 3 1 // R15=1 : initialize register for math use
MOVI 14 29 // R14=ram[29] : load the save-to-RAM instruction into a register
JMP 3 9 // jump to loader; R2 is already 0 which is where we should start
NILLIST 19
GETDATA 1 3 2 // R1=read(disk, R2) : read disk address of last instr. to load
MATH 1 3 5 // R3=R1 : set loop max register to that disk address
SET 14 3 0 // R14[address]=0 : initialize RAM address
MOVO 14 29 // ram[29]=R14 : update the save-to-RAM instruction; start of loop
MATH 15 14 0 // R14++ : increment RAM address
MATH 15 2 0 // R2++ : increment disk address
GETDATA 1 3 2 // R1=read(disk, R2) : read program data from disk
MOVO 1 0 // ram[0]=R1 : save loaded data to RAM; note: self-modified
IFJMP 2 5 3 // loop: jump 5 back if R2<R3
JMP 1 0 // start the loaded program

The demonstration program

The demonstration program is another implementation of the win screen, this time by using hard-coded line drawing operations rather than storing the screen as an image and loading that.

It does this without modifying itself at all, other than by loading overlays - the disk doesn't contain even a single MOVO instruction, nor any disk read/write instructions. (It could, it just doesn't need to, so it doesn't.)

There are two library procedure overlays, one for drawing horizontal lines, and one for drawing vertical lines, with parameters for where to draw that line and with what color (using registers to pass the arguments).

The program starts by calling horz-line twice for the top and bottom borders, then vert-line twice for the left and right borders, then calls horz-line in a loop to fill the background. (Thus showing overlays can be reused.)

Then, for the characters, it has a simplified copy of the vert-line procedure, which it calls 10 times for the various lines of the characters, with a few explicitly set pixels here and there.

Thus, in total it ends up drawing 20 lines plus setting 3 pixels, all done with actual code (instead of looping though a list of lines to draw, as then it would just be another image file viewer, just for a vector image instead of a raster image).


Obviously, all this code doesn't fit in 32 words of RAM, nevermind the 26 that are the most my bootloader can load from disk.

So, instead, I split it up into 10 overlays that are each 22 words or less (since that's the most my loader can load without overwriting itself in the default mode).

The exact length of each overlay varies, and some of them take advantage of this by first doing some initialization and then loading a smaller overlay on top of that initialization code, which runs and then resumes the code of the first overlay without having to reload it.

Of course, having to stop to load the next bit of code means that this runs slower (with pauses) than if everything was in RAM, but in return it's not as limited by RAM size. (Also, this demo program could still be optimized a bit.)

For ease of development (not having to keep modifying the addresses everywhere if I change the size of an overlay), the disk is split up into chunks of 24 words, that each contain one overlay. This "wastes" some space between the overlays, which is filled with NILs, but made things easier on me, so I considered it worth the tradeoff. (Of course, if I had needed more than 10 chunks, I would have run out of space. Luckily, I didn't.)

I actually wrote each overlay in a separate file, and then copied the code into a combined file with the disk formatting (and editing in the actual disk addresses), but since I did have to go back and edit things sometimes, having the chunks was nice. The combined file is the most useful one, so it's the one I've included here.

Here's the code for the demonstration program:

// main 0: draw top and bottom border
// start address: 0 = 00000000000000000000000000000000
// length: 16
DATAC 00000000000000000000000000010000 // last address: 16
JMP 0 4
DATAC 11000000000000000000000000000000 // Start pixel top-left
DATAC 00000000000000000000000000010000 // End X position
DATAC 00000000000000000000000000011000 // Disk address of hline proc
MOVI 10 1 // R10=ram[1] : load start pixel top-left
MOVI 11 2 // R11=ram[2] : load end X position
MOVI 2 3 // R2=ram[3] : load disk address of hline proc
JMP 3 9 // Jump to overlay loader : load and run the hline proc
MATH 10 2 5 // R2=R10 : previous start pixel
MOVI 10 14 // R10=ram[14] : load start pixel bottom-left
MATH 10 3 5 // R3=R10 : new start pixel
IFJMP 1 0 1 // if R2!=R3 (old start pixel is not same as new) then run again
MOVI 2 15 // R2=ram[15] : load disk address of next part of main
JMP 3 9 // Jump to overlay loader : load and run the next part of main
DATAC 11000011100000000000000000000000 // Start pixel bottom-left
DATAC 00000000000000000000000001001000 // Address of next part of main
// last address: 16
NILLIST 7 // alignment for the next overlay part
//
// subproc: draw horizontal line
// inputs:
//   R10: start pixel and color
//   R11: end X position (not inclusive - will not be drawn)
// overwrites: R1, R2, R3
// start address: 24 = 00000000000000000000000000011000
// length: 8
DATAC 00000000000000000000000000100000 // last address: 32
MATH 11 3 5 // R3=R11 : copy end X position
MATH 10 1 5 // R1=R10 : copy start pixel pos/color
MATH 2 2 1 // R2=0 : clear R2 so start pos will be the only thing in it
PMOV 1 2 2 5 26 1 // R2=R1[posX] : copy start position
SETDATA 0 3 1 // write current pixel to screen
MATH 15 2 0 // R2++ : increment X
PMOV 2 1 28 31 26 0 // R1[posX]=R2 : copy next X position
IFJMP 2 3 3 // if R2<R3 (curX < endX) then continue loop
// last address: 32
NILLIST 15 // alignment for next overlay part
//
// subproc: draw vertical line
// inputs:
//   R10: start pixel and color
//   R11: end Y position (not inclusive - will not be drawn)
// overwrites: R1, R2, R3
// start address: 48 = 00000000000000000000000000110000
// length: 8
DATAC 00000000000000000000000000111000 // last address: 56
MATH 11 3 5 // R3=R11 : copy end Y position
MATH 10 1 5 // R1=R10 : copy start pixel pos/color
MATH 2 2 1 // R2=0 : clear R2 so start pos will be the only thing in it
PMOV 1 2 6 8 23 1 // R2[posY]=R1[posY] : copy start position
SETDATA 0 3 1 // write current pixel to screen
MATH 15 2 0 // R2++ : increment Y
PMOV 2 1 29 31 23 0 // R1[posY]=R2[posY] : copy next Y position
IFJMP 2 3 3 // if R2<R3 (curY < endY) then continue loop
// last address: 56
NILLIST 15 // alignment for next overlay part
//
// main 1: draw left and right border
// start address: 72 = 00000000000000000000000001001000
// length: 16
DATAC 00000000000000000000000001011000 // last address: 88
JMP 0 4
DATAC 11000000100000000000000000000000 // Start pixel top-left
DATAC 00000000000000000000000000000111 // End Y position
DATAC 00000000000000000000000000110000 // Disk address of vline proc
MOVI 10 1 // R10=ram[1] : load start pixel top-left
MOVI 11 2 // R11=ram[2] : load end Y position
MOVI 2 3 // R2=ram[3] : load disk address of vline proc
JMP 3 9 // Jump to overlay loader : load and run the vline proc
MATH 10 2 5 // R2=R10 : previous start pixel
MOVI 10 14 // R10=ram[14] : load start pixel top-right
MATH 10 3 5 // R3=R10 : new start pixel
IFJMP 1 0 1 // if R2!=R3 (old start pixel is not same as new) then run again
MOVI 2 15 // R2=ram[15] : load disk address of next part of main
JMP 3 9 // Jump to overlay loader : load and run the next part of main
DATAC 11111100100000000000000000000000 // Start pixel top-right
DATAC 00000000000000000000000001100000 // Address of next part of main
// last address: 88
NILLIST 7 // alignment for next overlay part
//
// main 2: draw background
// start address: 96 = 00000000000000000000000001100000
// overwrites: R1, R2, R3, R10, R11, R12
// length: 20
DATAC 00000000000000000000000001110100 // last address: 116
JMP 0 4
DATAC 10000100100000000000000000000000 // Start pixel top-left
DATAC 00000000000000000000000000001111 // End X position
DATAC 00000000000000000000000000011000 // Disk address of hline proc
MOVI 10 1 // R10=ram[1] : load start pixel top-left
MOVI 11 2 // R11=ram[2] : load end X position
MOVI 2 3 // R2=ram[3] : load disk address of hline proc
JMP 0 8 // jump to the rest of the initialization
MATH 15 12 0 // R12++ : increment Y position
PMOV 12 10 29 31 23 0 // R10[posY]=R12[posY] : copy new Y position
MATH 12 2 5 // R2=R12 : copy Y position for comparison
MOVI 3 18 // R3=ram[18] : load end Y position
IFJMP 1 0 3 // if P2<P3 (curY < maxY) then continue loop
MOVI 2 19 // R2=ram[19] : load disk address of next part of main
JMP 3 9 // Jump to overlay loader : load and run the next part of main
MATH 12 12 1 // R12=0 : clear value for insertion of Y position bits
PMOV 10 12 6 8 23 1 // R12[posY]=R10[posY] : copy start Y position
JMP 3 9 // Jump to overlay loader : load and run the hline proc
DATAC 00000000000000000000000000000111 // End Y position
DATAC 00000000000000000000000001111000 // Address of next part of main
// last address: 116
NILLIST 3 // alignment for next overlay part
//
// main 3: draw W, part 1 of 2
// start address: 120 = 00000000000000000000000001111000
// overwrites: R1, R2, R3
// length: 22
DATAC 00000000000000000000000010001110 // last address: 142
MOVI 1 12 // R1=ram[12] : copy start pixel pos/color
MOVI 3 13 // R3=ram[13] : copy end Y position
JMP 1 15 // jump to drawing routine
MOVI 3 13 // R3=ram[13] : copy end Y position
IFJMP 0 4 1 // if R2!=R3 then second line is done already
SET 1 0 01001010 // R1[0]=.. : increment X position, keep rest
SET 3 3 00000111 // R3[3]=7 : update end Y position
JMP 1 15 // jump to drawing routine
SETDATA 0 0 0100110110000000000000 // draw top pixel for center of W
SETDATA 0 0 0100111000000000000000 // draw bottom pixel for center of W
MOVI 2 14 // R2=ram[14] : load disk address of next part of main
JMP 3 9 // Jump to overlay loader : load and run the next part of main
DATAC 01000100100000000000000000000000 // Start pixel, top-left
DATAC 00000000000000000000000000000100 // end Y position, middle of W
DATAC 00000000000000000000000010010000 // Address of next part of main
MATH 2 2 1 // R2=0 : clear R2 so start pos will be the only thing in it
PMOV 1 2 6 8 23 1 // R2[posY]=R1[posY] : copy start position
SETDATA 0 3 1 // write current pixel to screen
MATH 15 2 0 // R2++ : increment Y
PMOV 2 1 29 31 23 0 // R1[posY]=R2[posY] : copy next Y position
IFJMP 2 3 3 // if R2<R3 (curY < endY) then continue loop
JMP 1 3 // jump back to resume drawing commands with next line
// last address: 142
NILLIST 1 // alignment for next overlay part
//
// main 4: draw W, part 2 of 2
// note: uses code from the previous part
// start address: 144 = 00000000000000000000000010010000
// overwrites: R1, R2, R3
// length: 13
DATAC 00000000000000000000000010011101 // last address: 157
MOVI 1 10 // R1=ram[10] : copy start pixel pos/color
MOVI 3 11 // R3=ram[11] : copy end Y position
JMP 1 15 // jump to drawing routine
MOVI 3 11 // R3=ram[11] : copy end Y position
IFJMP 0 4 1 // if R2!=R3 then second line is done already
SET 1 0 01010010 // R1[0]=.. : decrement X position, keep rest
SET 3 3 00000111 // R3[3]=7 : update end Y position
JMP 1 15 // jump to drawing routine
MOVI 2 12 // R2=ram[12] : load disk address of next part of main
JMP 3 9 // Jump to overlay loader : load and run the next part of main
DATAC 01010100100000000000000000000000 // Start pixel, top-right
DATAC 00000000000000000000000000000100 // end Y position, middle of W
DATAC 00000000000000000000000010101000 // Address of next part of main
// last address: 157
NILLIST 10 // alignment for next overlay part
//
// main 5: draw I, and draw N part 1 (first line)
// note: uses code from a previous part
// start address: 168 = 00000000000000000000000010101000
// length: 15
DATAC 00000000000000000000000010110111 // last address: 183
MOVI 1 11 // R1=ram[11] : copy start pixel pos/color for I
MOVI 3 13 // R3=ram[13] : copy end Y position
JMP 1 15 // jump to drawing routine
MATH 1 2 5 // R2=R1 : copy current pixel pos/color
MOVI 3 12 // R3=ram[12] : copy start pixel pos/color for N
IFJMP 0 4 2 // if R2>R3 (cur pix > N start) then second line is done already
MATH 3 1 5 // R1=R3 : copy start pixel pos/color for N
MOVI 3 13 // R3=ram[13] : copy end Y position
JMP 1 15 // jump to drawing routine
MOVI 2 14 // R2=ram[14] : load disk address of next part of main
JMP 3 9 // Jump to overlay loader : load and run the next part of main
DATAC 01011100100000000000000000000000 // Start pixel for I
DATAC 01100100100000000000000000000000 // Start pixel for N, top-left
DATAC 00000000000000000000000000000111 // end Y position
DATAC 00000000000000000000000011000000 // Address of next part of main
// last address: 183
NILLIST 8 // alignment for next overlay part
//
// main 6: draw N part 2 (diagonal)
// note: uses code from a previous part
// start address: 192 = 00000000000000000000000011000000
// length: 13
DATAC 00000000000000000000000011001101 // last address: 205
MOVI 1 10 // R1=ram[10] : copy start pixel pos/color
MOVI 3 11 // R3=ram[11] : copy end Y position
JMP 1 15 // jump to drawing routine
MOVI 3 11 // R3=ram[11] : copy end Y position
IFJMP 0 4 1 // if R2!=R3 then second line is done already
SET 1 0 01101110 // R1[0]=.. : increment X position, keep rest
SET 3 3 00000110 // R3[3]=6 : update end Y position
JMP 1 15 // jump to drawing routine
MOVI 2 12 // R2=ram[12] : load disk address of next part of main
JMP 3 9 // Jump to overlay loader : load and run the next part of main
DATAC 01101001000000000000000000000000 // Start pixel, part 1 of diagonal
DATAC 00000000000000000000000000000100 // end Y position, middle of N
DATAC 00000000000000000000000011011000 // Address of next part of main
// last address: 205
NILLIST 10 // alignment for next overlay part
//
// main 7: draw N part 3 (last line), and draw exclamation mark, and halt
// note: uses code from a previous part
// start address: 216 = 00000000000000000000000011011000
// length: 13
DATAC 00000000000000000000000011100101 // last address: 229
MOVI 1 10 // R1=ram[10] : copy start pixel pos/color for N line
MOVI 3 11 // R3=ram[11] : copy end Y position
JMP 1 15 // jump to drawing routine
MOVI 3 11 // R3=ram[11] : copy end Y position
IFJMP 0 4 1 // if R2!=R3 then second line is done already
MOVI 1 12 // R1=ram[12] : copy start pixel pos/color for excl. mark
SET 3 3 00000101 // R3[3]=5 : set end Y position
JMP 1 15 // jump to drawing routine
SETDATA 0 0 0111101100000000000000 // draw bottom point for excl. mark
HLT // We're done drawing the win screen, so halt here
DATAC 01110000100000000000000000000000 // Start pixel, top of N line
DATAC 00000000000000000000000000000111 // end Y position, bottom of N
DATAC 01111000100000000000000000000000 // Start pixel, top of excl. mark
// last address: 229
NILLIST 10 // alignment for next overlay part
Developer (1 edit)

I'd say you shared a program, and the compiler/runtime to make it run.  Very fancy!

I've thought about writing something similar to this independent of having ever actually seen something like it in action before, but it makes sense that the idea's been around for a while.

If you wanted to be thrifty with your space usage, I'd say to make the start of the drive a list of starting addresses for each function, and then make the actual first address of said function contain the length of it/the ending address.  That would (in theory) cut down on space usage, especially when you're not dealing with too many small functions where the 8-byte overhead could take up a large part of the overall space requirements.

(Also: I'm super happy to see flag 3 for JMP in use.  I knew it would come in handy someday!)

(EDIT: OMG, I'm blind, you already had the end address at the start of each function!)

Seeing the actual code for your testing win screen (and the associated walls of addresses) frankly makes me want to work on some kind of custom out-of-game code editor.  Having a tool where you could write functions & such in their own screens, easily reference other functions (even pass arguments to them!), etc, would be SUPER cool, and probably make life a ton easier for high-level programmers who can't get their heads out of OOP-land (like me >.<)

Very impressive work, in any case!

(+1)

Thank you. :)

Yeah, the end address (or length, but end address was easier for the code to deal with) pretty much had to be in there somewhere, so I could load only the necessary words from disk (both for speed and to allow partial overwrites with some code remaining behind). Putting it at the start of each function means the loader only has one address it needs to deal with to start loading that code.

If I was really strapped for disk space I suppose it might be possible to put the length as the first byte of the given disk address or something, but that would both limit the max address I could load from, and make the loader code more complicated. In turn, more complicated loader code would mean the loader was larger, and thus would leave less RAM space for each overlay, which means not only that they would be trickier to write, but that you'd probably need more of them - so did we actually save any space doing it..?

Putting the start addresses in a table at the start of the disk is a nice idea though; while it does take an extra word, it would allow reference to functions by index into that table instead of needing to reference it by address directly, which would add a level of indirection so that the calling code doesn't need to change even if the function has to be moved.

Something I've been thinking of is to write a script that takes a bunch of code files (like I had here) and merges them together into a "disk image" code file for me (as in, adds in the length word and such for each of them while concatenating them).

That would simplify my work as a programmer, since I wouldn't have to do that merging manually, and it would save disk space since it wouldn't need to insert all those NILs to make tracking the addresses easier (computers are good at such tracking - generally much better than humans).

However, it would also have to insert the resulting addresses into the code in the right places for me, since I no longer know where exactly on disk each file will end up. So I was thinking I'd have to make up some syntax for that. (Your idea about the function table might make that unnecessary, though, as long as I can predetermine which function gets which index in the table.)

Essentially, I'd be adding a preprocessor (like C has). And if I do get around to making it, there are some other features I've been thinking of too, like having labels for addresses (both disk and RAM), so thaht it doesn't matter if I move the DATACs around as long as they're labeled (and as long as I used that label in the relevant instructions).

On the other hand, something else I've been thinking is that if I start down that road, maybe I should I just go all the way immediately, and instead of writing my own compiler, just make a new target for an existing one like gcc or LLVM. That way we could write in C/C++ or other high-level languages and have it compiled down to the TC-06 for us. Though that assumes that the compiler can cope with the extremely restricted nature of the TC-06 - especially the default mode would probably be difficult, with its tiny amount of RAM limiting the code space. It also assumes that I could figure out how to do that - it's often easier to make your own code base than to figure out someone else's after all...

Regarding the out-of-game code editor, like I mentioned, I've been writing most of my programs outside of the game and just pasting them in (*thank you* for making copy/paste work). It's just been easier that way, in part due to higher familiarity with the editor.

Having a purpose-built IDE could be neat, but I generally think it would be better to build more general tools that can be used with existing IDEs first.

Take, for example, those function references you mentioned - if I understand you correctly, they would require some extensions to the language (if not a whole new language), so there would need to be a compiler of some sort to turn those into the actual assembly code used by the game.

I think starting with that compiler would be better than starting with a new IDE to host it, in large part because the compiler would be the new part - while pretty good IDEs already exist, that people are familiar with, and which could be used with such a compiler. (It would also enable non-IDE building, e.g. for larger projects using make.)

Of course, if what you _want_ to do is to build an IDE, don't let me stop you. If people only ever did the "best" thing, the world would be a boring place. Which, honestly, makes it arguable whether it was really the best thing to do in the first place... (Not to mention, best according to whom?)

(Also: I probably wouldn't have missed it if you hadn't added it, since I wouldn't have thought of it, but yes, JMP 3 did come in handy... :) )

Developer (1 edit)

Using the indexed start-of-disk system would be really handy for writing functions in a more efficient manner, and for making a program that can easily generate an Overlay-ready file with functions inside of it - being able to consistently refer to a function by ID sounds like an absolute lifesaver!

My idea for the IDE would, at first, basically just be a preprocessor.  All code is still written purely in TC-06 assembly, but you have some special "codes" the IDE knows how to use (i.e, "FUNC <function_name>" automatically inserts the code to jump to a function - the names are for human purposes only, it'll automatically pick an integer id for 'em at generation time), and it lets you work on individual functions easier.  That alone would probably make my life way easier when making games, OSes, etc.

Actually building up to a proper C/C++/C#/Java/etc compiler/parser of some sort that can output TC-06 assembly code would be INCREDIBLY COOL and definitely stands as a goal for sometime in the future, but I do have a feeling it's going to require some additions to the TC-06 language itself.  There's space for 5 more op-codes (plus, those codes could end up being some sort of "sub-code" thing - e.g, SUBONE [4-bit op-code from the sub-code #1 list] [24 bits of arguments] could be a new "command" to allow 15 more commands with less argument data), which I should hope would be enough!

I'm definitely gonna poke around in QT and see what tools I have available for making an IDE/preprocessor, and if I can wrap my brain around it, I definitely wanna try making a basic test of the preprocessor tool, because I really do think having some basic built-in function/memory location management could be a lifesaver while programming bigger things.

Unrelated-ish, but I'm actually kinda tempted now to run some sort of Senbir Game Jam where the goal is just to make a game that runs in Senbir, in, say, a week.  Not many people are likely to participate, I suspect, and there are some limitations in Senbir itself at the moment (like the apparent lack of support for holding down a key?), but I know I for one would have fun trying (and probably failing) to make a proper game in it.  The one major caveat I see there is the fact that the (apparent) maximum clock speed of 180 Hz is definitely a major limiting factor that could mess up people's entries, and having to deal with the gameified render layer could annoy potential players of said games.

EDIT: Also, possible thing of interest - I've set up an official Senbir Discord server!  Link/join widget is in the main Itch page.

I think the start-of-disk function index system will mostly be useful for when you're doing it manually and referring to the functions by ID yourself.

If your assembler/compiler/preprocessor/IDE (or whatever you want to call it) lets you use "FUNC <name>" and inserts the code to jump there on its own, keeping track of the IDs for you - then it must also keep track of the addresses for those IDs, which suggests it can probably just as easily use those addresses directly, without needing the IDs or such an index table.

Though, I suppose we would want to minimize the number of instructions (or other resources) needed to do a call, to maximize what's available for other code, so I guess havin the table might help with that.

Note: the rest of this post ended up being a rather in-depth analysis of the available approaches that such an assembler/etc. could use. Feel free to correct me if I've missed something, but apparently there's no cut-and-dried "best" approach, and it depends on circumstances... Also, I originally intended to respond to other parts of your post as well, but this is too long already, so I'll add separate replies for those later.

Let's see now. I don't think the JMP to the loader routine can be avoided (unless you can put the call at the end of the memory area), so that's one instruction, but since it's unavoidable we can ignore it for the purpose of comparing the different approaches.

So the main thing we need is to somehow get the actual disk address to load the function from into a register for the loader to use.

With index table

Now, if we have and use an index table somewhere on disk, what would the code for that look like?

Well, to start with, it means we must have a GETDATA instruction to load the actual address from the index table, based on the index.

GETDATA supports an immediate (constant) value, so can we use that for the index, to load the address directly, with just one instruction?

*checks the docs* ... well, that constant value gets shifted up by 10 bits (documentation says 11, but I think that's incorrect, and 11 would be even worse for this). This means that it can only be used to load from addresses that are multiples of 1024. Which means we get one function per 4KiB of disk space, minus one for address 0 since that's where the initially bootloaded program is. Not really useful with the default 256-word disk.

So, we can't practically have the table index inside that one instruction, which means it must be stored either in memory or in a register.

The memory variant means having the function index stored in memory somewhere, probably loaded as part of the current function, and having the GETDATA instruction point to that address. The obvious way to do this would leave each call site using two memory addresses.

Trying to be clever and putting the instruction in the loader doesn't really help either, since we'll either be limited to one call per function, or have to spend instructions on modifying memory (either the instruction or the address with the index), which will probably take more addresses total.

The register variant means getting the function index into a register somehow, which will (generally) require at least one instruction, but in return it's possible to move the GETDATA instruction to the loader.

If we dedicate a register to it and limit ourselves to 256 functions (minus the initially bootloaded program), we can use SET to have it use just one instruction/memory address per call site.

If we don't dedicate a register to it, or need more functions, we have to either store the function index in memory somewhere (to use MOVI), or use multiple instructions (e.g. MATH to clear + SET) - so at least two addresses per call site. This is no better than the memory variant, so we can disregard this option.

So, with an index table, we end up with these options to choose from:
- two memory addresses per call site
- one memory address per call site, plus one in the loader and one register, with limitations

This is in addition to the space taken by the table itself, and the JMP for each call site.

Without index table

Now, if we don't have an index table, and just use the address directly, what can we do then?

Using MOVI will work, and will take two memory addresses - one for the instruction, one for the function address. Simple and straightforward.

Using SET can work, and will take just one instruction, but requires all functions to start at addresses before 256 (since we can only use 8 bits), and that we're careful about how the load-address register is used (since the other 3 bytes must remain 0).

However, the loader is currently using R2 for the load address (to use IFJMP), which I doubt we can be that careful with, so we'll need to use another one, and copy it into R2 as needed. That copy instruction can be in the loader, but this will essentially require a dedicated register.

It's also possible to use multiple SET instructions, to ease (or even eliminate) the limitations, but that means using between two and four instructions per call site, without being any better than using MOVI, so we can disregard this option.

Using PMOV or MATH essentially requires already having the address (or something that can easily be turned into the address) in a register, which seems rather unlikely in the general case, without spending extra instructions on it. Generating a function index using this method is somewhat more likely, but not much. So either way, this can only be used for special cases.

So, without an index table, we end up with these options to choose from:
- two memory addresses per call site
- one memory address per call site, plus one in the loader and one register, with limitations

This is in addition to the JMP for each call site, but avoids taking space for a table.

These options are very similar to the ones with a table, though not quite the same, in that the limitations of the second option are a bit different.

Summary of options

The first option for both uses the same number of instructions, addresses and clock cycles, which suggests that with those approaches, the table is an unnecessary indirection that just takes extra disk space.

The second option for both also uses the same number of instructions, addresses and clock cycles. But they have different limitations.

Now, if the disk is no larger than 256 addresses (like the default disk), then the limitations are void for both, since they are based on needing more than 8 bits to address things. So in this case the table again just takes extra disk space.

However, if the disk is larger than that, then the limitations come into play, and then the table is actually useful as it allows us to have functions stored anywhere on the disk instead of just in the first 256 addresses. However, even with the table, we are limited to at most 256 functions, minus the space taken by the initial program.

Which approach to choose

The above suggests that the choice of approach will mainly be based on which resources are most dear, and how many function calls you have.

First off, if you need more than 256 functions, you obviously need to use the first option, and thus don't need the function table.

If you need all the registers you can get, but have room to spare in memory, then again the first option is probably best.

If you can spare a register, but have lots of calls and little room in memory, then the second option is probably best, as it saves you one word of memory per function call.

If you have little disk space, and at least a couple calls, then the second option without a table is probably best, as it saves you both the table and one word per function call (not just in memory, but on disk).

If your dearest resource is your sanity (because you don't have an assembler/etc. that does this work for you), then I think the second option with a table is probably best, closely followed by the first option with a table, with the non-table options pretty far behind...

Aaargh. Of course. Just moments after posting, and I realized I missed something rather significant... (The worst part is that I'm pretty sure I had noticed it early on and started to write something about it, but it apparently got lost somewhere while editing/expanding, and then I forgot about it...)

For both of the with-table options, I missed/forgot that GETDATA always puts the result in R1, while the loader expects to get the load address in R2, so it can use it with IFJMP without having to move it there first.

This means that those options require another instruction, to move the address from R1 to R2, either per call site or in the loader itself.

Thus, the with-table options are always more expensive (in both memory size and clock cycles) than the non-table options, instead of being equivalent.

... I do think that most of the post is still valid, though, including the last section.

Developer

PSA: There is an edit button, so in the future, if you post something and go "aw crap, I should've remembered to add [insert thing here]!" - you have a way out without double-posting.  I know I've done that before - it happens to the best of us!  At least this isn't Twitter or something, right?  :P

I am inclined to agree with pretty much all your conclusions on efficiency analysis - the tables are pretty much only good for human sanity when developing without an IDE or similar.  Having to search & replace for address changes is an absolute pain.  I don't have much in the way of comments beyond that - brain is a bit numb from it being late where I am, and from programming a kernel for the past several hours.  Will re-read everything in the morning when I'm less zombified.  >.<

(+1)

Yeah, I know there's an edit button, but at the time I really didn't feel like doing the editing required, since it wasn't just a matter of "should have added this" - to edit in the correction I would have had to change and rewrite significant chunks of the text, such as the summary, and it was already late (getting towards early), and it would have taken enough time that others might have read the first version in the meantime, so I'd have to add something about the correction anyway, and... yeah.

I suppose I could have added my reply as an "EDIT:" at the bottom or something, but it felt more appropriate as a reply, since it was a pretty significant correction. (And in my mind, double-posting is something entirely different than responding to yourself. But I guess I might be out of touch on that.)

(+1)

(Note: This is based on the version that was out before the update mentioned in the below post about the OS kernel. I don't know if that update changes anything that matters for this post, but thought I'd mention it just in case.)

Regarding the op-codes, one thing I've noticed is that the current instruction set is fairly RISC-like. It even mostly uses a load/store architecture, with MOVI/MOVO being the only memory-accessing instructions - except for GETDATA/SETDATA with flag 1 or 2. That's pretty neat.

Also, several of the existing instructions already have the kind of sub-code you mentioned, though usually called "flag", and their bit positions vary.

E.g. MATH has sub-codes for ADD, SUB, MOV, etc., and IFJMP has two separate ones for forward/back and for EQ, GT, etc..

Regarding the max clock speed, based on the numbers you're using, I'm guessing your clock ticks are currently tied directly to the game's rendering frame rate, or maybe to some kind of timer (with a limited resolution).

However, I don't think you really need them to be tied that way - after all, for an emulator, it doesn't really matter if the ticks are evenly spaced. The most you might need is for them to appear that way to the player.

So, a fairly simple technique for that is to run two or more ticks per frame (or per timer triggering). This would double (or more) the apparent clock frequency, as long as the CPU can actually keep up with the emulation.

I used that technique in my JS TC-06 emulator, and have managed to hit 500kHz that way. Admittedly only with the debugger off, and a very simple program (the max I've reached depends on what it's doing) - but this was in JavaScript, running in Firefox, with code that isn't primarily built for max speed - so I suspect you can do better than that in C#, without needing to move to C++ or using things like threads.

Of course, that assumes you actually are timer bound and not CPU bound, but I don't really see how you could be CPU bound at that frequency, without trying to be...

Developer (1 edit)

RedCode and RISC/CISC (as described by my dad, a C64 vet.  can never remember which, though >.<) have been my main inspirations for developing the TC-06 process set.  While many of the functions already support sub-codes of their own, the main purpose of adding a dedicated sub-code function would be for utilities, mainly - which is what the current UTL code does.  UTL 0 is the offset function used in the kernel, and the assembler will just directly accept OFST [starting address] to output the equivalent of UTL 0 [address].

The max clock speed seems to be a limitation specifically of the Unity function I'm using to execute the actual function that does a clock cycle, MonoBehaviour.InvokeRepeating(string methodName, float time, float repeatRate).  If I could get past that, I have a feeling the clock speed limitation would disappear.  Your idea about having it run multiple ticks per call of the function from InvokeRepeating is a good one - it wouldn't be hard to amp it up to at least 1.8kHz, maybe further!  Unity can be a bit badly-optimized, in my experience, so even a 1kHz max would be a big deal to me - getting up to, say, 1MHz would be huge (and I'm genuinely not sure it's possible without using an external library.)  I would LIKE to keep it trying to run at a specific clock speed (e.g, keep a timer, rather than just "execute as many cycles per frame as possible"), because the limitations in processor speed are a fun part of the challenge for TC-06 development.

You made a JS implementation of the TC-06?  That's mind-blowingly cool!  Do you plan to share it anywhere?  Also, 500kHz really isn't half-bad, especially when you compare it to the current max speed of ~1/2778th that in Unity - I'm not sure that 500kHz could be topped in Unity with just raw C# stuff, but handling it with a native C++ library or similar should pretty much guarantee much higher speeds.

(+1)

Yeah, I did - well, it's not complete, and probably has bugs in it (as in, things that don't work quite the same as in yours), and parts that could use optimization, but it seems to work, more or less.

I'm not sure why I made it, really, but couldn't seem to stop myself... Probably mostly the challenge, to see if I could, without looking (at least too much) at how you did it, just at the docs and the in-game behaviour. (I haven't really looked through most of your code yet, just some of the latest diffs to see what exactly had changed - and I haven't yet integrated those changes into mine.)

I haven't shared it anywhere yet (wasn't sure you'd approve and figured I'd ask first), but I can push it somewhere (probably GitHub) if you'd like to see it (and don't mind it becoming public).

I agree that it's good to try to hit a specific frequency rather than simply running it as fast as it can - that's what my emulator does, too. I don't usually run it as fast as it can go, unless I'm specifically trying to find the max frequency or compare the performance of different implementations. (The default frequency is set at 60Hz to match Senbir.)

Also, that 500kHz figure is pretty much the highest one I've managed so far - most of the time I don't get anywhere near that (not that I really try to, or check all that often). Especially enabling the memory debugger limits the max frequency to a lot less, but it also depends on exactly which instructions it's running, since those take varying amounts of real time (e.g. a simple MOVO vs updating the screen). It has also varied over time with changes to the implementation. I think I've seen something like 30kHz too, at the lower end.

Of course, if I had done just one emulator tick per timer tick, I wouldn't have gotten anywhere close - IIRC setInterval in browsers is usually limited to something like at least 10ms between ticks, which would have limited me to about 100Hz. I still set it to the desired frequency, so it doesn't tick more often than it needs too (e.g. 100Hz when I want 60Hz), but it also doesn't always tick as often as I'd want.

My code for getting around that is a bit odd, though, in that it tries to maintain the asked-for clock frequency even if the underlying timer is unreliable (as in, has significant jitter) - so it keeps track of the time for the last tick that was run, and when the timer triggers, it checks what the current time is and runs as many emulator ticks as necessary to catch up to what it should have run by that time (whether that's 0 or 100k).

This approach is a bit risky, since if the asked-for frequency is too high, it might take so much time to run those ticks that it keeps needing to run even more ticks the next time the timer triggers, which (if not stopped) would eventually make it seem to have locked up since it takes so long.

(My approach for measuring the max Hz is to start the emulator with a reasonably high frequency, make a note of actual time and tick count, wait 10 seconds, make another note of actual time and tick count, and stop it. Then the frequency is calculated as (endTicks - startTicks) / (endTime - startTime). If I hit the target frequency, I increase the target and try again, until I fail to hit it. That gives me an approximation of how fast it can go (with that program etc.) - I usually round that result downwards to avoid problems.)

I've considered adding code to detect and protect against that runaway effect, but haven't done so yet - which enables me to measure the max without having that protection kick in.

A similar risk exists even for a simple loop that gives you N emulator ticks per time tick, too, if you don't protect against setting N too high - but at least that wouldn't start seemingly safe and then run away getting worse. (As long as your timer doesn't try to catch up to missed ticks, anyway.)

Developer (1 edit)

I know the feels - I'm prone to "doodling" in Unity and making little projects, just because they seem like an interesting challenge.

Senbir, and by extension, the TC-06 architecture, are LGPL-licensed.  You're 100% free to redistribute mods, updates, reimplementations, etc - I believe they just have to be LGPL themselves.  I'm not sure how it affects something based on the architecture (maybe I should explicitly define that as Creative Commons or something?  dunno), but far as I'm concerned/can tell, you're good to go for sharing the JS version.  You'd need to include a link (I think) to here, and/or the Gitlab page, but that should be the extent of extra garbage you need to do for sharing it.

I'd be interested in seeing the catch-up/timer code you've got - even if it's not perfect, it'd probably be useful in figuring out how to give Senbir better support for clockrates >180Hz.  My current ideas vaguely revolve around getting some sort of average (e.g, the InvokeRepeating speed is 1f/(clockSpeed/numberOfCyclesPerInvocation), and numberOfCyclesPerInvocation=clockSpeed//180f, assuming // is a "divide and round to integer" function of some variety), but I'm not quite sure what formula would be best, and it could still cap out around some relatively low number, like 324kHz.

EDIT: *fixing derp wording because sleepy*

(+1)

Well, regarding reimplementations, IANAL, but I think clones (whether of games or other things) are an example of how that doesn't require following the license of the original (as long as the clone authors haven't copied any of that original's code, just written equivalent code themselves based on observed behaviour (and maybe documentation?)). (Come to think of it, isn't Mono in some ways an example of that? Having reimplemented .NET?)

So, given that I wrote it without referencing the original code, I probably don't really have to to use the same license etc. for it. On the other hand, it's not like I'm really against using the LGPL (though I'm not very familiar with it, esp. v3, as I usually tend to use simpler ones) - and I have since started looking at the code of the original (not to directly copy it but to figure out what exactly it supports/handles (actually for a different project)), so I guess that might be going into a gray area, since it might affect whatever code I write later even if I'm not trying to copy it. So I guess it would probably be safer and easier to just use the LGPL like you said.

Anyway, here you go: https://github.com/edorfaus/TC-06.js/

You can see it live here: https://edorfaus.github.io/TC-06.js/

Regarding the architecture itself, I'm not sure if that can really be protected with a copyright license, as I think the copyright can protect your documentation about that architecture, but IIUC not the actual information inside that documentation about the architecture itself? (Meaning that if someone learned it well enough to write their own docs from scratch, without copying from yours, I think they could do that without infringing.) I think you might have to get into patents to protect the information itself. But again, IANAL, and this is a pretty messy legal area IIUC. Not to mention the international aspects of it. (I'm in Norway, myself.)

However, I think the idea about using CC for that instead of GPL is probably a good one regardless, as the GPL is not really meant for documentation like that (or documents in general, really). Do look into it yourself before deciding, though, don't take my word for it. (I'm not an expert.)

--

That formula pair looks about right to me (maybe depending on implementation details), though you may want to tinker with that 180 number - if a lower number is more reliable (in terms of the timer actually hitting the frequency), it might be better to do that and just loop a few more times for each timer tick instead. You may also want to add some limits to avoid having someone make it try to loop 1e9 times per timer tick or something crazy like that. (Ideally it would probably adjust that relative to what the host PC can do, but that's harder to get right.)

Here's the class that handles the ticking in my implementation: https://github.com/edorfaus/TC-06.js/blob/master/clock.js

That class emits a "tick" event to run an emulator tick, while the "render-tick" event was added later for optimization purposes (the memory debugger now uses that to avoid updating its HTML elements repeatedly in one render cycle).

(I've tried to cleanly separate the various components, to keep them independent of each other (loose coupling), with just the main index.js linking them together. I do think I have a few places left with some tighter coupling that I haven't gotten rid of yet though. Feel free to ask if something's confusing, though I can't promise to always (or ever) respond quickly.)

Developer (1 edit)

I, also not a lawyer, concur with your thoughts on all the legal jargon.

Really solid JS implementation!  I've spent a bit of time toying around with it, trying to write a basic Blinkenlights program - I have to admit, having an assembler has spoiled me.  Before Senbir, I was toying with an older prototype of the TC-06 architecture, and made a Blinkenlights program with naught but my documentation, and manually writing out the binary code for it.  I'm having a bad time of trying to do the same in the JS version, and I'm not willing to pin that on, say, unfinished debug tools or what-have-you.  >.<

Classic Terminal
(Context for the surroundings: I just hijacked a previous test/doodle project that had a basic first-person controller, so it was possible to walk around and turn the computer on/off)
I've done some maths for the formula being /100 instead of /180, and the numbers come out to something like needing to run the actual clock cycle function ~10k times per call from InvokeRepeating at 100Hz to run the computer at 1MHz, and...My Unity experience tells me it'd probably just lock up if you asked it to crunch like that.  With a native C++ library, it might be able to handle it, though - even in a low-power VM, I can do some heavy crunching with minimal slowdown.  The XScreensaver Galaxy program can be modified to be a proper N-body simulation, without MUCH lag even when there's several galaxies with 1000+ bodies each, and still manage ~45 FPS - in a VM.

I think that's probably gonna be my next development project, just trying to optimize things so it's possible to run at even a meagre 1kHz.  Well, that, and toying with a networking peripheral.  I have an idea for the actual hardware side (i.e, what you have to work with as a programmer), but I'm not sure how to go about letting players actually connect to one another, from a UX standpoint.  Do you pick a peripheral in-game, go to the debug screen, type in a real-world IP, and connect to it?  Does it automatically host things, or do you have to be a host/connector?  Stuff like that.

Developer(+1)

I've completed what is, I think, my most complicated Senbir project yet tonight.  A multitask-capable kernel of sorts.  It's pretty jury-rigged, and suffers from some major technical limitations (not to mention performance issues, due to the 180Hz max speed), but serves as a decent proof of concept for a functional OS core.  It also relies on a new update that I just released, containing a new op-code and some minor bugfixes here & there.  It's also meant to run on the Compy6c preset I provided in the OP of this thread - it needs 1024 addresses of RAM to run, though it should be possible to port to larger systems.

So, the numbers.

  • Supports 8 simultaneous processes, though speed cannot be guaranteed, especially beyond one or two.
  • Each process gets 96 addresses (384 bytes) of RAM to do with as it pleases, the first address of which will always be executed for the program's clock cycle.
  • The first 32 addresses of RAM are JMPs that go to various system functions.  Currently, only 0 does anything (tells the kernel it can let the next program start a clock cycle), but I plan to include some other ones down the line (e.g, #1 will wipe a program's chunk of RAM and mark it as no longer executing, leaving the slot open for another process)
  • Addresses 800-1015 are the kernel itself, only going up to address 865 at the moment.
  • Addresses 1016-1023 are used to store the starting address/state of each of the 8 process slots.  If it's not zero, then it's a pointer to where a given process wants execution started (at the moment, this is just where it starts getting written into RAM, and is equal to 32+(programID*96))
  • Register 0 is the active program ID.
  • Registers 1, 2, and 3 are all used by various TC-06 functions, and thusly are going to be used by both the kernel and programs it runs.
  • Registers 4 & 5 are currently unassigned, and generally safe for programs to use - just make sure to put their values in RAM if they're not serving as temporary variables.
  • Registers 6, 7, 8, and 9 are use for temporary math operations & self-modifying code.
  • Register 10 is the integer 1024 - the length of RAM.
  • Register 11 is the integer 96 - the number of addresses a program will get.
  • Register 12 is the integer 32 - the offset from the start of RAM where programs get put.
  • Register 13 is the integer 8 - the number of process slots there are.
  • Register 14 is the integer 1 - used for basic addition & whatnot in loops.
  • Register 15 is the integer 0 - used in some cases for IFJMP.

Multitasked Blinkenlights

Debugger register view visible on the side.
It also requires a custom bootloader program to be put in ROM, which loads in the function calls for addresses 0-31, and then the actual OS at the end of RAM.

NILLIST 32 //Addr 0-31.  Ignore so the program won't get overwritten.
DATAC 00000000000000000000010000000000 //Addr 32.  Integer 1024.
MOVI 10 32 //Addr 33.  Move 1024 into register 10, initializing it for the OS.
SET 11 3 96 //Addr 34.  Initialize register 11.
SET 12 3 32 //Addr 35.  Initialize register 12.
SET 13 3 8 //Addr 36.  Initialize register 13.
SET 14 3 1 //Addr 37.  Initialize register 14.  Register 15 is already zero - no worries there.
SET 3 3 31 //Addr 38.  Set register 3 for loading in the function calls that live at the start of RAM.
GETDATA 1 3 2 //Addr 39.  Beginning of load loop 1.
MOVI 9 43 //Addr 40.  Move the MOVO to modify into register 9.
PMOV 2 9 23 31 0 1 //Addr 41.  Splice the updated address into the MOVO op.
MOVO 9 43 //Addr 42.  Splice it in!
MOVO 1 0 //Addr 43.  Move the loaded data into RAM.
MATH 14 2 0 //Addr 44.  Increment the counter.
IFJMP 0 2 0 //Addr 45.  If we're done loading, jump ahead.
JMP 2 7 //Addr 46.  Otherwise, continue the loop.
DATAC 00000000000000000000001100100000 //Addr 47.  Int 818.
MOVI 2 47 //Addr 48.  Put 818 into register 2.
MATH 10 3 5 //Addr 49.  Set register 3 to the number 1024.
MATH 14 3 1 //Addr 50.  Subtract 1 from it, so we get 1023.
GETDATA 1 3 2 //Addr 51.  Beginning of load loop 2.
MOVI 9 55 //Addr 52.  Move the MOVO to modify into register 9.
PMOV 2 9 15 31 0 1 //Addr 53.  Splice the updated address into the MOVO op.
MOVO 9 55 //Addr 54.  Splice it in!
MOVO 1 0 //Addr 55.  Move the loaded data into RAM.
MATH 14 2 0 //Addr 56.  Increment the counter.
IFJMP 1 800 0 //Addr 57.  If we're done loading, jump to the OS.
JMP 2 7 //Addr 58.  Otherwise, continue the loop.

This version only supports loading 2 programs, two different Blinkenlights (one in light orange, color ID 27, in the upper-left, and one in light lime, color ID 30, in the upper-middle), using the keys 1 and 2.  There's no way to terminate the processes, and if you load in more than one copy of either, odd side-effects may arise.

This is a WIP and likely to have bugs.  I plan to update it with support for loading up to 8 programs (as well as having it automatically pick an empty slot to load in, instead of the haphazard way it works now), but here - the kernel itself, along with the two blinkenlights.  Compile & install to the harddrive, rather than ROM.

//-=BEGINNING OF SYSTEM FUNCTION CALLS=-
JMP 1 800 //Addr 0: Function ID 0 - Jump to the END PROCESSING function, which indicates a given program is finished with its cycle.
JMP 1 869 //Addr 1: Function ID 1 - Jump to the HALT PROGRAM function in the operating system.
NILLIST 30 //Addrs 2-31: Blank space.  Other system operations are not yet implemented.
//-=END OF SYSTEM FUNCTION CALLS=-
//-=BEGINNING OF PROGRAM SPACE=-
NILLIST 768 //Addrs 32-800: Blank space.
//-=END OF PROGRAM SPACE=-
//-=BEGINNING OF PROCESS LOOP=-
MATH 14 0 0 //Addr 800.  Begins process of, well, ticking a process.
OFST 0 //Addr 801.  Reset offset.
MATH 0 2 5 //Addr 802.  Part one of checking if we've gone out of bounds.
MATH 13 3 5 //Addr 803.  Part two of checking if we've gone out of bounds.
IFJMP 0 2 1 //Addr 804.  If we're NOT out of bounds, jump ahead to the next part.
MATH 0 0 1 //Addr 805.  We ARE out of bounds, so let's jump back to program 0.  Subtract the process counter from itself.
MATH 10 8 5 //Addr 806.  Move the max RAM length into register 8.
MATH 13 8 1 //Addr 807.  Subtract the max number of processes.
MATH 0 8 0 //Addr 808.  Add the current process.
MOVI 9 812 //Addr 809.  Load in the MOVI function to modify.
PMOV 8 9 15 31 0 1 //Addr 810.  Splice the new address in.
MOVO 9 812 //Addr 811.  Load the modified MOVI into RAM.
MOVI 2 1015 //Addr 812.  Copy the value of the appropriate process status into register 2.
MATH 3 3 1 //Addr 813.  Set register 3 to zero.
IFJMP 0 9 0 //Addr 814.  If this process slot is NOT ACTIVE, jump to the loader test.
MOVI 9 822 //Addr 815.  Load the JMP to modify into register 9.
PMOV 2 9 15 31 2 0 //Addr 816.  Splice the new address in.
MOVO 9 822 //Addr 817.  Load the modified JMP back into RAM.
MOVI 9 821 //Addr 818.  Move the OFST operation to modify into register 9.
PMOV 2 9 15 31 0 1 //Addr 819.  Splice the new address in.
MOVO 9 821 //Addr 820.  Load the modified OFST operation back into RAM.
OFST 32 //Addr 821.  Set the offset.
JMP 1 32 //Addr 822.  Jump to the program.
//-=END OF PROCESS LOOP=-
//-=BEGINNING OF BASIC LOAD SUBROUTINE=-
GETDATA 2 3 15 //Addr 823.  Get whatever the last key was.
MATH 3 3 1 //Addr 824.  Set register 3 to zero.
MATH 3 2 5 //Addr 825.  Set register 2 to zero.
MATH 1 2 5 //Addr 826.  Set register 2 to the last keypress.
MATH 8 8 1 //Addr 827.  Set math temp register 8 to zero.
SET 3 3 00110001 //Addr 828.  Set register 3 to the key id for the number 1.
IFJMP 1 833 0 //Addr 829.  If lastKey==numeralOne, then jump to the code to load things.
SET 3 3 00110010 //Addr 830.  Set register 3 to the key id for the number 2.
IFJMP 1 836 0 //Addr 831.  If lastKey==numberalTwo, then jump to the code to load things.
JMP 1 800 //Addr 832.  Otherwise, jump back to the start of the process function.
//-=END OF THE BASIC LOAD SUBROUTINE=-
//-=BEGINNING OF THE KEY SET=-
SET 8 2 00000100 //Addr 833.  Set the drive position.  1024.  ----KEY: 1----
SET 8 3 00000000 //Addr 834.  See above.  1024.
JMP 0 3 //Addr 835.  Jump to the loading portion.
SET 8 2 00000100 //Addr 836.  Set the drive position.  1025.  ----KEY: 1----
SET 8 3 00000001 //Addr 837.  See above.  1025.
JMP 0 1 //Addr 838.  Jump to the loading portion.
//-=END OF THE KEY SET=-
//-=BEGINNING OF THE ACTUAL LOADER=-
JMP 0 1 //Addr 839.  SKIP IT YO
GETDATA 1 3 8 //Addr 840.  Load the thing.
MATH 1 2 5 //Addr 841.  Transfer the starting position into register 2.
GETDATA 1 3 2 //Addr 842.  Load the ending address.
MATH 1 3 5 //Addr 843.  Put the requested ending address in register 3.
MATH 11 9 5 //Addr 844.  Put the integer 96 in reg9.
MATH 0 9 2 //Addr 845.  Multiply 96 by the current program ID.
MATH 12 9 0 //Addr 846.  Add 32 to register 9.
MATH 9 6 5 //Addr 847.  Clone reg 9's contents to reg 6.
MATH 14 2 0 //Addr 848.  --BEGIN LOAD LOOP--  Add 1 to the thing.
IFJMP 0 10 1 //Addr 849.  Check to see if we're done loading.  If we aren't, continue the load process.
MATH 10 8 5 //Addr 850.  Move 1024 into register 8.
MATH 13 8 1 //Addr 851.  Subtract 8 from register 8.
MATH 14 8 1 //Addr 852.  Subtract 1 from register 8.  (==1015)
MATH 0 8 0 //Addr 853.  Add the current program ID to it.
MOVI 7 857 //Addr 854.  Move the MOVO op into register 7.
PMOV 8 7 15 31 0 1 //Addr 855.  Splice the address in.
MOVO 7 857 //Addr 856.  Move it back into RAM.
MOVO 9 1015 //Addr 857.  Move the load address into RAM.
JMP 1 806 //Addr 858.  Jump to the loaded program.  --PROGRAM LOAD COMPLETE--
GETDATA 1 3 2 //Addr 859.  Load things.  --IFJMP DESTINATION--
MOVI 7 863 //Addr 860.  Move the MOVO operation to modify into register 7.
PMOV 6 7 15 31 0 1 //Addr 861.  Splice the new address into the MOVO op.
MOVO 7 863 //Addr 862.  Move the modified MOVO operation back into RAM.
MOVO 1 32 //Addr 863.  Move the loaded data into RAM.
MATH 14 6 0 //Addr 864.  Add 1 to reg 6, incrementing the write location.
JMP 1 848 //Addr 865.  Jump back to the beginning of the loop.
//-=END OF THE ACTUAL LOADER=-
//-=BEGINNING OF FUNCTION 0: HALT PROGRAM=-
JMP 1 0 //Addr 866.  HALT IS UNFINISHED.
NILLIST 157 //Addr 867-1023.  Fill in the blank space for the unused portions of the operating system.
DATAC 00000000000000000000010000000010 //Addr 1024.  Position of BLINKENLIGHT 1. (1026)
DATAC 00000000000000000000010000011001 //Addr 1025.  Position of BLINKENLIGHT 2. (1049)
//-=BEGINNING OF BLINKENLIGHT 1=-
DATAC 00000000000000000000010000011000 //Addr 1026.  LAddr -1.  End address of BLINKENLIGHT 1 (1048)
MOVI 2 1 //Addr 1027.  LAddr 0.  Move the current counter state into register 2 for comparison.
NIL //Addr 1028.  LAddr 1.  RAM position for the counter variable.
MATH 15 3 5 //Addr 1029.  LAddr 2.  Move 0 into register 3 for comparison.
IFJMP 0 4 0 //Addr 1030.  LAddr 3.  If the counter is 0, jump to the "toggle pixel" function.  Otherwise, increment the counter.
MATH 14 2 1 //Addr 1031.  LAddr 4.  Count down.
MOVO 2 1 //Addr 1032.  LAddr 5.  Move the counter back into RAM so it won't be lost when the next process starts.
JMP 1 0 //Addr 1033.  LAddr 6.  Tell the OS that we're done here and it can go ahead and start the next process now.
MOVI 2 8 //Addr 1034.  LAddr 7.  IFJMP TARGET.  Move the current pixel state into register 2.
NIL //Addr 1035.  LAddr 8.  Current pixel state in RAM.  0 or 1.
IFJMP 0 4 1 //Addr 1036.  LAddr 9.  If the pixel is currently ON...
SETDATA 0 1 10 //Addr 1037.  LAddr 10.  Turn the pixel ON to color 27 - light orange.
MATH 14 2 5 //Addr 1038.  LAddr 11.  Set pixel state to ON in register.
JMP 0 3 //Addr 1039.  LAddr 12.  Jump to the end of the toggle function.
SETDATA 0 1 8 //Addr 1040.  LAddr 13.  IFJMP TARGET.  Turn the pixel OFF.
MATH 15 2 5 //Addr 1041.  LAddr 14.  Set pixel state to OFF in register.
MOVO 2 8 //Addr 1042.  LAddr 15.  Put the pixel state back into RAM.
MOVI 2 1 //Addr 1043.  LAddr 16.  Put the counter state back into register 2.
MATH 14 2 5 //Addr 1044.  LAddr 17.  Set the counter state to 1 tick.
MOVO 2 1 //Addr 1045.  LAddr 18.  Move the counter back into RAM so it won't be lost when the next process starts.
JMP 1 0 //Addr 1046.  LAddr 19.  Tell the OS that we're done here and it can go ahead and start the next process now.
DATAC 01101100000000000000000000000000 //Addr 1047.  LAddr 20.  COL: 27, X: 0, Y: 0
DATAC 00000000000000000000000000000000 //Addr 1048.  LAddr 21.  COL: 00, X: 0, Y: 0
//-=END OF BLINKENLIGHT 1=-
//-=BEGINNING OF BLINKENLIGHT 2=-
DATAC 00000000000000000000010000110000 //Addr 1049.  LAddr -1.  End address of BLINKENLIGHT 2 (1071)
MOVI 2 1 //Addr 1050.  LAddr 0.  Move the current counter state into register 2 for comparison.
NIL //Addr 1051.  LAddr 1.  RAM position for the counter variable.
MATH 15 3 5 //Addr 1052.  LAddr 2.  Move 0 into register 3 for comparison.
IFJMP 0 4 0 //Addr 1053.  LAddr 3.  If the counter is 0, jump to the "toggle pixel" function.  Otherwise, increment the counter.
MATH 14 2 1 //Addr 1054.  LAddr 4.  Count down.
MOVO 2 1 //Addr 1055.  LAddr 5.  Move the counter back into RAM so it won't be lost when the next process starts.
JMP 1 0 //Addr 1056.  LAddr 6.  Tell the OS that we're done here and it can go ahead and start the next process now.
MOVI 2 8 //Addr 1057.  LAddr 7.  IFJMP TARGET.  Move the current pixel state into register 2.
NIL //Addr 1058.  LAddr 8.  Current pixel state in RAM.  0 or 1.
IFJMP 0 4 1 //Addr 1059.  LAddr 9.  If the pixel is currently ON...
SETDATA 0 1 10 //Addr 1060.  LAddr 10.  Turn the pixel ON to color 30 - light lime.
MATH 14 2 5 //Addr 1061.  LAddr 11.  Set pixel state to ON in register.
JMP 0 3 //Addr 1062.  LAddr 12.  Jump to the end of the toggle function.
SETDATA 0 1 8 //Addr 1063.  LAddr 13.  IFJMP TARGET.  Turn the pixel OFF.
MATH 15 2 5 //Addr 1064.  LAddr 14.  Set pixel state to OFF in register.
MOVO 2 8 //Addr 1065.  LAddr 15.  Put the pixel state back into RAM.
MOVI 2 1 //Addr 1066.  LAddr 16.  Put the counter state back into register 2.
MATH 14 2 5 //Addr 1067.  LAddr 17.  Set the counter state to 1 tick.
MOVO 2 1 //Addr 1068.  LAddr 18.  Move the counter back into RAM so it won't be lost when the next process starts.
JMP 1 0 //Addr 1069.  LAddr 19.  Tell the OS that we're done here and it can go ahead and start the next process now.
DATAC 01111010000000000000000000000000 //Addr 1070.  LAddr 20.  COL: 27, X: ???, Y: 0
DATAC 00000010000000000000000000000000 //Addr 1071.  LAddr 21.  COL: 00, X: ???, Y: 0
//-=END OF BLINKENLIGHT 2=-

This has taken several days to put together, and no small amount of "AAAAAAARRRRGH" directed towards my computer (both virtual or otherwise) when it inevitably failed.  The comments aren't great.  I think.  Either that, or I spend so long working on it my brain just goes numb.  Dunno.

Goals

I think I can work with this kernel to start building my actual OS idea.  Making, say, the first two processes basically be OS daemons, and then leaving the remaining six to be things a user can launch?  I think it'd work well.  Overlays would be mandatory, of course, but that is in-and-of-itself a neat challenge; writing an OS designed to run a chunk at a time, without disrupting other programs.

I also don't think it'd be that hard to expand into a WINDOWED operating system, especially if I can eventually manage an implementation of the TC-06 in C++ to get a performance boost (and enable a processor speed like, say, 180 kilohertz instead of the 180 hertz speed I'm stuck with right now) - that's definitely an end-game goal, though.  For now, terminals are probably easier to work with.

(+1)

Nice! This is pretty impressive. I'm not surprised it's caused some frustration.

Cooperative multitasking like this is pretty neat - IIRC MS Windows 3 used that. (I also think it's the best kind that is possible when we don't have any timer interrupts (without resorting to emulation anyway).)

I also agree that a windowed OS based on this would probably not be too hard - in fact, I suspect that might be easier than a terminal based one, since the screen is inherently graphical with no built-in text mode. Though I suppose that could be handled with some library/OS functions. Neither would be trivial, though.

(1 edit) (+1)

Here's another program, though really it's more of a drawing routine for programs to use, with a demonstration drawing.


(I didn't care to do the win screen again, and this better shows off some of what it can do, such as the dotted/multicolored lines, and the wrapping trick.)

It doesn't itself use overlays, but is small enough to fit within a single overlay, and could easily be adjusted to take the drawing as a parameter instead of hardcoding it. (This would actually make the program smaller.)

As such, it should work with any basic bootloader - though I discovered that the built-in bootloader starts running the program at address 4 instead of 0, which doesn't work for this program. (I could make it work, but haven't bothered to.)

In some ways, this is a line drawing routine, as it can easily draw several common types of lines (though not all of them) - but really, it'd be more accurate to call it a repeated-pixel placer.

The routine is given the address of a drawing on disk, which consists of a list of words that each describes a "line" to draw. It draws each in turn, until it hits a list terminator.

Each word of that list consists of the start pixel (where to start drawing), the stop pixel (where to stop drawing), and an increment (how much to change the position by for each step). The list terminator is a word where the start pixel is equal to the stop pixel. (It is worth noting that the stop pixel is never drawn, while the start pixel is - and that the stop pixel must be exact, that is, a position that would be drawn to if it wasn't the stop pixel.)

It's fairly fast - 3 cycles per pixel drawn (2 if IFJMP is instant), plus some setup for each word and for the routine as a whole. (I calculated that it spends 496 cycles to draw just the background and window frame, which in the demo is just the first 5 words of the drawing.)

Note that the code given below, while ready to be pasted into Senbir, is actually the output I got from my preprocessor when given the original source code - that source may be easier to read.

// Draws lines by repeatedly adding an increment to a pixel.
// Overlay main started at address 0
DATAC 00000000000000000000000000010000 // End address for overlay
// Assumed: R15 = 1
MOVI 5 15 // R5 = ram[..] : load address of data to be drawn
MATH 4 4 1 // R4 = 0 : initialization for updating only parts of it
MATH 3 3 1 // R3 = 0 : initialization for updating only parts of it
MATH 2 2 1 // R2 = 0 : initialization for updating only parts of it
// Label next found at address 5
GETDATA 1 3 5 // R1 = read(disk, R5) : load next step
MATH 15 5 0 // R5++ : update address
PMOV 1 2 0 8 0 0 // R2[0:8] = R1[ 0: 8] : set start pixel
PMOV 1 3 9 17 9 0 // R3[0:8] = R1[ 9:17] : set end pixel
IFJMP 1 14 0 // jump to done if R2 == R3
PMOV 1 4 18 26 18 0 // R4[0:8] = R1[18:26] : set position increment
// Label loop found at address 11
SETDATA 0 3 2 // Draw a pixel from R2
MATH 4 2 0 // R2 += R4 : increment position
IFJMP 1 10 1 // jump to loop if R2 != R3
JMP 1 4 // jump to next otherwise
//
// Label done found at address 15
HLT
//
// Label data_addr found at address 16
DATAC 00000000000000000000000000010001
//
// Overlay main ended at address 16
//
// Label demo_data found at address 17
// Start pixel (is drawn), stop pixel (is not drawn), position increment
DATAC 10000100110111011100000000100000 // Main area fill, TL-to-BR
DATAC 01111011100111111111111100000000 // Bottom row, R-to-L
DATAC 01000011000111111111111111100000 // Left column, B-to-T
DATAC 01000100010000000000000100000000 // Top row, L-to-R
DATAC 01111100110000000000000000100000 // Right column, T-to-B
//
DATAC 00000101000010111000000100100000 // Black \ line
DATAC 11000110111010100100000011100000 // Light-green / line
//
DATAC 00010100100111100100001000000000 // Dotted line 1: 2px
DATAC 00010101001000101000001100000000 // Dotted line 2: 3px
DATAC 00010101101000101100010000000000 // Dotted line 3: 4px
//
DATAC 00010110100111110100001000000000 // 2-color line part 1
DATAC 01011010110000010100001000000000 // 2-color line part 2
//
DATAC 00010111001000111000001100000000 // 3-color line part 1
DATAC 11011011011111111000001100000000 // 3-color line part 2
DATAC 01011111010000011000001100000000 // 3-color line part 3
//
DATAC 00000000000000000000000000000000 // End of list

(Feel free to use this code for your own purposes, same as with any other Senbir assembly code I post in this forum - I wouldn't have posted it if I minded.)

Developer

Reminds me of a simplified vector graphics renderer of some sort.  The speediness sounds really handy for, say, game development - every cycle counts when you're rendering a game, even in 2d!  IFJMP is instant now (fixed that bug), so, yes, it takes 2 cycles per pixel, which is...frankly, I didn't even know you could optimize the code that much.  Very impressive!


Your preprocessor is really cool.  The base source file for the line-renderer/pixel-pusher looks like real Assembly, like the sort I often see in, say, online 6502 development tutorials.  It's quite a bit easier to understand, and omg the use of underscores in the binary sections is a huge improvement to readability.

The only major comment I have is that it might be worth adding the estimated/intended address of every word in the comments for that line - makes it easier to debug when something (inevitably) goes catastrophically wrong.  Combined with the comments for, say, "label here", or "overlay here", it should be fairly easy to figure out where the problem is in the original pre-preprocessing source file.  One of the latest updates (dunno if it's the one I released last, or the one that's WIP w/ the code for the cycle timer & such) has a built-in way to check the current address in the Debug screen, meaning that being able to search for said address in your code can help you find what blew up faster than manually trawling through the RAM viewer, looking for the highlighted entry.


(Also, my apologies for taking so long to reply to this.  Internet blew up.  Again.  I feel like such an unprofessional developer >.<)

(1 edit)

Yeah, it reminded me of vector graphics too. I considered calling it something like that, but it kind of felt like it made it sound like it did more than it does, so...

As for the speed, well, it's a tradeoff really - it requires some setup, and using several registers (and the right ones), so it's not ideal for all cases - e.g. if you had lots of individual pixels or very short lines instead of long ones. (It's kind of telling that my Snake game only uses it for drawing the initial window, not during gameplay.)


Re: preprocessor, thanks. It's been a while since I did any assembly other than toys (not that I ever did much with it at all), so I don't really know what the state of the art is there (haven't looked at 6502 tutorials or anything), so it's encouraging to hear that I'm close anyway.

About the underscores and readability - yeah, that's exactly why I added that. I started with just plain 0b syntax for explicit binary numbers (along with 0x for hex), then added the "..." to make the monitor device easier to work with - but many things were still such a chore, what with having to count out the bits every time, so I was thinking some way of grouping/separating the bits would be nice, and... yeah, it was just so much better. I'm not removing that, no way, no how.

I've kept working on it and adding features I wanted, fixing bugs, etc. - I think I know two ways to fix the line number issue (not quite sure which I'll go for, one requires more refactoring than the other). Just need to get around to it. Another thing I've been meaning to do is include not just the disk address of labels, but also the local address (where it will be in RAM), since that can be more useful.

I'm not sure if having it add the address on every line will be all that useful to me personally, since I don't usually look all that much at the output (when not working on the preprocessor itself anyway), but I could probably make it do that pretty easily, so if others would find it useful, sure, I can add that. (Who knows, I might find it useful myself once it's there.) It wouldn't be an estimate either, since it needs to track the addresses accurately anyway. And once I fix the line number issue, including that too might also help?

EDIT: OK, I've now fixed the line number bug (went with the easier-to-do way for now), and added the local address to the label comments. I've also added an option to add the address of every instruction in a comment on that line. It can actually add any or all of the original line number, the disk address, and the local/memory address (where it will be when that overlay is loaded), depending on the options given to it, so whichever combination you prefer should be available. Use --help for the details.


No worries on taking a while to reply, I'm pretty slow at that myself, and I understand that life comes first. Also, I do programming professionally, and let me tell you, when the Internet goes down? A lot of things just... stop. Even if you already have all the code you're working on locally instead of being in the middle of code review or similar, "Hm, let me just look that up... Oh wait. *facepalm*"

(+1)

Here's yet another program - which uses both the drawing routine and the overlay loader that I have posted about earlier, and the preprocessor I've mentioned.

This time, the program is an implementation of the classic Snake game.


Classic WASD control scheme, plus R for reset/restart after a crash (hitting the wall or yourself). (Only lowercase, though. I'd need one more instruction to also handle uppercase, and I don't have room for that, plus it'd be slower.)

This is, yet again, for the default mode of Senbir, though it only barely fits. It requires that the overlay loader is in ROM (instead of including it on disk), and still fills the disk entirely (all 256 words). A couple of the overlays use all the available RAM (with the median being 19 words). And every register - all 16 of them - is used for something.

It's awkwardly slow during gameplay (though I haven't really measured it, I think it's about 5 or 6 seconds per step), but given enough patience, it's playable.

And that's after I tried pretty hard to optimize it...

I believe most of that slowness is because the main loop of the game is 3 overlays long, with another overlay for when we need to add a new food, and a couple more to handle a crash and restart. (Plus a couple for initialization.) I'm pretty sure that the repeated overlay loading takes a lot more time than running the game code itself does. So, no surprise really, the main limiting factor for speed is the RAM size.

Which is only part of the reason the main runtime scratch space of the game is actually on the disk - another reason is that with the TC-06 ISA it's simply easier to read/write from/to the disk than from/to dynamic areas of the RAM.

While I've fixed several bugs already, it's not quite bug-free yet, though the only known bug (besides the slowness) is pretty unlikely, as it requires you to fill the entire board with your snake first. (If you do that, then crash into something and restart, you're left with no food in the new game... Wouldn't be hard to fix if I had room for more code, but I don't, so... yeah.)

I've actually been considering replacing that restart code with simply re-initializing the game as if you rebooted. It would save some code space, and fix that bug. But it wouldn't look as nice, nor (probably) be as fast. Oh well. We'll see.

Anyway, the source code is on GitHub, along with the preprocessor it uses.

I've included an already-preprocessed copy of the code below, in case anyone wants to just run it without going through the trouble of getting the source and using the preprocessor.

In this copy, I've removed all the lines that only contained a comment, to shorten it down (preprocessor output was 335 lines). If you want to read the code, not just use it, I'd recommend looking at the actual source code.

DATAC 00000000000000000000000000010010 // End address for overlay
MOVI 6 16 // R6 = ram[..] : load address of data to be drawn
MATH 7 7 1 // R7 = 0 : initialization for updating only parts of it
MATH 3 3 1 // R3 = 0 : initialization for updating only parts of it
MATH 2 2 1 // R2 = 0 : initialization for updating only parts of it
GETDATA 1 3 6 // R1 = read(disk, R6) : load next step
MATH 15 6 0 // R6++ : update address
PMOV 1 2 0 8 0 0 // R2[0:8] = R1[ 0: 8] : set start pixel
PMOV 1 3 9 17 9 0 // R3[0:8] = R1[ 9:17] : set end pixel
IFJMP 1 14 0 // jump to done if R2 == R3
PMOV 1 7 18 26 18 0 // R7[0:8] = R1[18:26] : set position increment
SETDATA 0 3 2 // Draw a pixel from R2
MATH 7 2 0 // R2 += R7 : increment position
IFJMP 1 10 1 // jump to loop if R2 != R3
JMP 1 4 // jump to next otherwise
MOVI 2 17
JMP 3 9
DATAC 00000000000000000000000000010011
DATAC 00000000000000000000000000011001
DATAC 10000100110111011100000000100000 // Main area fill, TL-to-BR
DATAC 01111011100111111111111100000000 // Bottom row, R-to-L
DATAC 01000011000111111111111111100000 // Left column, B-to-T
DATAC 01000100010000000000000100000000 // Top row, L-to-R
DATAC 01111100110000000000000000100000 // Right column, T-to-B
NIL // End of list
DATAC 00000000000000000000000000101100 // End address for overlay
MOVI 0 18 // R0 = 6
MOVI 4 13 // R4 = start position (and color)
MOVI 5 14 // R5 = direction
MOVI 8 17 // R8 = 14
MOVI 9 15 // R9 = address of history array
MOVI 10 16 // R10 = max history size
MATH 15 11 5 // R11 = 1 : add two segments to start (1+food)
MATH 9 12 5 // R12 = R9 : tail is at first element of array
MATH 9 13 5 // R13 = R9 : head is at first element of array
SETDATA 1 3 9 4 // Save head into array
SETDATA 0 3 4 // Draw current head pos
SET 2 3 00101101
JMP 3 9
DATAC 00011110000000000000000000000000
DATAC 00000000000000000000000011111110
DATAC 00000000000000000000000010101000
DATAC 00000000000000000000000001010100
DATAC 00000000000000000000000000001110
DATAC 00000000000000000000000000000110
DATAC 00000000000000000000000001000011 // End address for overlay
MATH 13 2 5 // R2 = R13 : head of list
MATH 15 2 0 // R2++ : add one
MATH 10 2 4 // R2 %= R10 : mod size of list
MATH 12 3 5 // R3 = R12 : tail of list
MATH 10 3 4 // R3 %= R10 : mod size of list
IFJMP 1 19 0 // if head is one behind tail, then screen is full
MATH 15 11 0 // R11++ : add a segment to the snake tail
MATH 8 2 6 // R2 = random number within 0-13 : X pos - 1 of food
MATH 0 3 6 // R3 = random number within 0-5 : Y pos -1 of food
MATH 15 2 0 // R2++ : X pos of food
MATH 15 3 0 // R3++ : Y pos of food
PMOV 3 3 0 31 25 0 // R3 = .. : move Y pos into place
PMOV 2 3 28 31 28 0 // R3 = .. : move X pos into place
SET 3 3 00000010 // R3 = .. : set expected color
GETDATA 0 3 3 // R1 = current pixel in that position
PMOV 1 2 0 31 2 0 // R2 = R1(shifted) : current pixel for comparison
IFJMP 1 7 1 // if not the same, try again
PMOV 14 1 2 3 2 0 // R1 = .. : move color into place
SETDATA 0 3 1 // Draw food pixel
MOVI 2 21 // high bytes are set, so can't use SET here.
JMP 3 9
DATAC 00000000000000000000000010010100
DATAC 00000000000000000000000001010111 // End address for overlay
GETDATA 1 3 5 // R1 = read(disk, R5) : load direction value
MATH 1 4 0 // R4 += R1 : update position by adding direction value to it
PMOV 4 6 2 31 2 0 // R6[0:29] = R4[2:31] : set R6 to screen address of new pos
MATH 2 2 1 // R2 = 0
MATH 11 3 5 // R3 = R11
IFJMP 1 8 0 // if R11 == 0 then goto erase_segment
MATH 15 11 1 // R11-- : decrement number of segments to add
JMP 1 14
GETDATA 1 3 12 // R1 = read(disk, R12) : load tail position from history
MATH 15 12 0 // R12++ : increment history position of last tail segment
MATH 10 12 4 // R12 %= R10 : wrap around size of history
MATH 9 12 0 // R12 += R9 : re-add address of array to its index
PMOV 14 1 3 4 3 0 // R1[0:1] = R14[3:4] : set color for old pos to bg-color
SETDATA 0 3 1 // erase old position
GETDATA 0 3 6 // R1 = old pixel from the new position
SETDATA 0 3 4 // draw new position
MATH 1 6 5 // R6 = R1 : keep old pixel for later
SET 2 3 01011000
JMP 3 9
DATAC 00000000000000000000000001101000 // End address for overlay
MATH 15 13 0 // R13++ : increment history position of head segment
MATH 10 13 4 // R13 %= R10 : wrap around size of history
MATH 9 13 0 // R13 += R9 : re-add address of array to its index
SETDATA 1 3 13 4 // write current position to head of history array
PMOV 15 6 0 29 2 1 // R6[2:31] = 0 : clear all but color
PMOV 6 3 0 31 2 0 // R3 = R6(shifted) : copy color for comparison
SET 2 3 00000010 // R2 = 0b10 : the background color for comparison
IFJMP 1 14 0 // if old color was bg-color, goto done
SET 2 3 00000011
IFJMP 1 12 0 // if old color was food color, goto food
SET 2 3 01101001
JMP 3 9
SET 2 3 00101101
JMP 3 9
SET 2 3 10010100
JMP 3 9
DATAC 00000000000000000000000001111100 // End address for overlay
SETDATA 0 0 0000000000000000000000 // set status pixel to black to show crashed
SET 2 3 01110010 // R2 = 'r'
GETDATA 2 0 0000000000000000000000 // R1 = keyboard input
MATH 1 3 5 // R3 = R1 : for comparison
IFJMP 1 2 1 // if R2 != R3 then it was not pressed yet, so loop
MATH 13 3 5 // R3 = R13 : snake head
MATH 12 2 5 // R2 = R12 : snake tail
GETDATA 1 3 2 // R1 = read(disk, R2) : load tail position from history
PMOV 14 1 3 4 3 0 // R1[0:1] = R14[3:4] : set color for old pos to bg-color
SETDATA 0 3 1 // erase old position
IFJMP 1 15 0 // if tail == head then we're done
MATH 15 2 0 // R2++ : increment history position of last tail segment
MATH 10 2 4 // R2 %= R10 : wrap around size of history
MATH 9 2 0 // R2 += R9 : re-add address of array to its index
JMP 1 7 // loop back up for next tail segment
MATH 13 12 5 // R12 = R13 : reset tail position address to that of the head
MATH 1 6 5 // R6 = R1 : save head pixel so we don't need to re-load it
SET 2 3 01111101
JMP 3 9
DATAC 00000000000000000000000010010011 // End address for overlay
MATH 2 2 1 // R2 = 0
MATH 3 3 1 // R3 = 0
PMOV 6 3 6 8 9 0 // R3[29:31] = R6[6:8] : copy Y position
MOVI 7 20 // R7 = 7
MATH 7 3 4 // R3 %= R7 : mod-7 so that both 0 and 7 become 0
IFJMP 1 10 0 // if head-X is 0 or 15, goto make_white
PMOV 6 3 2 5 6 0 // R3[28:31] = R6[2:5] : copy X position
SET 7 3 00001111 // R7 = 15
MATH 7 3 4 // R3 %= R7 : mod-15 so that both 0 and 15 become 0
IFJMP 1 12 1 // if head-X is not 0 or 15, goto not_white
PMOV 15 6 30 31 2 1 // R6[0:1] = R15[30:31] : set color to 0b01
SETDATA 0 3 6 // draw pixel as white (to fix the border)
MOVI 4 21 // R4 = start position (and color)
SET 11 3 00000010 // R11 = 2 : add two segments immediately
PMOV 11 5 30 31 0 0 // R5[offset] = 0b10 : set starting direction
SETDATA 0 0 0100000000000000000000 // reset status pixel to white
SETDATA 1 3 13 4 // save head position to history
SETDATA 0 3 4 // draw head
SET 2 3 10010100
JMP 3 9
DATAC 00000000000000000000000000000111
DATAC 00011110000000000000000000000000
DATAC 00000000000000000000000010100111 // End address for overlay
MATH 2 2 1 // R2 = 0
GETDATA 2 0 0000000000000000000000 // R1 = keyboard input
MATH 1 6 5 // R6 = R1 : keep this key for later
GETDATA 2 0 0000000000000000000000 // R1 = keyboard input
MATH 1 3 5 // R3 = R1 : for comparison
IFJMP 1 2 1 // if R2 != R3 then another key was pressed, so loop
MATH 6 3 5 // R3 = R6 : for comparison
SET 2 3 01110111 // R2 = 'w' (up)
IFJMP 1 16 0 // if this key pressed, goto set_direction
SET 2 3 01100001 // R2 = 'a' (left)
IFJMP 1 16 0 // if this key pressed, goto set_direction
SET 2 3 01110011 // R2 = 's' (down)
IFJMP 1 16 0 // if this key pressed, goto set_direction
SET 2 3 01100100 // R2 = 'd' (right)
IFJMP 1 16 0 // if this key pressed, goto set_direction
JMP 1 17
PMOV 6 5 29 30 1 1 // R5[offset] = new direction (taken from key)
SET 2 3 01000100
JMP 3 9
NILLIST 84
DATAC 11111100000000000000000000000000 // 0b00 : a : left
DATAC 00000000100000000000000000000000 // 0b01 : s : down
DATAC 00000100000000000000000000000000 // 0b10 : d : right
DATAC 11111111100000000000000000000000 // 0b11 : w : up
Developer

This is incredible - the first full-featured game made for not just the TC-06 architecture, but the default mode version that has 128 bytes of RAM and a 1kB drive?  Mind blowingly cool.  Played in a Custom mode preset with some different colors, and a 1kHz clockspeed to have more than 0.15 frames per second?  It's a proper Snake game, complete with the real tension of needing to make decisions on the fly.  I do not have words for the levels of cool.  Also, naturally, I'm absolutely terrible at it.  >.<

I found what I initially thought was a bug while trying to do some fancy maneuvering around a food item, but I think it might just be that I ran into myself.  I don't think there's anything to stop you from turning in the direction you came from - e.g, going left to right, trying to change direction to be right to left functions just fine, and in a buttonmash panic, it's very easy to do this and get a game over.

Snake?  SNAAAAAAKE!

1kHz clock, custom colorpalette specially for Snake, otherwise just the Snake program in Default Mode. SUPER COOL OMG

I think you officially qualify as being better with the TC-06 than I am.  I haven't done anything nearly as cool as this, my main specialty seems to be planning out grand ideas that I'll never actually get around to implementing.  >_<

(+1)

Well, it's not like Snake is really an easy game. It may seem like it at first glance, but it's harder than it looks. (At least at a decent speed like that.) You have to keep track of quite a few things, while managing your action speed (not too fast, nor too slow). I tend to prefer games where I can take my time to think, but this was a game I thought I could actually implement.

One thing I'll note about this implementation is that it's possible to change your mind on which direction you're going, as long as you do it before the game is done checking the keyboard for that step - it takes whichever key was the last one you pressed. Obviously, that's harder to take advantage of at the 1kHz speed than at 60Hz, but still possible (at least in theory).

This is different from some other implementations I've seen, where pressing a key will actually make it immediately move in that direction (allowing you to go faster than the timer if you want to), or queue up inputs so you can press e.g. up-right-down and then sit back for a few frames. (Mine did the queue at first, but I'm finding it tricky to hit the game objects at first try (and there's no real visual indication of having done it), so I'd often end up starting with a few Fs in the queue...)


Yeah, switching direction back the way you came is pretty much an instant game over, since that counts as colliding with yourself (it actually does that backwards move and sees the collision as with any other tail hit). That's part of the reason you start the game with 2 tail segments, so that it's consistent that way from the start.

I think I've seen that be a game over in other implementations as well (as opposed to not allowing you to make that turn, which I'm less sure I've seen), but it's been a while, so I can't be sure. In your case (at least in the gif) it might not even have been that, you might have just switched direction towards the right too soon.

It would have been easier to tell if I had made the head a different color, like I wanted to, because then we could see where it ended up. But I both ran out of code space and wanted to minimize the run time since it was so slow, so... yeah.


That custom mode looks pretty good, and with that speed it does seem a lot more playable (or at least enjoyable).


Well, thank you? I'd guess it's probably mostly that I've been doing fairly small and self-contained projects that are graphical in some way, which makes them appear more interesting and lets them be ready sooner. (I've also been spending rather more time on Senbir stuff lately than I probably should...) (Though I won't deny that having experience playing around with related things probably helps too.)

(+1)

I wasn't sure whether to make this a separate top-level reply, but I guess it's mostly about the same thing, really, so, sub-reply it is, I suppose. Even though some of it is rather different.

To make a long story short, I made a new variant of the Snake game, which is not based on overlays but on another idea I had for enabling use of more code than you have memory. This variant can be started with the built-in bootloader, instead of needing a custom ROM.

This variant actually runs rather faster than the first one, taking "only" almost 2 seconds per step (though about double that when you eat food or press a key). It also uses a different color scheme that I think I like better than the old one (which I suspect used the background it did primarily to show off how that was drawn... *eyeroll*). I suspect that on your 1kHz machine it might be too fast to easily play.


For this variant I did away with the fancy resetting, instead simply restarting the game (well, not quite completely, but nearly so) - mainly to get enough space for the rest of the code.

I also have a version that shows where the snake's head is during gameplay, but it is slower - it tipped to the other side of the 2 second mark. So I decided not to include that in the final version, instead just blinking the head after a crash to show where you ended up - but if you want to try it, I kept that version of it in a branch. Here's how that looked:


As for the code, how this was done, well, to be honest the idea it's based on sounds a bit preposterous on the face of it, but as you can see, it turned out to work fairly well for this particular use case.

The idea was to not load sections of code into memory and then run them, but instead load and execute the instructions one at a time directly from the disk.

This means that for every instruction of the main program, the runtime actually runs several instructions. (5 in my runtime, so it should take 5 times as long to run a program, right? Well, both yes and no...)

In return, this enables the main code to be written in a more sequential manner, instead of dividing it up into blocks that you switch between, which makes things easier because you don't have to consider the tight memory space constraints all the time while writing the code.

Of course, this works best for code that is primarily sequential instead of having tight loops that need to be fast, but that's exactly what I saw in Snake - I didn't have many loops, or really time-sensitive things, mostly just long sections of code to run through mostly sequentially (with some jumps).

There were a couple exceptions to this, the line drawing inner loop and the snake position update, so I put those into the memory space left over from the main runtime, as separate functions I could just call from the rest of the code.

Getting back to the speed, this runtime really does make most of the instructions take 5 times as long as running them directly. However, what we're really comparing against is the overlay-based variant, and since the main loop there took 3 overlays for a single run through, it was effectively loading each instruction from disk for every time it was run anyway - and the overlay loader needs more instructions for doing that than the one-at-a-time runtime does.

(Of course, this does strongly indicate that having enough RAM to keep all of the code loaded at the same time, with a game variant written accordingly, would still be quite a bit faster - in fact, by a factor of ~5.)

The runtime also imposes some limitations on the code, such as JMP/IFJMP not really working the way they usually do, and R1 not being persistent from one instruction to the next (which affects any use of GETDATA). So the code needs to be written for this runtime, most nontrivial pre-existing code won't work without changes.

While it would be possible to make those things work, to make the runtime more transparent, that would significantly slow it down, as it would need to look at what each instruction is and handle some of them specially, instead of just blindly executing them like it does now.


Here's the source code of the game, and of just the base disk-runner runtime (which is included in the game code). The preprocessor isn't ideal for this kind of self-loading program, but it still made things significantly easier. (And I did end up using the per-line disk address comments for debugging, so good call on that being useful.)

Here's an already-processed and comment-stripped version of the game (and runtime):

DATAC 00000000000000000000000000010111
JMP 1 19
DATAC 00000000000000000000000000000001
MATH 13 14 5
JMP 1 5
JMP 1 19
GETDATA 1 3 14
MATH 15 14 0
MOVO 1 8
NIL
MOVO 1 1
JMP 1 5
GETDATA 1 3 2
MOVO 1 19
MATH 15 2 0
MOVI 1 12
MATH 15 1 0
MOVO 1 12
IFJMP 1 11 1
JMP 1 5
MOVI 15 1
MOVI 14 22
JMP 1 5
DATAC 00000000000000000000000000011000
MATH 2 2 1
MATH 3 3 1
SET 2 3 10011010
SET 3 3 10100101
SETDATA 0 0 1000000000000000000000
JMP 1 11
MATH 12 12 1
SET 12 3 10010101
MATH 2 2 1
MATH 3 3 1
MATH 4 4 1
SETDATA 0 0 1100000000000000000000
MATH 14 13 5
SET 14 3 10001100
SET 14 3 10001100
SET 14 3 10001100
SET 14 3 10001100
SET 14 3 10001100
PMOV 15 10 0 31 6 1
MATH 9 9 1
SET 9 0 11011110
MATH 4 4 1
MATH 6 6 1
MATH 7 7 1
MATH 8 8 1
SET 4 3 10101000
SET 6 3 00000110
SET 7 3 00001110
SET 8 3 01010100
MATH 4 11 5
MATH 4 12 5
MATH 15 5 5
SETDATA 1 3 11 9
SET 13 3 00111100
SETDATA 0 0 0100000000000000000000
SETDATA 0 3 9
MATH 11 2 5
MATH 15 2 0
MATH 8 2 4
MATH 12 3 5
MATH 8 3 4
SET 13 3 01010001
IFJMP 1 2 0
MATH 14 13 5
MATH 7 2 6
MATH 6 3 6
MATH 15 2 0
MATH 15 3 0
PMOV 3 3 0 31 25 0
PMOV 2 3 28 31 28 0
GETDATA 0 3 3
MOVI 2 1
PMOV 3 3 0 31 2 1
IFJMP 1 2 1
PMOV 1 3 0 1 0 0
SETDATA 0 3 3
MATH 15 5 0
MATH 2 2 1
GETDATA 2 0 0000000000000000000000
MOVI 3 1
SET 13 3 01111000
IFJMP 1 2 1
MATH 10 9 0
PMOV 9 0 2 31 2 0
SET 13 3 01100000
MATH 5 3 5
IFJMP 1 2 1
JMP 1 23
MATH 15 12 0
MATH 8 12 4
MATH 4 12 0
SET 14 3 01100011
JMP 1 26
MATH 15 5 1
MATH 3 3 1
MATH 15 11 0
MATH 8 11 4
MATH 4 11 0
SETDATA 1 3 11 9
PMOV 0 3 0 1 2 0
SET 13 3 01010001
IFJMP 1 2 0
SET 2 3 00000010
SET 13 3 00111100
IFJMP 1 2 0
SETDATA 0 0 0000000000000000000000
SETDATA 2 0 0000000000000000000000
SET 2 3 01110010
PMOV 15 0 0 31 1 1
MATH 14 13 5
MATH 0 9 0
SETDATA 0 3 9
GETDATA 2 0 0000000000000000000000
MOVI 3 1
IFJMP 1 2 1
SET 14 3 00011110
MATH 3 0 5
GETDATA 2 0 0000000000000000000000
MOVI 3 1
IFJMP 1 2 1
MATH 0 3 5
SET 13 3 10000111
SET 2 3 01110111
IFJMP 1 2 0
SET 2 3 01100001
IFJMP 1 2 0
SET 2 3 01110011
IFJMP 1 2 0
SET 2 3 01100100
IFJMP 1 2 0
SET 14 3 01010001
SET 2 3 11111100
PMOV 0 2 29 30 1 1
GETDATA 1 3 2
MOVI 10 1
SET 14 3 01010001
GETDATA 1 3 12
MOVI 0 1
MATH 15 12 0
PMOV 0 2 0 8 0 0
PMOV 0 3 9 17 9 0
PMOV 0 4 18 26 18 0
JMP 1 19
MATH 15 13 0
MATH 13 14 5
DATAC 00000100100111011100000000100000
DATAC 01000100010000000000000100000000
DATAC 01111100110000000000000000100000
DATAC 01111011100111111111111100000000
DATAC 01000011001000000011111111100000
SETDATA 0 3 2
MATH 4 2 0
IFJMP 2 2 1
JMP 1 5
GETDATA 1 3 12
PMOV 15 1 0 1 0 0
SETDATA 0 3 1
GETDATA 0 3 0
SETDATA 0 3 9
MATH 1 0 5
JMP 1 5
NILLIST 3
NILLIST 84
DATAC 11111100000000000000000000000000
DATAC 00000000100000000000000000000000
DATAC 00000100000000000000000000000000
DATAC 11111111100000000000000000000000
(2 edits) (+1)

Here's a classic screensaver - the bouncy ball. While written as a couple overlays using my overlay loader, it's small enough that it would fit in ROM with only a little rearranging of the code. I haven't managed to get it quite small enough to be loaded from disk as one unit by the built-in bootloader though, even by making assumptions on the start-up values of registers it takes a word or two too many. Might be possible with some tricks, but I haven't quite gotten there. (Edit: Not sure why I bothered, but I figured it out, so here's the code for a version that the built-in bootloader can (barely) load.)


Here's the code:

OVERLAY init
MOVI 13 @local:y_two
MOVI 12 @local:x_two
MOVI 9 @local:pos
MOVI 8 @local:dir
MATH 3 3 1
MATH 2 2 1
SET 2 3 @overlay:main_loop
JMP 3 9
pos: DATAC 0b11_1000_100...
dir: DATAC 0b00_0001_001...
y_two: DATAC 0b00_0000_010...
x_two: DATAC 0b00_0010_000...
OVERLAY main_loop
loop:
    MATH 2 2 1
    PMOV 9 2 6 8 23 1 // R2 = Y pos
    SET 3 3 7 // R3 = Y max
    IFJMP 1 @local:not_y_max 1 // if not at Y_max, skip reversing
    MATH 13 8 1 // R8 -= R13 : direction -= Y_two, so go from +Y to -Y
    not_y_max:
    SET 3 3 0 // R3 = Y min
    IFJMP 1 @local:not_y_min 1 // if not at Y_min, skip reversing
    MATH 13 8 0 // R8 += R13 : direction += Y_two, so go from -Y to +Y
    not_y_min:
    PMOV 9 2 2 5 26 1 // R2 = X pos
    // SET 3 3 0 : R3 = X min : R3 is already 0
    IFJMP 1 @local:not_x_min 1 // if not at X_min, skip reversing
    MATH 12 8 0 // R8 += R12 : direction += X_two, so go from -X to +X
    not_x_min:
    SET 3 3 15 // R3 = X max
    IFJMP 1 @local:not_x_max 1 // if not at X_max, skip reversing
    MATH 12 8 1 // R8 -= R12 : direction -= X_two, so go from +X to -X
    not_x_max:
    MATH 9 2 5        // R2 = R9 : copy old position
    PMOV 15 2 0 1 0 0 // R2[0:1] = R15[0:1]  : clear color
    MATH 8 9 0        // R9 += R8 : update position
    SETDATA 0 3 2     // Erase old ball position
    SETDATA 0 3 9     // Draw new ball position
JMP 1 @local:loop

EDIT: Gah. The code has empty lines to make it clearer which lines go together, but this site's post editor apparently doesn't like that... (Yet another annoyance to add to the list about it I guess...)

Developer(+1)

While I haven't actually written the Assembly code for it yet, I am working on a sprite rendering system test of some variety, to use in making games down the line.  Mostly posting this here as a to-do, and to share the design docs I have so far.  I'm (currently) targeting a 300kHz Custom setup with a 256x128 (8-bit by 7-bit) 512-color (9-bit) monitor, with 64kB of RAM and a 4MB harddrive.

A table of all the colors, as well as an easy means of finding their IDs.

The actual sprite format is as follows, fairly simple:

  • Number of addresses used for sprite (on the disk - they're always going to be hotloaded, for memory efficiency reasons)
  • Image metadata: first 8 bits are width, next 7 are height, next 8 are how many color IDs the image uses, while the last 9 are just ignored
  • List of color IDs, one per line, with each line being the actual 9-bit monitor color ID
  • List of pixel data, 4 pixels per line in a 1-dimensional array, each pixel being an 8-bit color ID.  Color ID 0 is transparent.

The pseudocode I wrote - of no particular language, it's just to articulate to myself what I would actually need to implement - for the actual render loop itself is as follows:

* Loop through in some form: estimated 21 cycles per loop tick that DOES NOT DRAW, otherwise 24
 *   Store both X and Y, use them in the loop.
 *   X *must* be a power of 2.  As must Y.
 *   That way, it's possible to evenly divide things & whatnot.
 *   Need to have a variable for "currentItem", a 0-3 int.  Used in figuring out which part of the current line it's on.
 *   Every time currentItem rises above 3, it increments the main counter, going down to the next line.
 *   -=LOOP LAYOUT=-
 *   PRE-LOOP: line = getdata(disk, registers, counter) //X=0, Y=0, counter=beginningOfImage, currentItem=0, registers[0:]=0, registers[4] = X,Y offset for extended SETDATA
 *   splice(line, registers[2], (currentItem*8), ((currentItem+1)*8)-1, (3-currentItem)*8, 1) //put the color ID into register 2 for comparison
 *   color = getdata(disk, global, id+1+registers[2])
 *   if color != 0 //make sure the pixel isn't transparent
 *   splice(color, registers[0], 22, 31, 9, 1) //splice the new 9-bit color in that we got from the color ID list.  goes from last 9 bits to first 9 bits.
 *   splice(X, registers[0], 23, 31, 17, 1) //splice the 8-bit X position in that we got from the incrementation.  goes from last 8 bits to bits[9:17].
 *   splice(Y, registers[0], 24, 31, 24, 1) //splice the 7-bit Y position in that we got from the incrementation.  goes from last 
 *   setdata(monitor, registers, 0, true, 4) //draw the pixel, with an X/Y offset in register 4 (the actual position the sprite was requested to be drawn at)
 *   endif
 *   currentItem += 1
 *   if currentItem >= 4
 *   currentItem = 0
 *   counter += 1
 *   line = getdata(disk, registers, counter)
 *   endif
 *   x += 1
 *   if x>= width
 *   y += 1
 *   x = 0
 *   endif
 *   if y>= height
 *   breakFunc
 *   endif

Next off, an example image's code, plus the image itself.  The formatting isn't...quite right for use in-game, but it gives a rough idea of what an image file looks like.

44 //# of addresses.  Equal to 1 + numCols + ((X*Y)/4).  ADDR 0
0b00001000_0010000_00001011_000000000 //X = 8, Y = 16, C = 11.  ADDR 1
019 //Colors[01] = 019, dark orange (30).  ADDR 2
030 //Colors[02] = 030, orange (30).  ADDR 3
093 //Colors[03] = 093, orange-grey (30).  ADDR 4
163 //Colors[04] = 163, dark lime-grey (90).  ADDR 5
236 //Colors[05] = 236, lime-grey (90).  ADDR 6
027 //Colors[06] = 027, black-yellow (60).  ADDR 7
100 //Colors[07] = 100, dark yellow (60).  ADDR 8
109 //Colors[08] = 109, mild yellow (60).  ADDR 9
054 //Colors[09] = 054, yellow (60).  ADDR 10
124 //Colors[10] = 124, lime (90).  ADDR 11
180 //Colors[11] = 180, lighter lime (90).  ADDR 12
0b00000000_00000000_00000000_00000000 //00, 00, 00, 00: 00,00 to 03,00 all transparent.  ADDR 13
0b00000000_00000000_00000000_00000000 //00, 00, 00, 00: 04,00 to 07,00 all transparent.  ADDR 14
0b00000000_00000000_00000111_00000111 //00, 00, 07, 07: 00,01 to 03,01 have helmet.  ADDR 150
0b00000000_00000000_00000000_00000000 //00, 00, 00, 00: 04,01 to 07,01 all transparent.  ADDR 16
0b00000000_00000110_00001001_00000111 //00, 06, 09, 07: 00,02 to 03,02 have helmet.  ADDR 17
0b00000111_00000000_00000000_00000000 //07, 00, 00, 00: 04,02 to 07,02 have helmet.  ADDR 18
0b00000000_00000110_00001000_00001011 //00, 06, 08, 11: 00,03 to 03,03 have helmet.  ADDR 19
0b00001010_00000000_00000000_00000000 //10, 00, 00, 00: 04,03 to 07,03 have helmet.  ADDR 20
0b00000000_00000110_00000001_00001000 //00, 06, 01, 10: 00,04 to 03,04 have helmet & arm.  ADDR 21
0b00001010_00000000_00000000_00000000 //10, 00, 00, 00: 04,04 to 07,04 have helmet.  ADDR 22
0b00000000_00000001_00000010_00000001 //00, 01, 02, 01: 00,05 to 03,05 have arm.  ADDR 23
0b00000001_00000000_00000000_00000000 //01, 00, 00, 00: 04,05 to 07,05 have arm.  ADDR 24
0b00000000_00000001_00000011_00000011 //00, 01, 03, 03: 00,06 to 03,06 have arm.  ADDR 25
0b00000100_00000101_00000100_00000101 //04, 05, 04, 05: 04,06 to 07,06 have cannon.  ADDR 26
0b00000000_00000001_00000001_00000001 //00, 01, 01, 01: 00,07 to 03,07 have arm.  ADDR 27
0b00000100_00000100_00000100_00000100 //04, 04, 04, 04: 04,07 to 07,07 have cannon.  ADDR 28
0b00000000_00000001_00000010_00000010 //00, 01, 02, 02: 00,08 to 03,08 have body.  ADDR 29
0b00000001_00000000_00000000_00000000 //01, 00, 00, 00: 04,08 to 07,08 have body.  ADDR 30
0b00000000_00000001_00000011_00000001 //00, 01, 03, 01: 00,09 to 03,09 have leg.  ADDR 31
0b00000001_00000000_00000000_00000000 //01, 00, 00, 00: 04,09 to 07,09 have leg.  ADDR 32
0b00000000_00000001_00000010_00000001 //00, 01, 02, 01: 00,10 to 03,10 have leg.  ADDR 33
0b00000010_00000001_00000000_00000000 //02, 01, 00, 00: 04,10 to 07,10 have leg.  ADDR 34
0b00000000_00000001_00000010_00000001 //00, 01, 02, 01: 00,11 to 03,11 have leg.  ADDR 35
0b00000010_00000001_00000000_00000000 //02, 01, 00, 00: 04,11 to 07,11 have leg.  ADDR 36
0b00000000_00000001_00000010_00000001 //00, 01, 02, 01: 00,12 to 03,12 have leg.  ADDR 37
0b00000010_00000001_00000000_00000000 //02, 01, 00, 00: 04,12 to 07,12 have leg.  ADDR 38
0b00000001_00000011_00000001_00000001 //01, 03, 01, 01: 00,13 to 03,13 have foot.  ADDR 39
0b00000010_00000001_00000000_00000000 //02, 01, 00, 00: 04,13 to 07,13 have foot.  ADDR 40.
0b00000001_00000011_00000001_00000011 //01, 03, 01, 03: 00,14 to 03,14 have foot.  ADDR 41.
0b00000001_00000000_00000000_00000000 //01, 00, 00, 00: 04,14 to 07,14 have foot.  ADDR 42.
0b00000001_00000001_00000001_00000001 //01, 01, 01, 01: 00,15 to 03,15 have foot.  ADDR 43.
0b00000001_00000001_00000000_00000000 //01, 01, 00, 00: 04,15 to 07,15 have foot.  ADDR 44.

Senbus.  Yes, I know, that's a terrible name.  I'm a programmer, ok?!

It's not a terribly efficient system - my estimates show the example character taking ~2.5k cycles to render, which at 60 FPS is already half the frame, or even at 20 FPS, roughly 1/6th the frame.  Even if a "room" was always 256x128 pixels, it could still easily take several seconds to render in all the entities, terrain, etc, to speak nothing of the time it might take to render large motile objects.  Go bigger than that (ah-la old Metroid games, Super Mario Bros, etc), and your performance simply disappears as soon as the room needs to scroll.  I KNOW there has to be a way to improve its efficiency, I'm just...currently a bit too daft to find it.  >.<

Some other ideas I can think of off the top of my head would be to use a list of individual pixels, if I had a max sprite size limit of 16x16, it would be feasible to make one that supports 2 pixels per line, in the form of CCCCCCCCXXXXYYYYCCCCCCCCXXXXYYYY, only rendering those individual pixels.  It'd cut down on some of the performance issues, since it outright skips transparent pixels, as well as the need to increment X and Y.  It'd be (in some cases) more space efficient (my math says the test character would take up only 38 addresses instead of the current 45), though it might lose out on some speed per loop cycle, it just compensates with having less cycles overall.  Image files would also likely read nicer.

Will update in replies if I make any breakthroughs.

(+1)

A sprite system? Wow, that would be really cool, and very useful for not just games but also other things that use graphics, e.g. icon-using window systems, or even for rendering text (using a sprite per char).


Regarding speed/efficiency, hmm. Well, let's do some math and figure out what our theoretical limits are, as that will help to discard options that aren't actually possible.

With a 256x128 screen, there's 32768 pixels, so (using the current screen device API) that's the theoretically minimum possible cycles a full-screen refresh would take.

At 300kHz, that means a theoretical maximum full-screen FPS of barely above 9.

In practice, unless the program is simply a long list of SETDATA instructions, it'll need to use more cycles than that - even my single-color-only fast loop needs 2 cycles per pixel, plus some more for setup for each frame.

If we assume that it will need at least 3 cycles per pixel to draw an actual image (which might still be low-balling it even as a best case), that's already down to about 3 FPS max - and it still doesn't include any of the processing needed to generate that image (such as game logic or sprite data decoding).

So, if you need 10 FPS or more for the game to be playable, full-screen refresh is simply a no-go even in theory, given this (virtual) hardware.

Thus, any game for this system that needs a decent FPS would have to be designed to not require full-screen refresh.

This also means that the basic way of doing sprites - always starting with a base image and then layering the sprites on top, and then blitting the result to the screen - is also a no-go. Even doing it directly to the screen instead of to an off-screen buffer would still involve a full-screen refresh (and then some more).

We'll therefore have to use something that only draws the pixels it needs to, to update the screen. Given a sprite system, that's not actually a major hindrance, since it would draw only the pixels of the sprites anyway, though we'll need to add erasing the previous sprites to that (or if the sprites move slowly, at least the parts of them that won't be drawn on top of.)


So. How many pixels can we actually do per frame, then?

Well, if we want 60 FPS, we only have 5k cycles per frame, so max 5k pixels - or somewhat more realistically, 5k/3 < 1667 pixels (which is less than a 41x41 square) - minus setup and game logic. So, at most ~5% of the screen can be updated each frame, even with that theoretical high-efficiency code.

At 20 FPS, we have 15k cycles per frame, which by the same logic gives us max 5k pixels (less than a 71x71 square), or ~15% of the screen, in that same very optimistic case.

Note that those numbers include any pixels that need to be erased (to show the background) because a sprite was moved away from there, and do not account for needing to handle transparency, do game logic, or any other overhead. So it's likely to be significantly less in practice.

So really, large moving objects (drawing over ~15% of screen size) at even 20 FPS are not really a matter of efficiency - they're simply not really possible on this hardware. Scrolling likewise unless it can be restricted to the same number of pixels actually changing. (I'll note that on some game machines, sprites/scrolling/etc. were implemented in hardware.)


Now, can we get around that limit?

Well, since the limit is on the number of pixels drawn, not where on the screen those pixels are, it might (depending on game and graphics style) be possible to have moving objects that cover a larger screen area - as long as only parts of it actually need to be redrawn for each frame.

E.g. if the large sprite is an enemy, if it's designed as a blob, with most of its internals being the same color, and the game knows this, then it can draw the whole thing once and then later update only its edges instead of the whole thing. (I actually did that in Snake, only drawing each end of the snake instead of the whole thing.)

I think that requires using special-case code instead of a generic sprite renderer, though, since the game needs to know about it to know that it can do it. Well... unless you encode that movement in the sprite data somehow and have the renderer use that for partial updates. But then I'm not sure if it's really just a sprite anymore... Although, I suppose it could be done indirectly by having several sprites - one for the initial rendering, then others for per-frame movement that only draw what needs to be redrawn for that movement. Though you'd still have to encode erasure areas somehow, unless the background is always the same color...


Regarding your algorithm pseudocode, I haven't studied it in detail, but noticed that it essentially has an inner loop for a small fixed-size set of elements (the 4 pixels per data line), on a system where inner loops (or multiple checks) is expensive (due to juggling of R2/R3), and there actually is a decent amount of RAM to put code in.

So, one easy way to optimize that would be to unroll that inner loop, instead having a copy of the inner drawing code for each of those 4 pixels. This saves both that R2/R3 juggling, and needing to calculate which bits to copy out (though that could probably be done by a bit shift instead), thus speeding things up - though at the cost of the code being longer. I do admit it limits us to sprite sizes that are multiples of 4, at least in the X direction, but I doubt that's much of a problem in practice.

However, your idea of instead using a list of pixels (including X/Y/C for each) would probably be even faster, not just due to skipping the transparent ones entirely, but because I think it would need less processing per pixel. With your proposed format, I'd say 6 cycles per pixel, plus 2 per data line, so 14 per 2 pixels (plus some initial setup per sprite, but I assume that's true for any method). Some games might shorten it by a couple cycles, though (i.e. if sprites can only be placed at multiples of their size).

setup:
    R2 = addr of first image word
    R3 = addr of last image word + 1
    R4 = X/Y position of sprite, encoded as pixel location for sprite's (0,0)
loop:
    R1 = read(R2)
    R2++
    two copies of this code, one for each pixel:
        R0 = 0
        PMOV color bits from R1 to R0
        PMOV X position from R1 to R0
        PMOV Y position from R1 to R0
        R0 += R4
        draw(R0)
    IFJMP to loop if R2 < R3


If even more speed is needed, and disk space can be sacrificed to gain it, we can easily get down to 4 cycles per pixel (including the data line reading) by using the very simple one-pixel-per-data-line format of your win screen image, and just adding the sprite location to each pixel (like above).

If there isn't enough disk space to store all the sprites that way, but only a few of the sprites are needed at the same time (e.g. different sprites on different levels), then one option to consider would be caching - setting aside an area of disk for the currently-used sprites, and decode from a compressed image format into that area before starting the level. This would increase the loading time of the level, but in return make it render faster, so you can do more while in the level.

It's actually possible to optimize this down to 7 cycles per 2 pixels if the screen size and color depth were changed to something that fits in 16 bits, as then it would be possible to just shift the second pixel into place with one PMOV instead of having to read and increment. But, that would mean making the screen smaller and having fewer colors, and if we do that, many of the calculations/conclusions above would have to be redone (since the hardware is different).


One thing I'll note is that none of these options have actually managed to reach 3 cycles per pixel, which suggests that the calculations above are actually on the optimistic side.

If we redo with 4 cycles per pixel, then 20 FPS works out to 15k/4 = 3750 pixels (less than a 62x62 square), or ~11.4% of the screen. Again, minus setup, game logic, etc.

Assuming your sprite is representative with drawing 72 of 128 possible pixels in its grid (57% fill), and assuming just 4 cycles of setup for each sprite (to make the math easier), that suggests a max of 3750/73 ~= 51 sprites can be drawn per frame, using the most time-efficient option we know of for this hardware.

Even if we have to erase all of them first, that would still leave us with 25 sprites per frame, which isn't too bad - many games can be done within that.

(Though the game logic will probably take away a good chunk of that, making it fewer, but maybe not all of the sprites need to be moved/redrawn every frame, either, which can compensate.)

(+1)

Here's another program, which also functions as a proof of the Turing-completeness of the virtual PC (well, technically just the same kind of almost-completeness C has, due to the available storage space not being infinite, but I think that's close enough for most purposes).

It's a proof by simulation, in that it implements an interpreter for a programming language which is already known to be Turing-complete, namely brainfuck.

I've tried to follow the implementors recommendations for BF, but the limitations of the underlying system make some of them difficult - as an example, output just goes to the screen in a binary format, instead of being displayed as characters, since there's no native character output and implementing it myself would take too much space (and be a project in its own right).

This program does work in Senbir's default mode, but in that mode it you only have 30 bytes of remaining space to distribute between the BF program and the memory tape it works on, which means you're quite limited in which BF programs you can run with it - and it's not particularly fast in that mode either (I'd guess about the same kind of usable as my Snake game, probably in large part because it uses the same overlay technique (and expects the overlay loader to be used as bootloader)).

However, if you use a mode with a larger disk, all that extra space will be available to the BF program or its tape, without changing the interpreter (beyond changing the BF program). It does not assume anything about the size of the disk (well, except for it being at least 256 words).

Since changing the BF program requires re-preprocessing the source code, for the interpreter to know where the BF program ends and its memory tape begins (it uses labels for this), it's not quite as easily reusable as I might like it to be - but at least it doesn't require manually changing the interpreter code itself.

The interpreter comes with a small example BF program which just reads characters from its input and writes them to its output, in an infinite loop.

Since the input comes from the keyboard and the output goes to the monitor, that allows the player to see what is going on and interact with it, though I'll admit it's not really all that interesting.

In theory you could create a BF implementation of a TC-06 simulator, run it in this interpreter, and then in that simulator run the interpreter again, etc... but I don't think I'd recommend it. :)

Since the interpreter source file is 472 lines long, I don't think I'll copy it in here - I'd say it's better to look in the git repository instead (which might even get updated if I find something more to fix).
Developer

FYI: The processed code is big enough, that in my install at least, Unity outright stops rendering text beyond a certain point in the code editor because of how long the string is.  "String too long for TextMeshGenerator. Cutting off characters."  Still functions normally, far as I can tell - the rendering's just messed up.

I can't say as that I've been able to test it yet, something's going wrong in my install that's preventing the processor from ticking as it should (probably just at low clockspeeds, like Default Mode's) - will update this when I fix whatever's broken.

All that being said: whoa.  This is a super neat idea, and I'm curious to know what one could actually pull off with it.  Given the proclivity of programmers to occasionally do utterly insane things (see also: Senbir itself, this interpreter, etc), there are tools for compiling/processing code from other languages into BF code, like this C compiler.  Though it's in a roundabout way, this does officially mean it's possible to write things in higher-level (?) languages, like C, and then run them in Senbir.  Would an OS or game made in Senbir-BF be usable?  Not in Default mode, or even Extended - I cannot begin to comprehend how slow it'd be with the base clockspeed of 60Hz.  Would it be a fun experiment?  Hell yeah, it would be!

(Also, sorry about kinda disappearing on everyone - I'm still working on the next update, but been sidetracked by playing Warframe, and working on Astronaut Plus Skateboard as of the past few weeks.)

I've seen that too, actually, Unity not rendering all the text. And yes, as far as I could tell too, it still worked, even allowed editing, it just didn't render all of it. I'd guess it's not really built for text-heavy applications. (At least not without some end-programmer effort to do things like split the text up into more manageable chunks.)

I don't see it much, though, probably in part since I've taken to minifying my code before pasting it in - not so much because of this, but because it means I don't have to scroll so much after pasting it in. (It's pretty easy to do, even - I just have the preprocessor output open in my editor, and use its regex replace to remove all instances of \s*//.*$ before I copy what remains. I've been thinking of making the preprocessor do it, but haven't bothered yet - dunno if I will.)

In theory, one could pull off essentially anything (computation-wise anyway) with it. In practice, though - what someone actually manages to do - yeah, that's where the interest lies, indeed. :) (I'll probably not do much/anything with BF myself, as making the asm do what I want in the space I have is tricky enough, but I certainly don't mind if others do.)

I'll note that clockspeed isn't the only problem for this with the default mode, I'd think the disk space is a bigger problem. I haven't tried it, so I'm making assumptions here, but I figure that anything even semi-significant having been compiled down to BF is likely to be large - and there's not really much space available here.

Also, the output method this interpreter uses means that it's even more limited than usual in user interaction, so game-type stuff is rather limited by that. OS-type stuff similarly. The thing about Turing-completeness is that it only talks about computation - and a lot of what modern computers do isn't really about that, instead involving things like real-time user interaction. Sure, a program on a Turing-complete computer could simulate such user interaction - but then it wouldn't be actual user interaction, now would it?

Still, even with those limitations, there's quite a lot that is possible. All it needs is for someone crazy enough to actually do it to come along... :)

Developer

The disk space and low computation speeds are both major issues, especially for the Default mode (I think you've probably made a program as fancy as is possible with your text echoer), but would probably be easier to handle with, say, the stats I have set up for working on SenbOS.

One major way I see to potentially improve the ability to make fancy stuff (like OSes, games, etc), would be to replace the current IO stream's binary representation with one pixel on an 8-bit-color monitor.  You'd have to choose between an 8-bit RGB palette (with 3 bits of R & G and 2 B, or similar), or an 8-bit grayscale, BUT, the payoff would be that actual output would likely be faster, and you can actually draw on a pixel-by-pixel basis with relative ease - the main challenge becomes picking where the pixel actually gets drawn (e.g, where in the 1-dimensional array of currentPixels is the output pointer), and I'm not sure if there's a way TO pick that.  Need to poke through the interpreter code more.

If that is possible, then the main issue remaining is that getting mouse input is impossible, and as such your OS probably has to be either command-line, or you control the mouse cursor with arrow keys or something.  Also, no first person shooters, but that's kind of a given with the super-low processor speed :P

(1 edit) (+1)

Here's a more graphical and interactive program - this time, one that draws Lissajous curves based on the parameters given at runtime by the user.

Honestly, the resolution of the default mode's screen is a bit small for this, so some of the curves aren't very recognizable, but at least some of them work - and if you know what's happening, even some of the ones for which the end result isn't very nice can at least be followed while it's being drawn.


The inspiration for this program came from Coding Challenge #116 on The Coding Train, where he generates a grid (or table) of such curves.

Now, the screen resolution in Senbir's default mode is way too small to show a grid of the curves all at once, so instead, the idea here is a virtual grid that the user moves around in, showing one curve at a time.


The grid is 8 by 8, and in addition, this program allows you to set the (initial) angular offset between X and Y, so that you can start drawing at a different point in the grid. The default offset is 8, which corresponds to 90 degrees (the difference between sin and cos) - with offsets from 0 to 31, each step is 11.25 degrees. Thus, with the default offset, you can draw a circle.

Moving around on the grid is done using IJKL - J/L for X and I/K for Y. The current position on the grid is shown in the two center columns (X on left, Y on right), with position 1 at the top and 8 at the bottom.

Changing the offset is done using WASD, where W/S decreases/increases the offset by 1, and A/D decreases/increases the offset by 8. The current offset is shown in the leftmost area, each column being an offset of 8, each row an offset of 1 (essentially, start at 0 in top-left, moving down, wrapping at the bottom to the next column).

Drawing the curve for the currently selected settings is done using Enter. This action uses the top two pixels of the leftmost separator column as status indicators - if either (or both) of these are bright green, it's working on drawing a curve (or preparing for it).

Both position and offset wrap around if you move them past their edges.

Note that using the top half of either grid direction may cause pixels to be skipped while drawing, due to the limited angular resolution being used to draw the curve. I believe I could fix this fairly easily, but only at the cost of making the curve drawing even slower than it already is (probably by a factor of 2), even when not using that half, so (at least for now) I've left that out.


Implementation-wise, this is probably one of the trickier programs I've made, since it uses a combination of both overlays and a variant of the disk runner technique, including overlays that only partially overwrite the previous overlay - plus it works with the built-in bootloader instead of needing a custom ROM.

However, unlike some of my previous programs, this one doesn't make any assumptions about the size of the addresses (memory or disk) - so I believe it could be built to be stored further into a larger disk, simply by prepending an appropriate NILLIST before preprocessing it. I could probably have made it slightly smaller if I did make such assumptions, but I tend to prefer not to (even if only for the challenge).

In all, I suspect I wouldn't like to have to maintain it, especially not after leaving it for long enough I forgot most of it. ^_^'


Somewhat interestingly, more than a quarter of the disk space this program uses is taken up by lookup tables - 68 of the total 250 words. That's in addition to the various DATACs that are interspersed with the code itself. These tables also require a specific alignment on the disk, but I got a bit lucky there and ended up getting the alignment without having to spend any space on it, just by moving them and the overlays around a bit.

About half of that space (32 words) are the precomputed (and prescaled) cosine values, that I'm using not just because I believe it's much faster than computing them on the fly, but because I think it takes less registers and disk space (though this probably depends a bit on which of the algorithms was used).

Another 32 are for the fast keyboard handling. It's actually a constant-time algorithm regardless of which key was pressed (always takes 9 cycles to decide where to go and set up the disk runner to do so), unlike a simple loop or sequence of IFJMPs (which are faster for the first key checked, but slower for later ones, and easily take more total space when there's more than just a couple keys to handle).

In return it both takes some disk space and sets limits on which keys I can use - though I could add 7 more keys to the 9 I have without taking any more space (except for the code that actually handles the actions for those keys of course).

I originally had separate handler code for each key, again for speed, but this ended up taking too much space, so I had to deduplicate them as much as I could - and managed to get it down from 9 to 4, while only adding 2 instructions to each remaining block, which was enough saved to fit everything in.

All together, this means that changing a setting takes about a second per step, regardless of which setting it is, which isn't too bad in my opinion. Not ideal, certainly, but given the restrictions of the default mode, not too bad.


The source code is pretty long, but this program is pretty self-contained, so here's a minified version ready to be put into Senbir:

DATAC 00000000000000000000000000010001
JMP 1 4
DATAC 00000000000000000000000000000001
DATAC 00000000000000000000000000010010
DATAC 00000000000000000000000000011100
MOVI 15 1
MOVI 14 10
MOVI 12 16
MOVI 2 2
MOVI 3 3
GETDATA 1 3 2
MOVO 1 22
MATH 15 2 0
MATH 15 14 0
MOVO 14 10
IFJMP 2 5 3
JMP 3 9
DATAC 00000000000000000000000010011000
GETDATA 1 3 2
MATH 1 3 5
PMOV 15 14 7 30 1 1
MOVO 14 29
MATH 15 14 0
MATH 15 2 0
GETDATA 1 3 2
MOVO 1 0
IFJMP 2 5 3
JMP 1 0
DATAC 00000000000000000000000000110010
JMP 1 17
MATH 3 3 1
PMOV 15 4 0 31 9 1
PMOV 2 3 9 17 9 0
PMOV 15 2 8 30 1 1
SETDATA 0 3 2
MATH 4 2 0
IFJMP 2 2 1
JMP 1 17
NILLIST 2
SETDATA 0 3 3
SETDATA 0 3 2
JMP 1 17
GETDATA 1 3 12
MATH 15 12 0
MATH 1 2 5
GETDATA 1 3 12
MATH 15 12 0
MOVO 1 20
NIL
JMP 1 17
DATAC 00000000000000000000000000111111
GETDATA 2 0 0000000000000000000000
MATH 1 2 5
PMOV 1 6 28 31 0 0
GETDATA 1 3 6
MATH 1 3 5
IFJMP 1 0 1
PMOV 6 5 28 31 0 0
GETDATA 1 3 5
MATH 1 12 5
GETDATA 1 3 11
JMP 1 16
SETDATA 0 3 3
DATAC 00000000000000000000000000000001
DATAC 00000000000000000000000001100001
DATAC 00000000000000000000000000000000
DATAC 00000000000000000000000001110011
DATAC 00000000000000000000000001100100
DATAC 00000000000000000000000000000000
DATAC 00000000000000000000000001110111
DATAC 00000000000000000000000000000000
DATAC 00000000000000000000000001101001
DATAC 00000000000000000000000001101010
DATAC 00000000000000000000000001101011
DATAC 00000000000000000000000001101100
DATAC 00000000000000000000000000001101
DATAC 00000000000000000000000000000000
NIL
DATAC 00000000000000000000000011000011
NIL
DATAC 00000000000000000000000011000011
NIL
NIL
DATAC 00000000000000000000000011000011
NIL
DATAC 00000000000000000000000011010111
DATAC 00000000000000000000000011001100
DATAC 00000000000000000000000011010111
DATAC 00000000000000000000000011001100
DATAC 00000000000000000000000011100010
NIL
NIL
DATAC 00000000000000000000000000000000
DATAC 00000000000000000000000000000001
DATAC 00000000000000000000000000000010
DATAC 00000000000000000000000000000011
DATAC 00000000000000000000000000000100
DATAC 00000000000000000000000000000101
DATAC 00000000000000000000000000000110
DATAC 00000000000000000000000000000111
DATAC 00000000000000000000000000000110
DATAC 00000000000000000000000000000101
DATAC 00000000000000000000000000000100
DATAC 00000000000000000000000000000011
DATAC 00000000000000000000000000000010
DATAC 00000000000000000000000000000001
DATAC 00000000000000000000000000000000
DATAC 11111111111111111111111111111000
DATAC 00000000000000000000000000000001
DATAC 00000000000000000000000000001000
DATAC 11111111111111111111111111111111
DATAC 00000000000000000000000010001010
PMOV 15 2 0 31 3 1
PMOV 15 3 0 31 2 1
SETDATA 0 3 2
MATH 4 2 0
IFJMP 1 2 1
JMP 1 17
DATAC 00000000000000000000000010010111
PMOV 7 2 0 31 18 0
MATH 0 3 5
PMOV 2 10 9 13 18 1
GETDATA 1 3 10
PMOV 1 13 29 31 6 1
PMOV 2 10 25 29 2 1
GETDATA 1 3 10
PMOV 1 13 29 31 9 1
SETDATA 0 3 13
MATH 9 2 0
IFJMP 1 2 1
JMP 1 17
JMP 1 14
DATAC 00000000000010000000000000000000
JMP 1 1
JMP 1 14
DATAC 10010000010010100000000000000000
JMP 1 3
JMP 1 14
DATAC 00010100000011100000000000000000
JMP 1 3
JMP 1 14
DATAC 10011100010100000000000000000000
JMP 1 3
MATH 7 7 1
SET 7 3 00001000
MATH 8 8 1
SET 8 3 00000010
MATH 9 9 1
JMP 1 14
DATAC 00000000000000000000000001000000
MATH 2 6 5
JMP 1 14
DATAC 00000000000000000000000001010000
MATH 2 5 5
JMP 1 14
DATAC 00000000000000000000000001100000
MATH 2 10 5
MATH 13 13 1
SET 13 0 01100000
PMOV 15 2 0 31 2 1
PMOV 7 2 27 31 9 1
SETDATA 0 3 2
SET 2 0 01010100
PMOV 8 2 29 31 9 1
SETDATA 0 3 2
SET 2 0 01011000
PMOV 9 2 29 31 9 1
SETDATA 0 3 2
JMP 1 14
DATAC 00000000000000000000000010000000
MATH 2 11 5
JMP 1 14
DATAC 00000000000000000000000000110011
JMP 3 9
PMOV 3 11 29 30 1 1
JMP 1 9
MATH 3 3 1
PMOV 7 3 27 31 9 1
MATH 2 7 0
PMOV 15 2 0 31 2 1
PMOV 7 2 27 31 9 1
JMP 1 11
JMP 1 0
PMOV 15 3 0 29 0 0
MATH 15 3 1
MATH 2 2 1
SET 2 0 00010100
PMOV 8 2 29 31 9 1
MATH 3 8 1
MATH 3 3 1
SET 3 0 01010100
PMOV 8 3 29 31 9 1
JMP 1 11
JMP 1 0
PMOV 3 11 30 31 0 0
JMP 1 9
MATH 3 3 1
SET 3 0 00011000
PMOV 9 3 29 31 9 1
MATH 2 9 1
MATH 2 2 1
SET 2 0 01011000
PMOV 9 2 29 31 9 1
JMP 1 11
JMP 1 0
SETDATA 0 0 1101000000000000000000
JMP 1 14
DATAC 00000000000000000000000010000100
JMP 3 9
SETDATA 0 0 1101000010000000000000
PMOV 15 9 0 28 0 0
PMOV 15 8 0 28 0 0
MATH 15 9 0
MATH 15 8 0
PMOV 8 9 28 31 16 0
PMOV 15 7 0 26 0 0
PMOV 7 3 0 31 18 0
PMOV 15 0 0 31 7 0
MATH 9 0 2
MATH 3 0 0
JMP 1 14
DATAC 00000000000000000000000010001011
JMP 3 9
SETDATA 0 0 1001000000000000000000
MATH 15 9 1
MATH 15 8 1
JMP 1 14
DATAC 00000000000000000000000000110011
SETDATA 0 0 1001000010000000000000
JMP 3 9
Developer

So, this is less of the usual "share a cool thing" post, and more a general question about how to make the TC-06 more...well, usable.

I'm toying with ideas on how to implement a C compiler for it (likely either an LLVM extension, or GCC extension), because being able to write in a higher-level language and then compile to the TC-06 would make programming advanced things way easier, not to mention just being a huge achievement.  As I understand it, most compiler implementations are going to want machine-code/assembly implementations of various functions (e.g, the function for the + operand), so in-between google searches and delves into manuals, I decided to start prototyping some of those basic functions.

I don't think the extent of how utterly useless the RAM is had hit me until now.  I decided to start with = and +, as they're arguably the most basic (and most commonly used) operands - for instance, you can represent subtraction & multiplication with +.  Here're my notes on the two.

-=SET OPERATION (=)=-
 * x = y;
 * I don't think you can build a programming language without this.
 * Assumes register 0 is a pointer to the start of the arguments, and register 15 is the integer 1.
 * Assumes OFST <N> is run, where N is the first address of the SET op.
 * ASM, V1:
MOVI 2 4            //Addr 00.  Move the command to be modified into register 2.
PMOV 0 2 7 31 0 0   //Addr 01.  Splice the pointer/address from register 0 into register 2.
MOVO 2 4            //Addr 02.  Move the modified MOVI back into RAM.
PCSR 2 0            //Addr 03.  Temporarily disable the current offset.
MOVI 4 0            //Addr 04.  Acquire the source address for MOV and put it in register 4.
PCSR 2 1            //Addr 05.  Re-enable the offset.
MATH 15 0 0         //Addr 06.  Increment the pointer by one.
MOVI 2 10           //Addr 07.  Move the command to be modified into register 2.
PMOV 0 2 7 31 0 0   //Addr 08.  Splice the pointer/address from register 0 into register 2.
MOVO 2 4            //Addr 09.  Move the modified MOVI back into RAM.
PCSR 2 0            //Addr 10.  Temporarily disable the current offset.
MOVI 5 0            //Addr 11.  Move the destination address for MOV into register 5.
PCSR 2 1            //Addr 12.  Re-enable the offset.
MOVR 0 5 4          //Addr 13.  Actually set X (register 4 pointer) to Y (register 5 pointer). Function finished.
 * Version 2 assumptions?
 * It assumes that register 15==int 1, and that OFST<N> is run, where N is the pointer for variable X (target), N+1 is the pointer for variable Y (destination), and N+2 is the code.
 * ASM, V2:
DATAC <X>           //Addr 0.  Variable X.
DATAC <Y>           //Addr 1.  Variable Y.
MOVI 0 0            //Addr 2.  Set registers[0] == the pointer for X.
MOVI 1 1            //Addr 3.  Set registers[1] == the pointer for Y.
MOVR 0 0 1          //Addr 4.  Set ram[x]=ram[y]. Function finished. -=ADD OPERATION (+)=-
 * x = y+z;
 * Assumes OFST<N> is run, where N is the pointer for variable X (target), N+1 is the pointer for variable Y (first number), N+2 is the pointer for variable Z (num 2), and N+3 is the code.
 * ASM:
DATAC <X>           //Addr 00.  Variable X.
DATAC <Y>           //Addr 01.  Variable Y.
DATAC <Z>           //Addr 02.  Variable Z.
MOVI 0 0            //Addr 03.  Set registers[0] == the pointer for X.
MOVI 1 1            //Addr 04.  Set registers[1] == the pointer for Y.
MOVI 2 2            //Addr 05.  Set registers[2] == the pointer for Z.
MOVI 3 10           //Addr 06.  Move a MOVI command into register 3 for modification.
PMOV 1 3 7 31 0 0   //Addr 07.  Splice the pointer for Y into the MOVI command.
MOVO 3 10           //Addr 08.  Move it back into RAM.
PCSR 2 0            //Addr 09.  Disable the offset.
MOVI 1 0            //Addr 10.  Go ahead and actually load the contents of variable Y into register 1, overwriting the pointer.
PCSR 2 1            //Addr 11.  Re-enable the offset.
MOVI 3 16           //Addr 12.  Move a MOVI command into register 3 for modification.
PMOV 2 3 7 31 0 0   //Addr 13.  Splice the pointer for Z into the MOVI command.
MOVO 3 16           //Addr 14.  Move it back into RAM.
PCSR 2 0            //Addr 15.  Disable the offset.
MOVI 2 0            //Addr 16.  Load the actual contents of variable Z into register 2, overwriting the pointer.
PCSR 2 1            //Addr 17.  Re-enable the offset.
MATH 2 1 0          //Addr 18.  Add the contents of register 2 (variable Z) to register 1.
MOVI 3 22           //Addr 19.  Move a MOVO command into register 3 for modification.
PMOV 0 3 7 31 0 0   //Addr 20.  Splice the pointer for X into the MOVI command.
MOVO 3 22           //Addr 21.  Move the command back into RAM.
PCSR 2 0            //Addr 22.  Disable the offset.
MOVO 1 0            //Addr 23.  Set X to the result, by moving the value into the RAM location specified by its pointer.
PCSR 2 1            //Addr 24.  Re-enable the offset.  Function finished.

Yikes.  Had to draft some new codes just to make them possible with any degree of ease.  From the current documentation file:

OP-CODE: UTL (0x1011) <sub-code = 4b> <arguments = 24b>

  • Gives 16 new sub-op-codes, primarily utility functions, like enabling an offset to Absolute operations (e.g, MOVI 1 0 becomes MOVI 1 0+offset)
  • If a sub-code is given a title, then you can refer to it by name directly in the Assembler - i.e, UTL 0 0 has the same result as OFST 0 in the compiled bytecode.
  • Operation 0x0 - OFST <24-bit address>: Sets an OFFSET (from address 0) for all ABSOLUTE ADDRESSING. Affects MOVI, MOVO, SETDATA flag 2, and GETDATA flag 2. Uses the full 24 bits given to it.
    • OFST 5 sets a 5-address offset to all absolute address references - save for those in IFJMP & JMP with Flag 1 or Flag 3.
    • This means OFST 5 followed by MOVI 1 0 will result in MOVI moving the contents of address 5 (0 + 5) into register 1.
    • But JMP 1 0 will still jump to & execute the contents of RAM address 0. Since flags 0 and 2 provide relative addressing, it's not necessary.
    • OFST 0 will also reset it so things work as expected.
  • Operation 0x1 - PCSR <4-bit sub-sub code> <20-bit argument>: Subcodes upon subcodes! This lets you interact with the processor somewhat.
    • PCSR 0 <arguments ignored>: Get CURRENT COUNTER POSITION. Similar to a GETDATA op, but for processor info instead. Returns the current counter position in Register 1.
    • PCSR 1 <arguments ignored>: Get CURRENT OFFSET. Same as PCSR 0, but for the offset instead.
    • PCSR 2 <1-bit flag>: Temporarily ENABLE or DISABLE the offset.
  • Operation 0x2 - TIMR <2-bit OFF, START, PAUSE, GET value> <22-bit TIMER ID>: Times the number of cycles run by the processor.
    • TIMR OFF <id> (argument 0x0): The default state. Sets the # of cycles to 0, and won't increment them.
    • TIMR START <id> (argument 0x1): Sets the # of cycles to 0, and starts incrementing it with each clock cycle run.
    • TIMR PAUSE <id> (arguiment 0x2): Pauses incrementation, but leaves the # of cycles alone. If run while paused, resumes cycling.
    • TIMR GET <id> (argument 0x3): Sets the contents of Register 1 to be the number of clock cycles run since the last call of TIMR SET.
    • The ID is useful if you're working in, say, a multi-tasked environment, and you want your program to time itself so it won't run over a requested number of cycles.
  • Operation 0x3 - MOVR <1-bit flag> <4-bit source-addr register> <4-bit dest-addr register> <remaining bits ignored>: Like MOVI and MOVO, but lets you MOV directly from one RAM location to another.
    • MOVR 0 <x> <y>: When the flag is 0, it uses ABSOLUTE ADDRESSING, no matter what. If registers[x]==4, then the source address will always be 4.
    • MOVR 1 <x> <y>: When the flag is 1, it will use RELATIVE ADDRESSING only if OFST is active. In that case, the source address would be registers[x]+OFST; say an offset of 5, and [x]=4, that gives 4+5 for a source address of 9.
  • Operation 0x4 - TBD
  • Further operations: TBD

I'm not sure about MOVR - it basically compresses a bunch of operations down into one, and serves only a very specific edge-case purpose, to my knowledge.  It's not even implemented or anything, just wrote it up to use in simplifying the = function.

So, that leads me to the question of the hour - how do I render the TC-06's RAM practical for storing more than just code, and should I?  Part of Senbir's charm at this point might be that its instruction set is unusual, and that programming for it is a challenge, even when you have lots of RAM, disk space, and processor speed available, simply due to that unusual set - adding, say, a "RAMC" op-code that does sub-codes for most major functions, but solely in RAM (e.g, an actual MOV comparable to that of Redcode or similar) would probably circumvent some of that challenge, and that charm.

If making it more practical were to potentially be detrimental to the spirit of the game, should I then consider just doing a proper spinoff with that alternate instruction set?  Something you could select in, say, Custom mode - same peripherals, world, underlying "hardware", etc, just a new instruction set/processor.

Regarding the RAM being useless: yeah, for a while now I've actually been considering it a place that is primarily only for code, and not very useful for data. You may have noticed that I've been using the disk even for temporary runtime data (e.g. in Snake) - that wasn't _just_ because of the size...


(A disclaimer: I haven't actually done any real work on/with compilers, so much of this post is really just guesswork and assumptions - since you've apparently been researching it, you might already know better.)

I noticed an implicit assumption in your function implementations: that the arguments are always in RAM, never in registers.

However, I think one of the things modern compilers usually spend some effort on is to keep as much as possible in registers (and keeping track of what is in which register), to avoid having to access RAM (which is usually much slower than the registers).

Obviously, this is limited by the registers usually being far less numerous than available RAM, and sometimes other limitations, but IIUC esp. things like local variables are often kept purely in registers.

This suggests that it may be better to think of x=y as a sequence of several operations:
- loading the address of y (if necessary)
- loading the value of y from that location (if necessary)
- setting x to y (this happens in the registers)
- loading the address of x (if necessary)
- storing the value of x (if necessary) into that location.

so that the compiler can skip the ones that are not necessary in that particular location (e.g. "x=y;z=y;" doesn't need to re-load y).

This would also simplify the implementation of e.g. x=y+z, since it would simply do the same first two steps, then again for z, in exactly the same way (no real difference in implementation, just the register assignments and pointer locations), and just the middle step is different.

I'll note that some of this probably depends on the ISA - e.g. modern x86_64 I think has a lot of instructions that work on data in RAM without needing separate load/store operations, and I think its calling conventions generally use RAM in form of a stack, which it has instructions to manipulate directly. I believe those are still slower than the register equivalents though. (Oh, and, those calling conventions don't really apply to the functions we're talking about here, since these are at a rather lower level.)

As such, it may be more useful to look at the operations the compiler expects to be given for implementing a RISC-style architecture that doesn't have those things, since the TC-06 doesn't either (except for a few special cases). I suspect that it may look more like what I suggested above, with separate operations for load/store and the actual action (set/add/etc).

Of course, I could be wrong - for all I know the compiler might be optimizing by parsing the resulting code and deduplicating the load/stores somehow - but I think that would require rather more deep information about what each of the instructions/operations do, which the compiler wouldn't be given simply by implementing those functions you mentioned.


Regarding MOVR, I'll note that it makes it possible to write a bootloader that doesn't use self-modifying code (and is smaller and faster):

SET 15 3 1
GETDATA 1 3 0
MATH 1 3 5
JMP 3 6
NILLIST 22
GETDATA 1 3 3
MATH 15 3 1
MOVO 1 0
MOVR 0 0 3
IFJMP 2 4 3
JMP 1 0

Other than that meta-point, though, I don't think it allows you to do anything technically new, unless the only reason you couldn't do it before was lack of space or that it took too much time to execute.

So, if you consider the need for self-modifying code (or the space/time restrictions) as central to Senbir, you may want to avoid adding it.

On the other hand, if you don't, there are other variants that would be far more useful - e.g. MOVI/MOVO variants with the memory address in a register instead of an immediate (or even better, both at the same time) - so you might still not want to add it, depending on just how easy you want these things to be.

(I think the decision about should is more up to you than anyone else, since it's your game. Especially the decision about how far to go, since it doesn't have to be all or nothing.)


In some ways, OFST is a similar change, in that it lets you do much the same thing as before but far easier, with much less code modification (you could have achieved the same thing by modifying the MOVI/MOVO instructions it affects) - with the exception of the meta-point that it allows you to run self-modifying code that wasn't designed for allowing such offsets (except in its JMPs).

I'll also note that I'm not aware of any other processor with an instruction quite like OFST, and I think you might here be starting to run into (one of) the reason(s) for this: it is global state that significantly affects other instructions, in such a way that you need to be aware of it and turn it off/on often - and depending on what you're doing, even that may not be enough.

Consider, for example, if OFST is used by the OS to set up an area for the program to work within, and the compiler thus generates variable addresses within that area (instead of truly global ones which might be what it's expecting), and then uses OFST for these internal functions like you've done here... Then the current implementation of turning it off wouldn't be enough, since it actually needs to use the previous offset instead to end up at the correct address. And if the program itself also uses OFST internally for other things, it gets even more complicated and/or necessary to carefully track the stack of offsets.

(I'll note that modern systems do tend to have something kind of similar, but a bit more flexible yet in some ways simpler - namely an MMU. Which is a device that sits between the processor and the RAM, remapping all the addresses, so that all the programs the OS loads can use the same addresses without conflicting with either each other or the OS.)


Regarding making it a separate ISA/processor you can select in a custom mode, I think that's a pretty clean solution, especially if you want to maintain the basic nature of the original challenge in the default modes while also allowing more complex things (like an OS) to be more easily built in a custom mode. Allowing choice here would also let you push at least some of this decision to the player, so that the should is up to them and what they want.

(In some ways you've already done that, except only allowing users to switch processor by starting a different version of Senbir itself, since newer versions of Senbir have a CPU with extra features...)


To be honest, I've actually been intending to do pretty much exactly that (custom ISAs/CPUs) in my own simulator (once I've gotten the default mode simulation working right - it currently has some significant bugs, like not using signed numbers, only unsigned, that I want to fix first).

A while back I even designed a different ISA that I think allows all the same things the TC-06 does (except UTL since that didn't exist yet), but without using sub-codes, and that also is much more flexible/easier to use (and maybe to implement, though I haven't tried to actually do that yet). There's probably some details I missed or could improve, but IIRC it seemed pretty nice. It was quite different in several ways, though.


By the way, out of curiosity, does the TC in TC-06 stand for anything?

Developer

While I can understand the allure of using registers, especially for simple operations (int X = int Y, for instance), I figured RAM might be better overall since it means you can have as many "arguments" as you need, especially if you get into custom datatypes (like a struct) that could easily balloon past 7 or 8 registers being required for even a simple X=Y op.  That is, however, coming from my own implicit biases, and lack of optimization skill, so I don't see it as being HUGELY unlikely that I'm wayyy off the mark in how best to do that.  (Also - you almost certainly know way more about what goes on under the hood of modern computers than I do.  Knowing how computers work is probably the more important factor for compiler development than having a tiny bit of research into how compilers work.  :P)


MOVR basically seems like a one-off to get out of needing to write a bunch of self-modifying code just to move one memory address' contents through RAM - while it can be used for some small improvements here and there, it's not necessarily worth taking up a whole sub-code slot for.  Your suggestion for alternate MOVI/MOVO modes is probably the more practical thing to add, even if it means an extra clock cycle or two.


OFST is definitely worth keeping - it's all-around useful, and in the case of the multitasking kernel I wrote a while back, mandatory for functionality.  Far as I can tell, there's no way to make a program that'll live at an offset without OFST - you can't just self-modify the MOVI/MOVO ops to splice the offset in, because self-modifying code would need that offset in the first place.

(Also, now I'm tempted to make an OFST variant for Custom Mode that lets you set up your own MMUs.  The code-creep is getting out of hand, there're just too many cool things to add!)


My thinking for using that separate mode is that it means the current feel (and perhaps charm) of the TC-06 can be preserved with ease, while also easily enabling access to a more practical processor (or less practical, if you so desire - experimenting with an online circuit simulator & making a byte of RAM inspired me to make a byte-based lower-fi TC-06 derivative, the specs for which will go up on the Gitlab at some point soon) for doing fancy stuff.

I'm aware Senbir is my game, but I also feel like it has a certain charm to its terribleness, and I'm worried adding a new-opcode (e.g, "RAMC <4-bit sub-code for practical RAM-based variants of all the main codes> <24 bits of arguments for that sub-code>") would potentially mess that charm up, or disturb the overall feel of the TC-06 & how it works, hence asking about it - don't wanna ruin it for my playerbase!  I do definitely want to look into making a more practical RAM-based architecture with less reliance on registers (maybe use them more as op-code arguments/variables than they are now?) down the line, just to explore what it'd be like.


(Also: no, TC-06 isn't really an acronym for anything.  It's sorta loosely based around "The 006 Cooperative", but mostly just serves as a cool abbreviation-sounding processor name.  :P

Also, sorry if this post is a bit discombobulated, it's six in the morning.  Am not as smart as I should be/could be.)

(2 edits)

Regarding MOVI/MOVO variants taking more clock cycles than MOVR, well, not necessarily, because they're more flexible and so can be used to do more parts of the job.

Consider the first version of your SET operation, with R0 pointing to the arguments - your version with MOVR takes 14 cycles, while with the MOVI/MOVO variants it could be done in 5, without self-modification (thus not needing OFST), and using one register less:

MOVIR 4 0   // R4 = mem[R0] : read the source address into reg 4
MOVIR 2 4   // R2 = mem[R4] : read the data from the source address
MATH 15 0 0 // R0++         : increment argument pointer
MOVIR 4 0   // R4 = mem[R0] : read the destination address into reg 4
MOVOR 2 4   // mem[R4] = R2 : write the data to the destination address

If the MOVI/MOVO variants supported both register and immediate at the same time, it could be done in 4, since then R0 doesn't need to be incremented.

For version 2, though, you're correct that it would take an extra cycle - though that assumes we're not counting the cycles required to move the pointers into those particular memory locations from wherever they were originally. That may or may not be reasonable, depending on the larger context.

(Btw, unlike MOVR, MOVIR/MOVOR could be used for your ADD operation as well.)

Of course, that flexibility also means they remove far more of the need for self-modifying code, so it depends on what you want the game to be - MOVR is somewhat less of a change in that respect.

Regarding taking up a sub-code slot, that's not in itself a problem, since there's really lots of space available - worst-case, you can not only do sub-sub-subcodes, but make multi-word instructions. (As in, the instruction at address N takes arguments from address N+1, and sets the next address to be executed to N+2 instead of N+1. Those arguments could even themselves be subcodes.) Consider e.g. the x86 family - it has 1-byte instructions, but from what I've read, it also has instructions that are up to 15 bytes long. (But then, it's got thousands of instructions - exactly how many depends on how you count them...)

Of course, an indirect problem with that is having to implement and support all those instructions... I'd say that would be a better reason to not add them without a decent reason for having them.


Regarding functions using registers or RAM, having many/large arguments, etc. - one thing to remember is that there's a major difference between language-level functions and the kind of compiler-operation-level functions I believe we were talking about here.

The language-level functions are the kind the programmer specifies in the higher-level language they're writing in (C, C#, whatever), with whatever parameters etc. they specify, and executing whatever code the programmer wrote - they're a part of the source code that is the input to the compiler.

At the CPU level, execution of these functions is generally started by a jump from whatever code called them, and once they're done executing, there's another jump to return to the calling code. Where to put the return address, arguments and return value (if any) for the function differs between architectures and languages and is part of what's generally termed the calling conventions of that architecture/language. Here, using RAM for arguments often makes a lot of sense (often in the form of a call stack).

The compiler-operation-level functions, on the other hand, are (I assume) used by the compiler to generate the assembly code that implements a given language-level function - and so are defined by the compiler itself (fixed parameters etc.), and basically return some assembly code that implements the operation that particular function is for. I'd say they are probably more accurately thought of as templates, rather than functions, since they don't directly execute the operation, but return the code for executing it (to be put into the generated program).

At the CPU level, in the program the compiler generated, those functions (or rather the blocks of code they returned) are generally reached without any jumps, and don't jump when they're done; instead execution simply falls through from one operation to the next, since the compiler placed copies of their code into the output, one after the other, in such a way that the combination does what the higher-level language described. (Doing it with function calls (jumps), while possible, would be much slower and would probably end up taking more space.)


This leads to a fairly obvious optimization, where if the code for one operation loads a value from memory into a register to do something with it, and the next operation also needs that same value (or the result of the first operation) to be in a register to do something with it, then it's rather wasteful to load it from RAM again, since it's already present in a register. (Whether that value came from an argument to the language-level function is rather immaterial at that point.) However, that does require some careful tracking of exactly which value is stored where. (This is the optimization I meant decent compilers typically do, as it's a relatively easy and effective one - though not quite as important for the TC-06 since its RAM is very fast.)


By the way, at the compiler-operation level, I'd guess there's probably no such thing as a struct - by that time, the compiler has probably already transformed operations on a struct into operations on either its component fields or the block of memory that holds it, depending on what is being done with it. At the CPU level, copying a struct (instead of just the pointer to one) generally means copying either its fields one by one, or (often quicker/easier) the entire block of memory that holds the struct (which can be done with a tight loop) - and the compiler knows this and generates the assembly code accordingly, based on the low-level operations it has available for the target architecture.


Regarding OFST and programs living at an offset without it - this can be done by pushing (some of) the responsibility into the program loader. (As an example, I know that GNU/Linux does something kinda like this, though the details are different of course.)

Basically, your kernel (or the OS around it) necessarily has some piece of code that loads a program from disk into memory to be executed, right? And that loader necessarily knows which offset into memory it is loading that program into. So, in addition to loading the program into memory, that loader could also update (parts of) the program's code to work at that offset, and tell it what that offset is so it can do whatever else it needs to do to adapt itself.

As a simple example, the loader could update every MOVI and MOVO instruction it loads by adding the offset to the address stored in that instruction - and then set a register, let's say R14, to the offset before starting execution of the program. That would make the MOVI and MOVO instructions already point at the right places, and if the program does any self-modification, it can use R14 to adjust how it does that - and since the MOVO instructions are already updated, it can easily save the other modified instructions in the right places.

Of course, a fancier loader could also update any other instructions that are known to contain absolute memory addresses, or the program file could contain a header that tells the loader to update specific other locations as well (e.g. DATACs) that it can't auto-detect - but I think updating MOVI/MOVO is enough for things to work.

Technically, R14 isn't needed in this scenario - the program could MOVI one of its MOVI/MOVO instructions and grab the offset from that - but it makes things easier, and the loader probably has the offset easily available anyway, so why not?

Technically in the other direction, I think that if the offset is given in a register (or PCSR 0 does what I think it does), then even just updating a single MOVO would be enough (could even be on a fixed address), but that would make things harder on the program. It's probably better to make the loader do more, to avoid having to duplicate that effort in every program.


Come to think of it, another solution would be to have an OS function at a known fixed absolute address, that basically does a relative MOVO - call it with a relative target address and return address, and the OS function adds the offset to those addresses before performing the MOVO operation and returning to the program. If given an equivalent MOVI-performing function, or some way to find its offset (whether R14 or PCSR 0), I think it can do everything it needs to. Though in a somewhat more complicated (and slower) manner from the program's point of view, so the other solution is probably nicer.


Regarding the MMU, I would suggest adding an MMU device (for a GETDATA/SETDATA port) rather than adding CPU instructions for its functions. Mainly because that makes it easier/more sensible for some game modes to not have it, or for custom modes to have different models that work differently or have different APIs, without the CPU's instruction set having to be different. (Though also because I see it conceptually as a separate device that happens to sit between the CPU and the RAM, even though most (but not all) CPUs these days apparently integrate it into the same silicon chip.)

Based on just a little bit of googling, it's apparently a pretty complex device, with enough possible options and variations (segmentation vs paging, page sizes, PTE levels, APIs for process switching, etc.), that I don't think we're likely to get it perfect first try - if there even is such a thing as perfect here. There are trade-offs involved. So being able to experiment with different variations with otherwise equivalent computers would probably be nice.

(One tutorial I found basically said that, like everything in programming, the only way to really understand it is to play with minimal examples - but that the minimal example for using that MMU is rather large because it involves making your own small OS... On the other hand, a tutorial for a different MMU was much smaller and simpler, so it apparently depends.)


It sounds to me like you rather like the original ISA, in part because of its limitations, and therefore don't really want to loosen those limitations up much (if at all) - but at the same time, want to be able to do more advanced stuff without having all of those limitations making it extra hard. Which suggests that having them be runtime-optional is probably the best solution. And implementing that as separate modes (or options for custom modes) sounds to me like a good way of doing that.

I may be biased in that assessment, though, as personally, I think that the limitations are part of the challenge, and that it probably wouldn't be quite as fun to do those early levels (or some of the other things I've done) without them, as it would be rather too easy. But at the same time, I agree that they can get rather annoying when trying to do more complex things later. And thus, that it would be nice to have options to enable choosing the appropriate difficulty for any given idea. (Also, I tend to go for providing options and flexibility in general, making frameworks/toolkits more than products, in part to avoid having to choose for others. This tends to cause a certain amount of overengineering on my part... Like designing my simulator so that the CPU's instructions can be replaced/reconfigured individually...)

(Also, I'm rather weird in several ways, and not really a people person - so I don't really think I should try to speak for players in general.)


Come to think of it, something like this could also be integrated as part of the main game - essentially having things be unlocked as the player goes along and reaches more difficult levels, kind of like achievements.
E.g. after finishing some basic screen manipulation levels, "Re-reading the documentation with your newfound experience, you find you now understand a part you didn't before - which shows that there's a way to change the resolution and color depth of the screen." and continue with some levels that use the higher settings.
Or when you start needing better instructions, "You suddenly notice that some pages in the manual had gotten stuck together. Carefully peeling them apart, you discover that there are some more instructions that you didn't know about before."
Or maybe, "You discover a small box tucked away at the back of the computer. It turns out to contain a memory upgrade and a better processor."
Or "Studying the internals of the computer, you notice there's a jumper marked "debug mode" on one side and "normal mode" on the other - currently set to debug mode. After changing its position, the computer starts to run much faster!"
Etc.

Of course, that kind of depends on thinking up some more levels that would make for a decent progression...


Eh, no worries. This post is probably no better. *Looks at clock* ... ~8am... Ok... time to go to bed I guess... Just gonna post this first... *shakes head* (... ok, ready to post finally... *checks* 08:45... *sigh*)

(+1)

Here's a program that is a bit unusual for mine, in that it doesn't really work in the Default Mode of Senbir. So I've tested it in the Extended Mode instead, and it seems to work there.

It's a TC-06 emulator. (For the version of Senbir I currently have installed - so without UTL/OFST.)


Technically I suppose you could say that the emulator itself fits in the default mode, since all its code and internal data takes less than 256 words, but to be used it needs some data areas for the emulated memory, registers and disk drive - and while I've managed to squeeze in the area for the memory, that still leaves the registers starting at address 256 (exactly), and the disk area comes after that (to take the rest).


It's currently set up to emulate approximately the default mode - 16 regs, 32 words of RAM, and whatever disk space remains available after the emulator code and data areas. I believe it could fairly easily be modified for larger memory though - even emulating more memory than the host has - as long as there's enough disk space for storing it.

While I haven't really tested it comprehensively, it appears to work with the programs I have tested. It currently includes a basic bootloader in ROM and my image displaying program on the emulated disk (the one that fits in ROM while showing a win screen), and those seem to work.

I'm not saying the behaviour is 100% identical - especially for code doing things it shouldn't like trying to read/write memory outside of what's available - but for well-behaved programs I believe it should work pretty much as expected. (Well, as long as you don't reboot without rewriting the disk at least, since the emulated RAM isn't reset at boot...)


It's horribly slow, though. Slowness is not really unexpected for an emulator like this, but even so.

That bootloader and image program, when run directly on the extended mode machine, takes about 3 seconds to draw the first pixel, and 14 more until it's done (machine HLTed), so about 17 seconds total from power-on to HLT.

When run in the emulator, the first pixel was drawn after about 228 seconds (3m 48s), and it was done about 1174 seconds later (19m 34s), for a total of about 1402 seconds (23m 22s) from power-on to HLT.

That's a factor of 82.5 in how much more time it takes in the emulator... ouch.

A lot of that (maybe most) is due to needing to use the disk runner technique for the emulator itself, of course - if it could fit in RAM (and was written to do so), it would obviously be significantly faster (though still much slower than running natively).


One potentially interesting tidbit is that the code for handling getdata/setdata is comparable in size to the code for the rest of the instructions put together. That gives an indication of how complicated those instructions are...


Also, in addition to/instead of emulating larger memory, I think it wouldn't really take all that much to modify this program to essentially do preemptive multitasking (not cooperative), as long as there was enough disk space on the host for storing the data for two or more programs (plus the extra code). I don't think it would be very difficult to make it switch between two programs, executing one instruction at a time for each of them, which basically makes them run concurrently, without being aware of each other - since they each have their own set of registers, memory, etc. - or even needing to know about the emulator. (It would be a particularly slow kind of multitasking though.)

Given a larger monitor, they could even be given separate sections of it to display themselves simultaneously, though that might come at the cost of the emulated video memory not really having the full 32-bit range of storage per pixel (since the secretly higher resolution takes some of the bits), or being much slower because the emulator would have to keep a separate copy of that memory.

That's getting into OS territory, though - it wouldn't really surprise me too much if either of those turned out to be more complicated to add than I currently think...
Developer

I figured it was only a matter of time before some sort of emulation/virtual machine was made in Senbir.  But...I'd basically figured the first would be a glorified bootloader, sorta like what I set up in the multitasking kernel.  This is...stupidly impressive, to vastly understate it.

(I really need to just get around to releasing the current update.  Been horrendously sidetracked by Warframe & working on/off on Astronaut Plus Skateboard lately.  Well, that, and also the RISC-06 system...did I post about that yet?)


If functionality breaks in Default mode, I'd say it's probably not compatible/doesn't fit.  Especially if that entails Unity blowing up - it'll almost certainly throw a fit about the array being out of bounds if one tries to copy the emulator onto the Default mode disk.


Makes me wonder how feasible it would be to make swap a thing; it could potentially get around the issue of RAM being nigh-on useless if you used RAM solely to hold a swap system that can use part of a disk (or a whole disk, when/if I get around to adding multi-disk setups to Custom Mode) - programs would suffer a performance hit, sure, but on the flip side, you get more RAM to work with, dynamic address remapping (means your programs don't need to sit sequentially in ram, which would make memory management so much easier), and maybe marginally less self-modifying everything.


I can't say as that I have anything smart to say about the slowdown, so just: whoa.  That's impressive levels of performance drop.


I'm not entirely clear on the finer details of multithreading/multitasking, but I can see how this would make for a decent multitasking system.

(Also: if "secret higher-resolution" mode on the monitors is extended SETDATA ops; those were absolutely not intended to provide a max resolution increase.  If the game doesn't explode violently when you go above 32 bits for color+width+height?  I have no intention of changing that - unintentional cool features are still features!)


(Also, once again, pre-emptive apologies for loopiness & lateness and such.  I really, really need to go to bed at more sane hours.  And, like, not procrastinate until going to bed at insane hours is necessary >.<)

(3 edits)

I don't remember seeing any posts specifically about RISC-06, but I may just have missed it.

I do remember us chatting about the possibility of other CPUs though, and seem to remember some chat about RISCy ones as part of that.

I think I mentioned that I had designed a RISCy ISA that encompasses the functionality of the original TC-06 instruction set - but I don't think I posted it. It's not perfect by any means, but just in case it might give you any useful ideas (seeing as you're apparently building something like that), here it is (well, I ended up improving it a bit before posting it, but it's more or less what I had):

R0 = 0 : writes are ignored, reads always return 0
    while this could be just a convention, we're enforcing it to be sure
    (IRL it's (in part) to avoid spending chip area on the memory for it)
R1 = PC : program counter, aka instruction pointer (IP)
    the address of the next instruction to be executed
    incremented before executing the current instruction (easier that way)
R2-R15 : general purpose, for use by programs

0000: NOP    zero28
0001: HLT    reg4 imm24                    // HLT src ticks
                                             // wait (src + ticks2) cycles
                                             // 0 means forever
0010: LOAD   reg4 reg4 imm20               // LOAD dst addr ofs
                                             // dst = mem[addr + ofs]
0011: STORE  reg4 reg4 imm20               // STORE src addr ofs
                                             // mem[addr + ofs] = src
0100: JMPEQ  reg4 reg4 reg4 imm16          // JMPEQ src1 src2 addr ofs
                                             // if src1 = src2
                                             // then R1 = addr + ofs
0101: JMPGT  reg4 reg4 reg4 imm16          // JMPGT src1 src2 addr ofs
                                             // if src1 > src2
                                             // then R1 = addr + ofs
0110: ADD    reg4 reg4 reg4 imm16          // ADD dst src1 src2 val
                                             // dst = src1 + (src2 + val)
0111: SUB    reg4 reg4 reg4 imm16          // SUB dst src1 src2 val
                                             // dst = src1 - (src2 + val)
1000: MUL    reg4 reg4 reg4 imm16          // MUL dst src1 src2 val
                                             // dst = src1 * (src2 + val)
1001: DIV    reg4 reg4 reg4 imm16          // DIV dst src1 src2 val
                                             // dst = src1 / (src2 + val)
1010: REM    reg4 reg4 reg4 imm16          // REM dst src1 src2 val
                                             // dst = src1 % (src2 + val)
                                             // This is remainder, not
                                             // modulo, in both C# and JS
1011: RNG    reg4 reg4 reg4 imm16          // RNG dst min max val
                                             // dst = random(min, max + val)
1100: PMOV   reg4 reg4 imm5 imm5 imm5 imm5 // PMOV dst src destB
                                           //      fromB endB rotB
1101: PSET   reg4 imm5 imm4 imm1 imm14     // PSET dst dstBit numBits
                                           //      clearRest valueBits
1110: DLOAD  reg4 reg4 reg4 imm8 imm8      // DLOAD dst dev addr ofsD ofsA
                                             // dst = device[dev + ofsD]
                                             //       .value[addr + ofsA]
1111: DSTORE reg4 reg4 reg4 imm8 imm8      // DSTORE src dev addr ofsD ofsA
                                             // device[dev + ofsD]
                                             // .value[addr + ofsA] = src

Note that "ticks", "val", "ofs", "ofsD" and "ofsA" can be negative (using two's complement over their field's width).

(Also note that I haven't implemented this ISA anywhere, just designed it - no code currently exists for it AFAIK. I might or might not actually implement it, or something like it, eventually.)

JMPEQ can also acts as an unconditional JMP, by using the same register as both sources. In addition, you can do an unconditional jump simply by setting R1 using any of the instructions that modify a register value. Jumps can be relative by using R1 as part of the target address calculation, or absolute by using something else (e.g. R0).

JMPGT can also perform less-than, simply by swapping the registers.

DLOAD/DSTORE is mostly equivalent to GETDATA/SETDATA, although only the extended form is supported - but a device can ignore any part of the write it wants to, or even combine the fields. Worth noting is that this CPU in theory supports 2^32 devices, though only the first and last 128 are accessible without setting a register. In practice, there's probably far fewer devices actually available.

I originally made MUL have two destination registers, one for the high bits of the result and one for the low bits, since a multiplication can end up needing that many - but I ended up deciding not to do that, since that makes it harder to implement, and I'm not doing anything like that for the other operations that can overflow. (In JS I can safely do up to 53-bit integers IIRC, but this would need 64 bits.)

This PMOV is similar in function to TC-06's PMOV, but has a different API and an additional feature: rotation of the bits being acted upon. Basically, take the bits fromB to endB from src, rotate those bits by rotB, and then insert them into dst starting at bit destB. (The shift-right-or-left argument isn't necessary since shift-left-31 and shift-right-1 is the same thing due to the wrapping.)

PSET is similar to TC-06's SET, but can set more or fewer than 8 bits at a time, at a bit position that is not a multiple of 8, and can optionally clear the rest of the bits (set them to 0).

I'm not really sure what to do with numBits = 0 and numBits = 15. I've been considering making one of them have the instruction ignore the clearRest and valueBits fields, and instead act as a LOAD of the next instruction word, followed by skipping that word instead of executing it. That could be very useful for keeping data close to where it's used without needing an explicit jump, but it kind of breaks the principle of least surprise.

I suppose numBits = 15 could make it copy the clearRest bit as if it was a part of the valueBits, or pretend the valueBits had a 15th bit that is always zero. Not sure which makes more sense.

This ISA still lacks CALL/RET instructions, PUSH/POP, binary operations (AND etc.), and probably other things - but it does everything the TC-06 does and more (sometimes in more instructions, other times in less), in 15 instructions without subcodes. One of the nice things about it is that you generally don't have to keep small constants in registers (no more R15 = 1) since you can usually use the immediate values for that. It also makes it easy to use relative addressing (whether for load/store or jumps) since you always have the current instruction's address easily available.


Yeah, the emulator has no real functionality in Default mode, which is why I said technically - in practice, I agree that it really doesn't fit, since the data that ends up out of bounds is required. And that's even assuming Senbir didn't fail when trying to load it onto the disk in the first place, which like you said it probably does.


Re: swap, that's one of the things an MMU is usually used to implement. The MMU gives you the dynamic address remapping, and notifies the kernel when the program attempts to access a virtual memory area that isn't currently in RAM (a page fault). The kernel then decides what to do about it - if it's an area that is swapped out, it loads the data for that area from disk, updates the address remapping accordingly, and returns control to the program. (This might require first swapping something else out to make room in RAM.)

As such, the overlay loader is kind of a poor-man's swap already - not having an MMU, it can't do the address remapping part, nor the automatic loading on out-of-bounds access, but it does do the swapping part. (Well, swapping in anyway - it doesn't swap out the old page to disk first.)

If it was given an appropriate MMU to work with, it could probably be extended into a swap-based OS that pretends to have more memory than it does. Like you said, only the swapping system needs to always be in memory, since it can also be used to load OS code when necessary - but you'd still need to have some RAM left over to put the swapped-in memory pages into, since the memory remapping still only allows access to the main RAM, not to other devices.

Well, unless you combined it with a different concept, namely a specific form of memory-mapped I/O. If you added support for that, and changed the disk device to support memory-mapping areas of the disk (making it pretend that that area of the disk is RAM), then you could avoid the need for the save/load step of regular swapping. But that's a separate feature that can be used even without an MMU (or any other address remapping), as a device typically has a fixed memory address range that it can use for such I/O, and programs could be written to use that range directly.

(... Heh. Bootloader that doesn't write to RAM: memory-map the appropriate disk area, and jump into it.)


Regarding the "secret higher-resolution" thing, I didn't mean that it could go outside the 32 bits using extended SETDATA. What I meant was, the real hardware has a specific resolution on its monitor, while the emulated monitor (what the emulated program would see) would have a smaller resolution, so the higher actual resolution is hidden (a secret) from the emulated program.

(This is only for the hypothetical extended emulator, of course, none of this applies to the current version, since it doesn't use a smaller virtual screen like that.)

Now, a program running on the real hardware always has 32 bits per pixel of monitor, of which some are reserved for the position and some others determine the color, while the rest are ignored by the monitor but can be used to store data (as is suggested in the documentation).

As an example, let's say that the real hardware has a resolution of 32x16 with 4 colors (2 color bits). That means its pixel data looks like CCXXXXXYYYYAAAAAAAAAAAAAAAAAAAAA where each A bit is available to store any data without affecting the colors shown on the monitor.

Now, if the emulator provides a virtual monitor of 16x8 with 4 colors to the emulated program, so that it can show 4 at the same time on the real monitor, then the emulated program's pixel data looks like CCXXXXYYYAAAAAAAAAAAAAAAAAAAAAAA, which has one less each of X and Y, and two more of A.

The emulator then has to modify each monitor getdata and setdata, to map the emulated data to the real data.

For setdata, transforming emulated to real: insert r and b:
prog: CCXXXXYYYAAAAAAAAAAAAAAAAAAAAAAA
emul: CCrXXXXbYYYAAAAAAAAAAAAAAAAAAAAAAA
real: CCXXXXXYYYYAAAAAAAAAAAAAAAAAAAAAee
For getdata, transforming real to emulated: remove r and b:
real: CCrXXXXbYYYAAAAAAAAAAAAAAAAAAAAA
emul: CCXXXXYYYAAAAAAAAAAAAAAAAAAAAA
prog: CCXXXXYYYAAAAAAAAAAAAAAAAAAAAAmm

For both, r and b define which quadrant this virtual monitor is shown in.

Now, notice that the remapped pixel data for the emulated program has 2 bits too many for setdata (marked as e for extra), and 2 bits too few for getdata (marked as m for missing). Those bits must go somewhere and come from somewhere.

So, the emulator now has an either-or choice:
- discard those bits on setdata, and set them to something arbitrary on getdata
- save those bits somewhere other than in the real monitor on setdata, and restore them from there on getdata

If it discards them, the emulated program might break, since it might be using the monitor to store important data (since it's documented that this works). This breakage may be rare, but it could happen, and would then be a bug in the emulator.

If it stores and restores them, however, then it would work correctly (without that bug), but it would have to use more memory (probably on disk), and the setdata/getdata operations would be slower since they have to maintain that additional memory area when working with the monitor. Which might make users complain about performance and memory use, especially if their programs don't use the monitor in that way anyway.

Damned if they do, damned if they don't...

Developer

RISC-06 In Action

A simplified win screen renderer!  The code to the left isn't meant to be compiled all at once; just put it in there so it'd be visible.
In that case - perfect time to show it off/talk about it!  The RISC-06 is sort of built around the same fundamental ideas as the TC-06 (e.g, instructions & arguments all get stuffed into one memory address, you have versatile-ish registers, self-modifying code is going to be fairly commonplace), but designed to be even more ridiculously minimal.  Each memory address is 1 byte, the first 3 bits of which are the op-code, and the last 5 of which are arguments.  That means we have 7 main op-codes (8, if you count NIL) - not a whole lot to work with!  Most data is byte-based, too - registers, memory addresses, even the data used for the various peripherals.  The current default setup is 32 bytes of RAM, a 16x8 1-color monitor, a 256-address (the maximum without making one that needs two GETDATA equivalent ops run to read, or three to write!) drive, and at some point, a keyboard.

-=OVERALL INFO=-
 * 32 bytes of RAM.  One byte = one address.
 * All data in bytes.  ALL DATA.  Even the program counter, meaning a hard max of 256 bytes of RAM and drive space.
 * Two 1-byte registers.  Used by MOV, DAT, OPR, BRN, and more - see op-code documentation for specifics.
 * Runs at 30 Hz.
 * First 3 bits are op-code, meaning there are 8 code slots, with 5 bits of argument space.
 * 256-byte "drive" on port 0.  (literal max because byte-based)
   * Run DAT 1 twice to write to it - first to specify the output address, then the data itself.
   * DAT 0 expects its argument to be the requested address, and returns its contents.
 * 2-color 16x8 monitor on port 1.  (1 bit color, 4 bit X, 3 bit Y)
   * DAT 1 expects first a color bit, then the 4 X bits, then the 3 Y bits, and will draw immediately.
   * DAT 0 expects first a 1-bit flag for COMMAND or COLOR.  If flag is 0, it returns the status of the selected pixel, otherwise the full command, then 4 X bits, then 3 Y bits.
 * This is a "reduced instruction"/simplified version of the TC-06 architecture, potentially to be implemented with homebrew IRL hardware.
 * In theory, it is, like the original TC-06, a TURING COMPLETE system.
 * SAMPLE CODE - WRITE BLINKENLIGHTS POSITIONS TO DRIVE, FLASH:
DAT 1 1 0 0  //ADR00
DAT 1 1 0 1  //ADR01
JMP 0 2      //ADR03
DTC 10001001 //ADR04
OPR 6 1      //ADR05
DAT 1 1 0 0  //ADR06
DAT 1 1 0 1  //ADR07
JMP 0 2      //ADR08
DTC 00001001 //ADR09
OPR 6 0      //ADR10-LOOPS
DAT 0 1 1 0  //ADR11
DAT 1 0 1 0  //ADR12
OPR 6 1      //ADR13
DAT 0 1 1 0  //ADR14
DAT 1 0 1 0  //ADR15
JMP 1 6      //ADR16-LOOPE
//RAM[4] & [9] are pixel data.
//4 is 1,1=ON, and 9 is OFF.
//Write them to drive[0,1].
//Loop loads them to Reg1...
//...and draws 'em. -=OP-CODE: NLS (N/A)=-
 * The equivalent to Senbir's NILLIST.
 * NILLIST.
-=OP-CODE: NIL (000)=-
 * Null space.  Skipped past, though it takes a cycle.  Assumed to be empty.
 * NIL.
-=OP-CODE: HLT <5-bit timer> (001)=-
 * If timer==0, halts until reboot.
 * Otherwise, halts for specified number of clock cycles, meaning halts of up to ~1.06 seconds.
 * HLT.
-=OP-CODE: JMP <1-bit flag> <4-bit dest. addr.> (010)=-
 * Jumps the program counter forwards or backwards the specified number of addresses.  Will wrap around RAM if need-be.
 * Flag 0 = forwards
 * Flag 1 = backwards
 * JMP, but localized.
-=OP-CODE: MOV <1-bit flag> <1-bit register> <3-bit addr.> (011)=-
 * If flag is 0, loads something from the first 8 bytes of RAM into register 0/1.
 * If flag is 1, does the opposite, loading from register 0/1 into RAM.
 * If an offset is done with OPR, it adds that to the specified address.
 * MOVI and MOVO combined into one, more limited function.
-=OP-CODE: DAT <1-bit flag> <2-bit peripheral id> <bit argument 1> <bit argument 2> (100)=-
 * If flag is 0, is GETDATA.
   * Argument 1 specifies the return register, either 0 or 1.
   * Argument 2 specifies where to get the command data from, either the opposite register (false), or RAM, 2 addresses ahead (true).
 * If flag is 1, is SETDATA.
   * Argument 1 specifies which register to use, if registers are to be used.
   * Argument 2 specifies where to get the command data from, either the specified register (false), or RAM, 2 addresses ahead (true).
 * GETDATA and SETDATA combined into one, more limited function.
-=OP-CODE: OPR <4-bit op> <1-bit optional flag> (101)=-
 * Operation 0: Addition & Subtraction.
   * Flag 0: Subtraction.  Registers[0] = Registers[0]-Registers[1];
   * Flag 1: Addition.  Registers[0] = Registers[0]+Registers[1];
 * Operation 1: Multiplication & Division.
   * Flag 0: Division.  Registers[0] = Registers[0]/Registers[1];
   * Flag 1: Multiplication.  Registers[0] = Registers[0]*Registers[1];
 * Operation 2: Copy
   * Flag 0: Registers[1] = Registers[0];
   * Flag 1: Registers[0] = Registers[1];
 * Operation 3: Modulo & Exponent
   * Flag 0: Modulo.  Registers[0] = Registers[0]%Registers[1];
   * Flag 1: Exponent.  Registers[0] = Registers[0]^Registers[1];
 * Operation 4: Jump Proper
   * Flag 0: Jump directly to the memory address with ID equal to the contents of register 0.
   * Flag 1: The same, but for register 1.
   * Wraps around if there's an overflow (e.g, if addr 48 is requested when there's only 32 addresses, it goes to addr 16)
 * Operation 5: Offset
   * Flag 0: Sets the current offset to the contents of register 0.
   * Flag 1: Sets the current offset to the current program counter.
   * Like the proper jump, will wrap on overflow in the case of flag 0.
 * Operation 6: Set01[0]
   * Flag 0: Registers[0] = 0;
   * Flag 1: Registers[0] = 1;
 * Operation 7: Set01[1]
   * Flag 0: Registers[1] = 0;
   * Flag 1: Registers[1] = 1;
 * Operation 8: Set23[0]
   * Flag 0: Registers[0] = 2;
   * Flag 1: Registers[0] = 3;
 * Operation 9: Set23[1]
   * Flag 0: Registers[1] = 2;
   * Flag 1: Registers[1] = 3;
 * Operation 10: Shift
   * Flag 0: Shift Registers[0] forwards by the number of bits specified in Registers[1].
   * Flag 1: Shift Registers[1] forwards by the number of bits specified in Registers[0].
 * A mix of MATH and UTL.
-=OP-CODE: BRN <2-bit op> <3-bit dest. addr> (110)=-
 * Operation is either == (0), != (1), 1>2 (2), or 1<2 (3).  Compares registers 1 and 2.
 * Jumps forwards up to 9 addresses (pointer = pointer + 2 + destAddr (0-7)) if the comparison is true.
 * Otherwise, ticks forwards once like normal.
-=OP-CODE: SPC <3-bit start point> <1-bit length (length=(arg+1)*2)> <1-bit offset>=-
 * Splices 2 or 4 bits from register 0 and pastes them into the same position (or the same position+1, wrapping cleanly if need-be) in register 1.
 * A simplified, even more finnicky PMOV.

Despite its limitations, I feel like it's actually more usable than the standard TC-06 assembly.  It seems a bit less reliant on self-modifying code (SPC/"Splice", the PMOV equivalent, and OPR 10, the PMOV offset equivalent, haven't been implemented under the hood yet, and I still wrote that image renderer!), and the register setup feels somehow less overwhelming than Senbir, even though it's far more limited.  I'm loving working with it so far.

Of exciting note, the actual VM for it is written using C++, in such a way that I can hook the simulation function up to Unity down the line and make it work in Senbir.  Getting an ingame RISC-06 computer up and running will be good practice for porting the TC-06 architecture itself to C++ - I've already learned a good bit about compiling it all, linking, dealing with data types, etc.  The visual/UX frontend here is QT-powered, and themes itself depending on your OS theme settings.  I plan to change some of it (at least the Assembler portion) to use some color choosers in the Options menu so it'll look good & be easy to tweak no matter what OS you're running on.


Your RISC-y setup looks good!  I'll admit I'm having a little bit of trouble wrapping my head around parts of it - like immediate-mode numbers in ADD/SUB/etc, how do they work, both on the Assembler level (e.g, would ADD 1 5 jump the pointer forwards five?), and the processor level (how does it decide between using registers & immediate-mode numbers?); the latter is why there's not much of that in Senbir, I couldn't figure out a good way of using immediate-mode numbers without making them an argument (say, a bit), which removes from the number of bits you have available for other arguments.

(I was...a bit one-track-minded about trying to maximize the number of available memory addresses, originally; the max was originally bound by the limitation of MOVI/MOVO, though you can now skirt past that to 2^32 addresses via the power of OFST.  This was especially noticable in the ye-olden TC-06 prototype I shared the gif of a while back - both my rather slipshod attempts to counter the storage issues, and the issues themselves having pretty big numerical impacts.)


Should definitely add an MMU as an optional addition at some point, though I'm not sure if it should be a custom addition to the assembly language itself (e.g, a new op-code for memory management), or a custom device of some sort you ping with GET/SETDATA - they sound way too handy for just about any situation one could imagine not to have around in some form.  ...Hm, maybe an OFST expansion?  Like something you could enable/disable in Custom mode, "MMU OFST" - it would rework the op-code in some shape or form to emulate an MMU.


I understand, now.  Thought there was an undocumented/unintended feature that would enable a monitor that technically uses more than 32 bits, but can function normally via the Extended SETDATA offset feature.

Not too sure what to say about that storage quandry, though.  If I were designing it, I'd probably choose to store emulated monitor commands in some chunk of memory set aside for that purpose, even if it means suffering a performance/storage hit.  Maximum compatibility is important, and as something of a security freak, I'd say that having little VM-specific quirks like that is...dangerous.  Someone looking to write a TC-06 virus (why anyone would is beyond me, but...thinking through these things anyway!) could intentionally check the behavior of that operation to deduce if their program is in a VM or not.  Generally tend to think that providing that sort of info can be a dangerous security hole.

(1 edit)

Aaah, I see, you were going for minimalism rather than RISCyness.

(IIUC (which I'm not really sure about), RISC's "reduced instruction" is not really about having a reduced (as in small) set of instructions, or about each instruction word being reduced (small), but about the instruction itself (as in the operation it performs) being reduced to its essentials (as in not doing more than it has to).

Basically, not doing several operations with one instruction, in terms of what the processor would have to do behind the scenes to complete the instruction - and in particular not optional steps that could be done with other instructions instead. (Hence ending up with things like a load/store architecture.)

I think the underlying idea is that by making each instruction do just one thing, it's much easier to make each instruction execute quickly, so that the processor can instead be made to execute more instructions per second, for a higher total data throughput - thus getting more done, more efficiently (since it takes less hardware to implement).

This doesn't mean that the instructions can't do complicated things (like, say, a step of AES encryption) - just that the instruction for it shouldn't also do other things. IIUC that is.)


Regarding your RISC-06 ISA: I think I like it. It's certainly interesting.

I haven't fully grasped the entire instruction set yet, or how exactly to do much with it (like your win screen), but that would probably come with actually attempting to write something in it. At first glance I would think that having only two registers would be severely limiting, but I guess some of the instructions being able to instead directly use memory alleviates that (also some useful values being quickly available via specific instructions).

Also, numbers never going above 255 probably makes them easier to reason about. Besides, limitations can be inspiring, which might be another reason it seems easier.

One thing I might suggest, though, to make it easier to work with, would be to consider acknowledging that it doesn't really have fixed-width (3-bit) opcodes - instead, it has variable-width opcodes (I've seen ones I would consider to have 3 (HLT), 4 (MOV 0), 5 (BRN 0), 7 (OPR 4), and 8 (OPR 0 0) bits) - and setting up/naming assembly instructions accordingly to represent the operation and to simplify the arguments.


Re: the C++ VM implementation: nice! Well done. Good luck adding the rest! :) (I haven't done C++ myself.)


Re: reg+imm: well, I'll try to explain it in detail, but the short answer is that all the parameters are required, and the processor actually doesn't decide between registers and immediate-mode, it always uses both (and thus always does the same thing for that instruction).

I think an example might help; let's go with MUL for now, the others work equivalently.

1000: MUL    reg4 reg4 reg4 imm16          // MUL dst src1 src2 val
                                             // dst = src1 * (src2 + val)

The first column is the opcode for the instruction, here 1000, followed by the name that is used for it in assembly code, here MUL.

The rest of the line, up to the // comment, describes the type and bit width of the parameters to this instruction. There are three distinct types:

- reg : register, these bits name a register to be used for this parameter
- imm : immediate, these bits constitute an immediate value that is used as-is
- zero : zeroes, these bits should be zero (only used in NOP; maybe ign (for ignore) would be better? I'm not sure)

In other words, this instruction has 4 parameters, the first three are 4 bits wide each and refer to registers, while the last is 16 bits wide and is an immediate value.

The comment on the first line shows the assembly instruction with its parameters again, but this time shows the names of the parameters instead of their types. They are in the same order as the first time, which is also the order they would be specified in when using the instruction in assembly code. (I haven't yet 100% decided upon the field ordering inside the binary instruction word.)

So, the first parameter is named "dst" and refers to a register. The next two are named "src1" and "src2" respectively, and also refer to registers. The last one is named "val" and is a 16-bit immediate value.

The second comment line (slightly indented) shows the operation performed by this instruction, in a higher-level language pseudo-code.

Translating to prose, this means that MUL sets the dst (destination) register to the result of multiplying the src1 (source) register with the sum of the src2 register and the val immediate value.

In short, this is an add-and-multiply instruction - a concept I'm pretty sure I've stolen from somewhere, though I can't remember quite from where exactly.

In assembly code, it would look something like this:

MUL 2 3 4 10

which would take the value of register 4, add 10 to it, multiply the result with the value of register 3, and store the result of that in register 2: R2 = R3 * (R4 + 10)

As noted under the instruction list, most of the immediate values can be negative, so this is also a valid instruction:

MUL 2 2 0 -1

which would do R2 = R2 * (R0 - 1) = R2 * -1 and thus negate R2 (since R0 is always 0).


ADD similarly requires 4 arguments (so "ADD 1 5" is not actually valid code), and works equivalently - add val to src2, then add that to src1, then save the result in dst.

So, to move the program counter forward by 5 (to skip the next 5 instructions), you could do this:

ADD 1 1 0 5

which works because R0 is always 0, so it becomes R1 = R1 + (0 + 5) = R1 + 5

Worth noting at this point is that R1 starts out pointing at the address immediately after the ADD instruction, which is why this skips 5 instructions, instead of skipping 4 and running the 5th. Adding 0 is thus a no-op.

(This also means that moving backwards requires higher numbers than moving forwards - subtracting 0 is also a no-op, subtracting 1 is an infinite loop, and subtracting 2 jumps back to the instruction immediately before the current one. (If I had an explicit instruction for relative jumps, it might work differently, but setting R1 is essentially manipulating the internal state of the CPU directly, so no such niceties here.))


To be honest, I expect that most uses of the arithmetic instructions will have a zero in one of the two last arguments, depending on whether it wants to use a register value or an immediate value, but the CPU doesn't care - it always does the same thing: adding them together before applying the main operation.


Re: MMU, I agree that having one would probably be very nice, but you may want to take a look at how they typically work before you make too many plans about how to emulate one.

The details differ between MMU models, but from what I've seen (which admittedly isn't much), they typically require you to set up some data structures in main memory (to define the memory mapping(s)), usually with some specific alignment (for speed reasons), and then you have to tell the MMU where that data structure is, and enable it. Sometimes there are other settings too, like ways to enable/disable parts of the mapping for fast context switching, but that's model-specific.

Another thing the MMU needs is some way to call the kernel when a page fault happens, including a way to tell it which address caused the fault, and unlike most platforms the TC-06 doesn't have any standard calling conventions (e.g. for interrupts) to rely on for that. I guess we'd need a way to store the fault handler address at minimum, and maybe some other things for various details.

I suppose you could make the offset register (what OFST manipulates) instead be a pointer to that MMU data structure, which enables the MMU when set. But that would completely break backwards compatibility with older programs that already use OFST (like your kernel), since it would suddenly work completely differently and trying to use it in the old way would probably make the system crash (since the MMU would suddenly be pointed at garbage data). Changing the way the OFST instruction itself works (parameters etc.) would cause similar issues.

Unless you don't care about BC breaks, I'd say a new opcode would be a better idea than overriding OFST, as at least it wouldn't have those BC issues - well, unless and until you change how the MMU works in such a way that that instruction would have to change as well, but it might be possible to plan for at least some of that.

I've been thinking that the device API (GETDATA/SETDATA) would be nicer for this, because it already has addressing we could use for multiple "registers" for those various pieces of required data, and it's sort of built in to the device concept that a device might not be present or has been replaced with a different one. That's just my thinking though, you might feel differently about it.

I had another idea for at least part of the problem, though - namely that most of those values could probably be stored in memory, linked to the mapping data structure we point the MMU to. Then those mappings could be set up to protect those settings (along with the mappings themselves) so that any user programs can't mess with them, only the kernel can. This may cause some wasted memory if the alignment doesn't match up perfectly, though. Also, that still leaves the initial pointer to that data structure without a safe place to live, so we'd still need one of the other solutions for that - and then we might as well use that solution for the rest, too.

On the other hand, if the MMU can protect memory, it can probably protect its own registers as well, and simply ignore any disallowed SETDATA calls (or complain to the kernel about it).

An interesting point from a security point of view is that the user program shouldn't be able to change the mappings, but the kernel should, so then we somehow need to transition from user mode privileges to kernel mode privileges without letting the user mode program switch the mode on its own (privilege escalation), despite it being in control of the CPU... Luckily there's a fairly simple solution, if the MMU has the right feature. (Namely having it switch mappings automatically right before calling the kernel's page fault handler. Then the mode switch happens by triggering a page fault, which the user mode program cannot do without transferring control to the kernel.)

Of course, none of that really matters if we don't think this kind of security is necessary in Senbir. If we assume that programs are never malicious and are always well-behaved (won't try to mess with the MMU), then we don't really need to protect it. (I'd prefer not to assume that, though.)


Re: the storage quandary: yeah, personally I'd probably do the safe and slow thing too, for much the same reasons. Many others wouldn't, though, whether because they didn't think of it or because they cared more about performance... Lots of examples of that. On the other hand, though, I suppose most of those people would never play Senbir to such a depth that it mattered anyway...