Indie game storeFree gamesFun gamesHorror games
Game developmentAssetsComics
SalesBundles
Jobs
Tags

[Devlog] ming Inc. - The Robot Software Company

A topic by Nimble Beasts Collective created Oct 02, 2020 Views: 270 Replies: 5
Viewing posts 1 to 6
Submitted

The Game

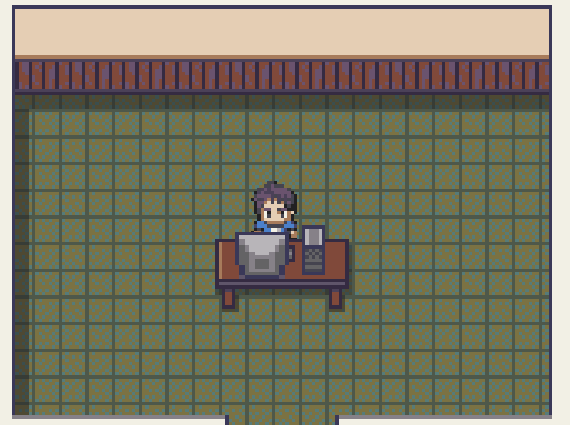
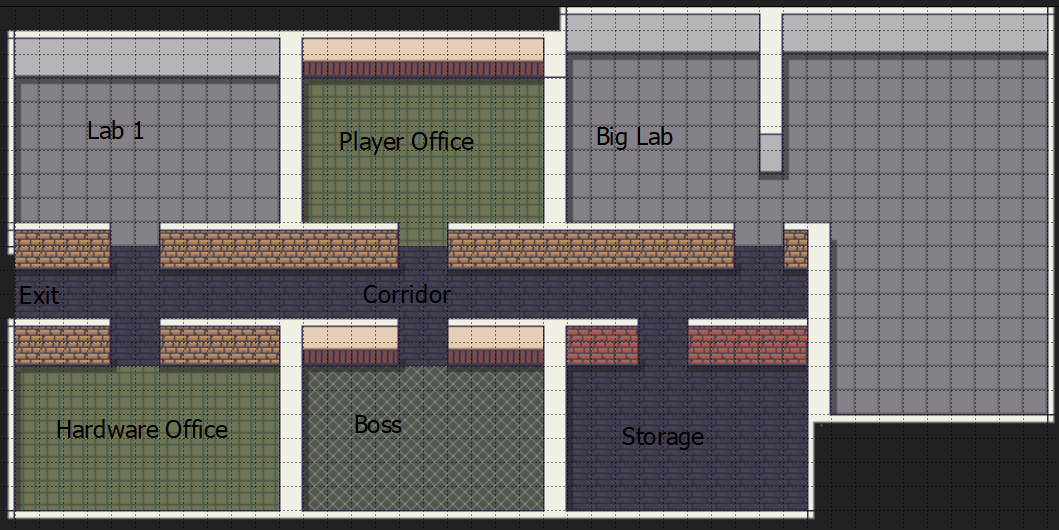
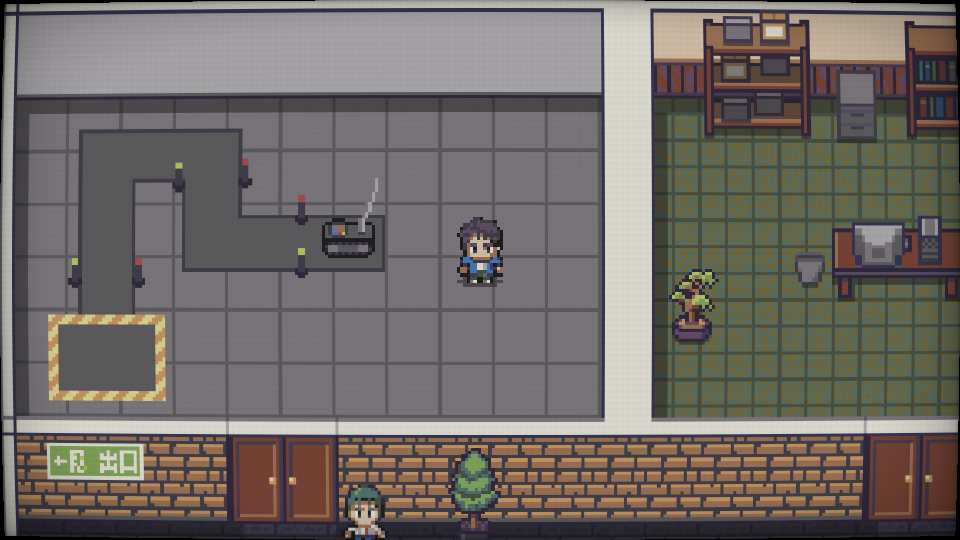
In this game you take on the role of a software engineer in the late 70's at ming Inc. using the new ming M80 chip, your task is to develop a functional robot. While your colleague mainly takes care of the hardware, your task is to develop the drivers and write control programs.

The game is a NimbleBeasts community project within the #Devtober event and is in a very early stage of development. We still want to get a lot of feedback, so we want to post a devlog in regular intervals.

What happend so far

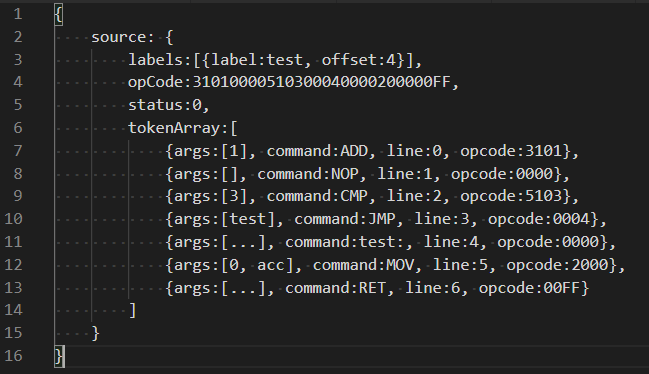
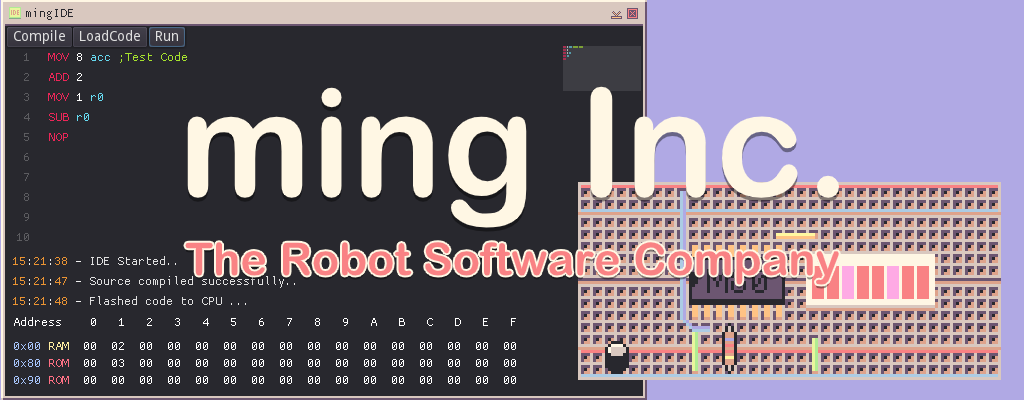
We love retro. And we love fantasy consoles. Inspired by the CHIP-8 and the games TIS-100 and Shenzen I/O, we came up with the idea to design our own fantasy CPU to create a virtual robot and solve different tasks. The player takes the role of the software developer, who should breathe life into the robot. On the first day we built a small prototype, which interpreted an assembly dialect directly. But since this seemed a bit too superficial to us, we wanted to dive a bit deeper and actually transfer the assembly code into our own OpCode and run it from our virtual ROM.

On the second day we started to define our assembly commands and OpCodes.

WIP: CPU Specification

The planned virtual CPU (M80) will have 256 bytes of RAM and 512 bytes of ROM on which both program code and constants will be stored.

The CPU has access to 8 registers. The acc register on which all arithmetic operations take place, r0 - r7 as buffer and the ctrl register in which the status and options can be viewed or changed. For communication with other electronic components the M80 has eight pins, all of which can be used in an analog (0, 1 or 0V, 5V). Four of these eight pins can be switched into a digital operating mode to transmit values from 0 - 127.

OpCodes and Assembly Language

We specified 25 commands right now. If you are interested in which, please have a look on this file:

https://github.com/NimbleBeasts/Devtober2020-Game/blob/master/M80-Spec.md

Thanks for reading! We are looking forward to your comments and questions.

Original Post: https://nimblebeastscollective.itch.io/ming-inc/devlog/183451/day-1-2-brainstorm...

Submitted (2 edits)

Compiler Update

Today we want to give you some insights how our "compiler" works. In the last devlog, we already introduced the M80 Assembly Language. Today it's about how to convert the written source code into byte code.

Given the sample line:

MOV 8 acc ;Test Comment

Tokenizer: The first step is to split the line into its basic components. In the first place we always expect an instruction and depending on the kind of the instruction no, one or two arguments. This will result in a dictionary/struct like this:

{command: "MOV", args:[8, acc], line:0, opCode: 0}

Beside the instruction and arguments, the line and a placeholder for the opcode are stored to make debugging support easier.

The tokenizer also checks for valid syntax and throws errors when an illegal instruction is found or an invalid address.

In a next step, the compiler takes the tokenized code and translate it in our op codes. For "MOV" there are two variants available. 10xy and 2xxy:

| 10xy | MOV x(R/P) y(R/P) | Copies a value of a register to target register |
| 2xxy | MOV x(V) y(R/P)   | Copies a integer to target register             |

As the first argument is a number (integer), the second pattern is used resulting in: 2080. Where 08 is the hex representation of 8 and 0 is the index for the register acc.

You can have a look at the code here: 

https://github.com/NimbleBeasts/Devtober2020-Game/blob/master/src/_Autoloads/Com...

Original Post:

https://nimblebeastscollective.itch.io/ming-inc/devlog/184587/compiler-update

Submitted

This is all  very impressive. I was working on doing something very similar, but taking pico-8 as the concept and building it as an integrated OS with programming language:


Submitted

Devlog - 15 Days Have Gone 

The first 15 days with our game "ming Inc" are over. In the meantime we have a more concrete idea of what the game should become.
As an employee of ming Inc you will not only have to code. You will experience the game in a kind of RPG in which you will get additional pressure from the boss, can get help from colleagues and of course test the robot in the lab.

When the player uses his computer, he can start the popular ming OS and start programming and debugging.

After you have written the first simple programs, e.g. controlling the electric motor that drives the robot, you can test it in the laboratory and solve different tasks. Over time, the robot gets more and more components that need to be controlled to solve tasks or of course to please the boss.

Status Quo

The virtual CPU is up and running. Codes can be compiled and be burned to ROM in order to execute it. You can also debug the code step-by-step. The assembly language and opcodes are considered as complete. We have switched the color palette and started making a basic tileset, implemented the player character and animated the players sprite. 

It is absolutely clear that we will not finish the game this month. The project is too ambitious for that. Nevertheless we are always looking for people who want to participate. No matter if beginner or professional and no matter if programming, sound design, music or pixel art - everyone is welcome. Get in touch with mago @Discord.

Submitted

This is how the typical workflow looks like :) 

Submitted

Devlog: Your First Day at ming Inc

In this devlog post we want to give you some more insights on how your first days at ming Inc will be. We want to avoid a tutorial and start with simple missions to get familiar with the toolchain, "notes from your coworker" and the "user manual". Your coworker will constantly supply you with new tasks as he develops new hardware features for the robot. The user manual gives you more insights on the assembly languages and explains the boards capabilities.

Getting Started

In the first mission the player will get familiar with the tool chain. The programming effort should be really low. Like turning the robots motor on. This could be achieved by implementing:

MOV 1 p0

While p0 is connected with the robot.

Taking control

On the lab, the robot starts driving but does not stop. So your coworker provides you with a remote control so you can stop the robot. It`s a simple analog device. When 1 is on the bus. The robot shall stop driving. A solution could be:

MOV p1 acc
CNE 1 ; Execute next line if acc != 1
MOV 1 p0

While p0 is to robots input and p1 is the remote control output

The player has to run the code on the robot in lab and stop the robot by pushing the button within a marked area.

Advanced Control - Part 1

This time the player will setup a own code for an advanced controller with left, right input and stop. The input is digital and output could be digital or analogue for advanced players.

Inputs: p5 {-1, 0, 1} - X axis left, neutral, right p6 {-1, 0, 1} - Y axis break, neutral, speed up

Output: p6 {0, 1, 2, 3, 4} - Nothing, break, speed up, left, right

MOV p6 acc
CMP -1 ; if acc == -1
JMP break
CMP 1 ; if acc == 1
JMP forward
MOV p5 acc
CMP -1 ; if acc == -1
JMP left
CMP 1 ; if acc == 1
JMP right
break:
MOV p6 1
RET
forward:
MOV p6 2
RET
left:
MOV p6 3
RET
right:
MOV p6 4
RET

As the player has not yet implemented the robots code, he could not test it in the lab. To verify the result he could use a blackbox sort of probe analyser tool to emulate inputs and verify the results.

Advanced Control - Part 2

Now that the player has a working input controller device he will have to implement the robot side code.

Input: p4 {0, 1, 2, 3, 4} - Nothing, break, speed up, left, right - Or as defined in previous mission

Output p5 {-1, 0, 1} - Left, Nothing, Right p0 {0, 1} - Break, Speed up

MOV p5 acc
CGT 2 ; if acc > 2
JMP directions
CMP 1 ; if acc == 1
JMP break
CMP 2 ; if acc == 2
JMP speedUp
break:
MOV 0 p0
RET
speedUp:
MOV 1 p0
RET
directions:
CMP -1 ; if acc == -1
JMP left
CMP 1 ; if acc == 1
JMP RIGHT
RET
left:
MOV -1 p5
RET
right:
MOV 1 p5
RET

Now that the player has implemented and verified the code of the controller and finished the implementation on the robots side, its time to test the robot in a parcour in the lab. The players bot has to pass several checkpoints and need to stop within an area to complete this mission.