Hi:
I purchased this amazing tool and created my character but now I need assign the character a rendering layer mask. In my previous character I did this in the Sprite Renderer but here I dont have that so, how can I do it?
Thank so much.
No, I do not mean any of those, I mean when you add a renderer to other gameobjects (sprite renderer, mesh renderer...) there is in the Additional Settings section of the renderer (if you are working with LWRP) called Rendering Layer Mask. But with the prefab I do not know how to do that.
This is what I mean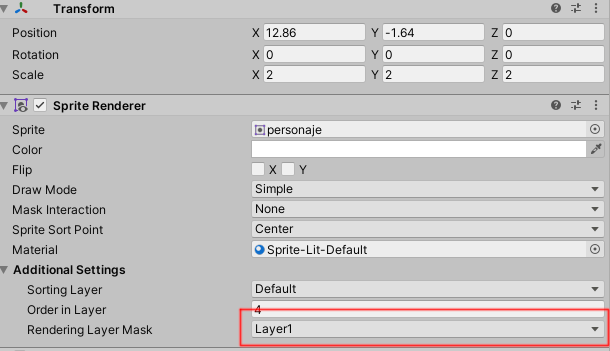
Thanks so much
I see, thanks for the explanation!
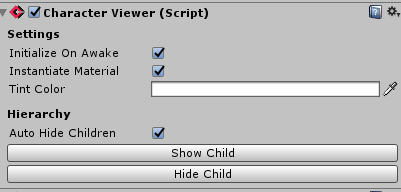
Currently there is no direct way to do this for CC2D, I'm afraid.
But you can do this manually, prefab generated from CC2D is basically just a bunch of Sprites. You can do this by editing the prefab, click the Show Child button, and disable Auto Hide Children. You should be able to see the children of the prefab now.
Then you can set the Rendering Layer Mask for each renderer under the prefab.
You can also automate this using script, of course. Which should be much faster and easier.
PS. Disable InitializeOnAwake after modifying the prefab, so that your changes won't get overridden in runtime.