

Hello and welcome back to another Aseprite tutorial. In the previous tutorial I went over the basics of the Aseprite interface, creating some shortcuts and options if necessary, but in this tutorial we're going to draw our first sprite! You will learn some tools as well as how to tile bricks onto a tilemap (we may even create a full dungeon tileset at some point). Let's start by drawing a seamless brick tile.
Create a 16x16 Canvas
Let's start by creating a small canvas just to focus on exactly one tile for now, but we will have it auto-tile shortly. Set the new canvas to 16x16 pixels and RGBA. Put any background option.
Set Up Preview Window
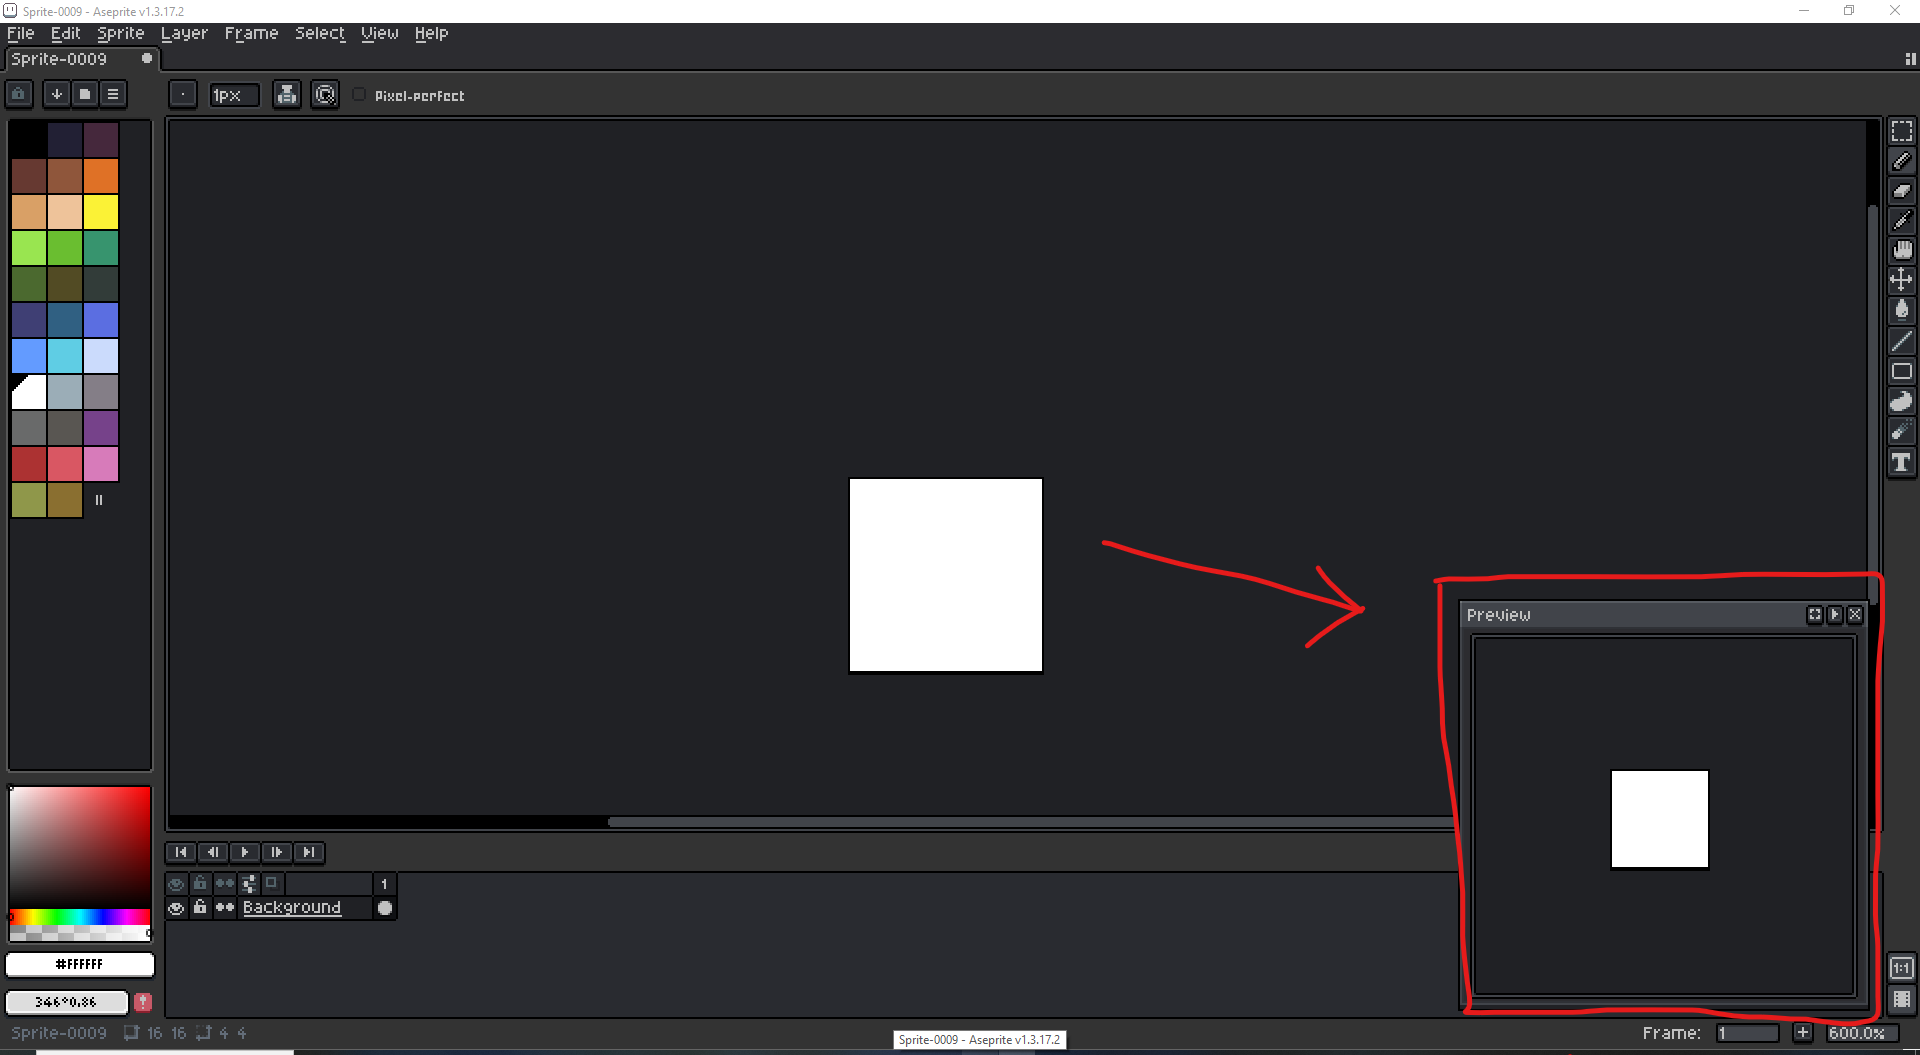
Open your preview window and set it about this big (not very big) in the bottom right corner of Aseprite. This will allow you to see your work in progress without the camera constantly moving as you work.
Pan and Zoom Controls
In the future, there will be much camera panning and zooming as we're drawing, so we need to know how to do that. At the right of my Aseprite window is the toolbox and these are the Hand Tool and Zoom Tool.
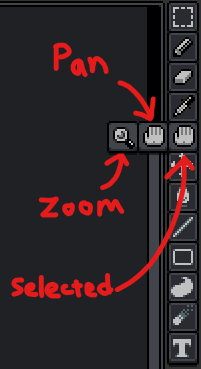
Left click any tool to select it. You can see whatever tool is currently active by seeing a slightly brighter background behind the icon. For example, the Hand Tool here is active rather than the Eyedropper Tool.

With the Hand Tool, you can pan the camera horizontally or vertically by left click dragging the canvas. With the Zoom tool, you can zoom in or out of the canvas; left click zooms in, right click zooms out.
However you'll eventually realize that's tedious. It's better to set up shortcuts for these. I have Hand Tool (quick) set to 'Ctrl' so whenever I hold down Ctrl, I can left click drag to pan the camera. Also I think as a constant default setting, you can hold the middle mouse button and drag to pan the camera as well.
I actually never use the Zoom Tool, however do zoom in and out very often. I have the mouse wheel's default action for zooming, which is also found in the Keyboard Shortcuts. For whatever reason if your mouse wheel shortcut key is empty or glitched, just click "add" and apply a blank set of options there and it should return to "Default Action"
Panning and Zooming the Preview Window
The panning and zooming controls for the preview window are identical, except you can't change them. It's always going to be left click drag to pan and mouse wheel to zoom.
Layer Panel
At the bottom of Aseprite is our Layer panel. We currently have just one layer, either a background layer or normal layer. There is a an eye, a lock, and dot icons displayed near the layer. They serve different purposes:
Eye - Toggle the layer's visibility on the canvas.
Lock - Allow/Restrict drawing on the layer.
Dots - Link/Unify frames (will be discussed in an animation tutorial in the future).
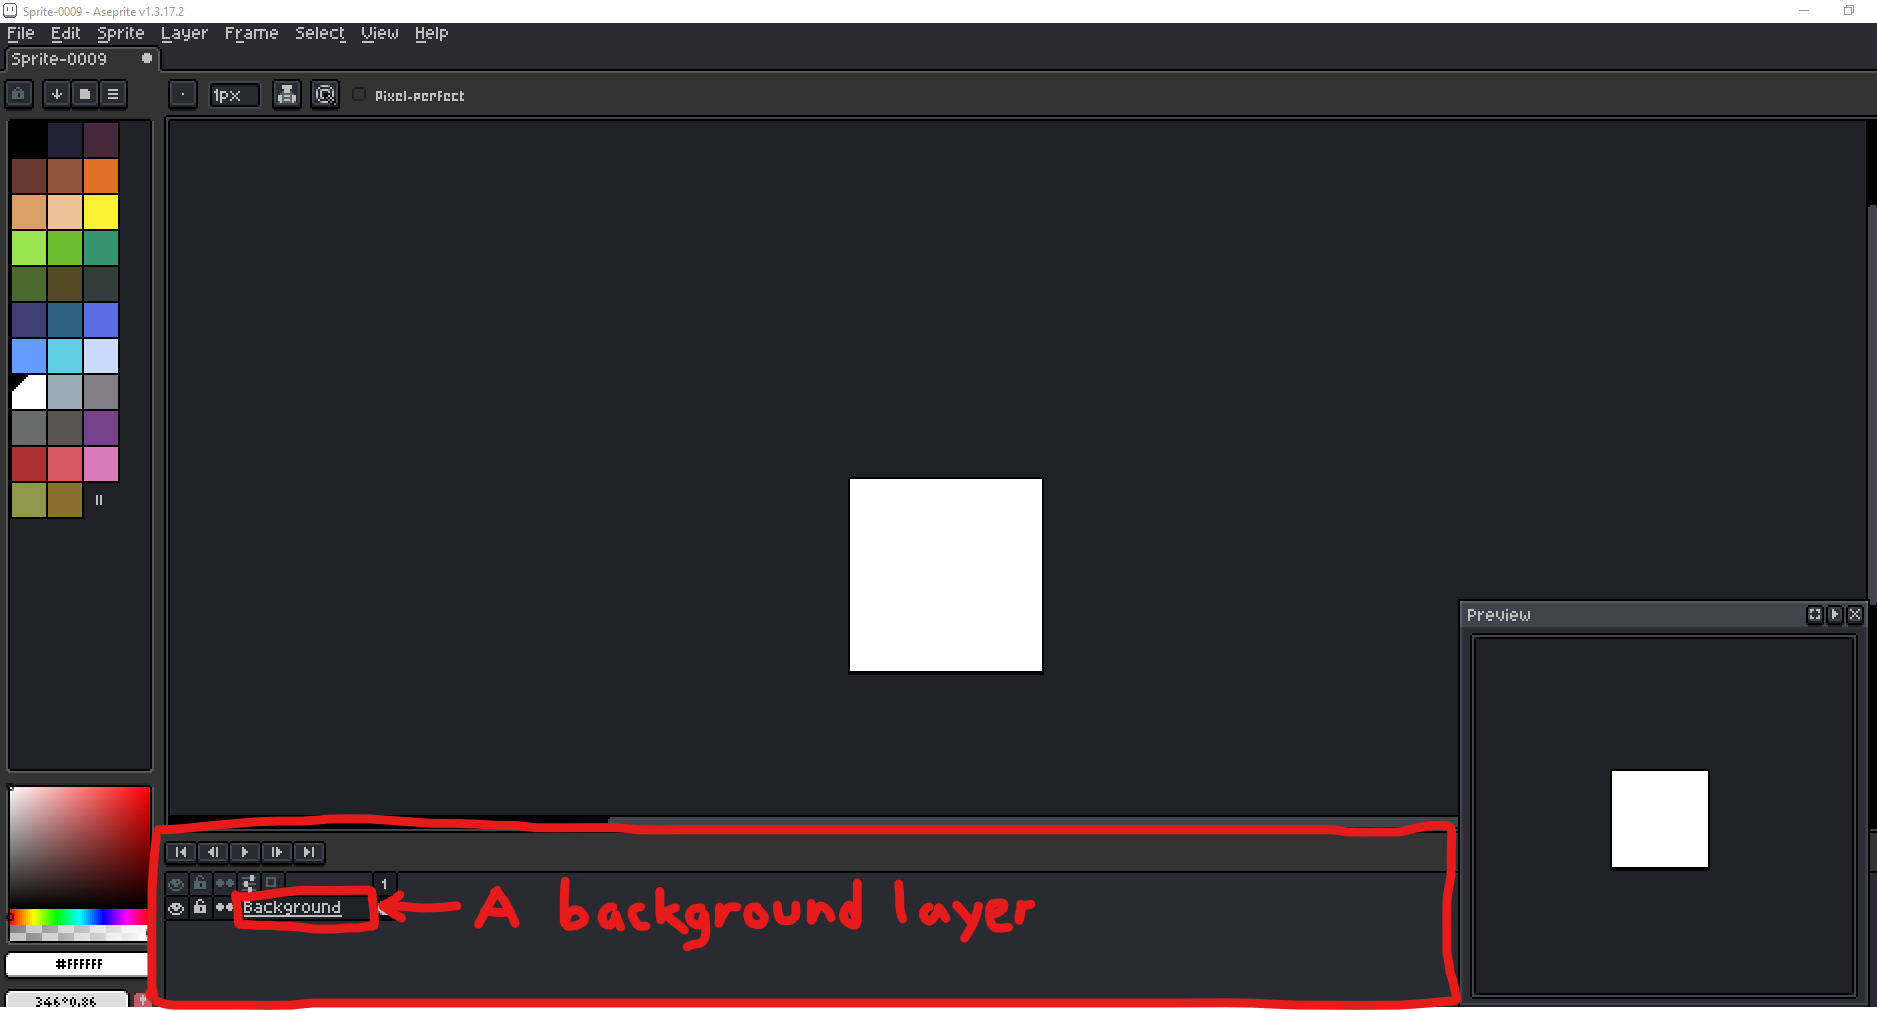
I'm not concerned with the background for now since we will entirely draw a square tile right in front of it.
Creating a Brick Layer
If you haven't modified the shortcut, creating a new layer can be done with 'Shift + N' or you can right click the background layer and select New - New Layer. Rename the new layer to "Brick Tile".
Grid and Auto-Tile Feature
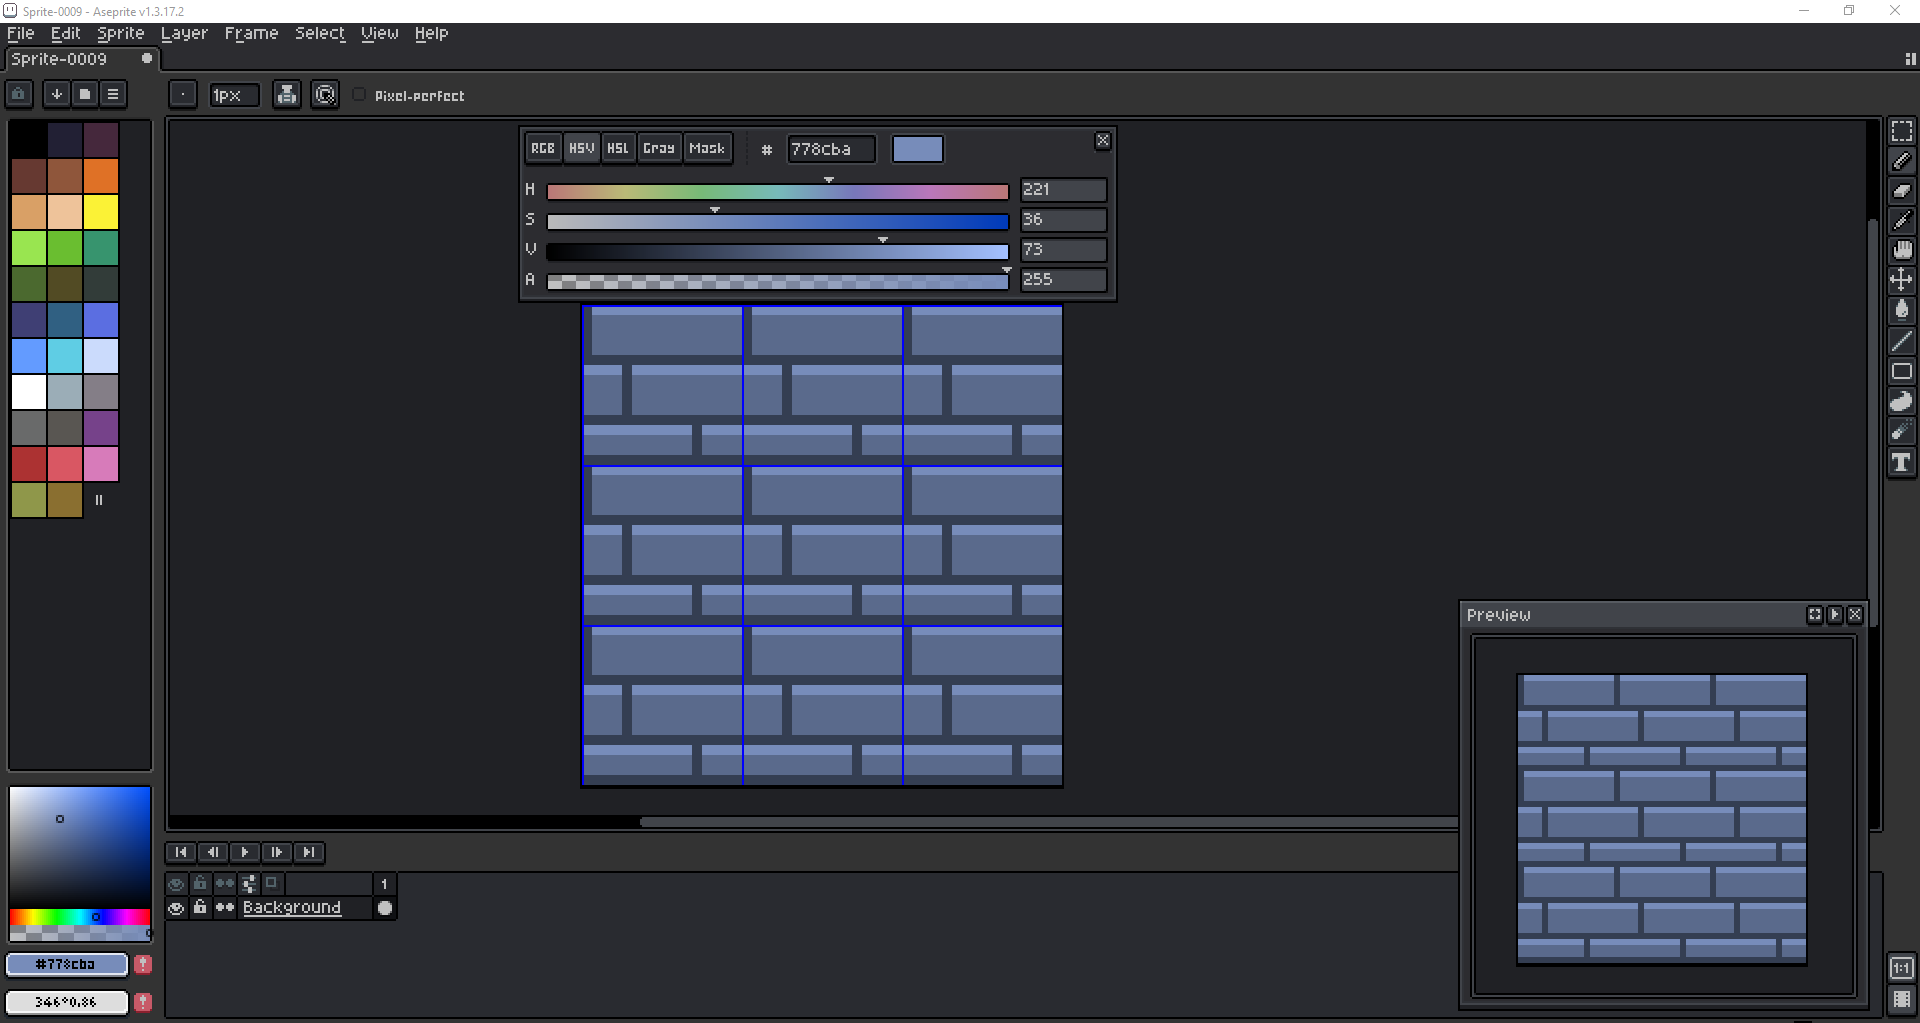
In the menu bar select View. Under View, there are 3 features listed: Grid, Show, and Tiled Mode.
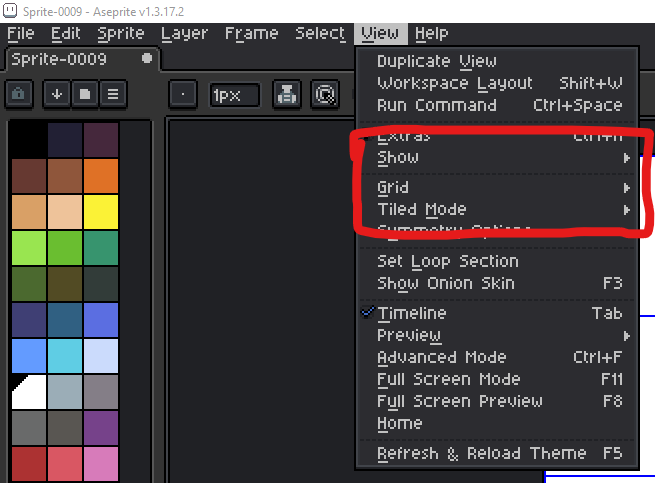
First select Tiled Mode - Tiled in Both Axes.
Set Grid Settings to 16x16 pixels.
Set Show-Grid.
You will then see a 3x3 tile grid.
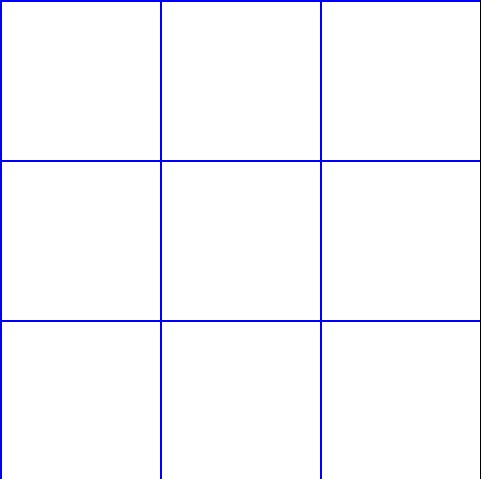
Now as we edit any of these squares, all of these squares will update identically!
Drawing the Brick Tile
To start, we can fill the whole brick layer with a simple color desaturated blue color. First, we need to select all of our original canvas (which is only the center tile, before we turned on Tiled Mode). You can set a shortcut for "select all", but by default I think it's either 'A' or 'Ctrl + A'. After that, congrats, you've just made your first marquee selection. It appears as animated dotted lines around your selection.
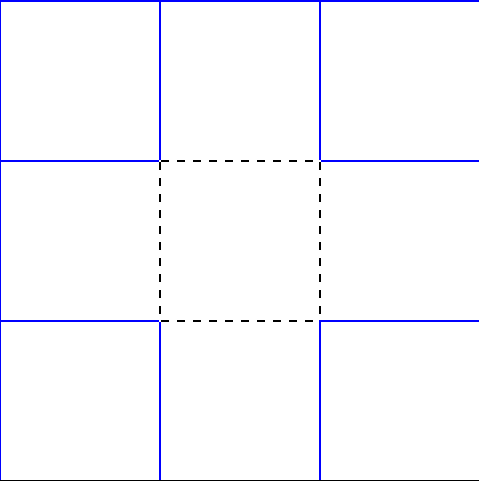
Now, you can fill a color in that center tile space, which in turn will fill all the tiles! But we must first select a color.
Color Picking
In the bottom left of Aseprite is the Color Picker. I call them some things here and they're not official names of these things, but it's a convenient way to remember them. I listed: Free Picker, Hue, Alpha, Active Brush Color, and Toggle Color.
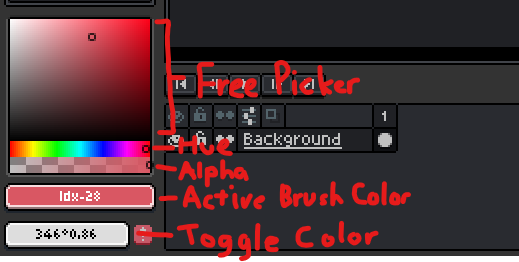
Free Picker - I call it "free" because you get to slide the color cursor both horizontally and vertically, though Hue and Alpha values are listed seperately.
Hue - Think of it as a simple color choice (i.e. red, green, blue, yellow), but no lightness/darkness or transparency values attached to it.
Alpha - How opaque the color is. The color could be completely invisible, half visible, fully visible, etc.
Active Brush Color - The color displayed in the rectangular box is the one currently selected and will be used for drawing, filling, etc.
Toggle Color - An alternative brush color that is inactive, but can be selected with 'X' or whatever keybind is assigned. This also swaps your Active Brush Color in its place.
Color Sliders
You can click your active brush color to pop up some colors sliders, useful for more precision. You can slide the arrows to achieve the exact number values you want. You can also type them in directly.
There are many letters associated with the color sliders and I'll define them below:
R - Red
G - Green
B - Blue
H - Hue
S - Saturation
V - Value
L - Lightness
A - Alpha
# - Color ID
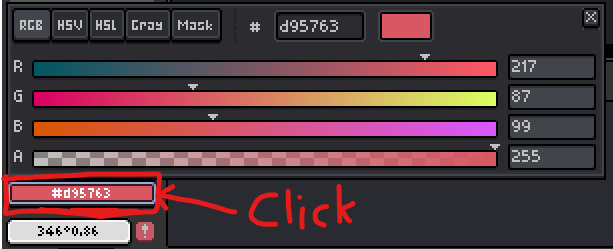
Note: One thing that's a bit tedious is that by default the slider window auto-closes if you move your mouse away. To prevent this, drag the window out and away from its original location, though you can place it back afterwards. For example, arrange it like this:
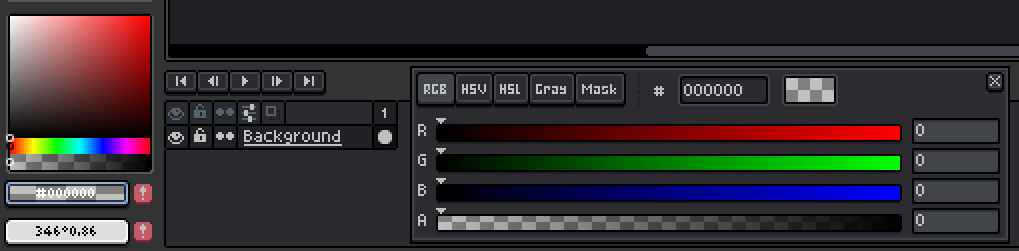
My favorite sliders and my way of picking colors is nearly always the HSV sliders. I use this to achieve Hue Shifting which is a popular topic that I'll introduce for the brick tile.
Filling the Brick Tile Midtone
Ok, select a slightly bluish gray color such as the one I have selected. It will serve as the midtone for the brick tile. Then select Fill from Edit or use the shortcut. You should see a result like this.
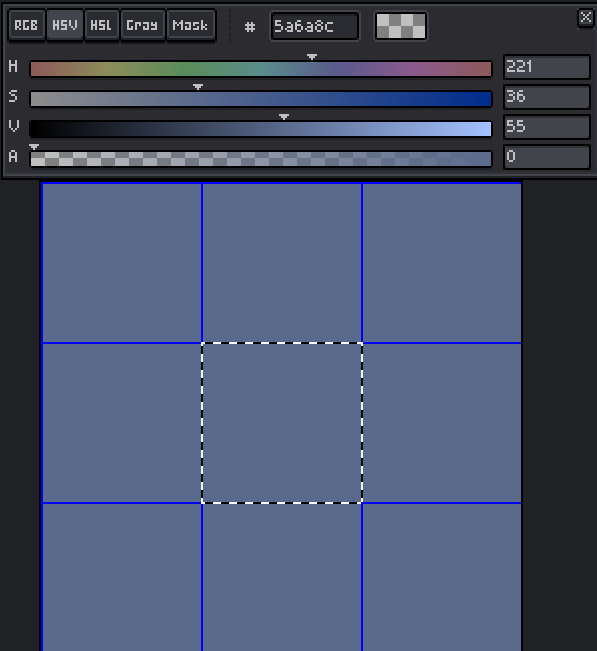
You can deselect the marquee selection now, which is also found in "Select".
Drawing with the Pencil
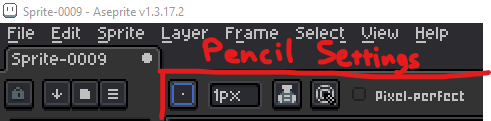
I will explain hue shifting shortly, by for now let's keep things simple and create some dark brick lines. Slide the value of the current color down, but keep every other slider amount the same. Select the pencil tool. While the pencil is selected, you can access the settings near the menu bar. There are different brush shape options there that you can mess around with. There is the brush size which we'll just set to 1px. The Ink is a bit more confusing but just select Copy Alpha + Color. Completely ignore "Dynamics". Pixel Perfect determines if your lines will appear as jaggy staircase lines or simple lines.
With the pencil tool, you can "free draw" with left click, or even draw straight lines! To draw straight lines, you must first click a start point on your canvas, then hold 'Shift' and click an end point. You can also hold 'Ctrl' to snap the angle of the lines to ~30 degree increments. Draw some brick lines like this until you get a nice seamless pattern.
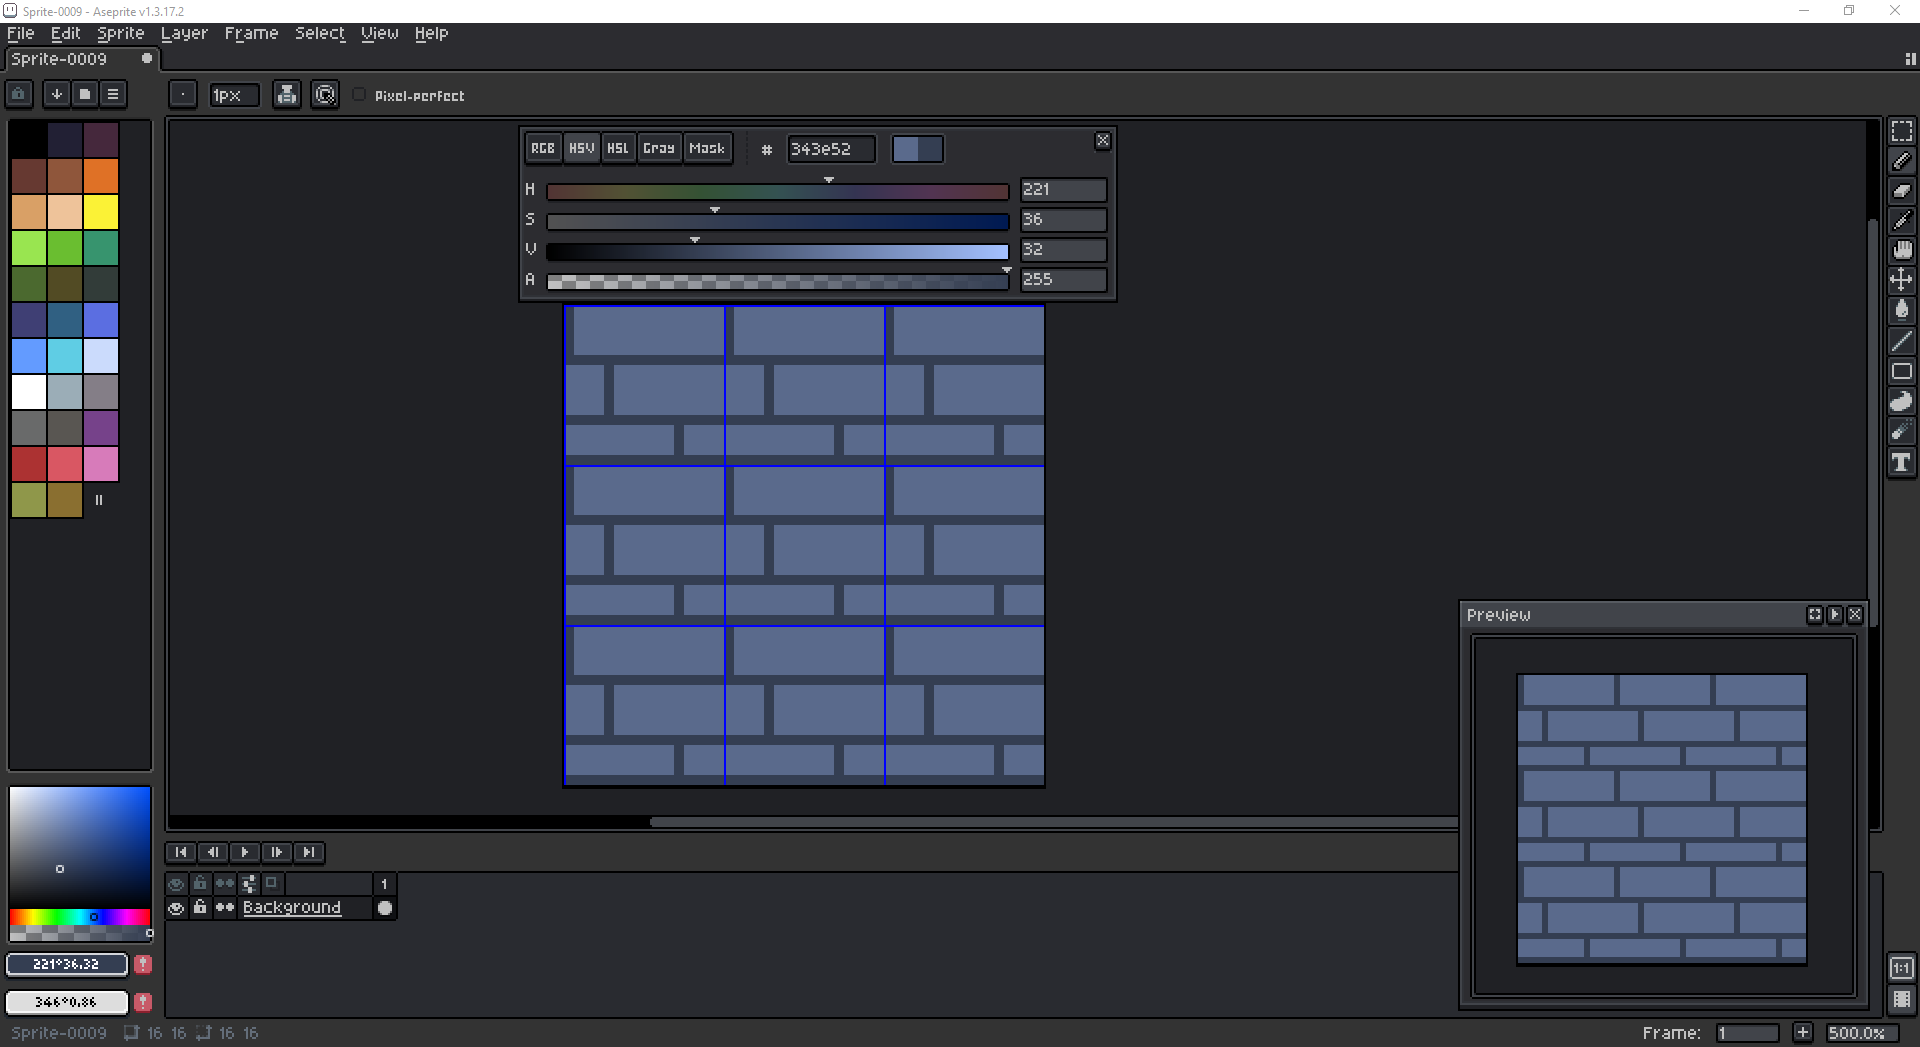
Now go brighter, slide the brush color value greater than the original brick color we added. This will be our highlight color for our bricks. Add some highlights to the top of the bricks.
Eyedropper Tool
Now that we have a few nice colors on our canvas to work with, you can reselect them with the Eyedropper Tool.
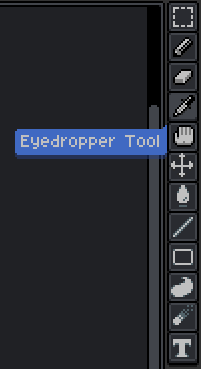
With it selected, you can left click any color on your canvas to reselect it as your active brush color, though you may have to modify the its settings found near the menu bar.

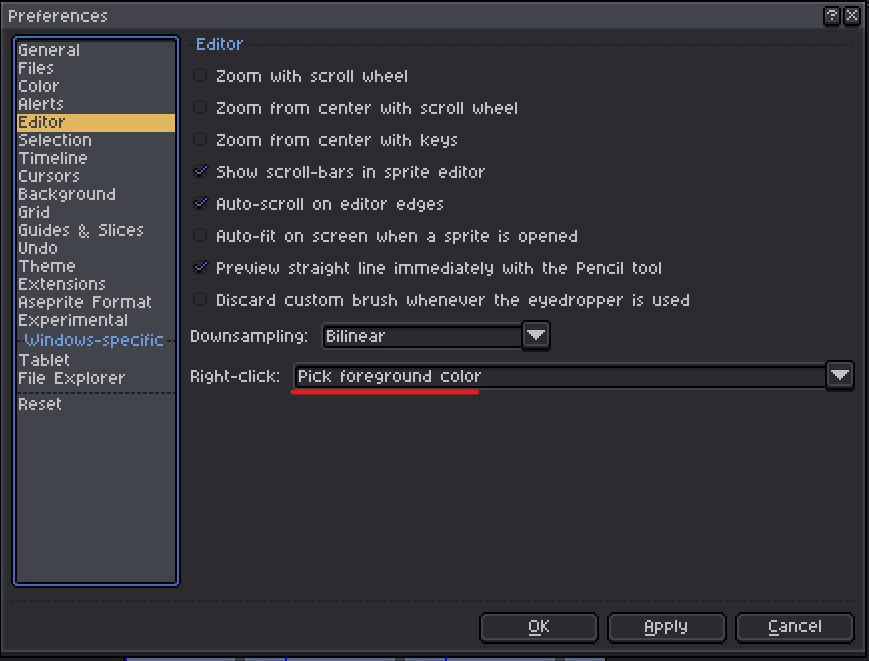
However as mentioned in the previous tutorial post, you can set right click as a shortcut for this exact feature so you never have to select the eyedropper tool manually. This option is found in Preferences from Edit.
Hue-Shifting
Now lets apply some hue shifting to our tile sprite. The general 1st rule for hue shifting is that highlights should appear warmer in color (i.e yellow or orange) and the shadows should appear colder/cooler (i.e. blue or purple). The 2nd rule is that warmer colors become less saturated and cooler colors become more saturated.
Replacing Colors
In "Edit", there is a feature to replace colors on your canvas. You must eyedrop the color first. Then you can modify the original color (From) to the new color (To). Tolerance determines if similar colors to the color in "From" will also be replaced, but generally it's best to keep it at 0. Make sure "Preview" is check-boxed to see the replacement in real-time.
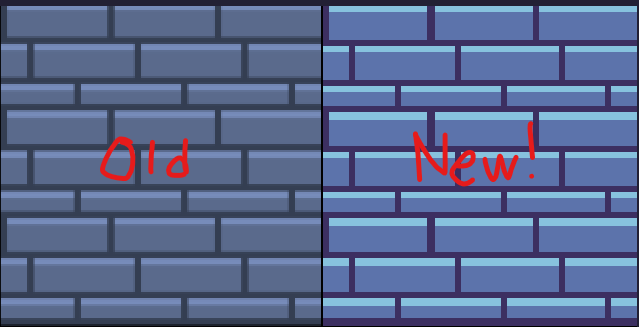
Now I have updated all the colors of the brick tile.
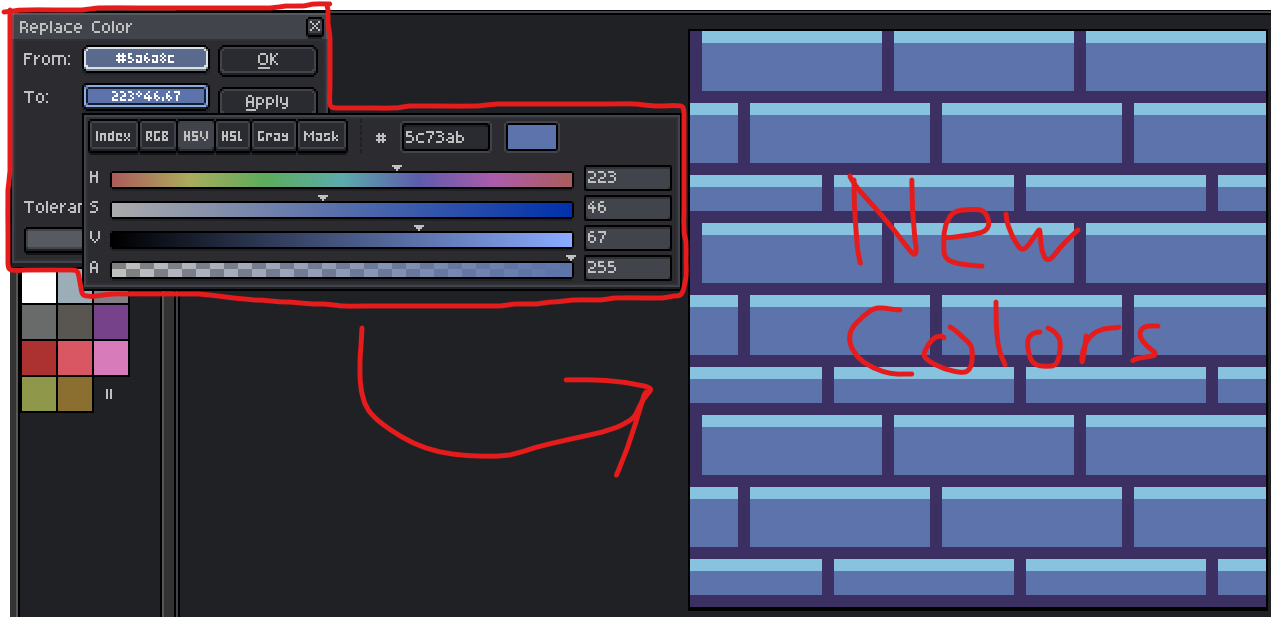
This new tile pops, compared to before. The colors are much stronger and contrasting along with the subtle hue shift. Without hue shifting, it's very common for sprites to look desaturated and basic.
Polish
The final stage of spriting anything is the Polish stage; basically just making things look good and ready to publish. We can give our brick tile more texture, reusing our existing color with the eyedropper function or even adding more colors if you wish. I want to do that and show the true power of hueshifting before we close this tutorial.
I usually create a new "polish" layer over my original layer to make these edits, then merge them down after I'm done. The background layer can basically be ignored for now, or even deleted because it's irrelevant at the moment.
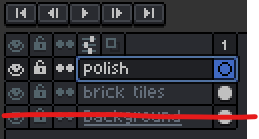
Here I basically add more roughness and cracks to the bricks, using more colors and hue shifting techniques.
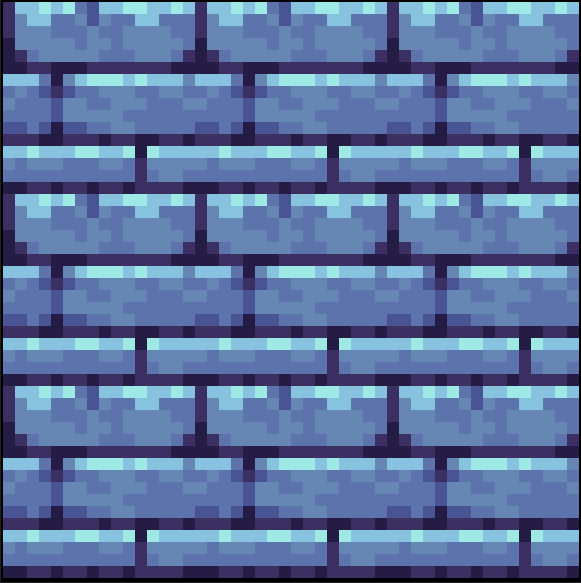
That's it for the brick tile for now, but we will discuss more dungeon tile-mapping and in the next tutorial. Thanks for reading!