(Originally written January 2024 - updated October 2025)
There were no instructions for how to actually use more colors in Bitsy Color, so here is a tutorial.
Note: If any time your test screen goes white, freezes, the animations look super sped up, or your game data seems to disappear, normally all you have to do is refresh the page and it will come back. 99% of the time it does not mean that your game data was lost.
Coloring Tiles: Visual Method
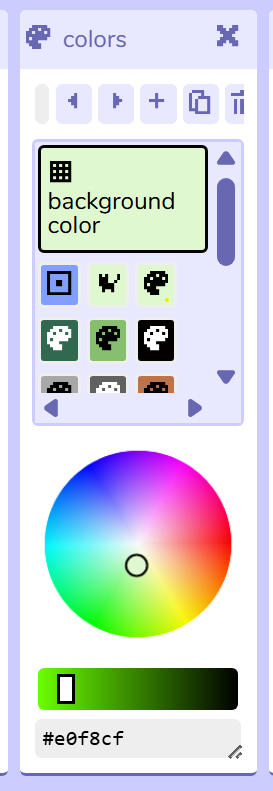
Go to the color window. Click and drag on the little triangle on the lower right to resize the window. Mess with the size until as many colors as possible appear.
Click + (which appears as the last "color" in the list) to add a new color. It will be a random color. Click on the new random color and then change the color of it by inputting a hex color code or changing on the color wheel.
If doing this is impossible for you, it means your computer monitor is too small.
Alternative method (for small monitors)
Click on "tools" then "game data" and scroll down a little. You'll see something like this:
PAL 0
204,74,90
128,159,255
255,255,255
NAME blueprint
Colors are made up of 3 numbers ranging from 0 to 255. The first number in the list is actually color 0, and the second color is color 1.
In Bitsy Color you can add as many new colors as you want. You can use the following sites to help:
- A site where you can use a color picker and grab any color on your computer screen: https://www.colorbook.io/colorschemes
- Another site: https://www.colorbook.io/colorschemes
Bitsy Color deletes notes in the game code, so if you need to use a text version of the list, you should copy paste your color palette into a blank dialog and then label your colors in that dialog.
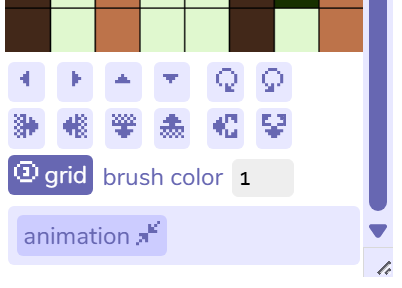
1) go to "brush color" and change the number to whatever color in line you want on your list.
2) click to remove the current color on the sprite, and click again to add the new color you have changed to.
Text Data Method
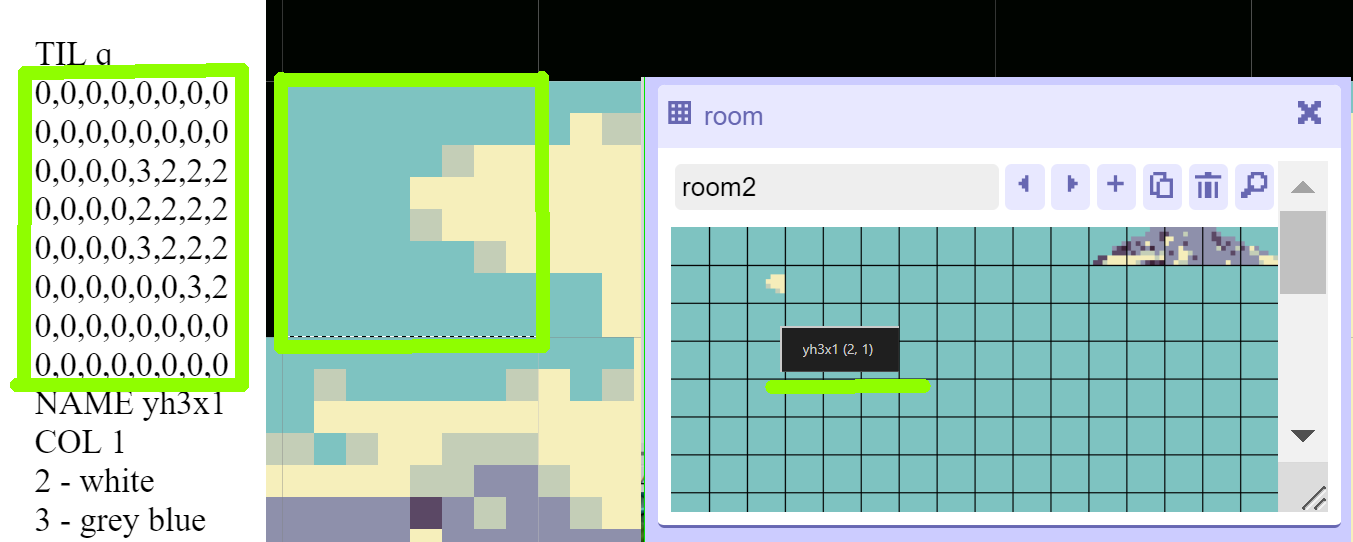
This is an example of a blank tile taken from my game data:
TIL q
0,0,0,0,0,0,0,0
0,0,0,0,0,0,0,0
0,0,0,0,0,0,0,0
0,0,0,0,0,0,0,0
0,0,0,0,0,0,0,0
0,0,0,0,0,0,0,0
0,0,0,0,0,0,0,0
0,0,0,0,0,0,0,0
NAME yh3x1
COL 1
You can just TYPE in the numbers that correspond to each color, or copy-paste bits of matching tiles together, which in some cases is much faster than coloring by hand.
Coloring Text:
The same color codes work for text. Just replace the 0 of {clr 0} with 1, 2, 3, 4, etc the same as when coloring a picture.
Both the following methods work:
{clr 0}I{/clr 0} {clr 1}am{/clr 1} {clr 2}a{/clr 2} {clr 3}cat{/clr 3}
and the much easier
{clr 0}I {clr 1}am {clr 2}a {clr 3}cat{/clr}
The difference between the two ending tags is that {/clr 3} ends only color 3, but {/clr} ends all colors. For example:
{clr 1}I have a {clr 3}dog{/clr 3} at home {/clr 3}
Would mean "I have a" is red, "dog" is blue, and then "at home" is red.
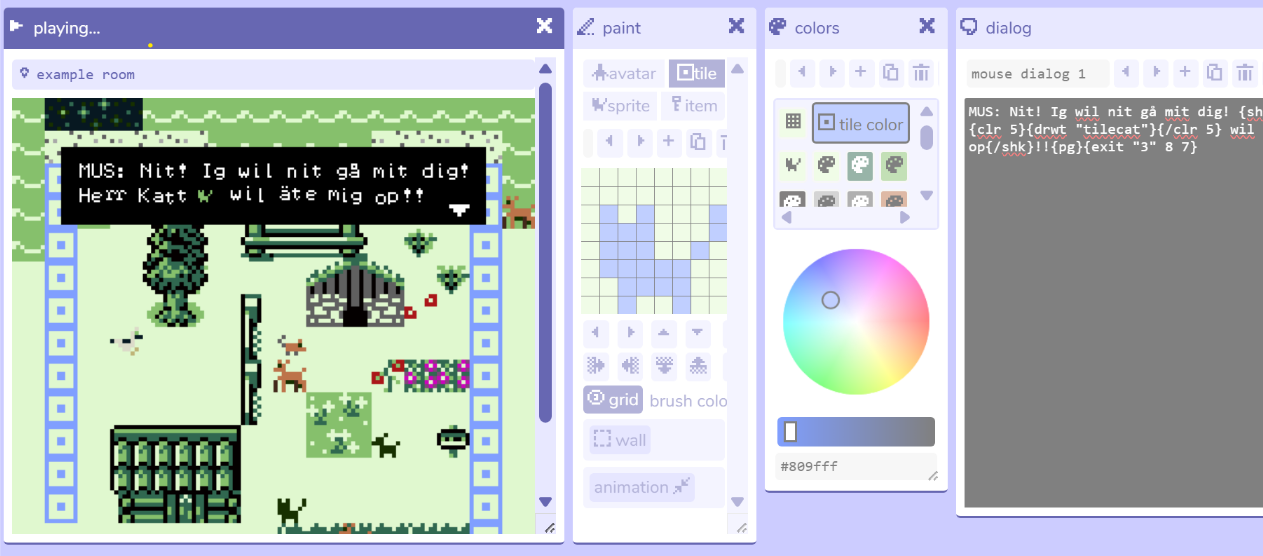
Coloring Item or Sprite Images as Text:
Same as text. In some versions of Bitsy Color you need to press "show code" and type it in there, but in the October 2025 version you can type it in without clicking "show code".
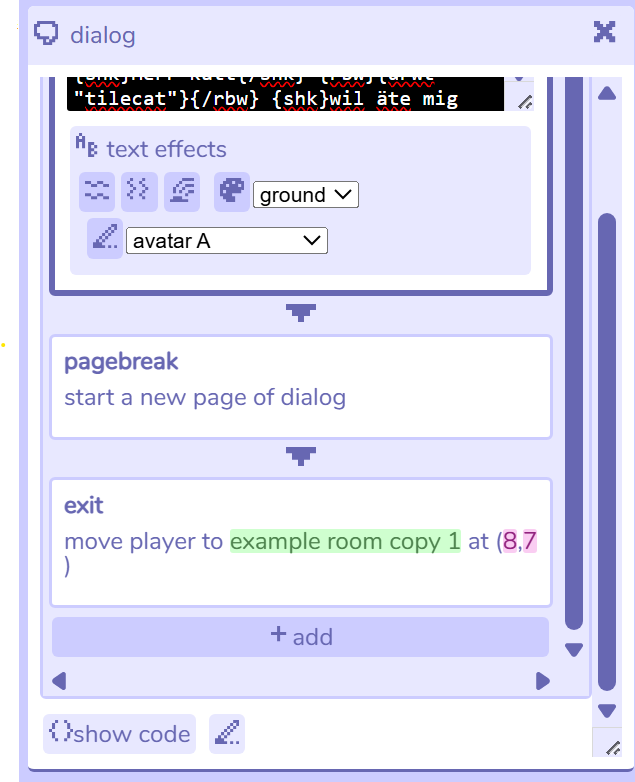
As of October 2025 Bitsy Color has some bugs with this so SEE BELOW POST FOR UPDATES ON DISPLAYING AND COLORING ITEMS, SPRITES AND TILES IN DIALOG.
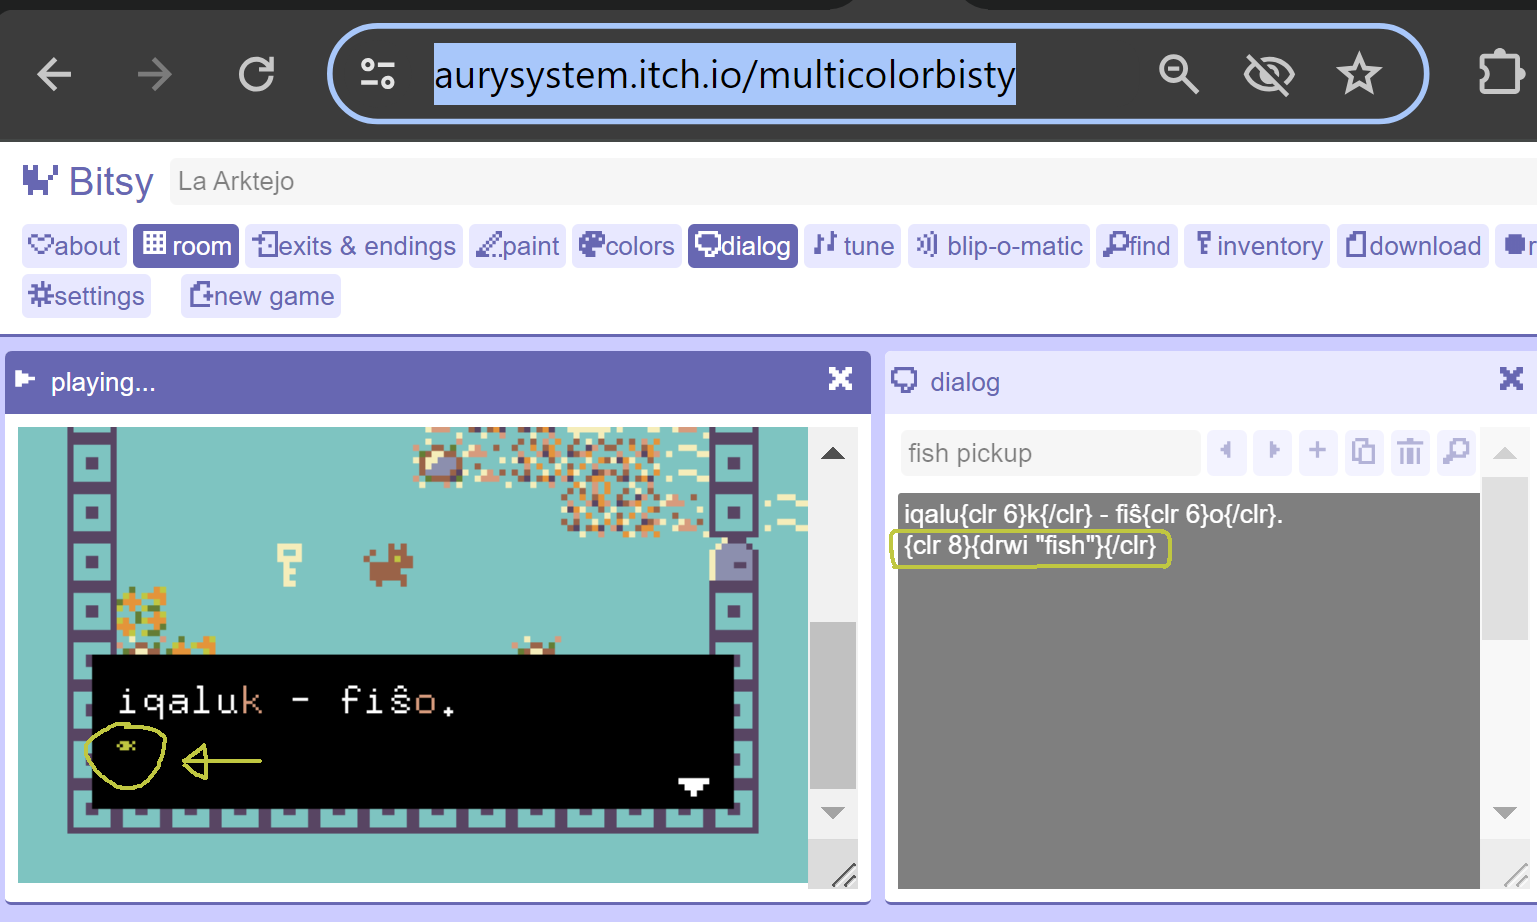
As you can see, the fish icon I made it display got colored to color 8 (green) but it's also really tiny - there is on way to increase the size unless you insert Javascript into the html file of your finished game.
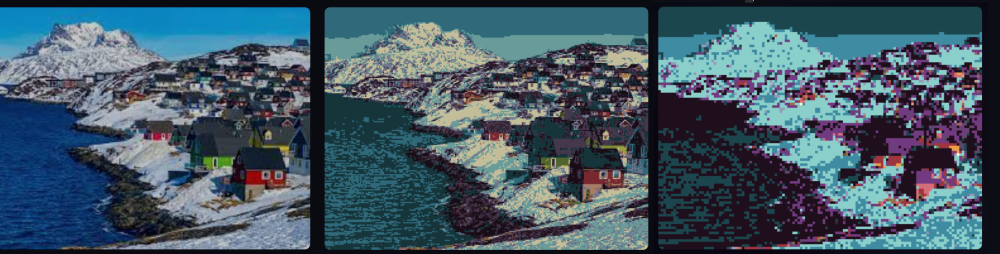
Coloring Backgrounds:
You can run a photo through Pixelicious to pixellate it: https://www.pixelicious.xyz/.
(Photo) ー> (Pixelicious round 1) ー> (Round 2)
And a good color reducing tool: https://onlinejpgtools.com/reduce-jpg-colors
In January 2024, RGBitsy (https://janosc.itch.io/rgbitsy) didn't work with Bitsy Color at all.
In January 2024, Pixsy (https://ruin.itch.io/pixsy) only worked if you started with a blank game - insertion into an existing Bitsy Color game didn't work.
Mass Recoloring (Pseudo paint bucket fill tool):
1) Backgrounds: Open "game data", copy-paste to duplicate the palette for your scene, replace a color number in the palette to change all tiles using that color.
2) Sprites, Items, Avatar, Tiles: Find the picture in the game data. If it's unlabelled, you can tell its shape by the change in numbers. For example, here's a dog:
SPR A
0,0,0,0,0,0,0,0
0,0,0,0,1,0,1,0
0,1,0,0,1,1,1,0
1,0,0,0,1,8,1,1
0,1,1,1,1,1,1,1
0,1,1,1,1,1,0,0
0,1,1,1,1,1,0,0
0,1,0,0,0,1,0,0
>
Paste the code into Google Docs or something, then hit ctrl f or use the menu's "find" command, hit the down arrow to get "find and replace", "replace all" to change the numbers easily. For example if I replace 1 to 8 then the entire dog's body will change to the same color as its eye.
Transparent Backgrounds:
You can make the player avatar, sprites and items have transparent backgrounds. Open "game data", add BGC * ("BackGround Color") underneath the COL line if there is one, for example:
NAME cat
DLG a
POS 0 8,12
COL 2
BGC *
BLIP 1
(As of 2024, and still being an issue in October 2025, the transparent background command does not work in Bitsy Color. It will appear transparent in the editor and while test playing, but when you export the game to the final .HTML file it will not be transparent.)
The player avatar is unlabelled in the game data but starts with "SPR A" and will be the one right before your Cat sprite in a new game.
It is very likely your animations will glitch and look super fast in the game editor after you make their backgrounds transparent. It doesn't matter, they'll appear normal in-game.
Troubleshooting:
Some people have added a few more colors into vanilla Bitsy in a similar way as my instructions above. However when I tried it, it didn't work correctly, whereas Bitsy Color worked with just a copy-paste.