

I'll edit this page as updates come out so that players can consult it. Also, spoilers, duh.
IMPORTANT: This walkthrough contains info on how to get past the storyline, it does not include Maidbot crafting and boss hunting, to learn how to do this properly just talk to Zero via Wagie's shop.
In the current build, crafting Maidbots is important to get past the final boss, in future builds it will be very necessary to do so.
PROLOGUE/TUTORIAL: ASYLUM
- Instance 1: Get out of your cell, check Emma's corpse to get some ammo, avoid the red areas as they are camera vision, go behind the counter and find a key in the second shelf, then open the door with the key to get to the next area.
- Instance 2: In this area you are told to crouch run to get past the enemy vision, after that, you will find an enemy drone, you can either avoid it or shoot at it, two shots will do. (YOU CAN SHOOT ENEMIES THAT ARE OFF SCREEN)
- In the next corridor, you are told to crouch-run to enter the room with a sign that says "DANGER, KEEP OUT", enter, check the electricity panel to turn the lights off, get out of the room and continue to the next corridor. While lights are off, enemies have reduced vision range.
- In the next corridor there's an enemy drone, your best choice is to shoot at it twice, you can shoot at it before it appears on your screen.

- After that, crouch-run to get past the enemy vision and get out of that room
- Instance 3: As the tutorial says, drag your drone to the key on the table so it can grab it for you

- Crouch run to avoid the enemy vision and get out of the room by using the door to your right.
- Instance 4: There are no dangers or puzzles in this area, just walk.
CUTSCENE
PROLOGUE/TUTORIAL 2: HOSTEL
- Instance 1: Interact with the receptionist by pressing F and choose to steal the key, then, use the door.
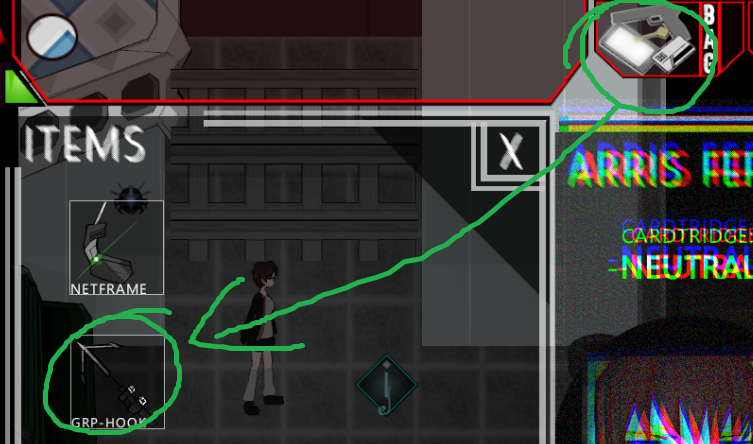
- Instance 2: Crouch run to avoid enemy vision, then, as the tutorial says, click on your bag button and then select the grappling hook, get under the highlighted area and click on the target to climb
- Once you reach the balcony, just walk through the corridor.
CUTSCENE
CHAPTER 1: YOUR ROOM AND THE AURIGA BRIDGE
- Instance 1: Save the game by interacting with your computer next to your bed, then get out of your room.
- Instance 2: It is required for you to talk to at least one of your crew mates before you can get out, it's wise to talk to your crew to get more information and some hints, especially Wagie, she has the Maidbot shop, while talking to Wagie.
- (OPTIONAL) While talking to Wagie, check the "Interact" button while looking at Zero's card to talk to her, Zero will provide you lots of information about how to find and gather materials to craft your Maidbots.
- When you're ready, talk to Hex again, and press on the Sortie button in her dialogue box.
- Sortie screen: Select your Maidbot and press Sortie, while in the map screen, choose the "Police Station" area to deploy there.
CHAPTER 1: CITY
- Check the controls to navigate better, ollow your compass(Bottom Left) and sprint to the Police Station
CHAPTER 1: POLICE STATION
- Instance 1: Drag your drone to the switch to open the door, then, use your grappling hook.
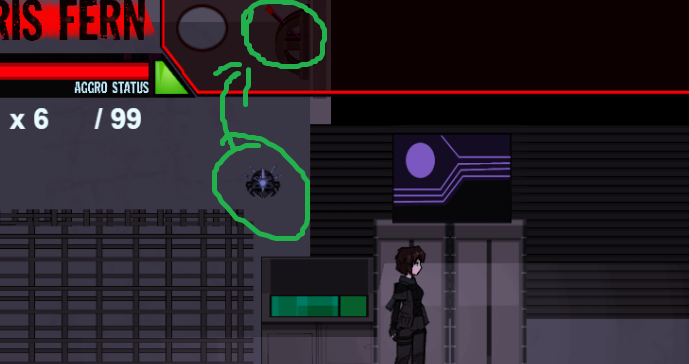
- Instance 2: Crouch-run to the end of the room to avoid enemy fire, then, use your drone to activate the switch behind the enemy to open the door.
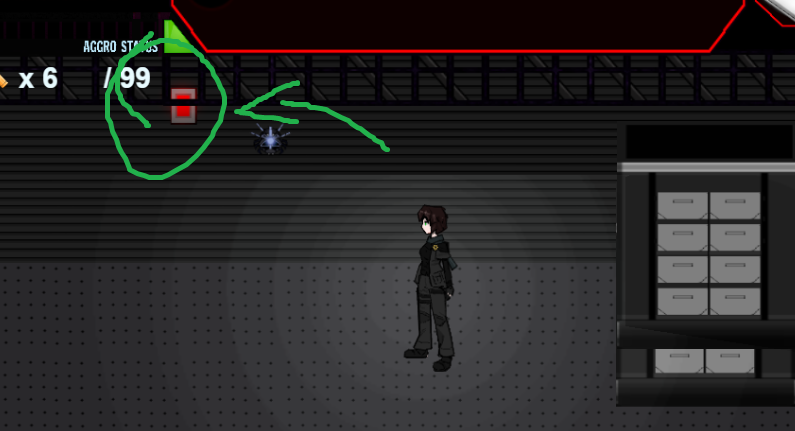
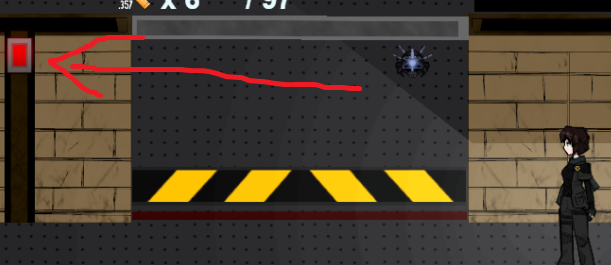
- Instance 3: Avoid the enemy to the best of your ability and walk to the middle of the room, you will see a small drone, stand on the platform and shoot at it to disable the turrets
- After that, you must walk to the platform where the enemy you just destroyed was, and walk on the steel beams behind it to access the next area, make sure to time your movement properly to not get caught by enemy fire.
- Instance 4: Drag your drone to the switch to close the door to prevent enemy fire
- After that, there's an enemy in the corridor, shoot at it, three shots will do, your bullets can reach it off screen as well.
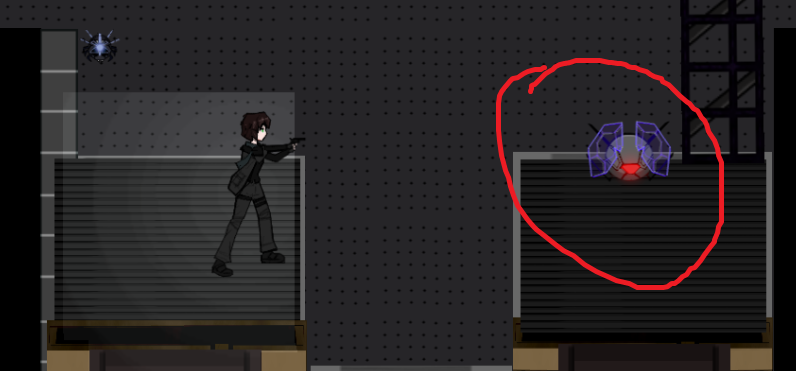
- After that, in the next room, shoot at the drone to deactivate the turrets, crouch behind the box and time your attacks properly to avoid getting shot, only one shoot is needed.
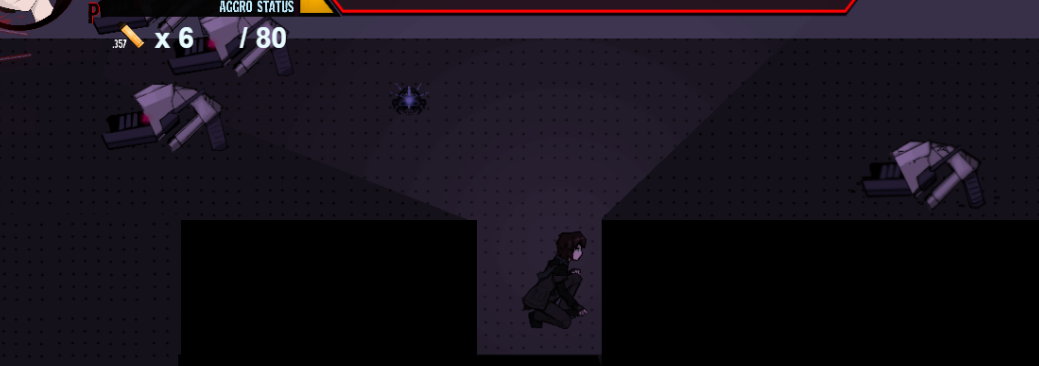
- Instance 5: Crouch-run to avoid the helicopter fire.
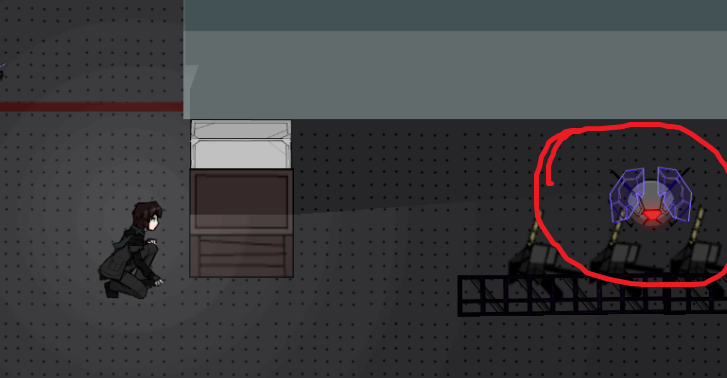
- Instance 6: Use the box for cover, the easiest way out of this is by attacking the drone that's walking alone, destroy it with three shots, after that, follow the three remaining drones from behind, until you find a spot you can hide into, once they get past you, you can get out and proceed to the next area.
- Instance 7: Interact with the computer and proceed to the next area.
- Instance 8: Avoid the enemy in the area and proceed to the next area.
- Instance 9: Avoid the enemy in the area by crouch-running and proceed to the next area.
- Instance 10: Just walk through the corridor
CUTSCENE
CHAPTER 2: BACK AT THE AURIGA
- Instance 1 and 2: Save the game and get out of your room, interact with your crew and then sortie to CODE RED IMPACT ZONE.
CHAPTER 2: CITY BOSS/XERA
- Follow your compass to the North, you will be attacked by Xera, it is STRONGLY advised that you have at least crafted one or two Maidbots before taking on this mission, if you haven't, take your time to talk to Zero in the bridge via Wagie's shop, she'll tell you location and requirements for Maidbot crafting, recommended Maidbots to fight Xera with are Shireywha and Vu, while Memorimo and Zero will perform poorly against her.
- While in the city, you can consult your map for locations, inventory and coordinates via the button on the bottom right corner.
- Here you have to deliver 1000 damage to Xera before the option to escape to the West is even possible, do it quickly, then Xera will get more aggressive, at this point just run to the East.
CUTSCENE-END