I assume that when you copy paste you are not really copy and pasting everything, and somehow when you duplicate you are actually duplicating everything.
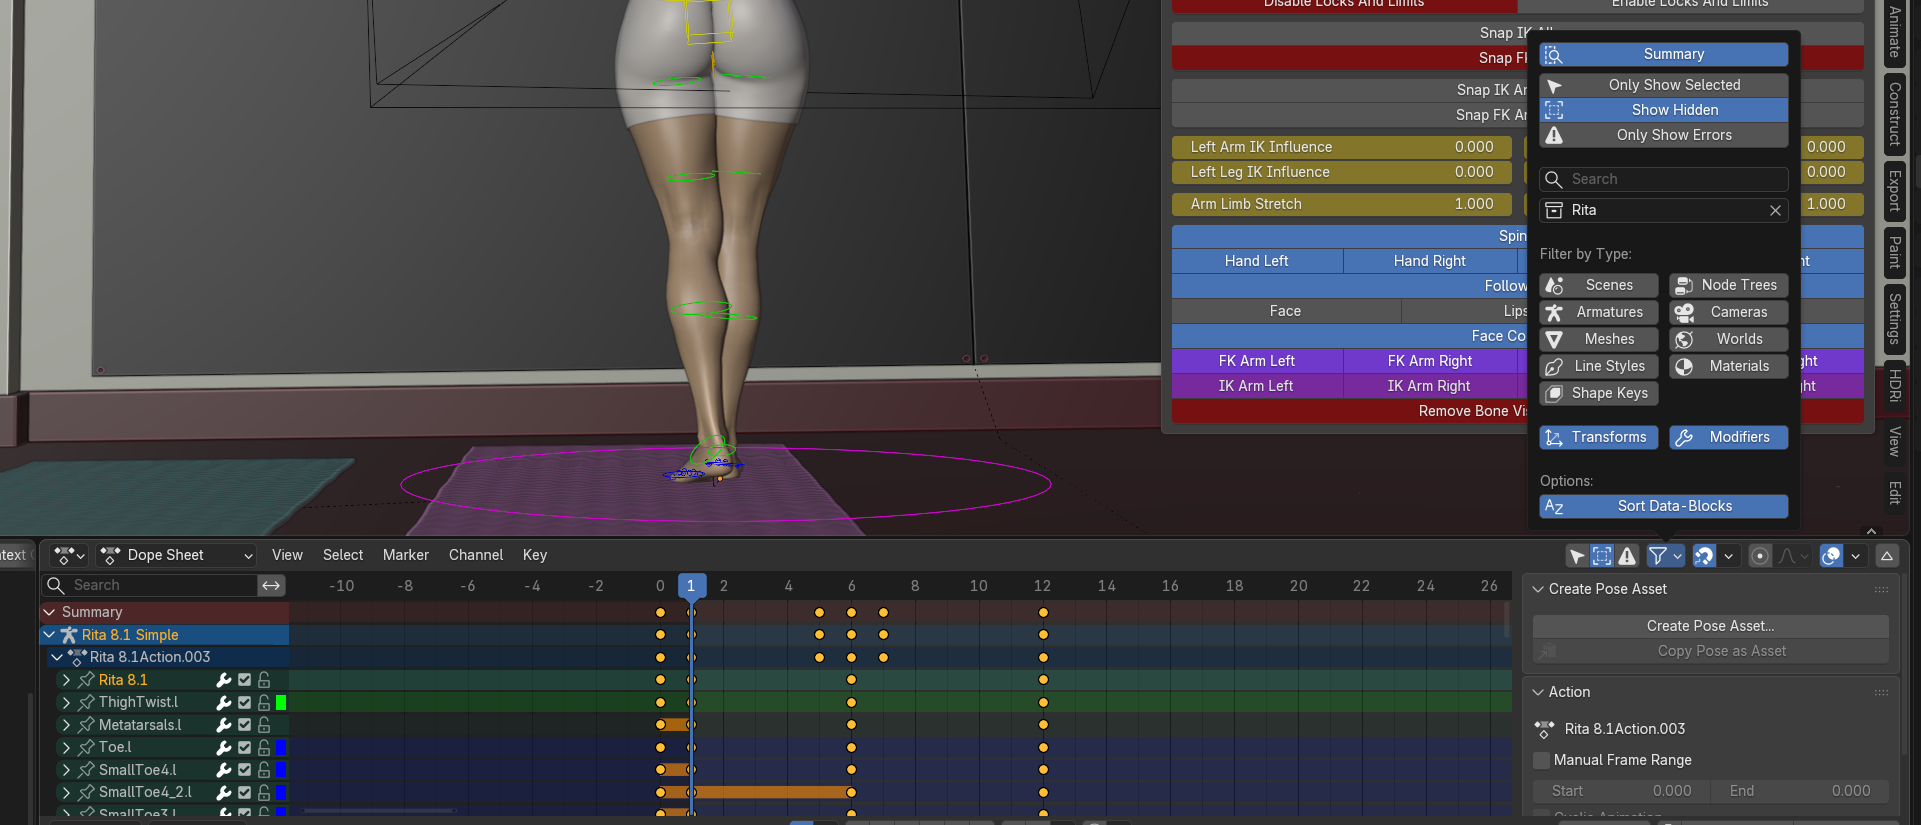
When dealing with FK/IK you need to be aware that there are two sets of bones, one set is the FK bones, those are basicly the same bones as the Daz figure has, those are the ones that are actually important for the animation. The IK bones are just a convenience that you can use while animating, the FK bones are the important bones that will hold the final result.
And then there are the IK bones, this is an additional set of control bones which have the IK modifier applied to them, so that you get IK movement. The FK are setup so that they will follow the IK bones while IK is active. And when you "snap to FK" you essentially just apply the current IK pose to the FK bones, and then hide the IK bones.
So this "while IK is active" thing is controlled through properties on the armature. The IK props which are also shown in the UI:

these "IK influence" properties make it so that either FK bones are active (at 0.0), or the IK bones are active (at 1.0).
When you are copying keyframes, then you might need to take into account these properties. If you copy a keyframe from somewhere in the timeline where the IK influence is 1.0 and copy it to somewhere where the influence is 0.0, you will end up with a broken pose, because you copied keyframes from the IK bones to somewhere where the IK bones are deactivated, so they won't do anything to the pose, only the bones that are always active will be posed so you can end up with a strange looking pose.
What I am trying to get at is that you need to be aware of these IK influence properties and take them into account when working on an animation, and when moving keyframes around in particular.
I would also recommend looking at how the Dope Sheet works in blender and learn to work with that, it is a lot easier to deal with keyframes there, though I think Blender 5 brings some of the functionality of the Dope Sheet into the Timeline. You can use the filtering in the Dope Sheet/Timeline to show all the keyframes of the currently selected figure and all of the bones (also hidden ones), that will make it easier to see what is actually going on.