Great tiles at a great price. Thanks for making these!
For anyone using Godot here's some tips for getting up and running with these. I'm using Godot 4.6:
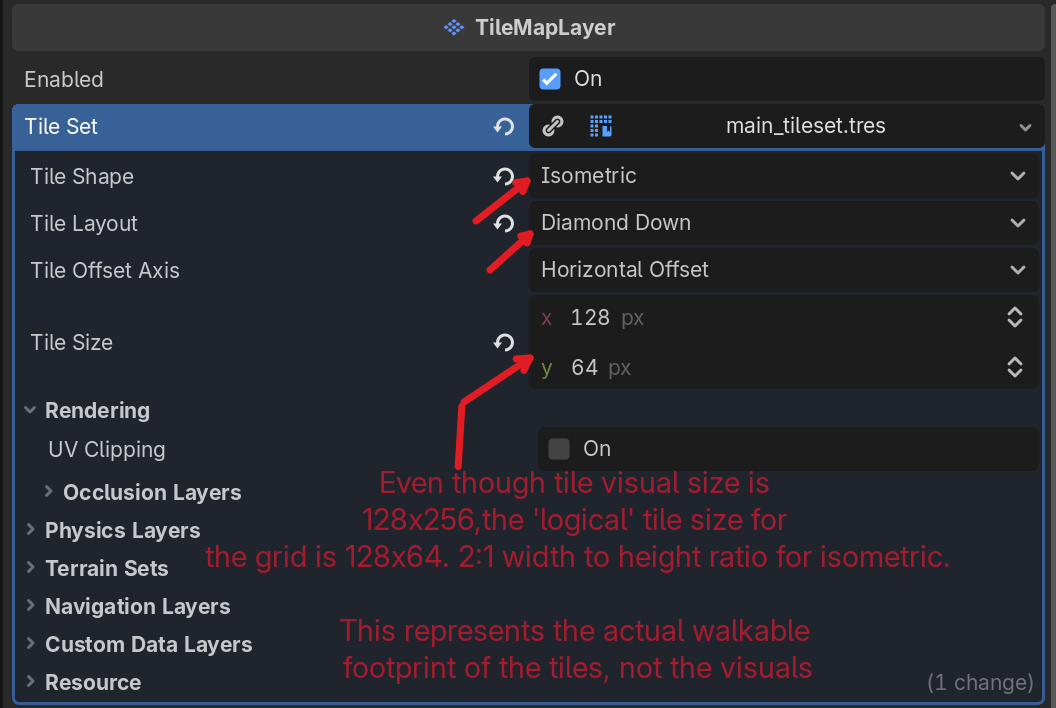
- When setting up / creating the TileSet in the TileMapLayer, set the TileSet properties to Isometric, Tile Size 128x64. Tile Layout varies on your needs I think. Same with Tile Offset Axis. Note that Tile Size here is not the visual size of the tile image, but the 'logical' size of the grid. For isometric a 2:1 width to height ratio should be used. This sets the TileMap grid to the right size to fit the tiles. See attached images.
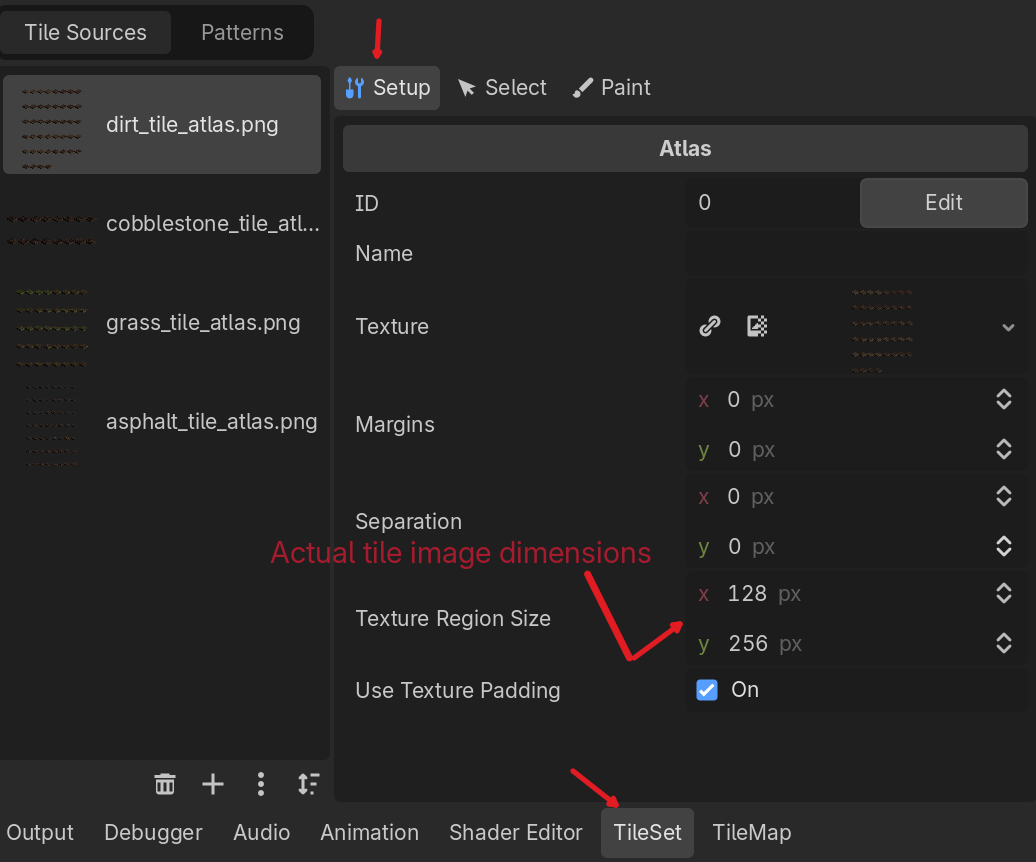
- When configuring the individual tiles in the TileSet editor, in the 'Setup' tab, set the Texture Region to 128x256, the actual size of each tile image. See attached images.
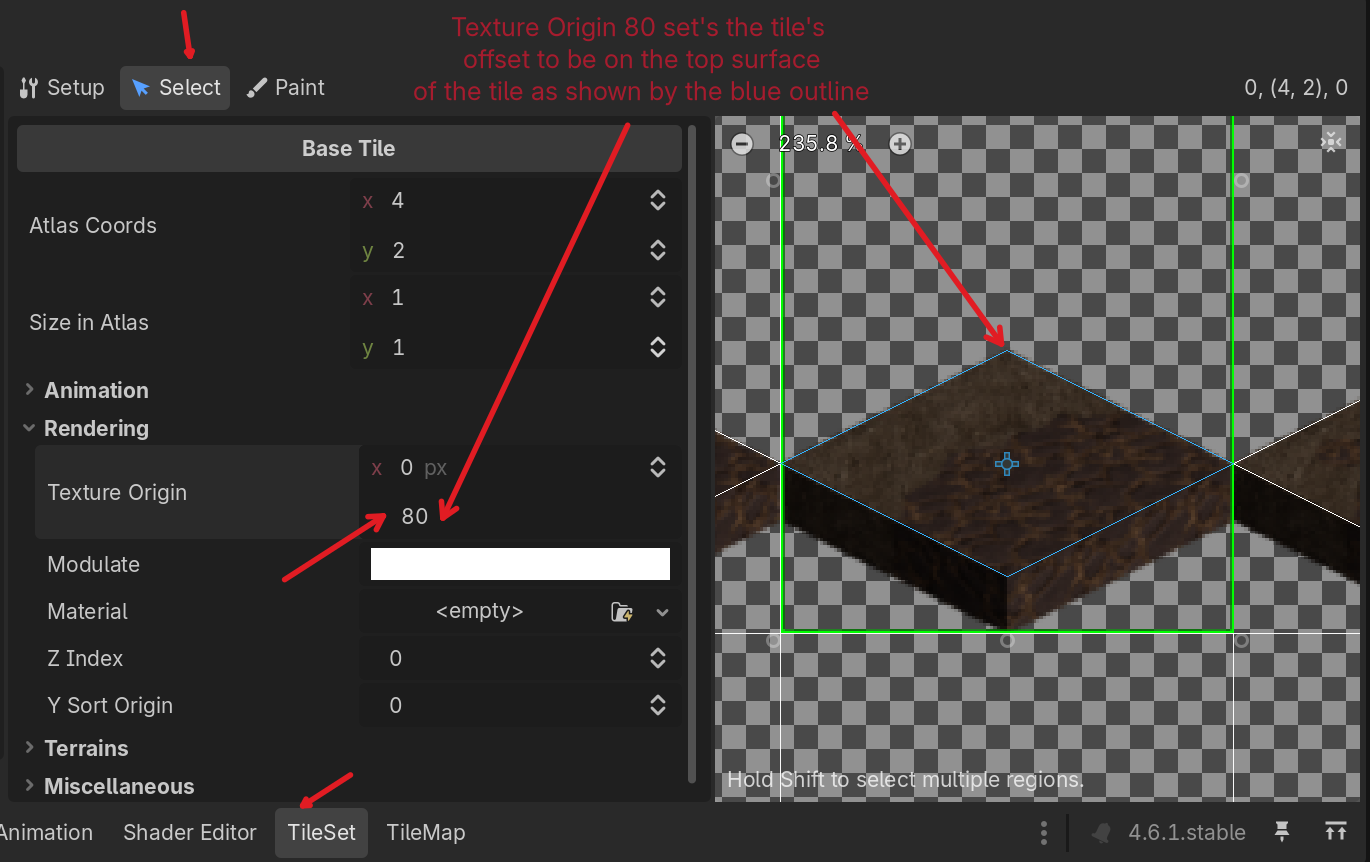
- In the TileSet editor, 'Select' tab, expand the Rendering category and set the Texture Origin to x: 0, y: 80. This configures the tile so the origin is exactly at the center of the walkable surface fo the tile. This ensures that when you place tiles in the TileMapLayer's grid, they actually visually line up with the grid. See attached images.
- You can merge the individual tile PNGs into a tile atlas within Godot but I found that a bit cumbersome cause you needed to setup the individual tiles first (the two steps above). I found it faster to use ImageMagick's 'montage' command to automatically make an atlas PNG outside of Godot, and then import that atlas into Godot. I grouped my tiles into several atlas files by tile type (grass, dirt, buildings, etc...)
- Example ImageMagick montage command:
- montage *.png -tile 8x -geometry 128x256+0+0 -background none my_output_atlas.png
- montage *.png -tile 8x -geometry 128x256+0+0 -background none my_output_atlas.png
- Example ImageMagick montage command: