
Alright, so the case I picked was Steve Propst's case called Footy Kit Designer: "Enter the exciting world of football (soccer) fashion. Design amazing looking kits for the pitch and the street."
https://famicase.com/20/index.html
I picked this case because of the Y2K look to the typeface and surrounding graphics. I knew I wouldn't be able to copy the look of this case exactly, but I wanted to turn this case into a character customization screen.
My first step was to make some buttons and a space where I could lay some 2D sprites on top of eachother. Then, I used Illustrator to make some collars and a shirt shape based on the case's shirt pattern. My shirt came out unreasonably pointy and I tried to smooth out some vertices to fix it, but it just looked unnatural. I eventually redid the shirt, but for now, have a unreasonably shaped shirt:
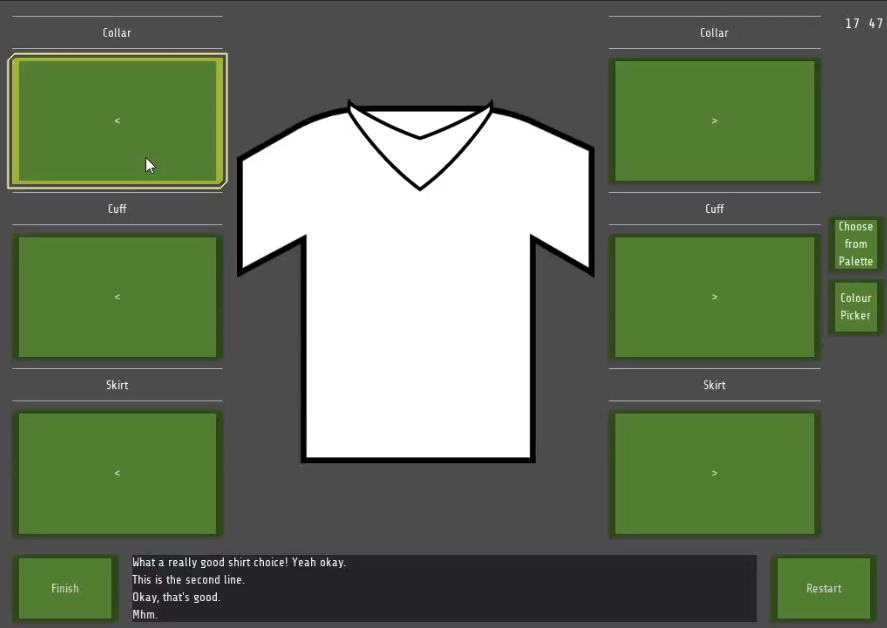
This screenshot is from a version where I thought I was going to have commentary given to you on what some background voice thought of your design. I put it here subconsciously since the last game I was working on was a visual novel. I later scrapped this entirely to keep the scope down, and found other ways of filling the screen space.Here in this early version of the colour screen (I didn't document my progress very well) you can see that I planned to have 5 whole colourable items and I didn't realize how tired I'd be after making just 3 sets of assets. Making content for this game is hard when you're also doing all the programming ^ ^; but I can see some other dedicated artist going ham with it.
I'd love to work with anyone who wants to help turn this game jam game into their own customizer-thing, if they're the kind of person who wants to make lots of content and doesn't want the prescribed, laggy setup of most online avatar makers. Either that or I'll try to make this project open-source on my github page eventually: https://github.com/deertears/
Something I'm the most happy with is how I got the palettes to work. I knew I could've just done a colour picker, but that would've been asking everyone to suddenly become a graphic designer and understand colour theory. I figured it would've been more fun to pick from a smaller set of palettes:

So here I have all these buttons reading a 1x1 pixel space on this atlas texture. Each button is a scene that can be instanced pretty easily, with just one script attached. Here's the code that grabs the colour from the icon:
func _on_ColorButton_pressed():
    var region = icon.get_region().position
    var icon_data = icon.get_atlas().get_data() # note: replace "get_atlas()" with "get_texture()" when using any other type of icon
    icon_data.lock()
    var icon_color = icon_data.get_pixelv(region)
    emit_signal("color_chosen", icon_color)
Then, in my main game script, I threw this in my _ready() function:
onready var color_buttons = $MarginContainer/.../etc...
var color_buttons = color_grid.get_child_count()
    for i in color_buttons:
        var child = color_grid.get_child(i)
        child.connect("color_chosen", self, "color_chosen")
And of course my main game script has a color_chosen(color) function to fit this connection, which does some inefficient passing around before it gets to color_selected_part(color)
func color_selected_part(passed_color:Color):
    match color_target:
        Enums.shirt_parts.NONE:
            pass
        Enums.shirt_parts.COLLAR:
            collar.modulate = passed_color
        Enums.shirt_parts.CUFF:
            pass # for now
        Enums.shirt_parts.PATTERN:
            pattern.modulate = passed_color
        Enums.shirt_parts.SHIRT:
            shirt.modulate = passed_color
        Enums.shirt_parts.SKIRT:
            pass
Oh, color_target is what's being changed when you change what you're colouring. That's a variable I defined earlier. There's also an enum to keep track of pieces of the shirt. Anyways, to summarize:
1. Click ColorButton
2. Read ColorButton's icon color and pass that in a custom signal
3. Mass-connect every ColorButton's custom signal to a function in the game script
4. Check our target to color, and apply that passed icon color to the sprite we wanna change the .modulate property of
I later went on to make the finish button save the colors and pieces used in the shirt, as well as to take a screenshot of the shirt. I still have yet to make loading actually work, right now it's just saved variables. I'll have to add a warning to really make sure that people aren't going to rely on the save/load system, or risk just gutting it entirely for scope's sake. I still have a few days left, so depending on how my graphic design classes are going I'll do something to address that.
Thanks for reading about my game jam game! Many thanks to Steve Propst for making such an interestingly specific idea that I thought was fun enough to make a game out of! It's now public, feel free to drop feedback/suggestions in this thread too! https://deertears.itch.io/footy-kit-designer