The fourth week of this game development journey ended with a playable demo, insightful feedback from users, and lessons learned. As in previous blogs, I documented what went well, what went wrong, and what could have been better, so anyone venturing into game development might use this as a starting point.
We presented our game concept to the other dev teams last Monday, going through the idea with a storyboard, a moldboard of the visual identity, and a video of the working mechanic. The audience responded positively; they seemed particularly interested in the brutalism aesthetic.
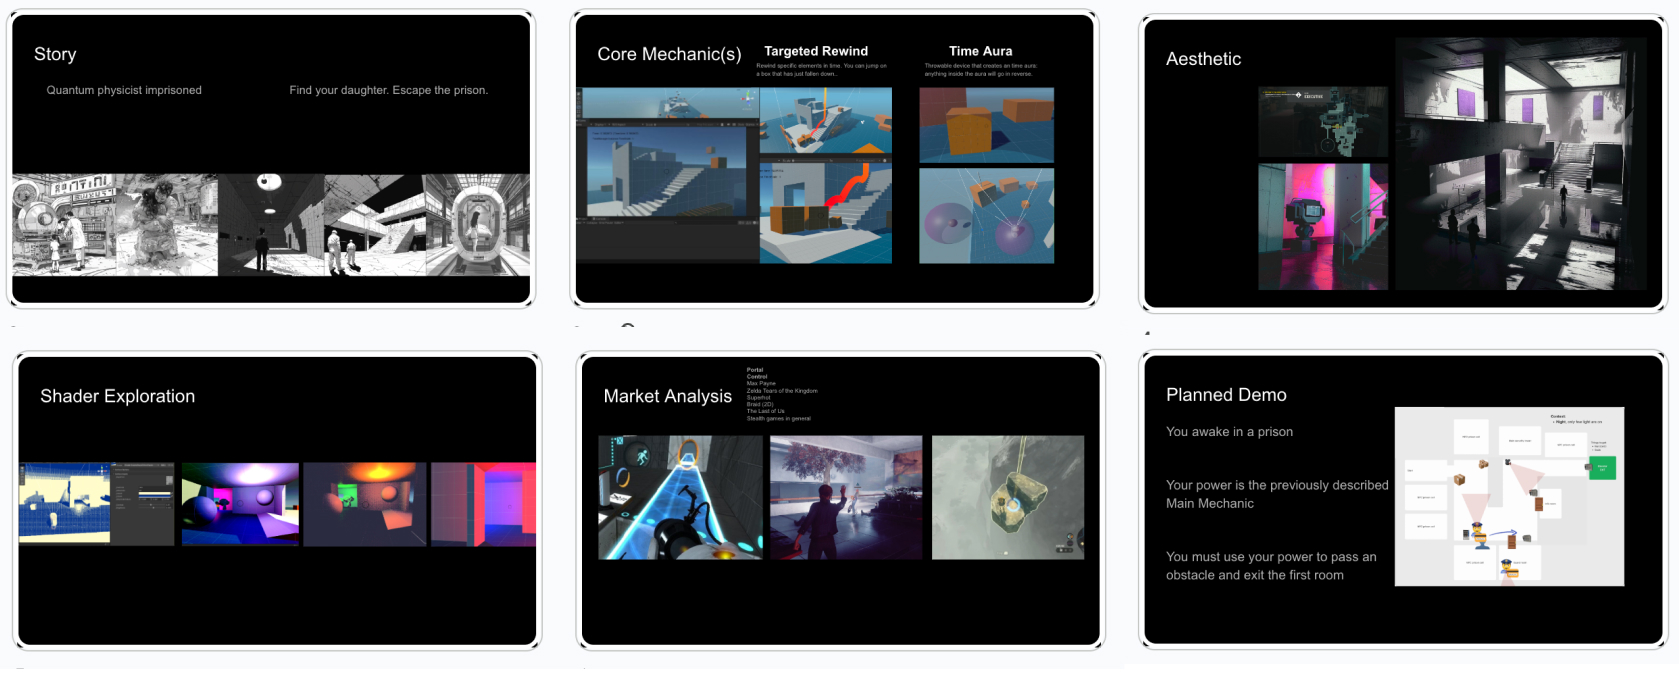
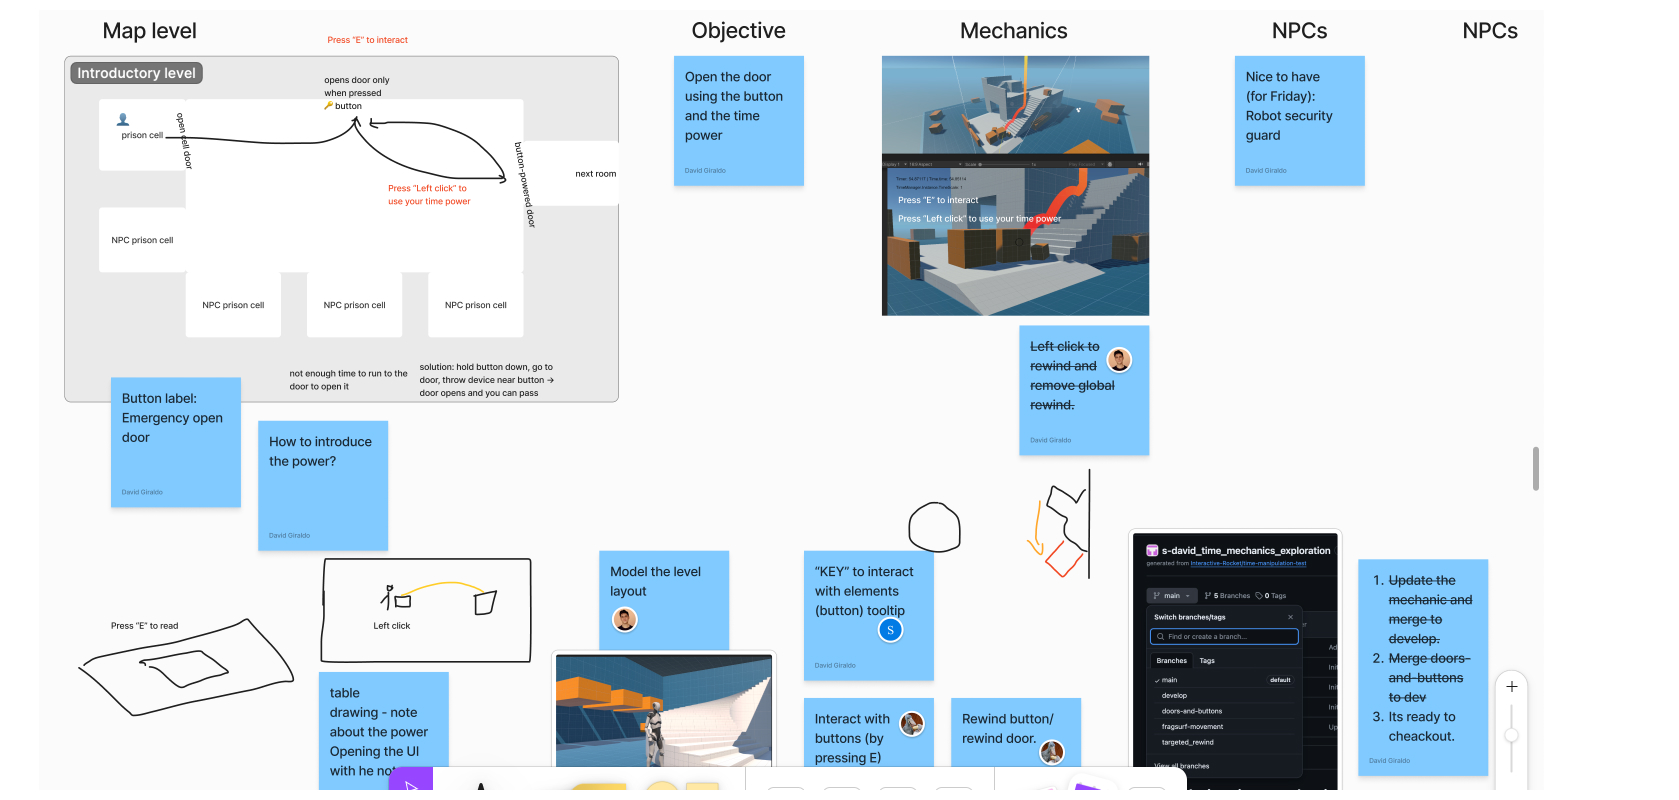
If you have a highly technical team, you might feel worried about not showing everything you have coded in the demo. But that does not mean you have a playable and understandable game experience. Delimiting our demo was a tough conversation because everyone wanted to showcase different things; despite that, we ended with the following definitions:
Merging is always challenging. The Unity workspace had some synchronization issues with the game objects, and some scripts and components attached to them went missing after merging. My recommendation would be to meet up on every merge and check for inconsistencies in the scene together with the person who made the Pull request. We organized our branches into level-layout, door-state, interact-buttons, grabbing-boxes, and audio-samples. Then, we merged and fixed inconsistencies in this exact order. It is worth mentioning that for deployment, we checked out from the main branch, but we did not merge back once it was built.
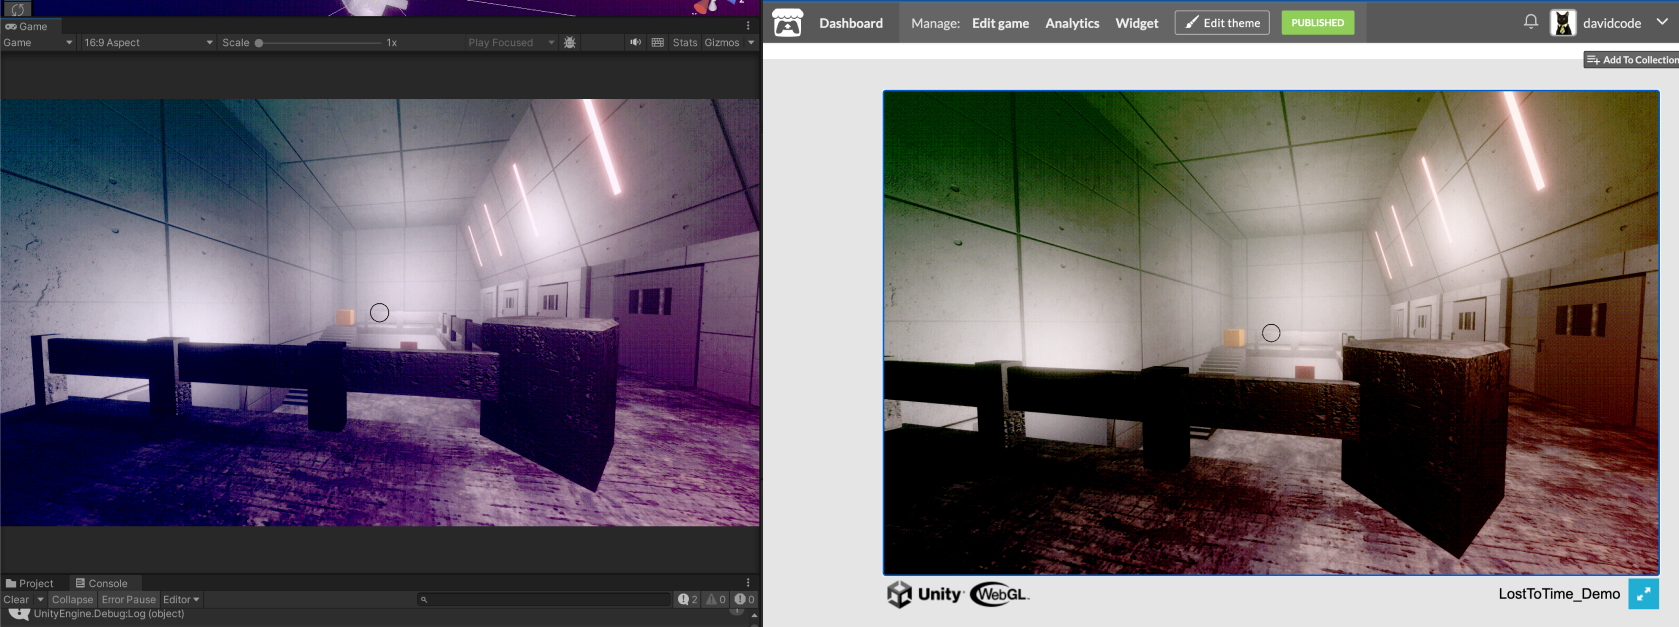
Having our game online enabled us to set up the demo instantly and start testing right away; moreover, some team members shared the game with friends to get more feedback. We released two playable versions on Itch to have working backups online. On each release, we added different things, such as shaders and other props for the player to interact with. You can check one of them at this link. The Universal Render Pipeline worked smoothly during the WebGL build, and there are many useful tutorials on how to do it. However, we noticed inconsistencies in the final results; the shaders and color mixing changed. We will be working on this.
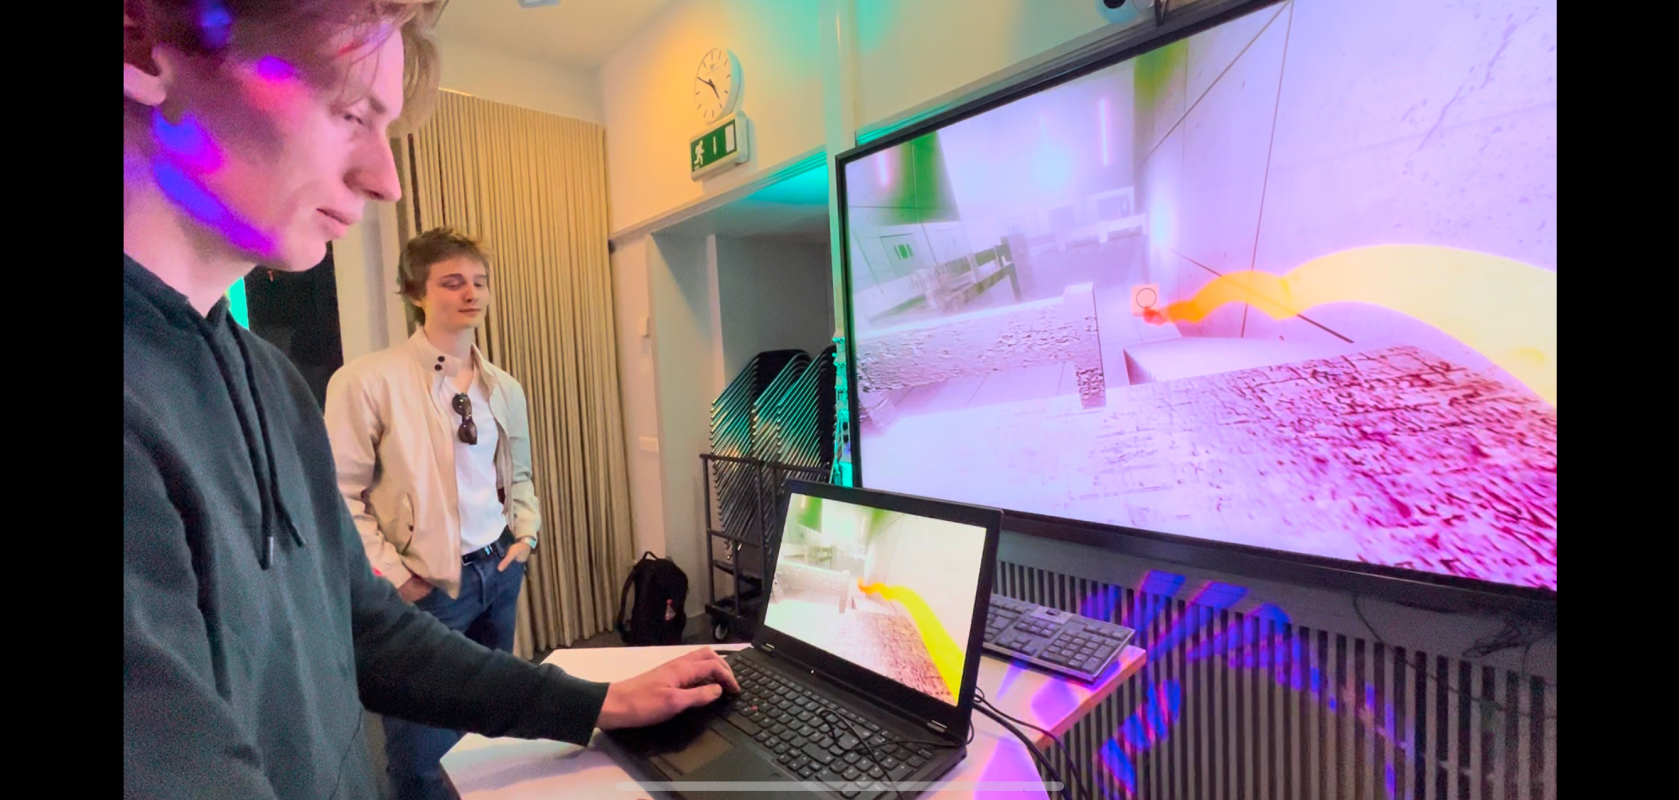
As in day-to-day apps, the user always has an end goal, forms a mental model of the experience, and interacts with the software through a set of inputs. The same happens in video games, so to make the most out of the short slot we had to test our demo, I conducted an open exploration with a couple of people with a think-aloud protocol to keep the user unbiased, resulting in insightful feedback. If you are new to HCI, you might feel tempted to explain every control, highlight all the bugs, and guide the user through the level. Avoid that; just state that the demo is an early version of a game and that you are interested in testing how fun it is. You should explain the objective of the game at most. Here are some questions one can ask during these tests:
*Please consider that I am oversimplifying the nuances of an HCI evaluation for the sake of keeping this documentation concise.
For our next steps, we will be working on the business side of game development in the upcoming week. We will prioritize fixes based on user feedback, determining what we are actually changing. We will also organize the next sprint towards the business checkpoint and next demo.
As a side note, I built the level using ProBuilder. Unity offers thorough tutorials on how to include the game-level design in the workflow:
I used texture assets from Nobiax / Yughues’s Free Concrete Materials, which turned out to be of great quality.
Did you like this post? Tell us


Leave a comment
Log in with your itch.io account to leave a comment.