This tutorial shows how to create a perspective illusion effect from the Superliminal game as shown below. Used Unity version is 2021.3.0.
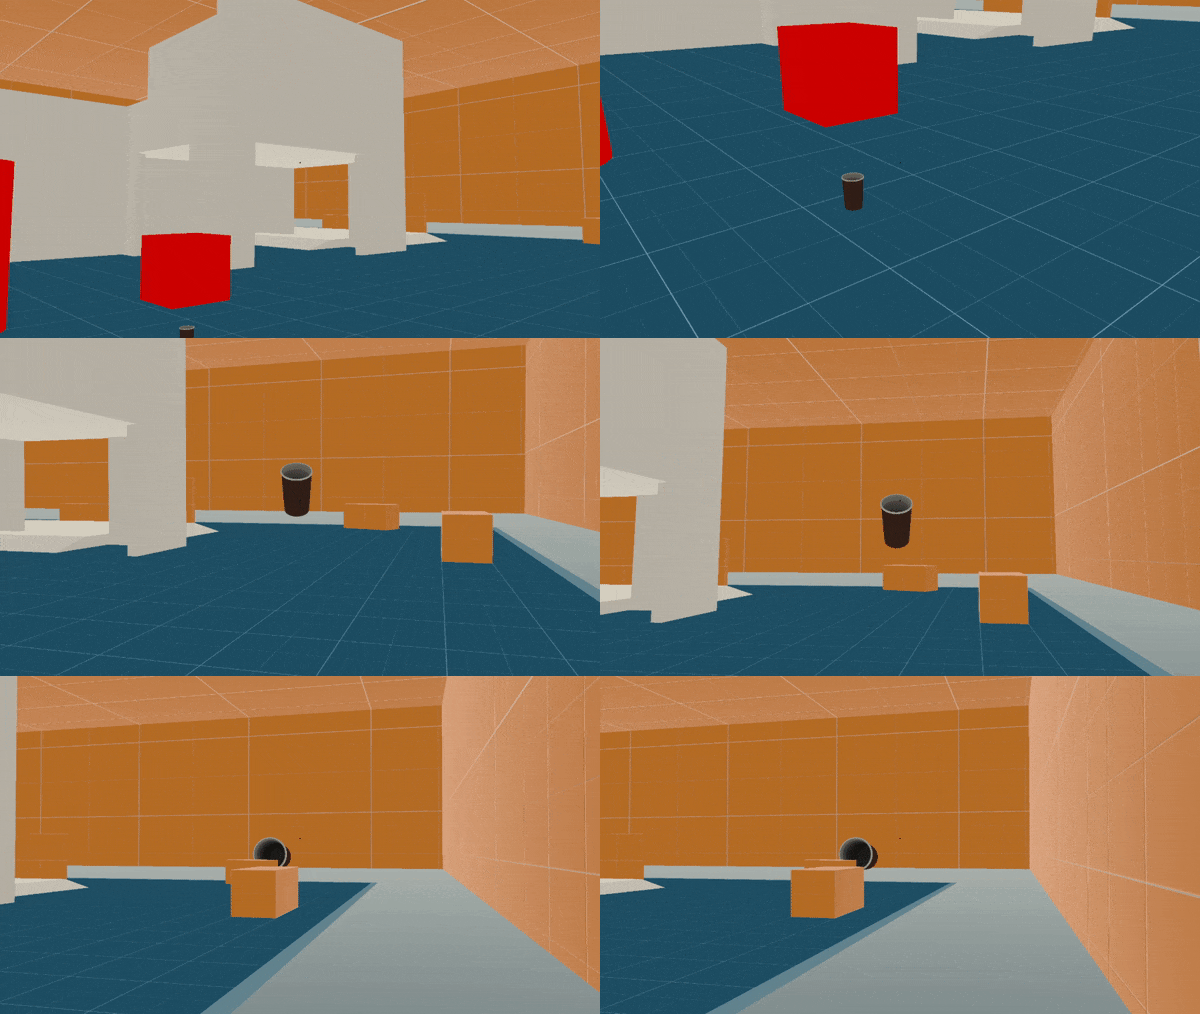
For this tutorial i'll provide a script and instead of explaining to you how the whole thing was written i'll just try to help you understand what it actually does. I tried to make it the most concise possible but even in its shortest readable form it takes a baffling 230 lines of code 🙃
But hey, the good news is that all of the programming required for this project is just only this one script. On top of that, everything else you need to set up in unity can be done in under 10 minutes.
Alright so here's our check list of things we need to do:
I'll go with you through all the points. If you feel like it you can just skip to what interests you. As to the first one, it should be pretty straight forward - you just press New Project in the unity hub and scroll till you find the correct template, then just download & select it.
After opening the project for the first time you should be presented with the working first person game. What we need to do is modify it so it suits the project a bit better.
I recommend taking the Tunnel_Prefab object and copy pasting it into the scene. You can then reset its Transform component, set the X rotation back to -90 and stretch it so it covers our playground.
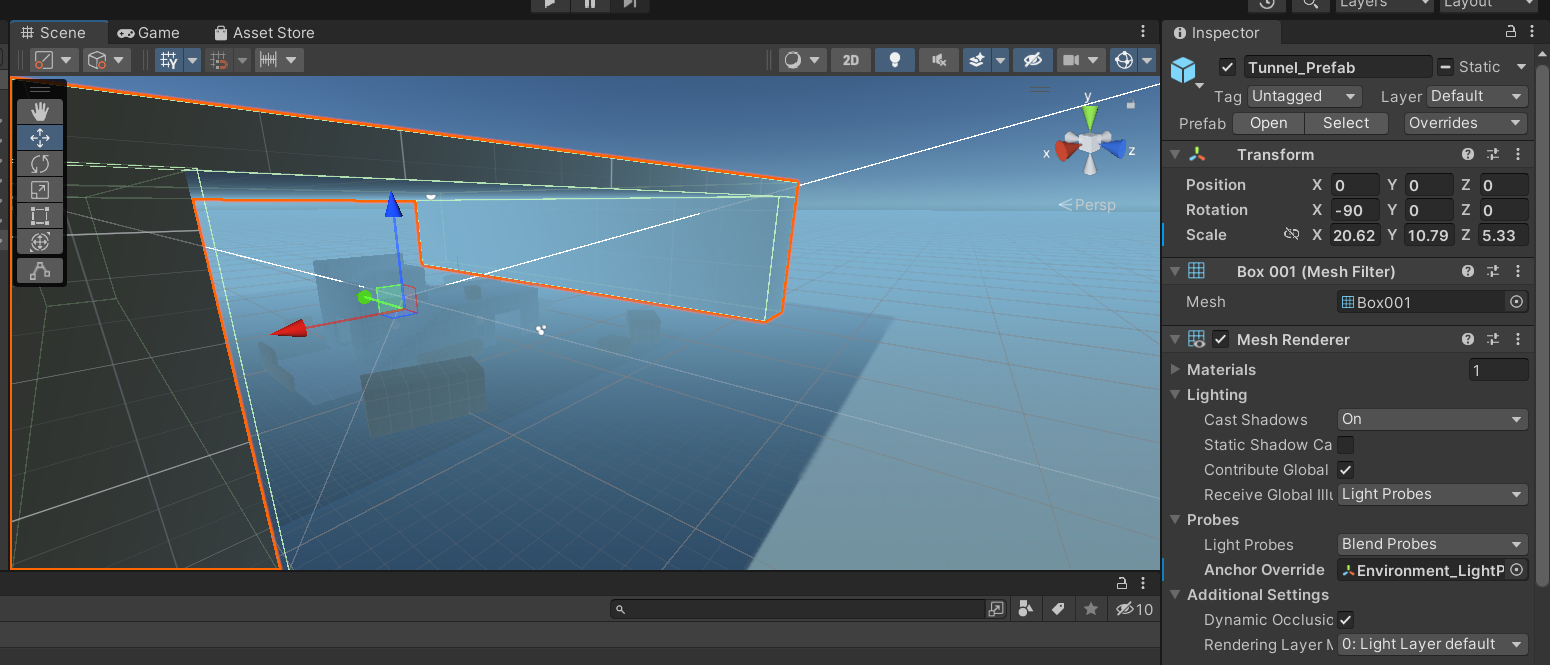
Then copy and paste this new object and rotate it in the Y axis to -90. You should end up with a box encapsulating this whole environment you can walk in. If the ceiling's texture bugs you can change one of the tunnel's Y position to sth like 0.01 so they both aren't in the exact same place.
This blue/grey gradient you see on the things that are further away is unity's fog feature. It's cool and all but not for this project so turn it off by going to Window > Rendering > Lighting > Environment > Other Settings and tick off the Fog check box.
Now your scene should look even darker so still in the Environment tab instead of going to the Other Settings sub-menu go to the Environment one and change Environment Lighting > Source from Skybox to Color (Ambient Color should be something white-ish, i kept the default one). Now your scene should look similar to the one you can see in the gif i posted above.
First obviously you have to download the model, here's the link. I chose the .fbx file extension cuz it's the most common one. After downloading you just extract files from the .rar file and import the folder you end up with to your unity project. Then from this folder select the binary model (the one with colors) and drag it into the scene. You'll probably have to scale it down.
Add the PickupObjects script to the PlayerCapsule GameObject and set its Camera Transform field to PlayerCameraRoot (first child).
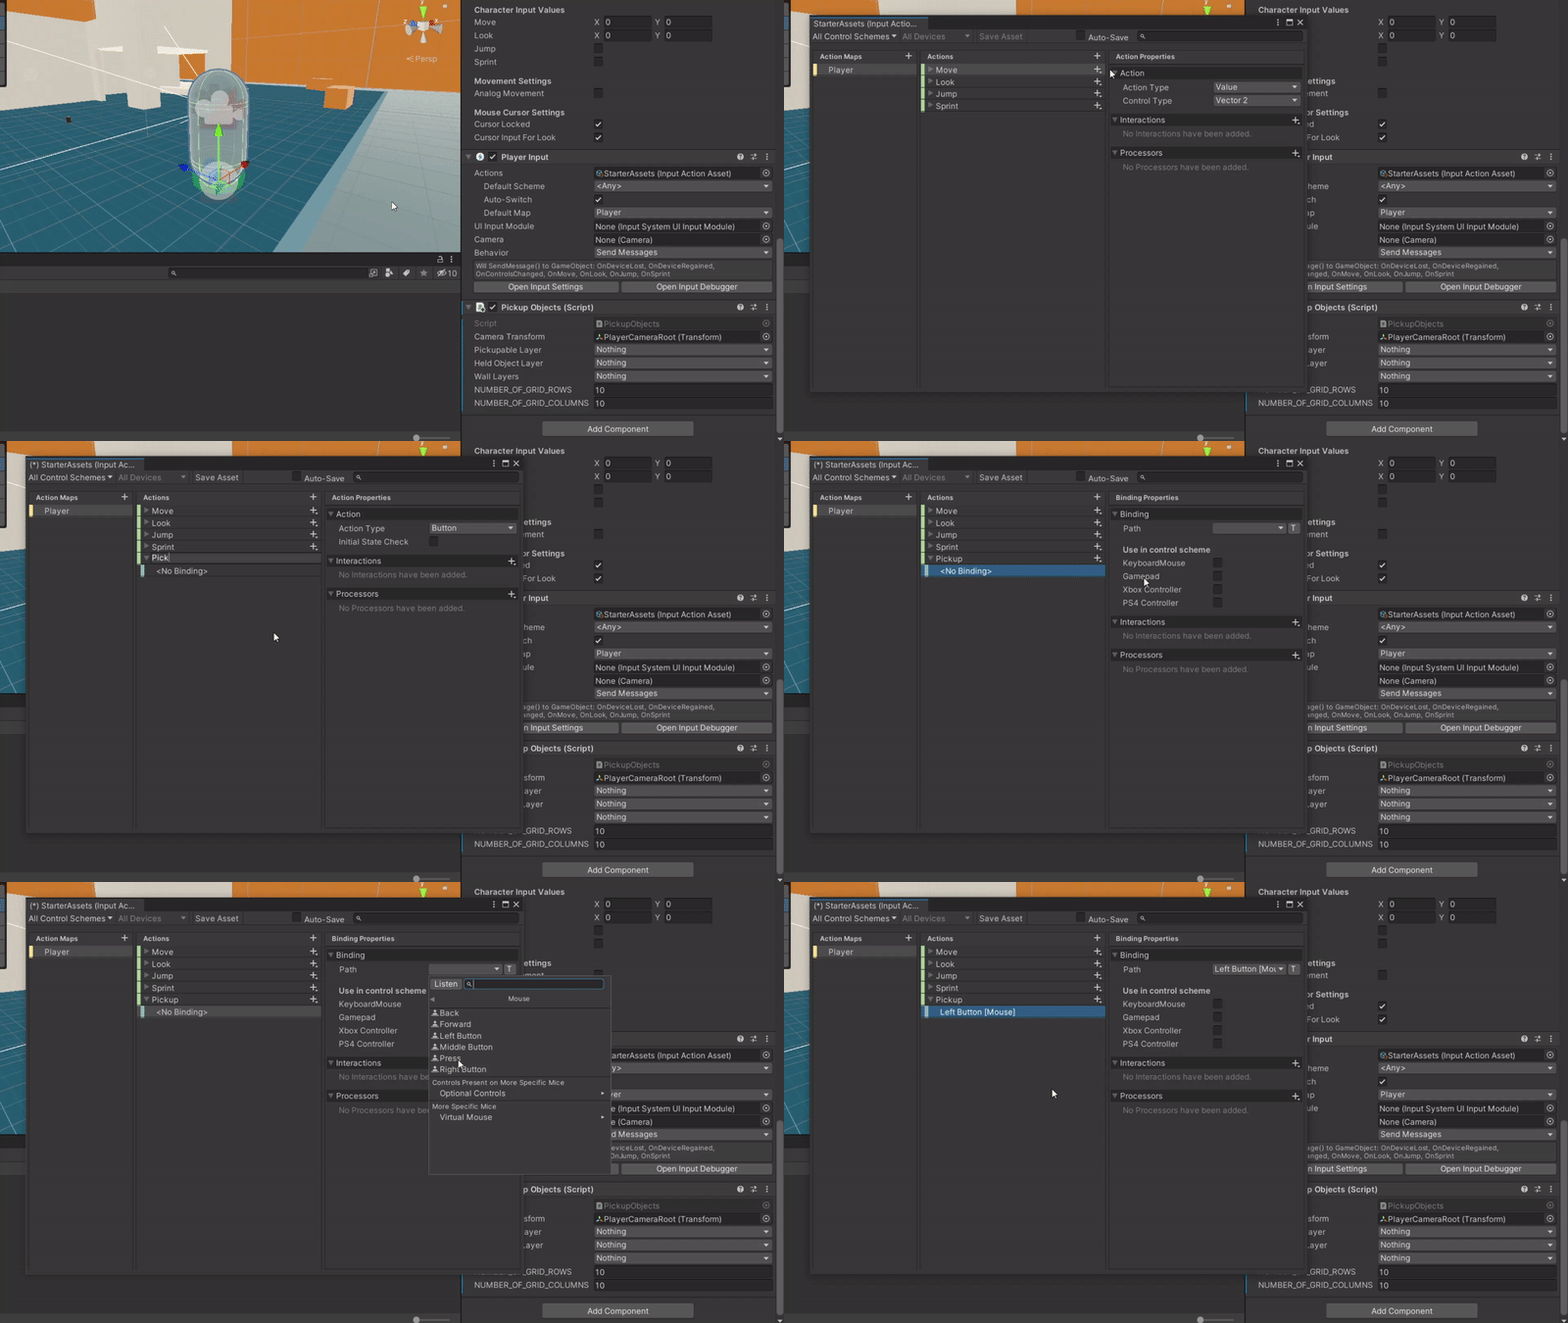
One more thing - you need to add an input action called Pickup and bind it to the left mouse button for the script to work. It's just telling the script that you wanna pick up the object you're currently looking at.
Follow the gif or just on the PlayerCapsule GameObject go to the Player Input component, double click on the Input Action Asset in its Actions field and click on the plus button in the actions tab.
After you do that you're ready to proceed to the last point:
Create two layers - one for the objects that can be picked up (i called mine Pickupable) and one that the PickupObjects script will use to mark the held object (i called it HeldObject xd). Assign these two to the corresponding fields in the inspector of our script and to the field called Wall Layers assign the Default layer.
After doing that go to the cup GameObject and assign it the Pickupable layer. Also add to it the Rigidbody and Mesh Collider components. In the Mesh Collider window you have to tick that the collider is Convex cuz unity doesn't support physics for non-convex colliders 😑
You should be able now to go around the scene, pick up the cup object and place it wherever you wanna. The scale should be automatically changing and the object moving the furthest possible creating this illusion effect we were after of the held object being seemingly still close to us when it's actually not.
Here's the script divided into logical parts numbered by their execution order. Parts I-IV execute once when you click the left mouse button and parts V-VII execute constantly (every FixedUpdate) while holding an object.

Only one method, it's binded to an input action. If you're already holding an object (_heldObject != null) then this method drops the held object so just un-does everything we did when picking the object up and then finishes executing.
If you're not holding an object then it means that you clicked the left mouse button in order to pick sth up. We first check if you're looking at anything you can pick up by casting a raycast in the pickupable layer, from the center of the camera forwards (distance here is set up to 100 but it just needs to be some large number). If you get a hit we also have to check if the object was set up correctly by the designers 😉 so if it has a more or less equal scale on all three axes - we need that just for the logical simplicity's sake.
If everything's alright we make the object stick to the camera - you can actually remove all the other methods, comment out the last two lines of the OnPickup method and check for yourself if everything works fine. Held object should now follow your viewport but it won't scale and move away from you yet.
The last two lines of the OnPickup method just trigger two methods from the Part II.
Method GetBoundingBoxPoints() returns an array of eight Vector3-s. They make up a box containing the object we're holding.
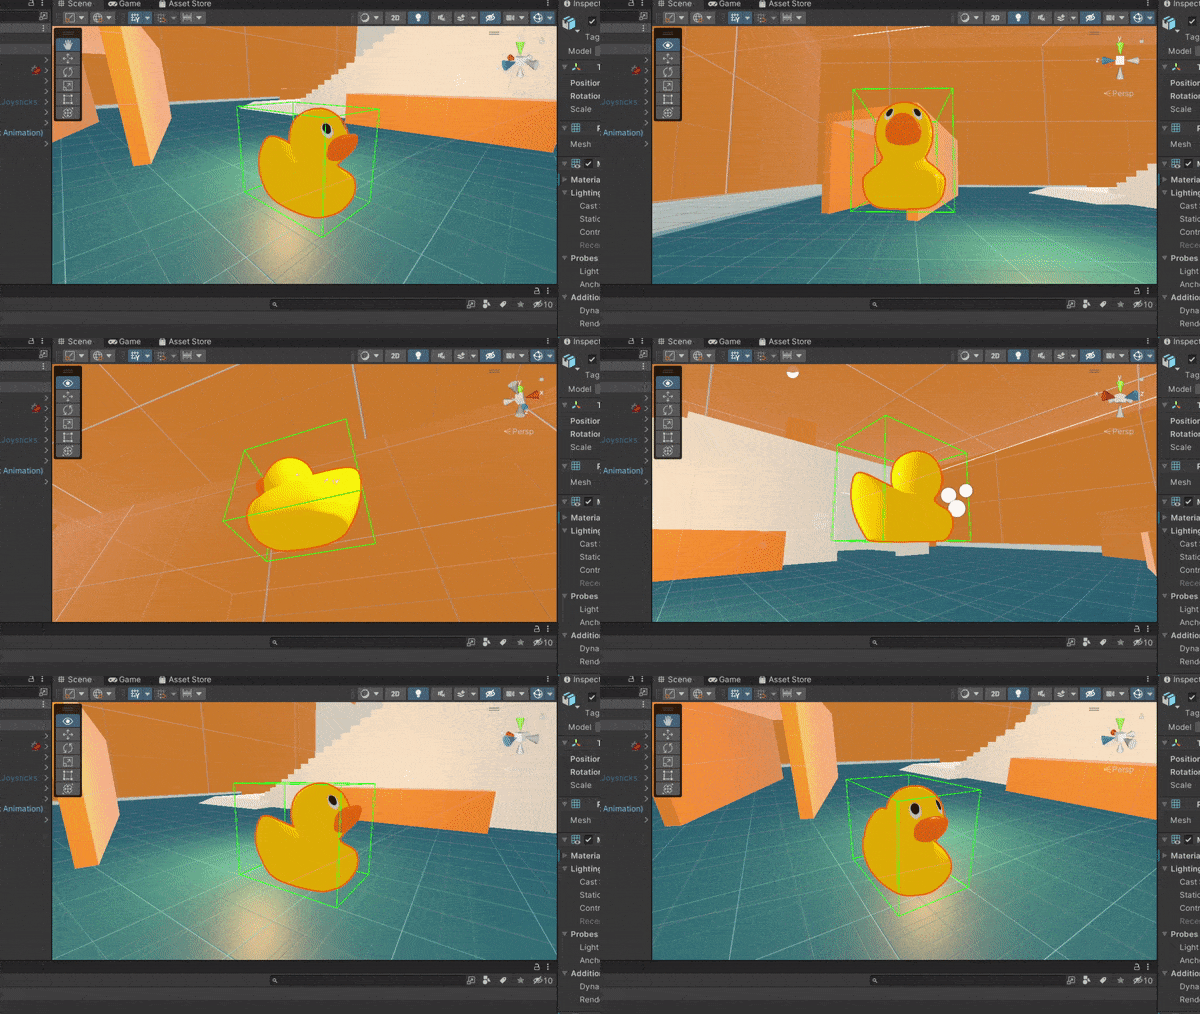
We need that box so we can project it on our 2D viewport and thus have a 2D shape we can split into a grid of points we'll raycast towards. We need these raycasts to check if anything's obscuring our object and if so - move it in front of that hindrance.
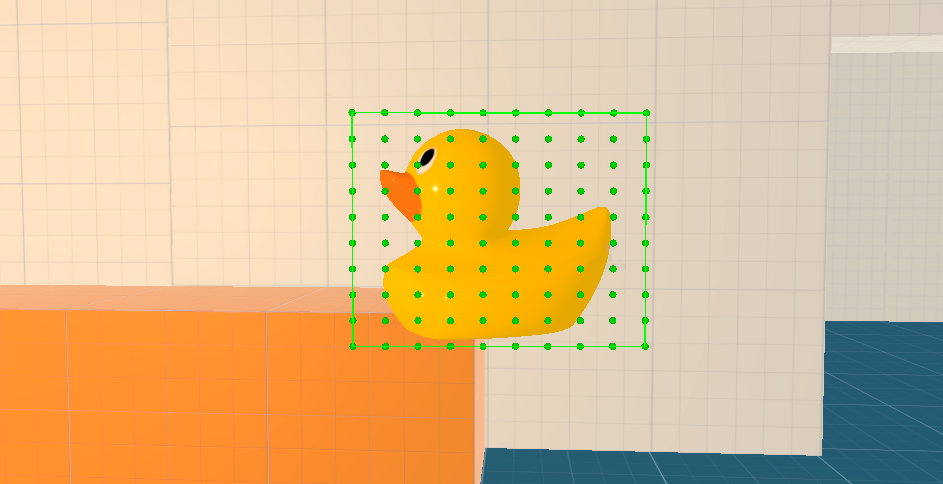
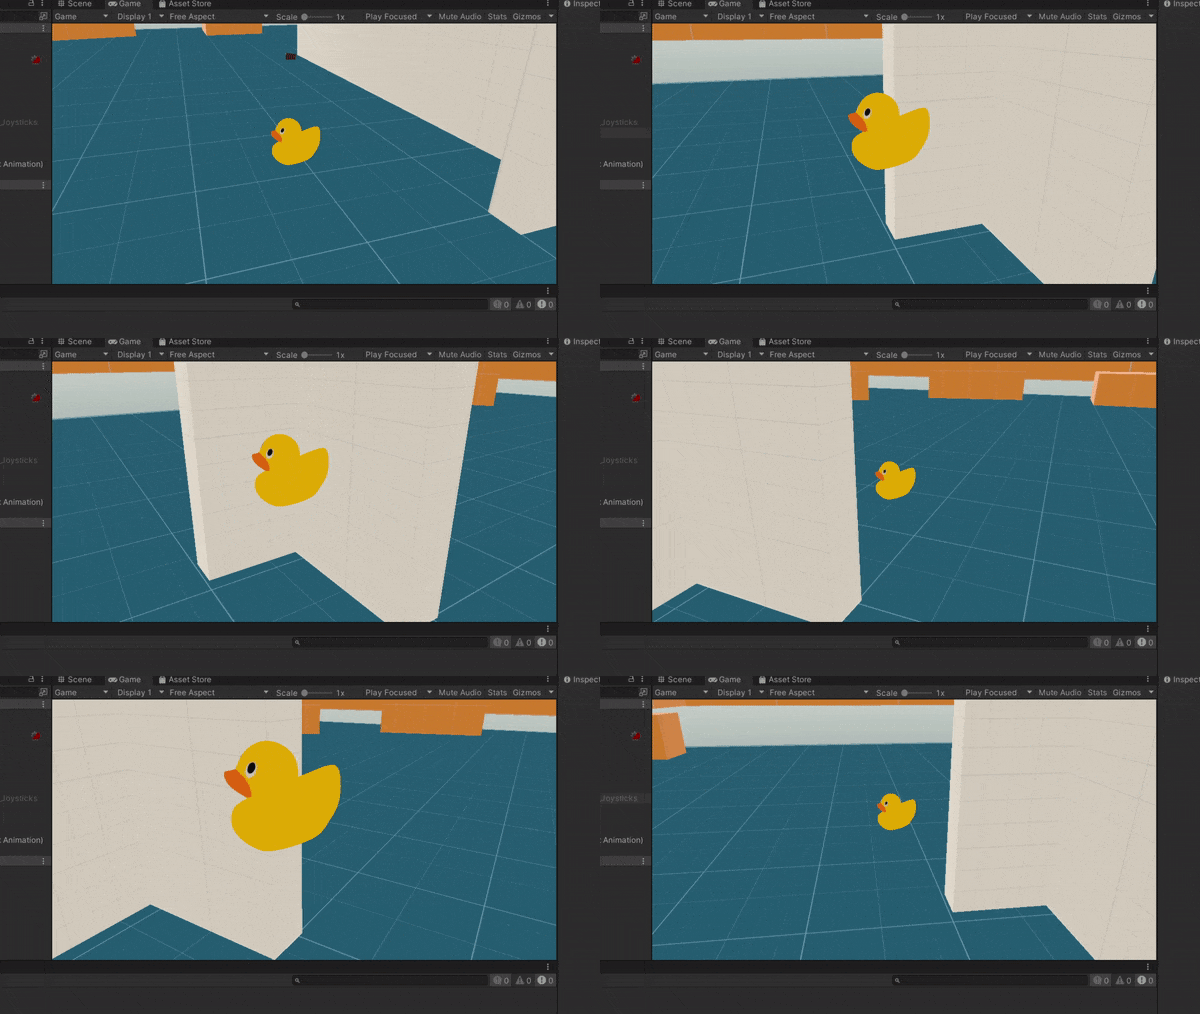
After getting our bounding box we call SetupShapedGrid() which will try to get us results shown in the image above and after that even get rid of the points that are unnecessary (that aren't visually on the duck) by calling GetShapedGrid().
GetRectConfines() projects all of our bounding box points onto our 2D viewport (screen) and caches the ones that are the furthest to the left, right, top and bottom. We store their coordinates in the camera's local space so it's easier later on. Their position in the z-axis is the closest point to us of the bounding box so when we draw a grid based on these points it's always in front of the held object and never obscured/intersected by it.
By calling SetupGrid() we create a rectangular grid based on these confining points.
GetShapedGrid() gets rid of these points that were unnecessarily added to the grid - they're visually outside of our 2D projection. To do that it uses a method from the Part IV.
This whole method's purpose is to cast a raycast from the perceived position of a given point towards and through it's real position. By doing that we can check if a specific point we see seems to be "part" of the held object or not. It'd be super expensive to check that for every pixel buut if we use this method only on the grid we calculated from the bounding box a second ago - it's not that bad. I mean, we go from e.g. 1920x1080 raycasts to 10x10 in case of the posted script so the difference is huuuuge.
Just a normal Fixed Update, nothing to see here 😋
MoveInFrontOfObstacles() positions our heldObject in front of the closest anything that would be obscuring it and then UpdateScale() scales it properly based on its new position so it looks like it never moved - the illusion effect!
We iterate through all the points of our shaped grid and for each of them find the closest point to the camera that could be obscuring the heldObject, no matter if it's actually in front of it or behind it. Then out of all these possibly obscuring points we choose the closest one to the camera and position heldObject in front of that one. That way heldObject will be in front of all these possibly-obscuring-points and thus won't be obscured by any of them.
When positioning the heldObject we can't just put it in the position of the closest possibly-obscuring-point because half of the heldObject would be in front and half behind that point (unless you'd start setting up custom pivot points which is hella work). To avoid that we check the magnitude of its extents which are basically half of the diagonal of the bounding box. That means that the magnitude of extents will be actually the largest possible distance from the center of the heldObject to it's any point.
By positioning the heldObject to the closest possibly-obscuring-point's position MINUS the magnitude of its extents we can safely assume it'll be always fully in front of that point.
We use a simple formula for the actual scaling of the heldObject (first line of the UpdateScale()). It linearly increases/decreases object's scale based on how far it is from it's original position when we grabbed it.
Yup that's right, most of the work we had to do was figuring out how to position it properly.
In the last few lines we're also changing up a bit the position because as far as i know there is no way of scaling the object without changing it's position in unity. I think it's just some built-in feature that was supposed to make the work easier for some ppl but if i'm wrong please let me know 😊
Ugh, finally xd. That was a long one, that's for sure. If you've made it so far i hope you were able to make sense out of my explanations. If not, feel free to hmu 😄
Did you like this post? Tell us
Leave a comment
Log in with your itch.io account to leave a comment.