Hi folks.
My goal over the past couple of weeks to remake one of Alan Wake II’s scenes from the Oceanview Hotel, Room 666, with a PSX style using blender 4.2 and Godot 4.3.
The problem is, I’ve never used blender to model anything before, and I’ve never been able to fully deliver on the PSX style; I am basically going in blind with a goal and some (extremely) basic prior knowledge of blender. Time to get learning!
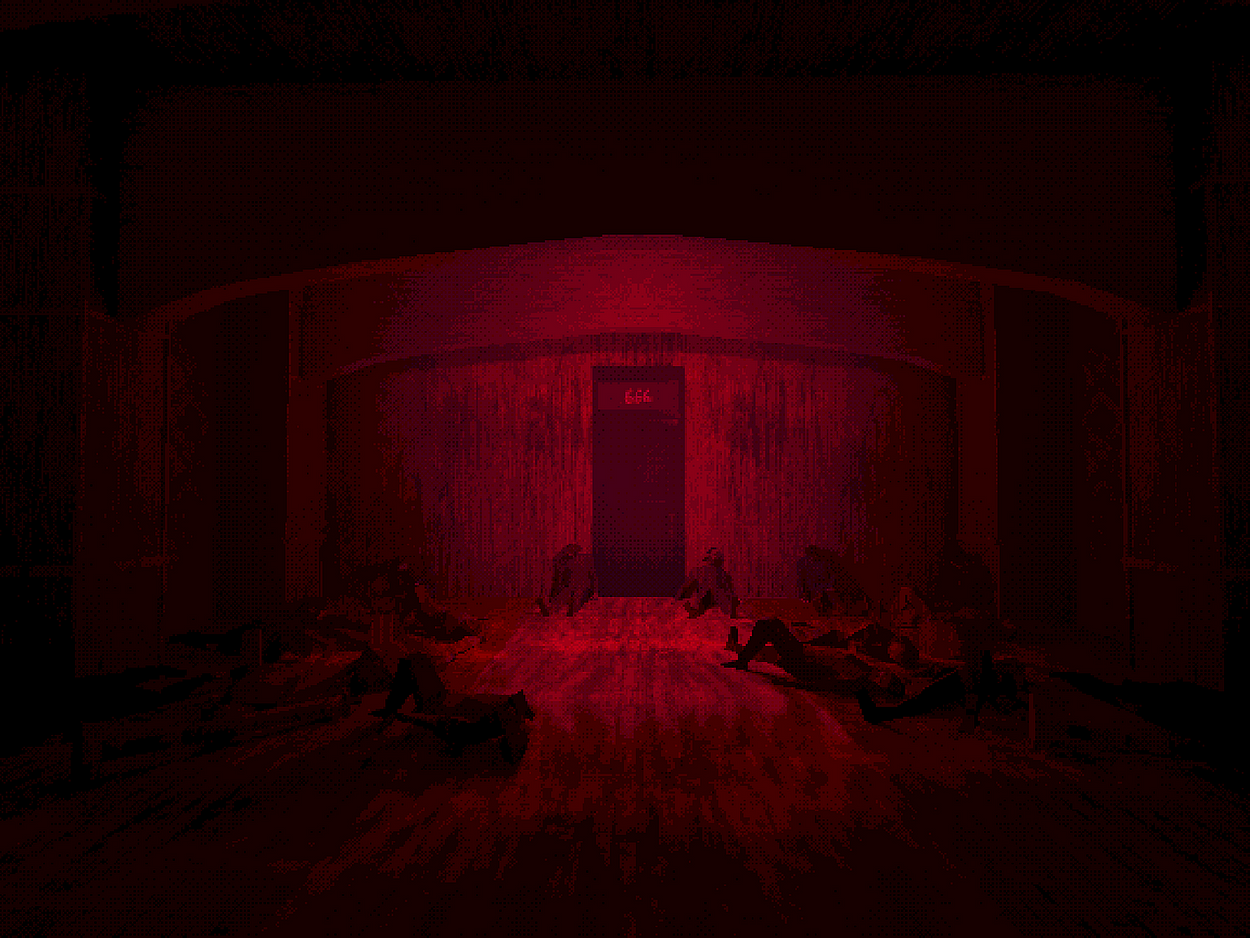
I knew I had to start somewhere, so I started by first getting a grasp of the space that I will be re-creating. I re-downloaded the game, then started taking some screenshots of the area. I needed 3 views of the room:
a front view:
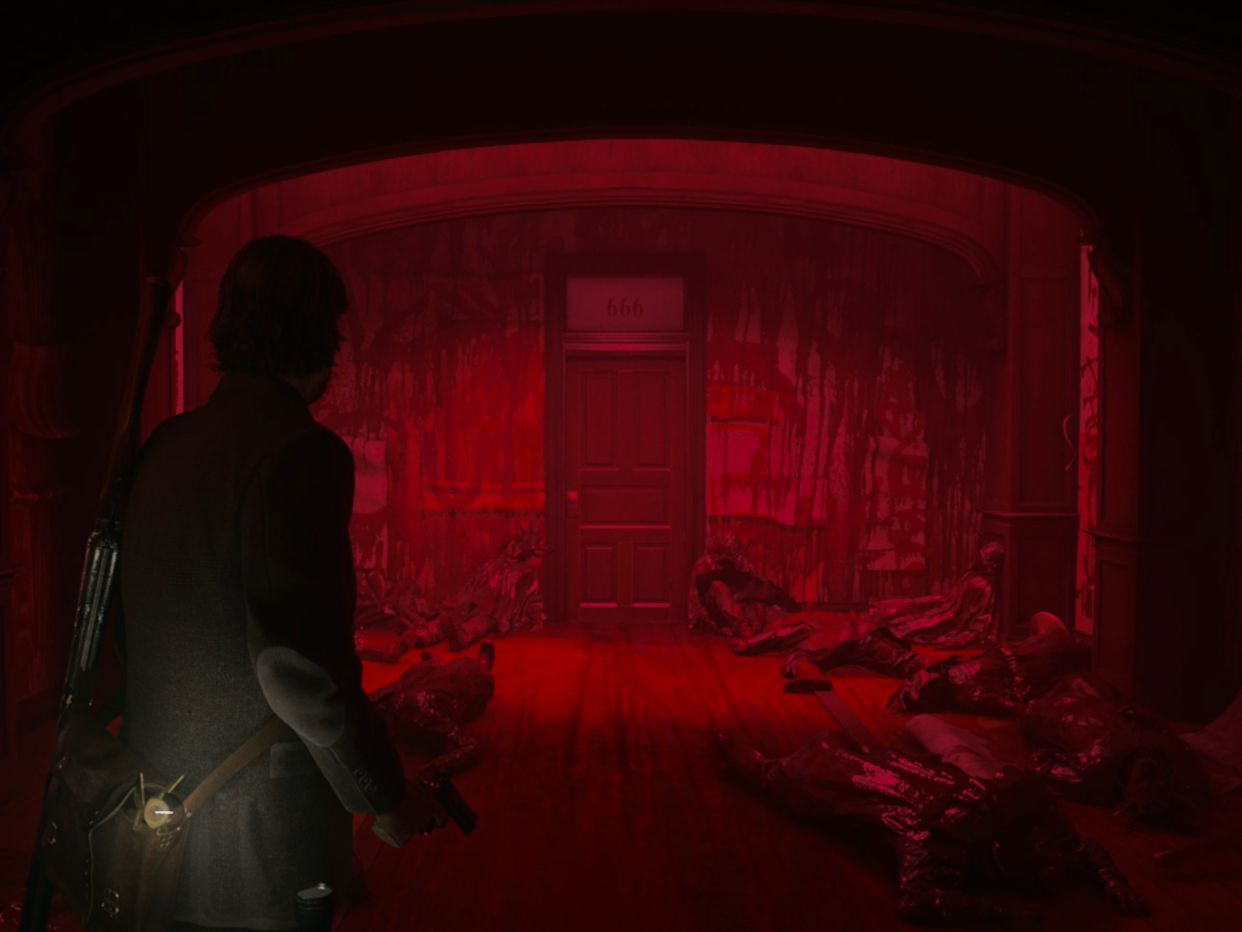
a side view:
and ceiling view because it doesn’t really show much in the screenshots:
Now that I have my reference images, let’s start up blender.
So as mentioned previously, I don’t really know how to model things. When making games in the past, I used Trenchbroom to make the levels; it’s a great tool, but I wanted to be able to create those pillars with more detail. I didn’t think TB was going to cut it this time. So now it’s time for me to get familiar with Blender.
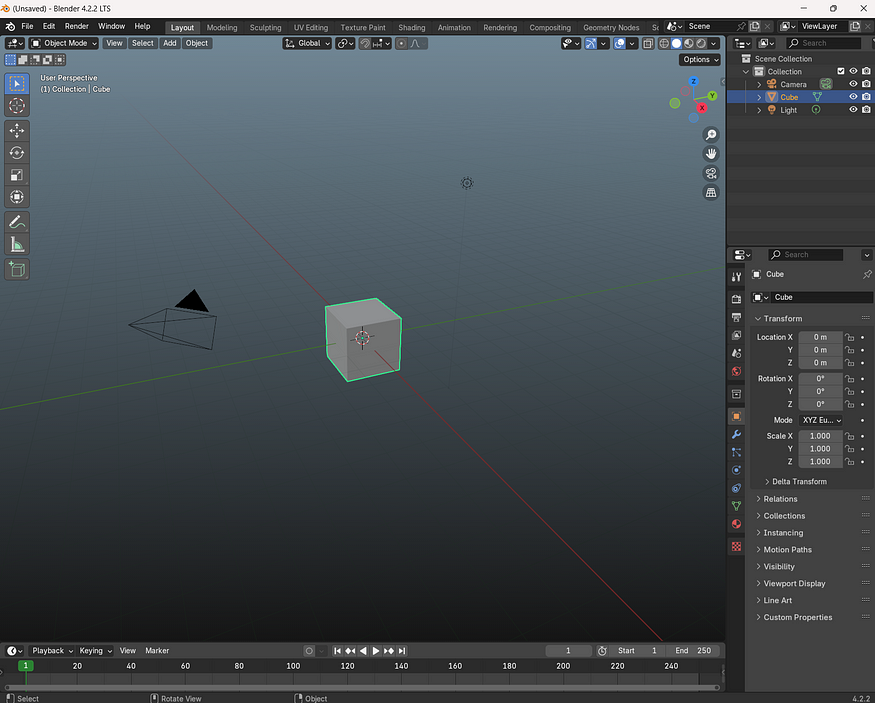
First thing was to remove the existing scene objects, I did that by tapping the “a” key on my keyboard to select all items, and then tapped the “x” key to bring up a menu that allowed me to delete all selected items
Once I had a blank slate, I had to figure out how the hell I was going to actually model this thing. Thankfully, others have done this for me, and I was able to follow a video from a few years back from someone named “TheSicklyWizard”, that essentially showed me everything I needed to know by looking at one of my favourite games of all time: Silent Hill.
How to make PS1-Esque graphics with Blender 2.9 (Trimsheets and Enviroment Modeling)
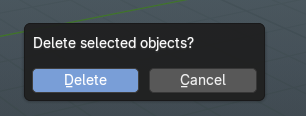
Now that I knew that I could use grids and sculpting to create environments, I figured I had everything I needed to get started. First thing I did was set up the correct scaling for the grid in blender by setting the units in the scene settings to “None”.
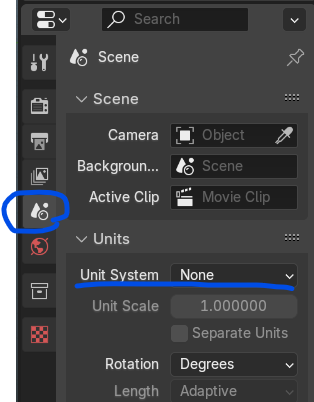
After that, I set the scaling in the viewport settings to 0.1, and subdivisions to 1.
Now that I had that out of the way, I hit shift+A to add a mesh to the screen, specifically a grid. Once I added the grid to the scene, a context menu popped up on the bottom left, and I used these settings:
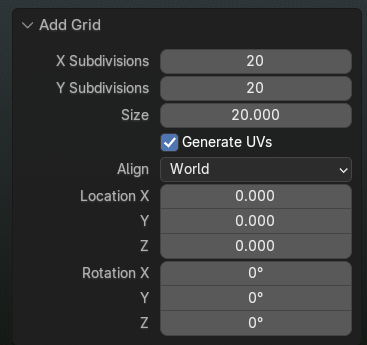
I plugged in those settings and hit “enter” on my keyboard.
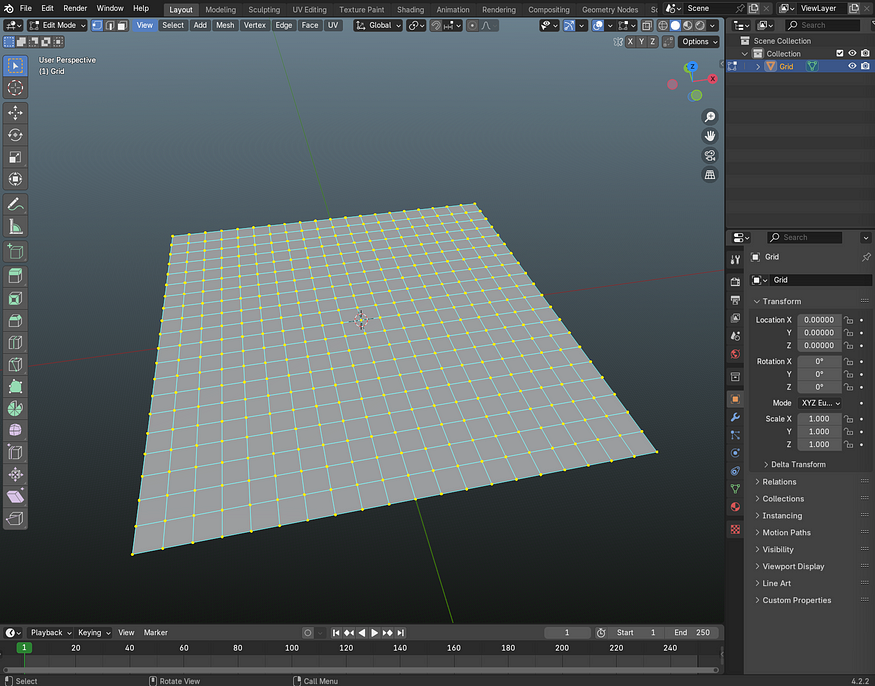
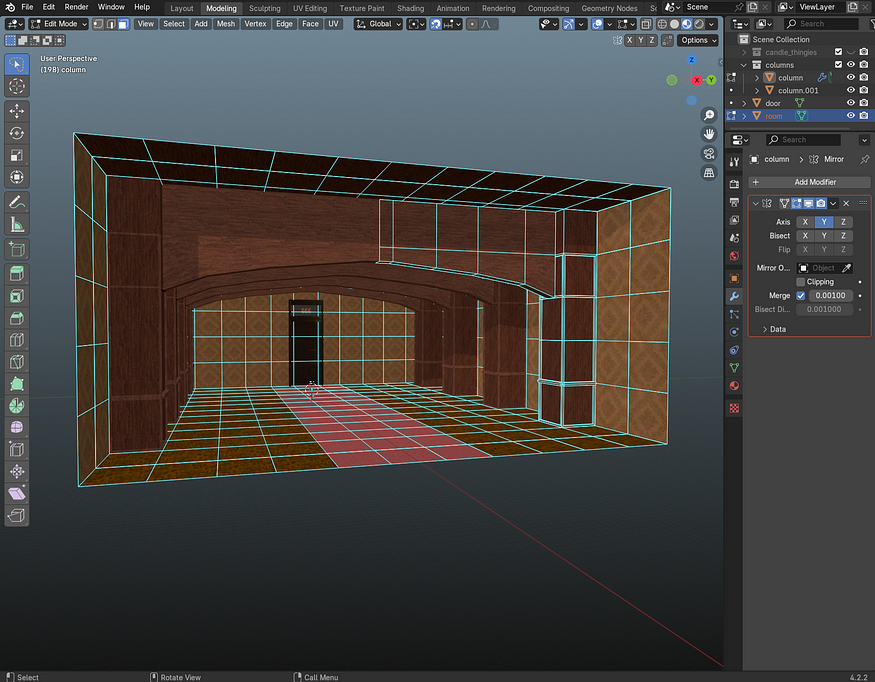
Once I finished that up, I trimmed the size of the grid down to what I wanted for the hallway by deleting some faces on the grid. Once that was done, I extruded the walls and copied the floor to the ceiling. Now I had a basic room to work with!

I didn’t want to get too fancy for the columns, so I just created a 5 “cube” high column, used the inset faces tool to create some moulding on the edges, and then I used the mirror modifier to create the other half of the column.
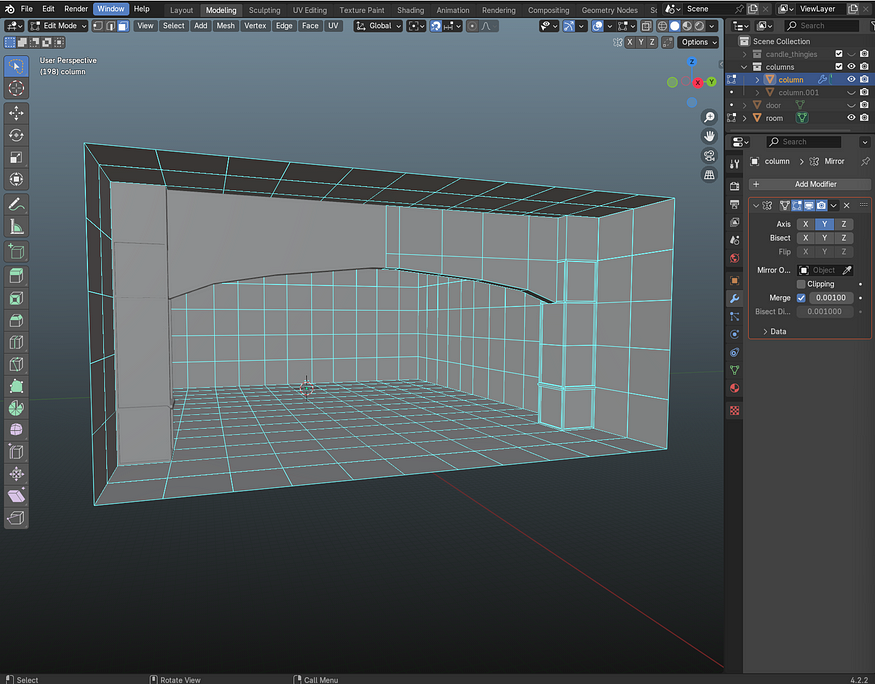
After that, I duplicated that column 4 times to match our side reference image.
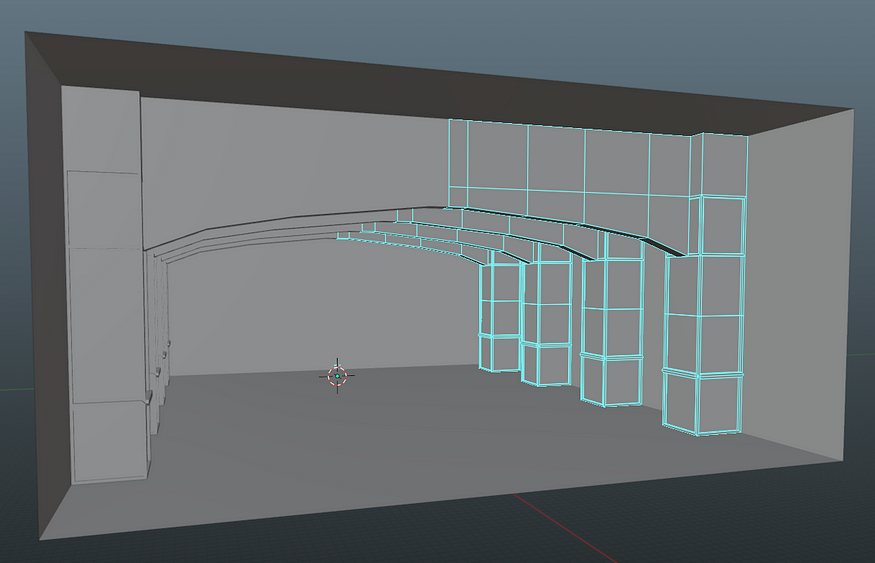
Once I had that done, I had pretty much all the geometry I needed for the hallway. The door will be made later once I rip the door texture from the game.
So as much as I wanted to go out and take real-world photos for my textures, it was -30° where I lived when I started this project, so I definitely needed to grab my textures from elsewhere. I still wanted to process them as much as possible on my end so I could learn how to do it though, so my process ended up like this: Grab image from textures.com (I have a monthly subscription, but there are free options elsewhere on the internet), import them into GIMP, and then scale / color / posterize them as I see fit.
From reading around and referencing TheSicklyWizard’s video, I could determine that texture size was generally anywhere between 32x32 to 128x128 for environment textures, but texture size could max out at 256x256 for things that require a lot of detail, such as a character’s face on a character mesh. I decided to go with 64x64 for my texture sizes, on a 256x256 texture atlas.
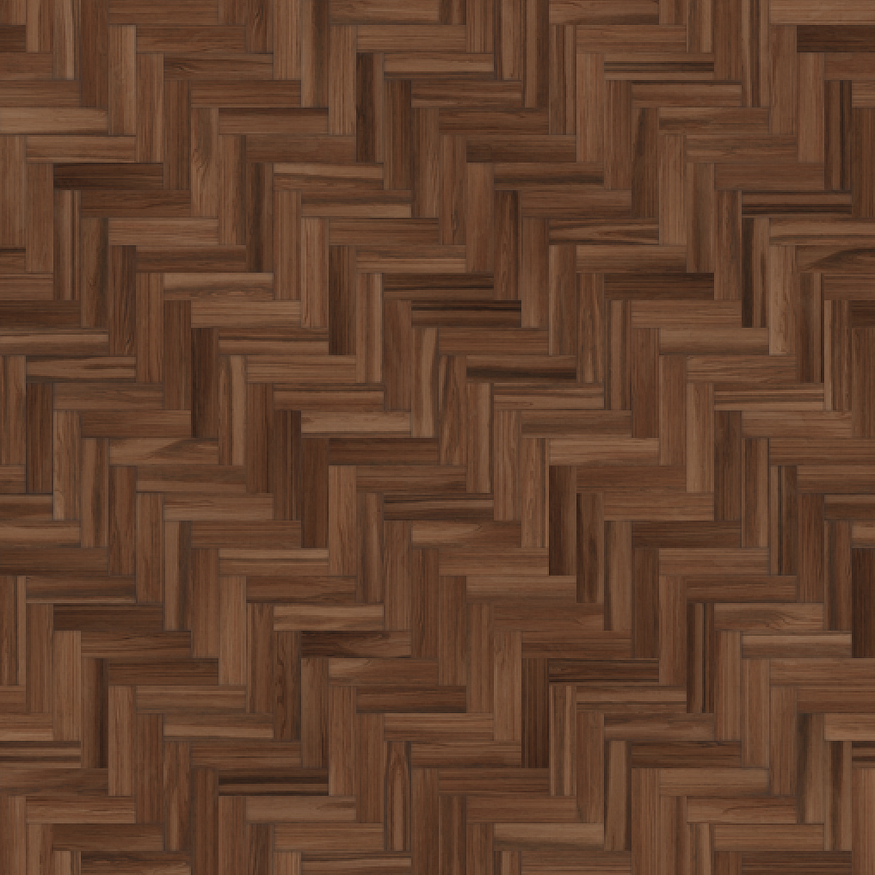
So I was looking for a wallpaper texture, a wood texture, a fancy hardwood texture, a carpet texture, and I needed to rip the door from the game still (we’ll get to that at the end). I landed on these textures from textures.com:
")


Now that I had all these, I just had to import them one by one into GIMP, and color them to how I needed. Then I scaled them to 64x64, and set the posterize level to 32 to reduce the amount of colors in the images. Finally, I pasted all those textures onto a 256x256 texture atlas.
Once I was done with all that, I tried to get a clear picture of one of the doors in the game so that I could rip the image from the game instead of trying to cobble together a door from textures.com. I took the clearest photo I could, and used Sand Ripper to grab a flat version of the door.
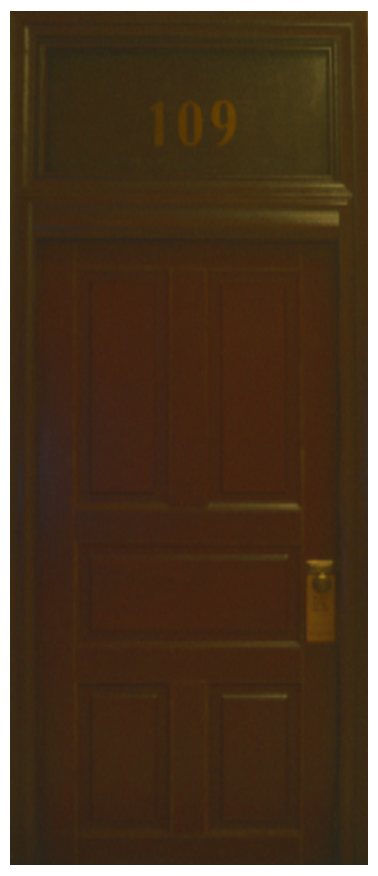
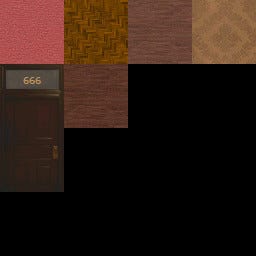
Now that I had a door, same thing; color, scale, and posterize. The door texture was going to be 128x64, so it kept a similar scale to the rest of the textures. The final texture atlas looked like this:
Final thing was adding a slightly darker wood texture so that I could have some contrast between the moulding and the rest of the pillars.
UV editing for this ended up being a lot easier than I thought it would. I just went into the UV editing tab in blender, selected the faces I wanted to texture, hit the “UV RESET” option under the UV tab, and then scaled the UV to fit my texture atlas.
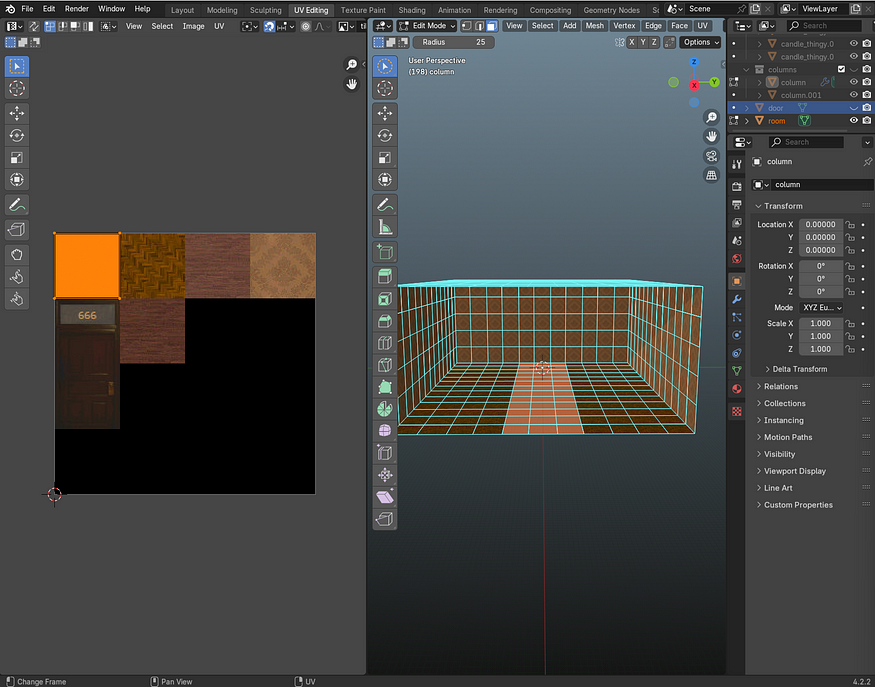
I just repeated that process for the walls, the floor, the ceiling, and the pillars. I also made up a quick door model that uses our texture we just made.
I threw the level into the engine and added some candle sticks, but it didn’t quite have the look I needed yet. Tried to add some blood decals I made, but that ended up looking REAL bad.
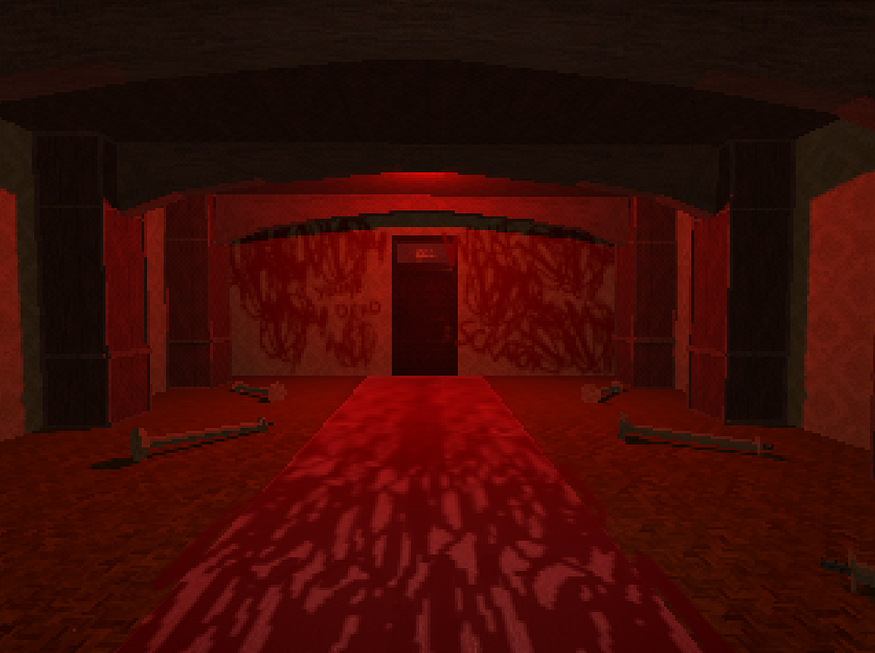
So I ended up doing the same texturing process I did earlier on some blood textures I found on textures.com, and I added some volumetric fog. I also bumped up the resolution a bit(ended up using 640x480 for that sweet sweet 4:3 aspect ratio). That really helped.
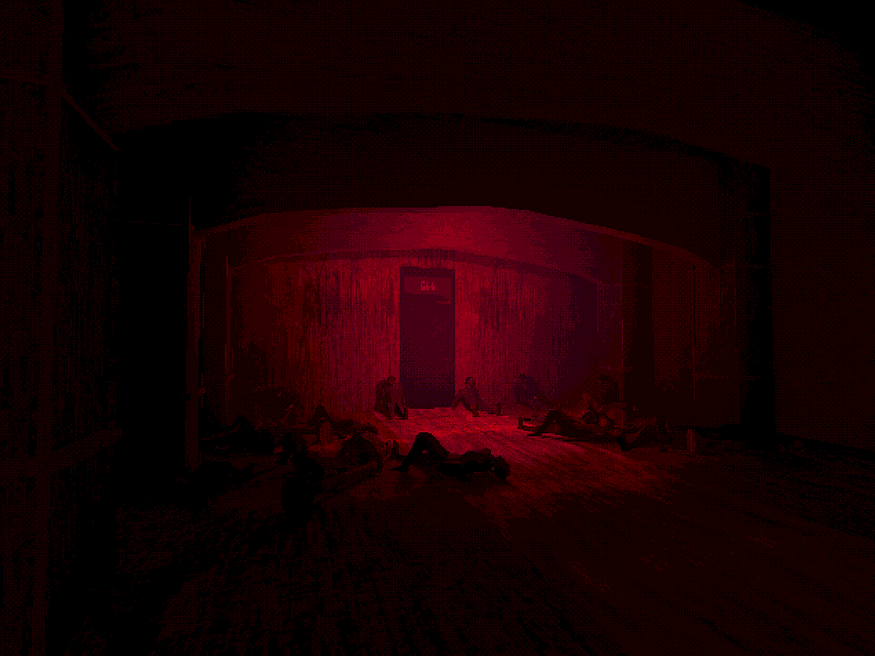
After that, I just needed some dead bodies littered around. So I followed a “Stark Crafts” video on making low poly 3d models to make an Alan Wake lowpoly model, and I think it turned out pretty good!
Definitely didn’t take me like, 6 full restarts to get it looking the way I wanted, but whatever.
Once I had finished that, I just threw the model into mixamo’s auto-rigger to rig the mesh, and then I put it into the engine and posed him looking dead a bunch of times. After that, I added a dither shader to the scene in Godot, and I was done!
I am very happy with the final results. I think it was a fantastic way to learn blender, and I couldn’t have done it without those who had paved the way beforehand. Looking forward to taking all these new skills into the next game project I am working on.
If you’d like to ask questions or keep an eye on the stuff I am working on, feel free to reach out/follow me on BlueSky. It’s where I do most of my posting nowadays.
Thanks for reading!
Did you like this post? Tell us

Leave a comment
Log in with your itch.io account to leave a comment.