Hello. Ricardo here.
The other night we were making our first build of the game, just an avatar moving around with some background music, camera set up and some UI instructions. Simple right?
Boy, did we run into issues...
Funnily enough, none were with code. We were just completely new to Perforce source control, but when it came to working with the installer, it was a tricky situation. Although I want to blame it more on it being almost 5am and we were really tired, I thought about making this post something to look back on, so that we can avoid late night frustrations.
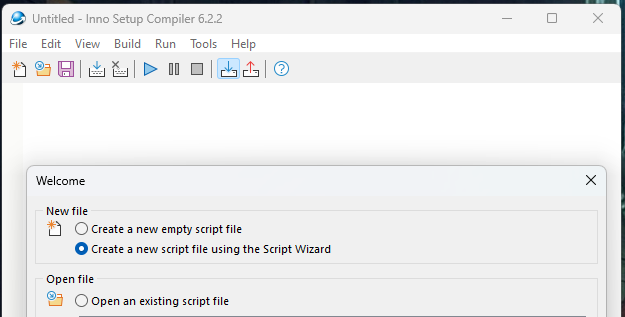
When you first run the software, it will look like this with those 3 options.
Step 1:
Select "Create a new script file using the Script Wizard" and it will write it for you, although you need to make some adjustments.
Otherwise, open an existing one or create a new empty script but we are here for a tutorial and those options just mean you know what you're doing.
Step 2:
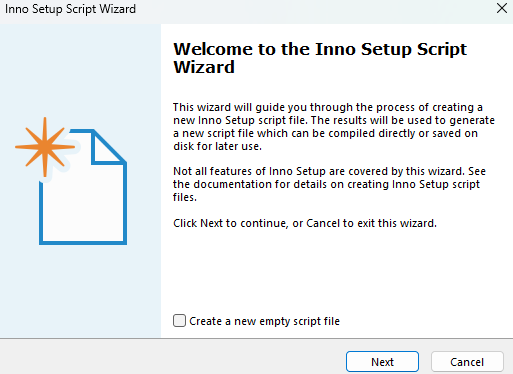
Click on Next. (Don't click "Create a new empty script file")
Step 3:
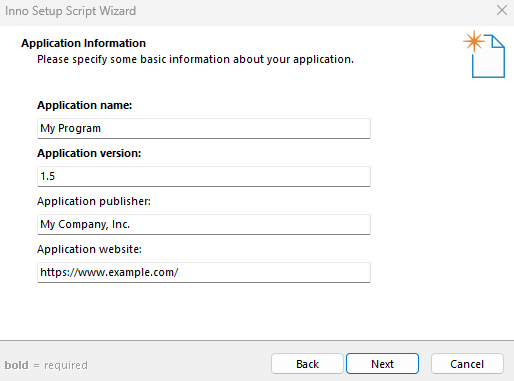
Fill these out, they're self explanatory.
Step 4:
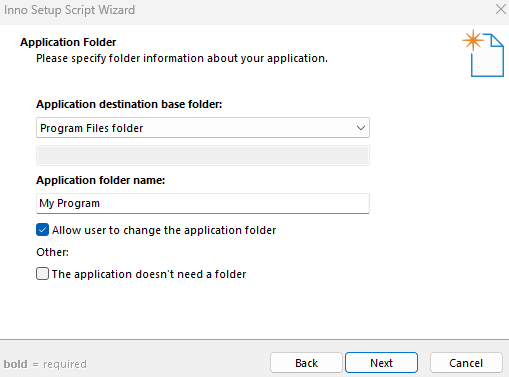
Application destination base folder - This the folder where your software will be installed. Typically, in the Program Files Folder but you can customize this option in the dropdown.
Application folder name - How will you name your software's folder.
Allow user to change the application folder - This will allow the user to see the location you're trying to install it in, and they will be able to change it if they want. (Be sure to check this one, if not you're evil.)
The application doesn't need a folder - If your software doesn't need a folder, great! But that is not normally the case.
Step 5:
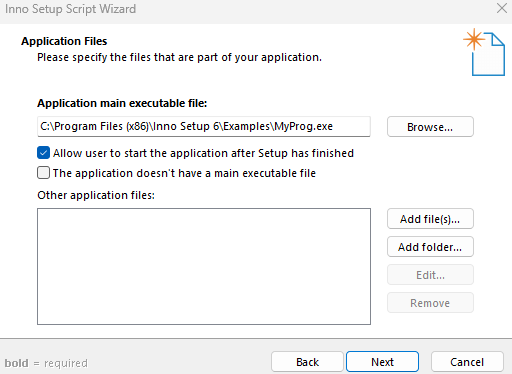
Application main executable file - This is where the executable file of your software is located in your computer.
Allow user to start the application after Setup has finished - This will show up as a checkbox at the end of installation, if users want to, they leave it selected and click on finish to run the application.
The application doesn't have a main executable file - If your app doesn't have a .exe file, check this box.
If there are more files to your application that are required, be sure to add them at the bottom.
Step 6:
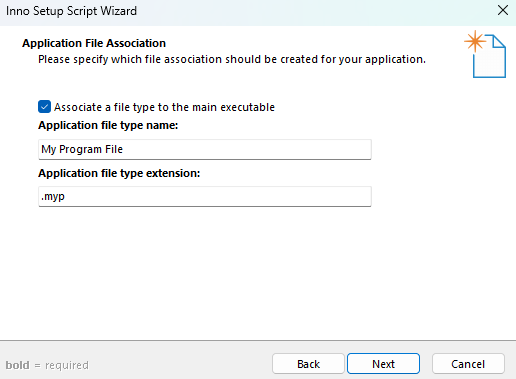
This may also seem obvious but be careful! Don't just go and write AppName.exe. This is actually asking you to create an association to the files of your application. You could do "App Name Save Files" and then .apsf for example. So all files with .apsf belong to your app and will use it to open.
Step 7:
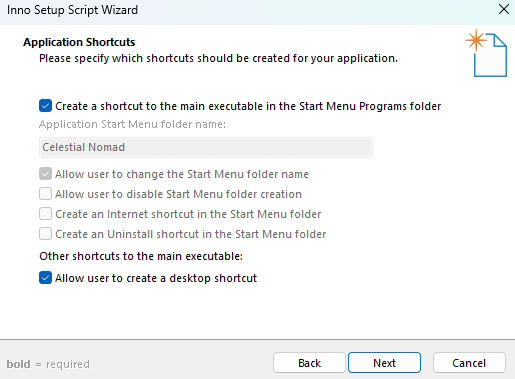
This step is also self explanatory. Basically user friendly shortcuts created for ease of access where you want them. I personally uncheck the first box and the check the first 2 below, giving the user freedom of choice, some may not like shortcuts.
Step 8: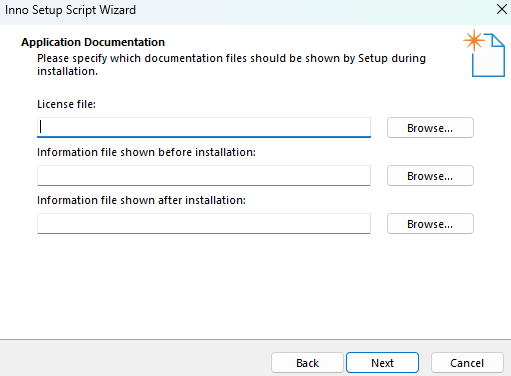
If your software has any license prior to use, be sure to add it here. Make them read the important legal information you add below License file, and they'll be prompted to agree or not. If there are instructions or anything you want them to read before installing or after you can add them there as well.
Step 9:
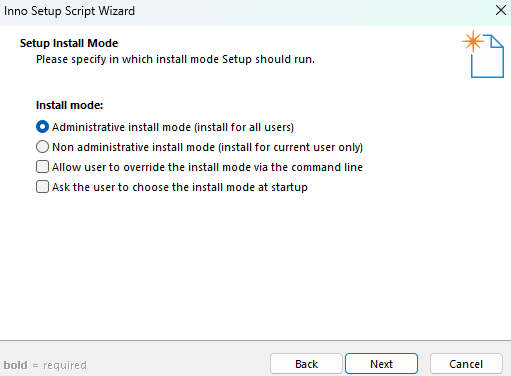
Administrative install mode (install for all users) - By selecting this option, the application will be installed for all users on the computer. Requires admin rights!
Non administrative install mode (install for current user only) - By selecting this option, the application will be installed only for the current user. No admin rights required.
Allow user to override the install mode via the command line - By selecting this option, users can override the chosen install mode by specifying a command-line parameter during the installation process.
Ask the user to choose the install mode at startup - By selecting this option, the installer will prompt the user to choose whether to install the application for all users (requiring administrative privileges) or for the current user only. I personally check this one, freedom of choice.
Step 10:
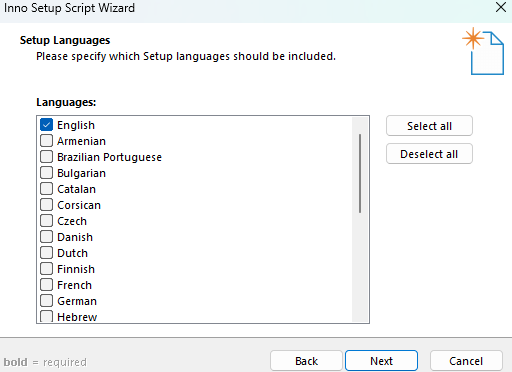
Select the preferred language for your installation Setup.
Step 11:
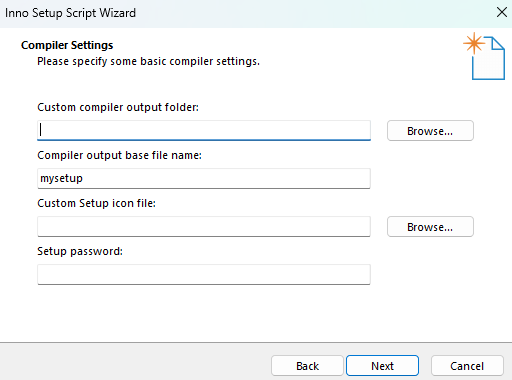
Custom Compiler Output Folder - Where are you saving this installer when you compile it?
Compiler Output Base File Name - What will be the name for the installer?
Custom Setup Icon File - Here you can add a custom icon for the installer.
Setup Password- Optionally set a password for protection.
Step 12:
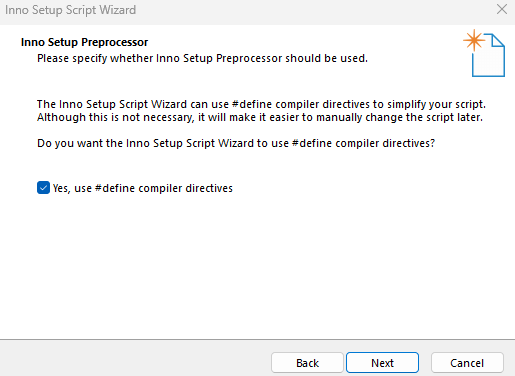
This option will help in simplifying the script by reducing repetitive code. Also makes the script easier to update, if a value needs to change, you only need to update the #define.
Step 13:
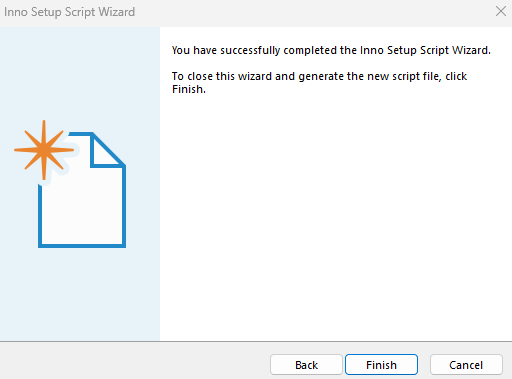
That's it! You're finally done. Be sure to compile the script when you're back on the main page and SAVE THE SCRIPT so you don't have to do this again, or just to make simple edits later.
And remember, when it's very late at night, use wizards. Don't think you know code and can simply do this yourself, wizards are there to make your life easier.
Hope you found this useful!
By Ricardo Rodríguez (05/17/2024)
Did you like this post? Tell us
Leave a comment
Log in with your itch.io account to leave a comment.