As of Bevy 0.11 there is no official editor for the game engine so to get to know Rust and Bevy better I decided to look into using Blender as a level editor for Bevy. What follows is how I approached it and what I ran into. Note that the things here may work but they are not the best methods!
For now the goal is to be able to spawn a scene with detailed, physics-enabled props. For this I'm assuming one optimization, which is to have a detailed model (the prop) and a low-poly version that will serve as the basis of the collider. This tutorial uses Bevy Rapier.
Sections:
Part 1: Asset prep.
Create/import your object to Blender and make/generate a low-poly version. Set the low-poly version as the child:
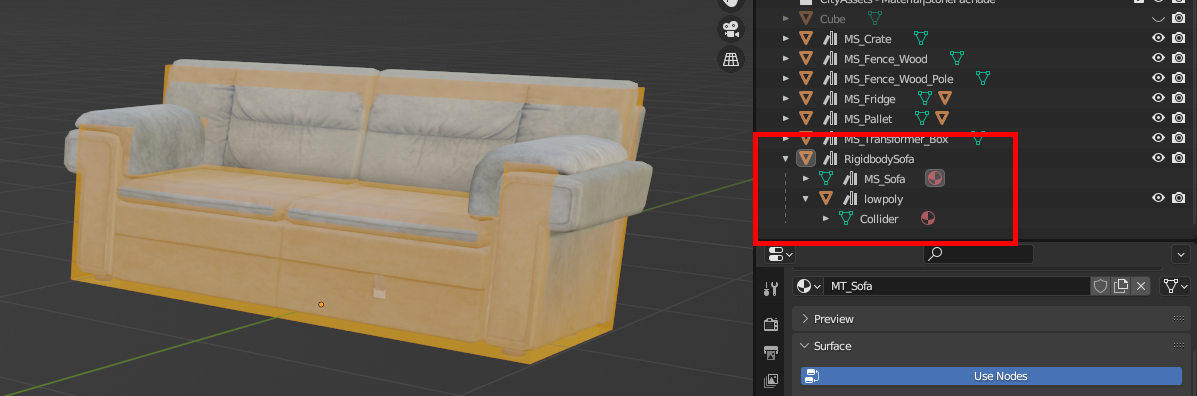
Add "Rigidbody" to the name of the parent if you want your sofa to be affected by forces. Leave it out to have a static object (better for performance).
Add "Collider" to the name of the Object Data of the low-poly object, see picture. We do this to make part 2 easier. In the gltf hierarchy this node will contain the handle to the mesh, which we will use to generate the collider shape.
See note 1 for more details on the requirements for your asset in order for it to display properly in Bevy.
See note 2 on how to make the transparent collider material in Blender (it won't be rendered in Bevy).
Part 2: Components.
Having "Rigidbody" and "Collider" in the object names doesn't mean Bevy will do anything with it. Let's do something about that! Note that this is a simple but naïve way to go about this. See section 'Limitations' below for more info.
First we'll need to load the object(s), the scene. Then using bevy_scene_hook we can add components to the entities based on the names we gave them:
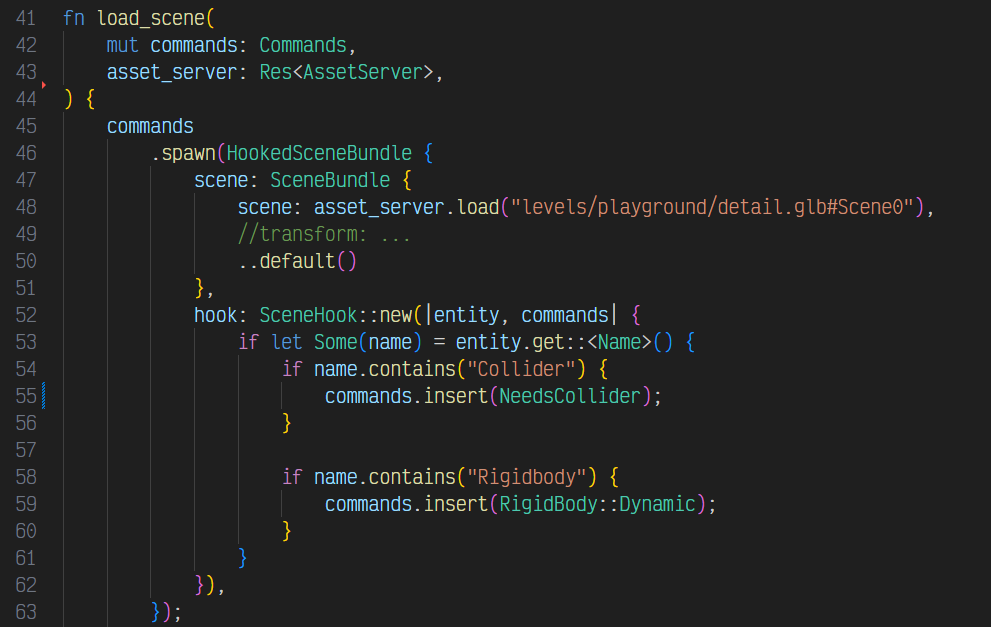
If for example you are dropping a sofa from the sky you can use the transform to place it where you want (assuming you have a single prop in your blender gltf export, placed at the origin). Otherwise leave it out to spawn objects as they are placed in your Blender scene.
Ideally we'd generate the collider shape right when we see name.contains("Collider"), but that would require a bit more Rust knowledge... Instead, we tell it a collider is needed by inserting NeedsCollider and then we use the following system to replace NeedsCollider with the actual Collider component:
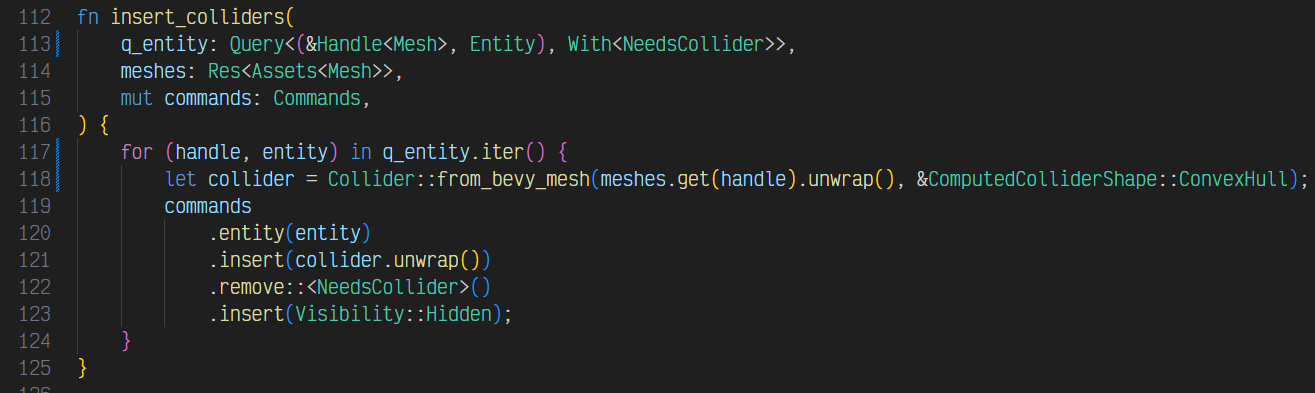
Run this system in an Update schedule and you should be good. Play around with the ComputedColliderShape to get the collider shape that works best for your scenario.
Part 3: Export scene from Blender
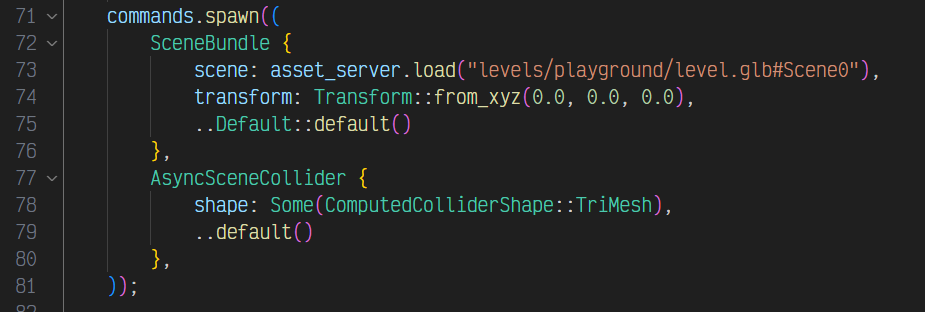
Select your detailed work (props, props with colliders, props with collider+rigidbody) and export the gltf. You can export the blockout of your level in a separate gltf and load it as usual with the AsyncSceneCollider component so you don't have to manually add a collider for everything in your blockout:
Notes:
1. Asset requirements for export to gltf/bevy:
From my limited experience it looks like your Blender shaders need to be Principled BSDF, no procedural stuff supported. If you buy 3D assets make sure you get assets that are made for video games. Otherwise you might get a nicely detailed asset with procedural textures, and you will have to bake the textures (with SimpleBake for example) to get something which can be used with Bevy.
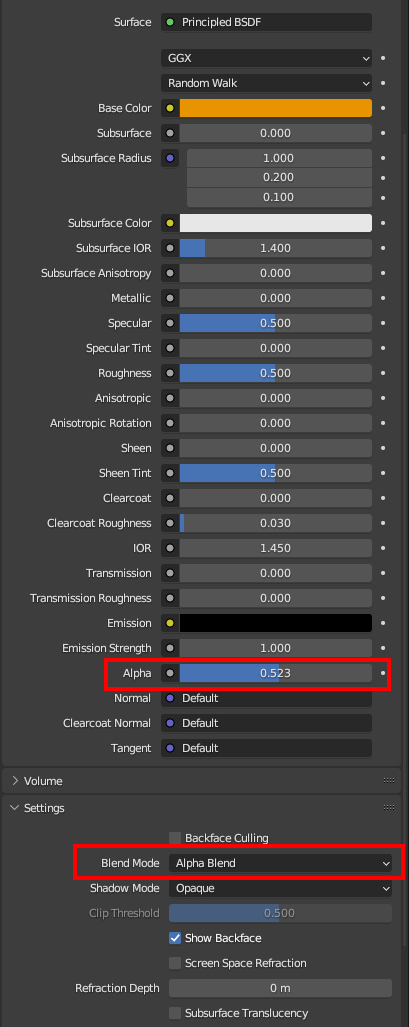
2. Collider material in Blender:
Create a new material (Principled BSDF), choose a nice color, lower the alpha and in the material settings change blend mode to alpha blend.
Limitations:
- With this method of adding components you can only add marker components. See https://github.com/kaosat-dev/bevy-fun-examples/blob/main/examples/blender_gltf_... for a way to add components in blender with properties.
Did you like this post? Tell us

Leave a comment
Log in with your itch.io account to leave a comment.